If you own a Harley Davidson, you know how important it is to keep every part in top shape. One crucial part that often gets overlooked is the drive belt.
When it wears out or breaks, it can stop your ride in its tracks. You might be wondering, “How much will it cost to replace my Harley Davidson drive belt? ” Understanding the replacement cost can help you plan your budget and avoid surprises.
You’ll discover everything you need to know about Harley Davidson drive belt replacement costs, so you can keep your bike running smoothly without breaking the bank. Keep reading to find out what affects the price and how to get the best value for your money.

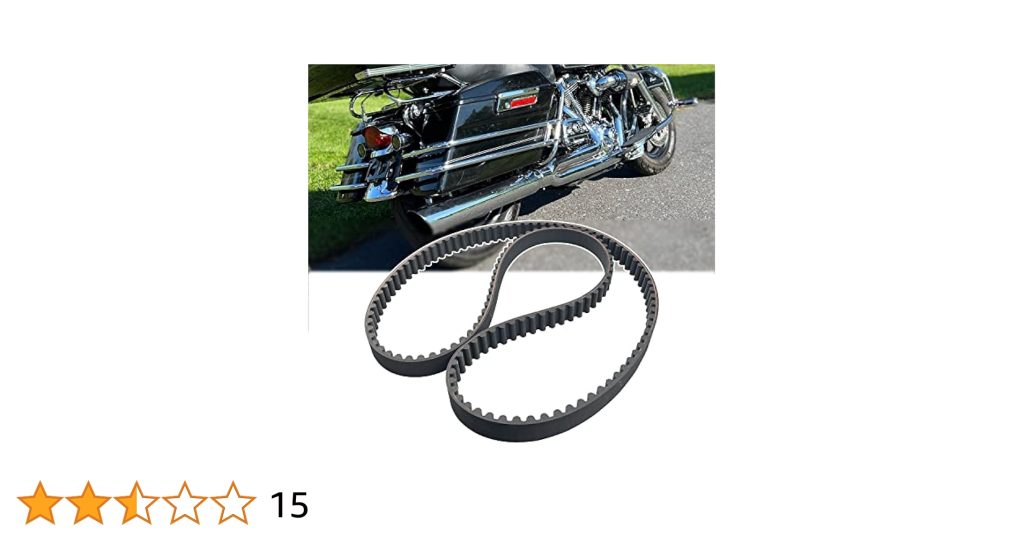
Credit: www.amazon.ca
Drive Belt Basics
The drive belt is a key part of your Harley Davidson motorcycle. It connects the engine to the rear wheel, helping the bike move smoothly. Knowing the basics of the drive belt helps in keeping your Harley running well. It also helps in understanding the costs involved in replacing it.
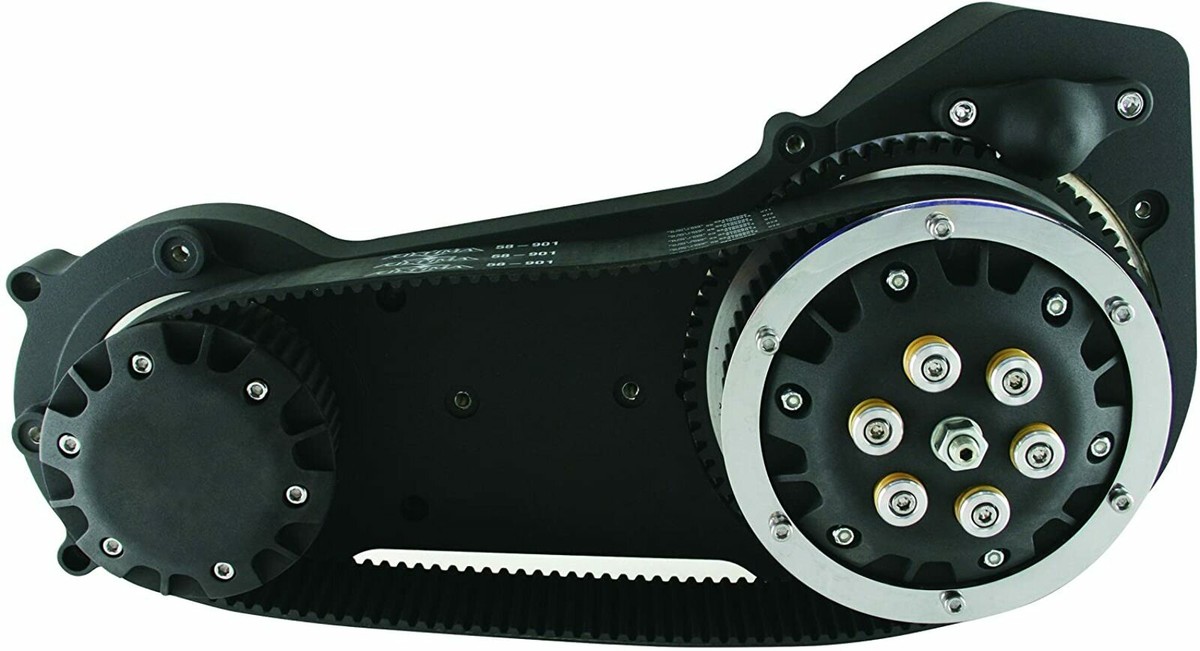
Role In Harley Davidson
The drive belt transfers power from the engine to the rear wheel. It keeps the motorcycle moving forward. Unlike a chain, the belt needs less maintenance. It runs quietly and lasts longer. The belt also absorbs shocks, giving a smoother ride. It plays an important role in the bike’s overall performance.
Signs Of Wear
- Cracks or fraying on the belt surface
- Squealing or unusual noises during rides
- Slipping or loss of power while accelerating
- Visible damage or missing teeth on the belt
- Vibrations felt in the foot pegs or seat
Noticing these signs early can prevent bigger problems. Regular checks help spot wear before failure.
Types Of Drive Belts
Harley Davidson uses mainly two types of drive belts:
- Toothed belts:These have teeth that fit into grooves. They offer better grip and less slipping.
- Smooth belts:These are flat and flexible. They provide quiet operation but less grip.
The choice depends on the Harley model and riding style. Using the correct belt ensures safety and durability.
Replacement Cost Factors
Several factors affect the cost of replacing a Harley Davidson drive belt. Knowing these helps plan your budget better. Prices vary depending on the type of belt, labor, and extra parts needed. Understanding these cost factors ensures no surprises during maintenance.
Belt Quality And Brand
Drive belts come in different qualities and brands. Original equipment manufacturer (OEM) belts cost more. They offer better durability and fit perfectly. Aftermarket belts are cheaper but may wear out faster. High-quality belts can save money in the long run by lasting longer.
Labor Charges
Labor costs depend on the mechanic’s experience and location. Some shops charge by the hour, others a flat fee. Complex models take more time to service. Expect higher labor charges for difficult installations. Choosing a skilled technician can avoid extra repairs later.
Additional Parts And Services
Sometimes other parts need replacement too. Pulleys, tensioners, or seals may wear out. Adding these parts increases the total cost. Services like belt alignment or system inspection add value. These extras help keep your motorcycle running smoothly.
Diy Replacement Vs Professional Service
Replacing the drive belt on a Harley Davidson can be done by yourself or by a professional. Each choice has its own costs and benefits. Doing it yourself saves money but needs the right tools and knowledge. A professional service costs more but offers expertise and peace of mind. Consider your skills and budget before deciding.
Tools Needed For Diy
- Socket wrench set
- Torque wrench
- Screwdrivers
- Allen keys
- Drive belt tension gauge
- Replacement drive belt
- Service manual for your Harley model
Step-by-step Replacement
- Park the motorcycle on a flat surface and turn off the engine.
- Remove the primary cover using the socket wrench.
- Loosen the clutch and primary chain tension.
- Carefully slide off the old drive belt.
- Inspect and clean the pulleys before installing the new belt.
- Place the new drive belt on the pulleys.
- Tighten the clutch and set proper belt tension.
- Reattach the primary cover and tighten bolts to specification.
- Start the engine and check belt alignment and tension again.
Benefits Of Professional Help
- Technicians have experience with Harley models and drive belts.
- They ensure correct belt tension and alignment.
- Professionals use specialized tools not commonly available.
- Work is usually faster and cleaner.
- Warranty on parts and service may be included.
- Reduces risk of damage to motorcycle components.
- Offers peace of mind and saves time.
Credit: www.ebay.ca
Cost-saving Tips
Replacing your Harley Davidson drive belt doesn’t have to drain your wallet. With a few smart moves, you can keep costs down without sacrificing quality or safety. Let’s dive into some practical cost-saving tips that can make a noticeable difference on your next replacement.
Where To Buy Affordable Belts
Finding a good deal on a drive belt starts with knowing where to look. Online marketplaces like RevZilla and eBay often offer competitive prices compared to dealerships. Don’t overlook local motorcycle shops, either—they sometimes have sales or clearance items that aren’t advertised online.
Buying OEM (Original Equipment Manufacturer) belts ensures quality but can be pricey. Consider high-quality aftermarket options that meet or exceed OEM standards. Reading customer reviews can help you spot reliable brands that won’t fail prematurely.
Timing Your Replacement
Replacing your belt too early wastes money; too late risks damage to your bike. Check your owner’s manual for recommended replacement intervals and stick to them. You can also inspect your belt regularly for signs of wear like cracks or fraying.
Scheduling the replacement during off-peak seasons or when shops offer discounts can save you labor costs. Have you ever thought about combining belt replacement with other routine maintenance to reduce multiple service visits?
Regular Maintenance Practices
Keeping your drive belt in good shape extends its life and delays replacement costs. Clean the belt and pulleys regularly to prevent dirt buildup, which causes premature wear. Make sure the belt tension is correct; too tight or too loose can lead to damage.
Simple habits, like avoiding aggressive acceleration and heavy loads, reduce stress on the belt. How often do you check your belt’s condition during routine rides? A little attention can prevent expensive repairs down the road.
Common Issues After Replacement
After replacing your Harley Davidson drive belt, you might expect smooth rides and silent streets. However, some common issues can pop up that may catch you off guard. Understanding these problems early can save you time, money, and frustration.
Belt Noise And Slack
One of the first things you might notice after a new belt installation is unusual noise. A squealing or chirping sound often points to belt slack or misalignment.
Slack means the belt isn’t tight enough, causing it to slip under load. On the other hand, too much tension can strain the belt and other components.
Have you ever heard a sudden squeal when accelerating? That’s a red flag telling you to check the belt tension right away.
Proper Tension Adjustment
Getting the tension just right is crucial for your Harley’s performance. Too loose, and you risk slipping; too tight, and you wear out the belt and pulleys faster.
Use a tension gauge or follow your motorcycle’s manual to measure the correct deflection. Make small adjustments and test ride between each change to find the perfect balance.
Remember, tension isn’t a set-it-and-forget-it deal—it can shift as the belt breaks in or as parts settle. Checking tension regularly keeps your ride safe and smooth.
When To Revisit The Mechanic
Sometimes, despite your best efforts, issues persist after replacement. If belt noise continues or you notice unusual vibrations, it’s time to get professional help.
A mechanic can inspect for hidden problems like worn pulleys, misaligned components, or incorrect installation. These issues can be tricky to spot without experience.
Don’t wait until a minor annoyance turns into a costly repair. Trust your instincts—if your Harley doesn’t feel right, a quick check-up can protect your investment and keep your rides trouble-free.
Faqs On Drive Belt Replacement
Dealing with Harley Davidson drive belt replacement raises many questions for riders who want to keep their bike running smoothly without breaking the bank. Understanding the key details about replacement intervals, the choice between OEM and aftermarket belts, and warranty coverage can save you time and money. Let’s clear up some of the most common concerns to help you make informed decisions.
How Often To Replace The Belt
Your Harley Davidson drive belt doesn’t last forever. Typically, it should be replaced every 20,000 to 30,000 miles, but this depends on riding style and conditions.
If you ride aggressively or often in stop-and-go traffic, your belt may wear out faster. Keep an eye out for signs like cracking, fraying, or unusual noises to know when it’s time for a change.
Have you checked your belt recently? A quick inspection during routine maintenance can prevent unexpected breakdowns.
Can I Use Aftermarket Belts?
Aftermarket belts often come with a lower price tag, but quality can vary widely. Some riders have found reliable aftermarket options that perform just as well as OEM belts.
However, using a belt that doesn’t meet Harley’s specifications might cause premature wear or even damage other parts. Always research the brand and read customer reviews before deciding.
Think about whether saving a little now is worth the risk of costly repairs later. Sometimes, sticking to OEM parts ensures peace of mind.
Warranty And Guarantees
OEM drive belts typically come with a warranty that covers defects and early wear. This can protect your investment if the belt fails unexpectedly.
Aftermarket belts may or may not offer a warranty, and the coverage varies significantly. Always ask for warranty details and keep your purchase receipt.
Remember, some warranties require professional installation to remain valid. Are you confident in your DIY skills, or is it better to let a pro handle it?

Credit: www.ebay.ca
Frequently Asked Questions
How Much Does A Harley Drive Belt Cost?
The cost of a Harley Davidson drive belt typically ranges between $100 and $250. Prices vary based on the model and brand. Labor costs will add additional expenses, often ranging from $100 to $200. Regular maintenance and timely replacements can prevent more costly repairs.
When Should I Replace My Harley Drive Belt?
It’s advisable to replace your Harley drive belt every 30,000 to 60,000 miles. Regular inspections can help identify wear and tear. Signs like fraying, cracking, or unusual noises may indicate the need for replacement sooner. Ensuring the belt is in good condition maintains optimal performance.
What Factors Affect Drive Belt Replacement Cost?
Several factors influence the cost of replacing a Harley drive belt. These include the motorcycle model, the brand of the belt, and labor charges. Additional costs may arise if other components need replacement. Regular maintenance can help minimize unexpected expenses and ensure smooth operation.
Can I Replace A Harley Drive Belt Myself?
Yes, you can replace a Harley drive belt yourself if you have mechanical skills. However, it’s recommended to follow the service manual closely. Proper tools and safety precautions are essential. If unsure, professional assistance ensures the job is done correctly, preventing future issues.
Conclusion
Replacing a Harley Davidson drive belt costs vary by model and labor. Choosing quality parts helps your bike run smoothly and last longer. Regular checks can prevent sudden breakdowns and save money. A timely belt change keeps your ride safe and efficient.
Know the expenses and plan your maintenance wisely. Simple steps can avoid bigger problems on the road. Keep your Harley ready for every ride.