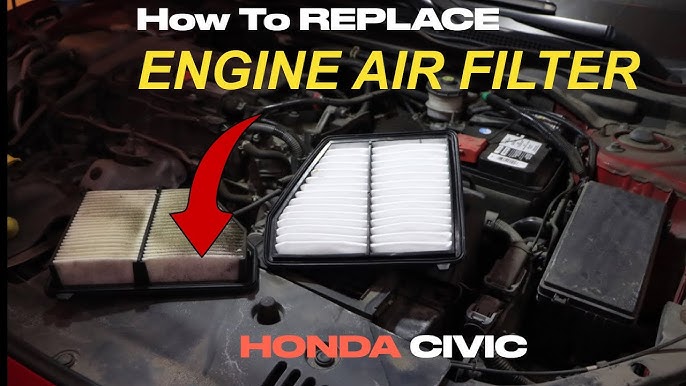
If you want your Honda Civic to run smoothly and efficiently, changing the air filter is one of the simplest and most important tasks you can do. A clean air filter helps your engine breathe better, boosts fuel economy, and keeps harmful dirt out.
But how do you change it without spending a fortune at the mechanic? In this guide, you’ll discover step-by-step how to replace your Honda Civic’s air filter quickly and easily. By the end, you’ll save money, improve your car’s performance, and feel confident handling basic maintenance on your own.
Ready to get started? Let’s dive in.
Tools Needed
Changing the air filter in a Honda Civic is simple with the right tools. Gathering these tools before you start saves time and effort. Most tools are basic and easy to find at home or a local store.
Basic Hand Tools
- Screwdriver (flathead or Phillips)
- Socket wrench with appropriate socket size
- Pliers (optional for clips)
Replacement Air Filter
Use a filter designed specifically for your Honda Civic model and year. Check the owner’s manual for exact specifications.
Cleaning Supplies
- Clean cloth or rag
- Vacuum cleaner (optional, for dust removal)
Safety Gear
- Gloves to keep hands clean
- Safety glasses to protect eyes

Credit: www.youtube.com
Locate The Air Filter
Locating the air filter in a Honda Civic is the first step in changing it. The air filter keeps dirt and dust from entering the engine. Finding it is easy with a little guidance.
The air filter sits inside a black plastic box near the engine. This box is called the air filter housing. It is usually rectangular or square in shape. The housing connects to a large air intake hose.
Look under the hood of your Honda Civic. The air filter housing is often on the driver’s side. You will see clips or screws holding the cover in place. These secure the air filter inside.
Check The Engine Bay
Open the hood and find the engine bay. The air filter housing stands out with its shape. It is larger than most parts nearby. It connects to a thick, ribbed hose.
Identify The Air Filter Housing
The housing is a black plastic box. It may have clips or screws on the edges. The cover lifts off to expose the air filter inside. Handle it carefully to avoid damage.
Use Visual Clues
- Look for a box with clips or screws.
- Find a large hose attached to the box.
- Check for any labels or markings.
Prepare For Removal
Have a screwdriver or pliers ready. Some models require tools to open the housing. Others have clips you can press with your hands. Make sure the engine is cool before you start.
Remove The Old Air Filter
Removing the old air filter from your Honda Civic is a straightforward task that sets the stage for improved engine performance and fuel efficiency. It’s important to handle this step carefully to avoid damaging any components. Let’s break down how you can access and remove the air filter with ease.
Open The Air Filter Housing
Start by locating the air filter housing under the hood. It’s usually a black plastic box near the engine, secured with clips or screws. You might need a screwdriver if the housing is fastened with screws.
Release the clips or unscrew the housing cover gently. Avoid using excessive force to prevent breaking the clips. Once the cover is loose, lift it off to expose the air filter inside.
Take Out The Filter
With the housing open, you’ll see the old air filter sitting snugly inside. Carefully lift it out, paying attention to how it fits so you can place the new one correctly. Notice any dirt or debris on the filter—this is a clear sign it’s time for a replacement.
Don’t rush this step; a damaged filter can let dirt into your engine. If the filter looks clean but it’s been a while since replacement, consider changing it anyway to keep your car running smoothly. Have you checked your air filter recently?
Clean The Filter Housing
Cleaning the filter housing is a crucial step before installing a new air filter in your Honda Civic. Dirt and debris can accumulate inside this space over time, affecting your engine’s performance and the lifespan of the new filter. Taking the time to clean the housing ensures that your new filter works efficiently and keeps your engine breathing clean air.
Remove Loose Debris And Dust
Start by using a clean cloth or a vacuum to remove loose dirt and dust from inside the filter housing. Pay attention to corners and crevices where debris tends to gather. This prevents particles from getting trapped between the housing and the new filter.
Wipe The Housing With A Damp Cloth
After removing loose debris, use a damp cloth to wipe down the entire inside surface of the housing. Avoid soaking the area; a slightly damp cloth is enough to pick up stubborn dirt. This step helps remove any sticky residue or fine dust that a dry cloth might miss.
Check For Damages Or Cracks
Inspect the filter housing carefully for any cracks or damage. Even small cracks can let unfiltered air bypass the filter, reducing its effectiveness. If you find any damage, consider repairing or replacing the housing to maintain proper engine protection.
Dry The Housing Thoroughly
Make sure the filter housing is completely dry before inserting the new air filter. Moisture can cause the filter to degrade faster and may invite mold or mildew growth. Use a dry cloth or let it air dry for a few minutes to be safe.
Why Does Cleaning The Housing Matter?
You might wonder if cleaning the housing really makes a difference. Think about it—if dust and dirt stay inside, they can clog the new filter quickly or even damage the engine. Taking this extra step prolongs your filter’s life and keeps your Civic running smoothly.
Install The New Air Filter
Installing the new air filter in your Honda Civic is a straightforward task that ensures your engine breathes clean air. This step is crucial for maintaining performance and fuel efficiency. Let’s focus on how to place the filter correctly and secure the housing properly to keep everything in place.
Place The New Filter Correctly
Take the new air filter out of its packaging carefully to avoid any dirt or damage. Notice the shape and size; it should match the old filter perfectly. Insert it into the air filter box with the rubber edge facing up or towards the opening, depending on your model’s design.
Make sure the filter sits flat without any gaps or bends. A poorly placed filter can let dirt bypass and harm your engine. Have you ever seen debris inside your air box? That usually means the filter wasn’t sealed properly.
Secure The Housing
Once the filter is correctly positioned, close the air filter housing cover. Align it carefully to avoid pinching the filter or leaving gaps. Use the clips, screws, or fasteners you removed earlier to lock the cover tightly.
Check each clip or screw to ensure the housing is firmly closed. A loose cover can cause the filter to shift or let unfiltered air in. When was the last time you heard unusual engine sounds? That might be a sign of a loose air filter housing.

Credit: www.youtube.com
Check Your Work
After changing the air filter in your Honda Civic, it is important to check your work. This step ensures the air filter is installed properly. A correct installation helps your engine run smoothly and protects it from dust and debris. Take a few moments to review your work carefully. This prevents future problems and saves time and money.
Inspect The Air Filter Placement
Open the air filter box and look inside. The new filter should fit snugly in its place. There should be no gaps or loose edges. The filter must sit flat and cover the entire air intake area. A wrong placement allows dirt to enter the engine. Adjust the filter if it looks uneven or loose.
Secure The Air Filter Cover
Close the air filter box carefully. Make sure the cover aligns with the box edges. Fasten all clips, screws, or latches tightly. A loose cover lets unfiltered air inside. Check that the cover does not move or rattle. Tighten any loose fasteners for a secure fit.
Test The Engine Performance
Start your Honda Civic’s engine. Listen for any unusual sounds or rough idling. The engine should run smoothly and quietly. If you notice any problems, recheck the air filter and cover. A properly installed filter improves air flow and fuel efficiency. Drive the car briefly to confirm normal performance.
Tips For Maintenance
Proper maintenance of your Honda Civic’s air filter helps keep your engine running smoothly. Regular care improves fuel efficiency and reduces emissions. Simple checks can prevent costly repairs and extend filter life. Knowing when to replace the air filter and spotting signs of dirt buildup are key to good maintenance.
When To Replace Air Filter
Replace the air filter every 12,000 to 15,000 miles for most Honda Civics. Driving in dusty or polluted areas may require earlier changes. Check the owner’s manual for specific recommendations. Routine replacement ensures clean air flow and protects engine parts.
Signs Of A Dirty Filter
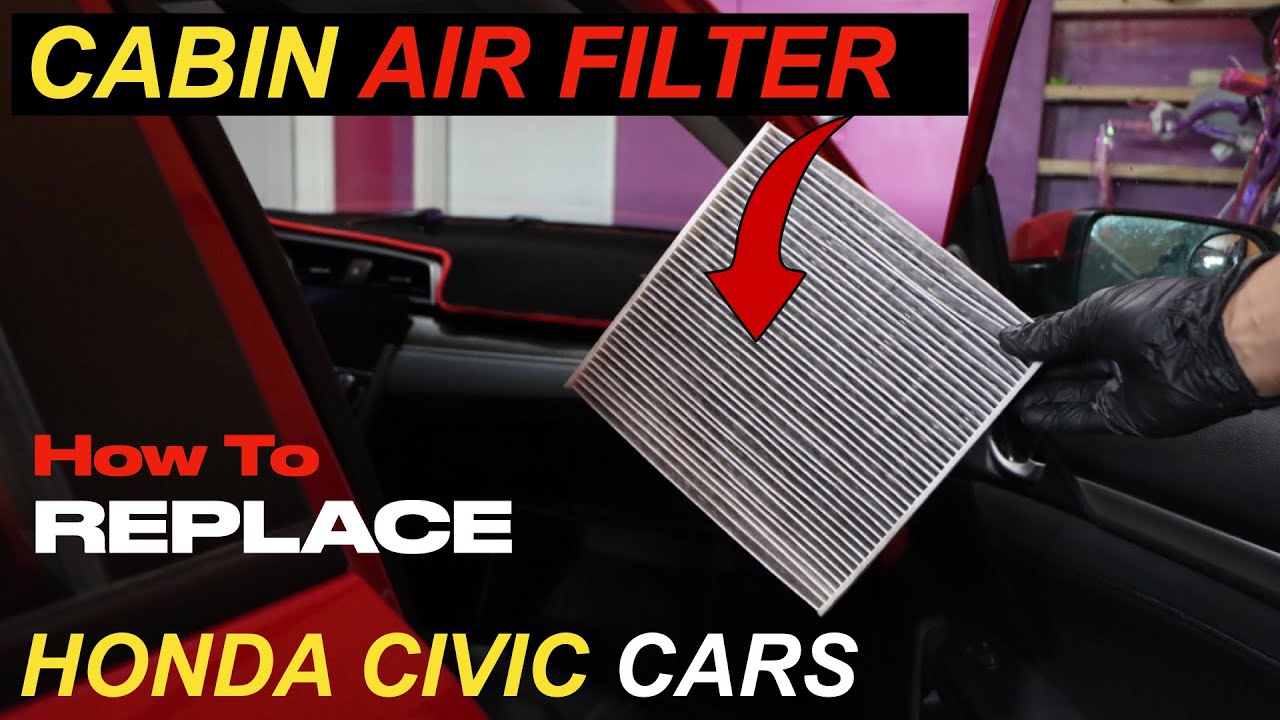
Watch for reduced fuel efficiency and engine misfires. A dirty filter can cause rough idling or unusual engine sounds. Inspect the filter visually—dark, clogged material means it needs changing. Pay attention to poor acceleration or increased emissions as well.
Credit: www.youtube.com
Frequently Asked Questions
How Often Should I Change My Honda Civic Air Filter?
It’s recommended to change the air filter every 12,000 to 15,000 miles. However, driving conditions can affect this interval. Check your owner’s manual for specific guidelines. Regularly inspecting your filter can also help determine if it needs replacement sooner.
What Tools Are Needed To Change The Air Filter?
To change the air filter in a Honda Civic, you’ll typically need a screwdriver. Some models may require additional tools, so refer to your owner’s manual. Having a clean cloth on hand can help remove any debris from the filter compartment.
Can I Replace The Air Filter Myself?
Yes, replacing the air filter in a Honda Civic is a simple DIY task. It requires minimal tools and typically takes less than 15 minutes. Following a step-by-step guide or video can make the process even easier for beginners.
Where Is The Air Filter Located In A Honda Civic?
In most Honda Civics, the air filter is located in the engine bay. It’s housed in a rectangular or square box near the engine. Refer to your owner’s manual for the exact location specific to your model year.
Conclusion
Changing the air filter in your Honda Civic keeps the engine clean. It helps the car run smoothly and saves fuel. The process is simple and takes just a few minutes. Regular changes prevent costly repairs later. Keep an eye on the filter’s condition every few months.
Doing this yourself saves money and gives you confidence in car care. Your Civic will thank you with better performance and cleaner air. A little effort goes a long way in car maintenance.