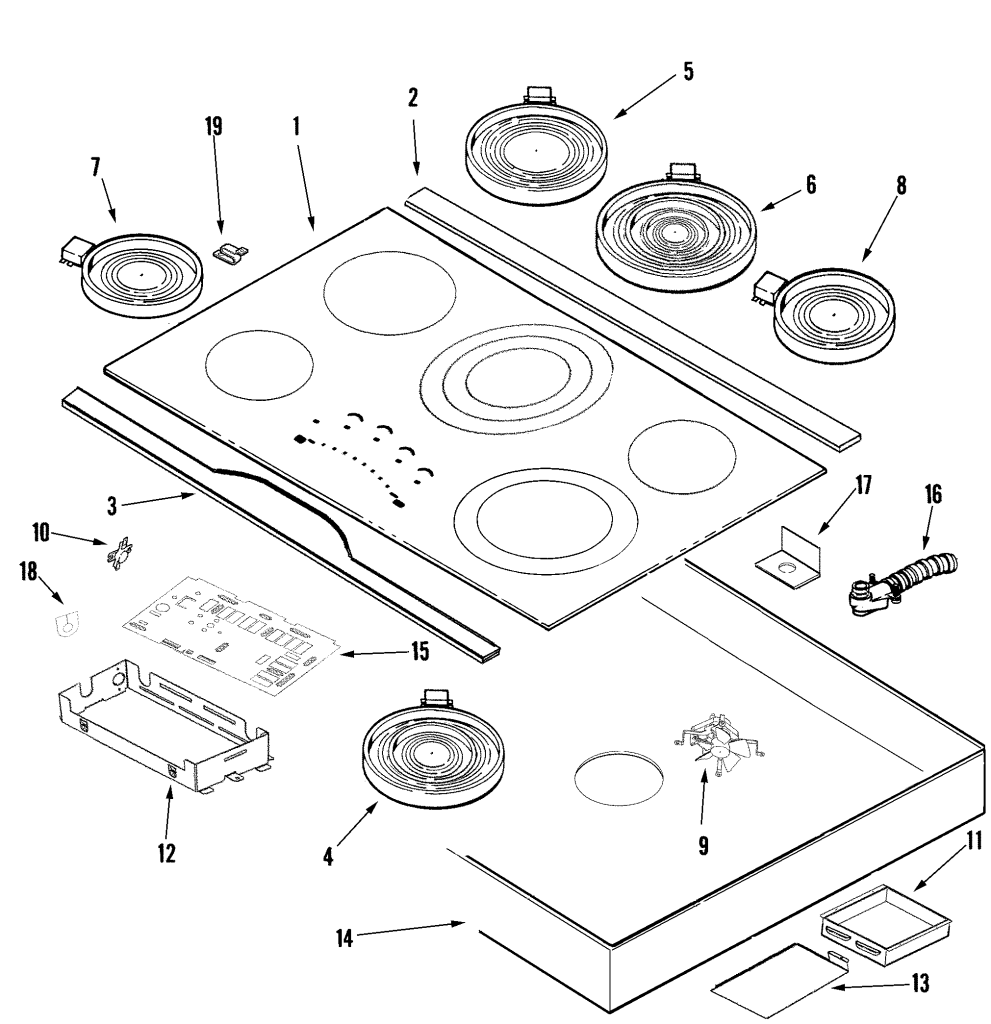
Installing a cooktop electric might seem like a daunting task at first, but with the right guidance, you can do it yourself and save money on hiring a professional. Imagine the satisfaction of cooking your first meal on an appliance you installed with your own hands.
This guide will walk you through each step, ensuring you feel confident and capable. You’ll learn what tools you need, the safety precautions to take, and how to avoid common mistakes. Ready to transform your kitchen and boost your DIY skills?
Let’s get started on this empowering journey to mastering your home improvement project!

Credit: www.whirlpool.com
Tools And Materials Needed
Installing an electric cooktop requires the right set of tools and materials to ensure the job is done safely and efficiently. Having everything prepared before you start can save you from unnecessary delays and frustration. Let’s break down exactly what you need to gather to make your installation smooth and straightforward.
Essential Tools
- Voltage Tester:A must-have to verify the power is off before you touch any wires.
- Screwdrivers:Both flathead and Phillips screwdrivers will help you remove and secure panels and screws.
- Wire Strippers:These make it easy to strip insulation from wires without damaging them.
- Adjustable Wrench:Useful for tightening electrical connections and securing the cooktop.
- Measuring Tape:Ensures your cooktop fits perfectly into the countertop cutout.
- Level:Keeping the cooktop level is crucial for even cooking and safety.
- Drill with Bits:Sometimes needed for securing mounting brackets or adjusting cabinetry.
Have you ever started a project only to realize you’re missing a critical tool halfway through? It’s frustrating and can cause costly delays. Gathering these essentials beforehand keeps your workflow steady and stress-free.
Required Materials
- Electric Cooktop Unit:Make sure you have the model that fits your kitchen setup and meets your cooking needs.
- Electrical Wire:Typically, a 30-amp wire is necessary, but check your cooktop’s specifications.
- Wire Nuts and Connectors:These secure your electrical connections and prevent exposed wiring.
- Mounting Brackets or Clips:Often supplied with the cooktop, these keep it firmly attached to the countertop.
- Electrical Box Cover:For safety and code compliance, covering the junction box is essential.
- Heat-Resistant Caulk or Sealant:To seal the cooktop edges and protect your countertop from spills and heat.
Missing even one material can turn a straightforward installation into a complicated task. Are you certain your electrical wire matches your cooktop’s requirements? Double-checking specifications now can prevent rewiring later.
Credit: www.vevor.ca
Safety Precautions
Safety is the top priority when installing an electric cooktop. Taking the right precautions prevents accidents and damage. Following simple safety steps ensures a smooth installation process. Focus on power control and using the right tools for protection.
Power Shutdown
Turn off the power supply to the cooktop circuit before starting work. Locate the circuit breaker and switch it off to cut electricity. Use a voltage tester to confirm no current flows to the wires. This step stops electric shocks and injuries. Never assume the power is off without checking.
Proper Gear
Wear safety gloves to protect your hands from sharp edges and electric shocks. Use safety goggles to shield your eyes from dust and sparks. Choose non-slip shoes to maintain balance while working. Avoid loose clothing that can catch on parts or tools. Proper gear keeps you safe and comfortable during installation.
Preparing The Installation Area
Preparing the installation area is a crucial first step before installing an electric cooktop. This stage ensures a smooth fit and safe setup. Proper preparation prevents damage and avoids future problems. Focus on measuring the space and clearing the surface carefully.
Measuring The Space
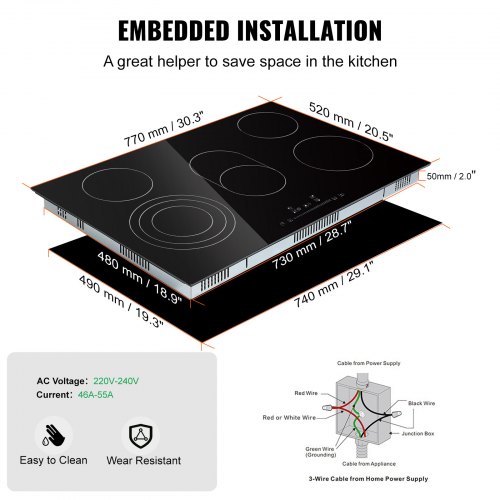
Measure the countertop opening where the cooktop will sit. Use a tape measure for accuracy. Note the width, depth, and height of the space. Compare these dimensions with the cooktop’s specifications. Make sure there is enough room for ventilation and electrical connections. Write down the measurements clearly to avoid mistakes.
Clearing The Surface
Remove any items from the countertop area. Clean the surface to remove dirt and grease. Check for any damage or uneven spots. Smooth surfaces help the cooktop sit flat and secure. Clear the space under the countertop if needed for wiring. A clean and open area makes the installation safer and easier.
Credit: ranein.net
Wiring And Electrical Setup
Wiring and electrical setup are key parts of installing an electric cooktop. Proper wiring ensures safety and smooth operation. A correct electrical connection prevents hazards like shocks or short circuits.
This section explains how to check your circuit and connect wires safely. Follow these tips to handle your cooktop’s electrical needs with confidence.
Checking The Circuit
Start by turning off the main power supply. This step keeps you safe from electric shocks. Use a voltage tester to confirm no current flows in the wires.
Check the circuit breaker for the cooktop. It should match the cooktop’s voltage and amperage needs. Most electric cooktops require a dedicated circuit with a proper breaker size.
- Look for a 240-volt circuit for most cooktops.
- Ensure the circuit breaker matches the cooktop’s amperage rating.
- Verify the wiring gauge is suitable for the load.
Test the outlet or junction box where the cooktop will connect. It must be in good condition and free of damage. Replace any worn or faulty parts before proceeding.
Connecting Wires
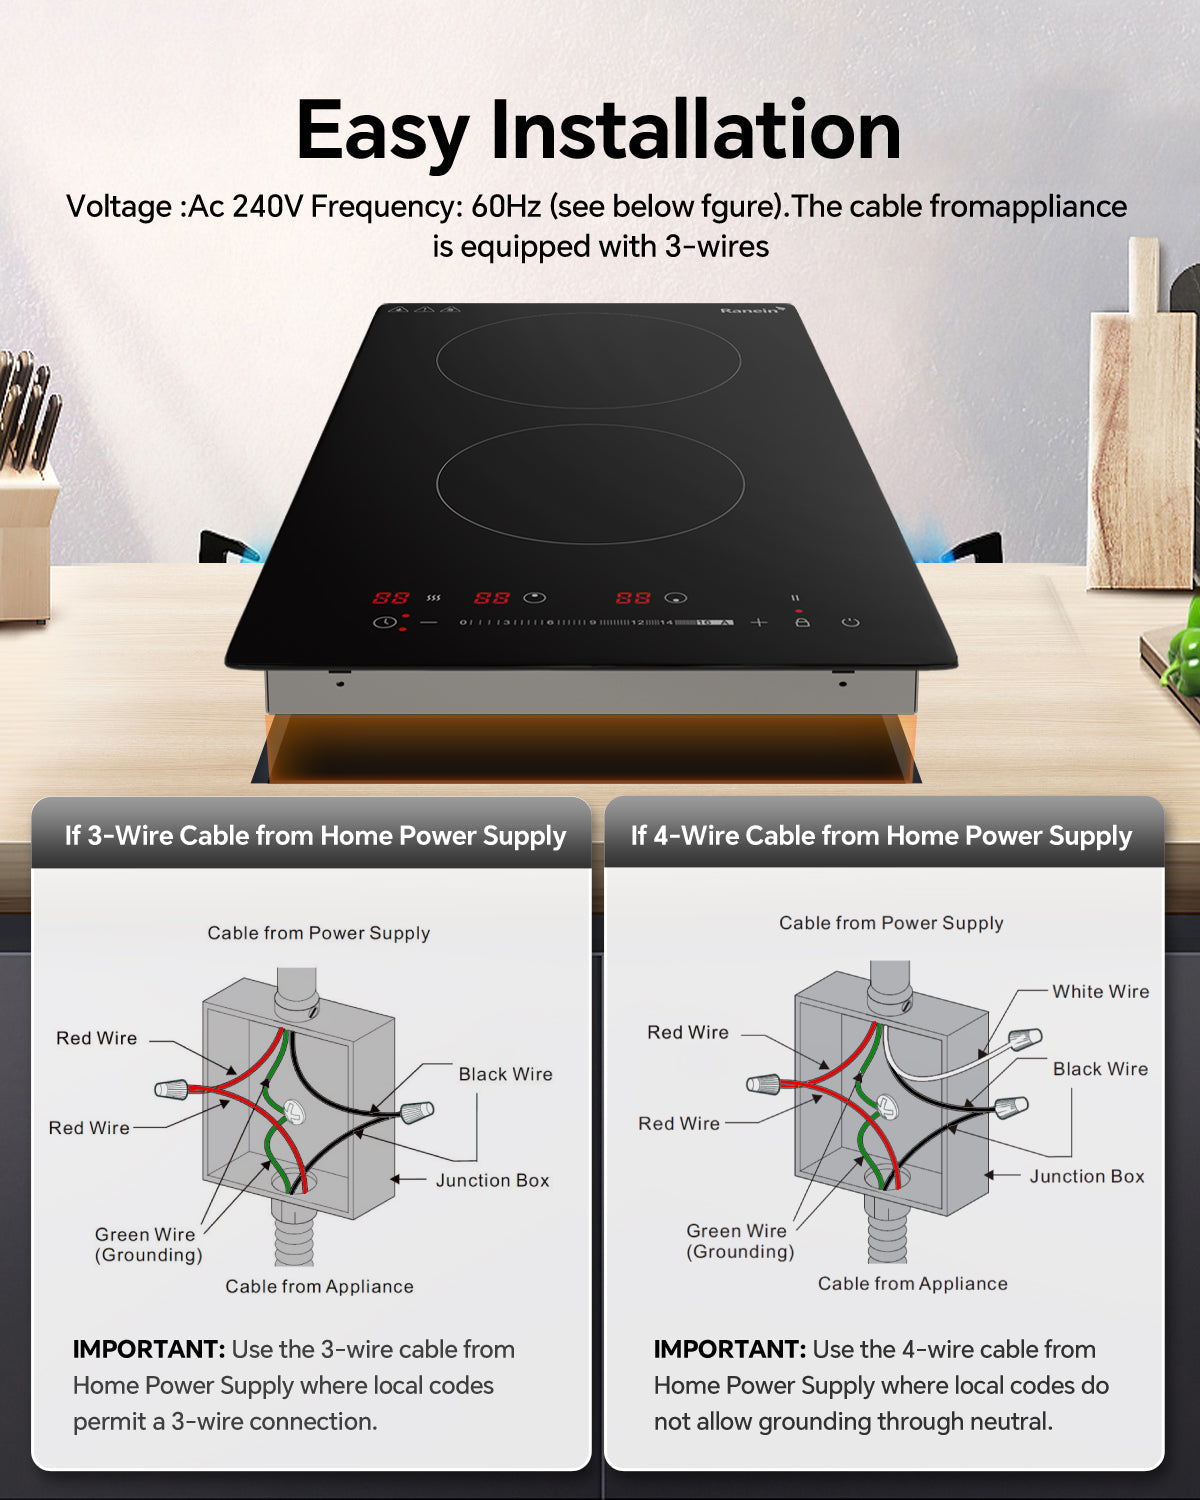
Match each wire from the cooktop to the house wiring by color. Usually, black or red wires are hot, white wires are neutral, and green or bare wires are ground.
Use wire nuts or connectors to join wires securely. Twist wires together tightly before applying connectors. Loose connections can cause sparks or overheating.
- Connect hot wires to the circuit’s hot lines.
- Attach the neutral wire to the neutral line.
- Connect the ground wire to the grounding system.
Double-check all connections for tightness. Wrap electrical tape around wire nuts for extra safety. Push the wires neatly into the junction box to avoid pinching.
After wiring, restore power and test the cooktop. It should power on without tripping the breaker. If problems occur, switch off power and recheck connections.
Placing The Cooktop
Placing your electric cooktop correctly is crucial to ensure safety, functionality, and a polished kitchen look. This step is more than just fitting the unit into the countertop cutout—it involves precise positioning and securing to avoid future issues like wobbling or improper heating. Paying attention to these details will save you time and frustration down the road.
Positioning The Unit
Start by carefully sliding the cooktop into the countertop opening. Make sure the edges align evenly with the surface to avoid gaps that could trap dirt or liquids.
Check that the cooktop is level by using a carpenter’s level. A tilted cooktop can cause pots to tip and uneven cooking. If you notice any imbalance, adjust the countertop supports or use shims to stabilize the unit.
Consider the location of your power source. The cooktop’s electrical cord should easily reach the outlet without stretching or bending sharply. Have you measured this before positioning? It’s a simple check that can prevent electrical hazards.
Securing The Cooktop
Once positioned, the cooktop needs to be firmly secured to prevent movement. Most models come with mounting brackets or clips underneath. Locate these and fasten them tightly to the countertop using screws.
Be cautious not to overtighten screws, as this could crack the cooktop or countertop. Instead, aim for a snug fit that holds the cooktop steady without stressing the materials.
If your cooktop didn’t come with mounting hardware, use heat-resistant adhesive strips designed for kitchen appliances. These provide a strong hold and can be a good alternative.
Finally, give the cooktop a gentle shake to confirm it’s secure. Does it feel solid? If there’s any wobble, recheck your fastenings or add extra support as needed.
Testing The Cooktop
Testing your electric cooktop after installation is crucial to ensure safety and performance. You want to confirm that everything powers on correctly and that all functions respond as expected. Skipping this step could mean overlooking issues that might cause inconvenience or hazards later.
Powering On
Before turning on your cooktop, double-check that the power supply is securely connected and the circuit breaker is on. Once ready, switch on the cooktop’s main power button. Pay close attention to any unusual sounds or smells; these can indicate a wiring problem.
Did you notice any lights or indicators turning on immediately? This feedback confirms that the cooktop is receiving power correctly. If nothing happens, recheck your connections or consult the manual for troubleshooting tips.
Functionality Check
After powering on, test each burner individually. Turn them on at low heat first, then increase to higher settings. Watch for consistent heating and stable flame or heat distribution.
- Does the burner heat up evenly without flickering?
- Are the control knobs responsive and smooth to turn?
- Is the cooktop surface warming as expected without hotspots?
Try using multiple burners simultaneously to see if the cooktop handles the load without tripping the breaker. If you encounter any issues, such as uneven heating or unresponsive controls, it’s a sign that further inspection or professional help is needed.
Troubleshooting Tips
Troubleshooting is key to a smooth electric cooktop installation. Small problems can stop your cooktop from working well. Knowing what to check saves time and stress. This section helps you spot common issues and fix them fast. Clear guidance keeps your kitchen safe and your cooktop running.
Common Issues
- Cooktop does not turn on after installation
- Burners heat unevenly or not at all
- Control knobs feel loose or don’t respond
- Electric sparks or unusual noises during use
- Cooktop trips the circuit breaker frequently
Quick Fixes
- Check if the cooktop is properly plugged into power
- Verify the circuit breaker is on and not tripped
- Make sure all wiring connections are tight and secure
- Clean burner elements and remove debris blocking heat
- Tighten or replace faulty control knobs
- Reset the cooktop by turning power off and on
- Consult the user manual for error codes or lights
Frequently Asked Questions
What Tools Do I Need To Install An Electric Cooktop?
You need a screwdriver, voltage tester, wire stripper, and a wrench. Safety gloves and goggles are also recommended. Ensure you have the cooktop’s installation manual for specific tools and instructions.
How Do I Safely Disconnect Power Before Installation?
Turn off the circuit breaker supplying power to the cooktop. Use a voltage tester to confirm no electricity flows. Never skip this step to avoid electric shock during installation.
Can I Install An Electric Cooktop Myself?
Yes, if you have basic electrical knowledge and follow safety guidelines. Read the manual carefully and check local codes. Hiring a professional is recommended for complex wiring or if unsure.
How Do I Connect The Wiring For The Cooktop?
Match the cooktop wires to your home’s electrical wires by color. Use wire nuts to secure connections and wrap them with electrical tape. Always follow the manufacturer’s wiring diagram precisely.
Conclusion
Installing an electric cooktop can feel simple with clear steps. Always check your power supply and safety first. Measure the space carefully before placing the cooktop. Follow the instructions to connect wires and secure the unit. Test the cooktop to make sure it works right.
Take your time, and don’t rush the process. This way, you get a safe and well-functioning cooktop. Enjoy cooking with your new appliance, made ready by your own hands.