Imagine yourself on a hot summer day, craving a refreshing treat that cools you down and tantalizes your taste buds. Italian ice is the perfect solution, offering a burst of flavor and a smooth, icy texture that’s irresistible.
But what if you could create this delightful dessert right in your own kitchen? With the Ninja Creami, you can transform simple ingredients into a delicious Italian ice that will impress your family and friends. In this guide, you’ll discover step-by-step how to make Italian ice using the Ninja Creami, unlocking the secret to this classic dessert.
By the end, you’ll not only satisfy your cravings but also master a new kitchen skill that brings a taste of Italy to your home. Dive in and see how easy it is to make a treat that’s as fun to create as it is to eat.
Ingredients Needed
Getting the ingredients right is key to making delicious Italian ice with your Ninja Creami. Choosing fresh, flavorful components sets the foundation for a refreshing treat that you’ll want to make again and again. Let’s break down what you’ll need to gather before you start spinning your icy creation.
Fruit Choices
Fresh or frozen fruits work beautifully for Italian ice. Think about berries like strawberries, blueberries, or raspberries for vibrant color and natural sweetness. Citrus fruits such as lemons and oranges add a tangy zing that wakes up your taste buds.
Have you tried using tropical fruits like mango or pineapple? They bring a unique twist and a burst of sunshine to your ice. Using frozen fruit not only saves time but also gives your Italian ice a smoother texture right from the start.
Sweeteners
Balancing sweetness is crucial. Simple syrup, honey, or agave nectar blend well without leaving a gritty texture. You can adjust the amount based on your preference, making your Italian ice as sweet or as tart as you like.
Consider using natural sweeteners to keep the flavor clean. I once swapped out sugar for maple syrup, and it added a subtle depth that surprised me. What sweetener will you choose to match your fruit’s personality?
Additional Flavors
Adding a splash of vanilla extract or a pinch of salt can elevate your Italian ice from good to unforgettable. Fresh herbs like mint or basil offer a refreshing twist and complexity.
Don’t hesitate to experiment with spices such as cinnamon or ginger for an unexpected flavor kick. These small additions can turn your homemade Italian ice into a gourmet experience that delights every time.
Preparing The Mixture
Preparing the mixture is the first key step to making delicious Italian ice with the Ninja Creami. This stage sets the flavor and texture of your frozen treat. A well-prepared base ensures a smooth and tasty Italian ice.
Gather fresh ingredients and measure them carefully. Use fruits, water, sugar, and a bit of lemon juice for balance. Mixing the right ingredients creates a refreshing and flavorful base.
Blending Ingredients
Start by combining all ingredients in a blender. Use fresh or frozen fruits for best taste. Blend until smooth and even. The mixture should be liquid with no large chunks. This helps the Ninja Creami create a fine, icy texture.
Adjusting Sweetness
Taste the mixture before freezing. Adjust sweetness by adding sugar or honey little by little. Stir well and taste again. Keep the flavor slightly sweeter than desired. Freezing dulls sweetness, so this keeps the taste perfect.
Chilling The Base
Pour the blended mixture into a bowl or container. Cover tightly with plastic wrap or a lid. Chill in the refrigerator for at least 1 hour. Cold mixture freezes better and produces smoother Italian ice.
Setting Up The Ninja Creami
Setting up the Ninja Creami correctly is key to making smooth Italian ice. The machine needs to be assembled properly to work without issues. Also, selecting the right setting ensures the best texture for your dessert. Follow these simple steps to get your Ninja Creami ready.
Assembling The Machine
Start by placing the base of the Ninja Creami on a flat surface. Attach the outer bowl firmly into the base. Make sure the bowl locks into place with a click sound. Next, insert the paddle inside the bowl’s lid. Screw the lid tightly onto the bowl. Check all parts are secure before turning on the machine. Proper assembly helps avoid leaks and motor problems.
Choosing The Right Setting
The Ninja Creami offers different settings for various frozen treats. For Italian ice, select the “Sorbet” or “Lite Ice Cream” mode. These settings create a smooth, icy texture without creaminess. Avoid using the “Ice Cream” setting, as it may make the Italian ice too thick. Use the control panel to press the chosen setting. Wait for the machine to finish the cycle before opening.
Freezing And Processing
Freezing and processing are key to making smooth and tasty Italian ice with the Ninja Creami. The right freezing time and proper machine cycle help create the perfect icy texture. Follow the steps carefully to get a refreshing treat every time.
Freezing Time Tips
Freeze the Italian ice mixture for 24 hours. Use the Ninja Creami pint container. Place it upright in the coldest part of the freezer. Avoid opening the freezer during freezing. This keeps the mixture firm and ready for processing.
Do not freeze for less than 24 hours. The mixture may be too soft and affect texture. More than 24 hours is fine but may take longer to process. Patience ensures the best icy consistency.
Running The Creami Cycle
Remove the pint from the freezer and unlock the lid. Place the pint in the Ninja Creami outer bowl. Lock the bowl in the machine properly. Select the “Ice Cream” or “Sorbet” cycle for Italian ice.
The machine will spin and shave the ice to a fine texture. If the ice looks crumbly, run the “Re-spin” function once. This smooths the mixture without melting it. Avoid using multiple re-spins to keep the texture firm.
Serving Suggestions
Serving Italian ice made with the Ninja Creami is as fun as making it. How you serve it can make the treat even more delightful. Simple touches bring color and texture that excite the eyes and taste buds.
Explore ideas that turn your Italian ice into a fresh, inviting dessert. Small changes in presentation and toppings can create a new experience every time.
Presentation Ideas
- Serve Italian ice in clear cups for a colorful look.
- Use small bowls or dessert glasses for a fancy touch.
- Layer different flavors for a rainbow effect.
- Place a small paper umbrella to add a summer vibe.
- Use a chilled plate or bowl to keep the ice cold longer.
- Place the Italian ice on a wooden board with fresh fruit slices around.
- Serve with a small spoon or a colorful straw for easy eating.
Toppings And Garnishes
- Fresh mint leaves add a pop of green and freshness.
- Sprinkle crushed nuts like pistachios or almonds for crunch.
- Add small chunks of fresh fruit such as berries or mango.
- Drizzle a bit of honey or fruit syrup to enhance sweetness.
- Use edible flowers to create a delicate and elegant look.
- Top with a dusting of powdered sugar for a gentle sweetness.
- Add a twist of lemon or lime peel for a citrus aroma.

Credit: www.atasteofmadness.com
Troubleshooting Tips
Making Italian ice with the Ninja Creami is fun, but sometimes textures or flavors don’t turn out as expected. Troubleshooting helps fix these common problems. Small tweaks can improve your dessert quickly. Here are easy tips to solve texture and flavor issues.
Fixing Texture Issues
Italian ice can be too icy or too soft. Adjusting the mix and processing helps achieve the right texture.
- If the ice is grainy or hard, try blending the mixture longer before freezing.
- Use a bit more sugar or corn syrup to keep the ice smooth and soft.
- Check the mixture’s temperature before spinning. It should be fully frozen but not rock solid.
- After processing, if the texture is crumbly, run the Ninja Creami again to smooth it out.
- For a creamier texture, add a small amount of milk or water to the base before freezing.
Adjusting Flavors
Sometimes the Italian ice tastes bland or too sweet. Balancing flavors is key.
- Add fresh lemon or lime juice to brighten the flavor without extra sugar.
- Use natural fruit purees or extracts for stronger, fresher taste.
- If too sweet, dilute the mixture slightly with water before freezing.
- For more intense fruit taste, increase fruit content or concentrate juices.
- Stir the mixture well before freezing to distribute flavors evenly.
Variations To Try
Once you’ve mastered the basic Italian ice recipe with your Ninja Creami, it’s time to experiment with variations. Changing up flavors and adding unique twists can make your homemade treat even more exciting. Here are some ideas to help you customize your Italian ice to suit any mood or occasion.
Different Fruit Combos
Mixing fruits can create vibrant and refreshing flavors. Try combining strawberries with kiwi for a sweet and tangy burst. Or blend mango and pineapple for a tropical twist that feels like a mini-vacation in every bite.
Think about textures too—adding a few small chunks of fruit after the initial freeze can give your Italian ice a pleasant surprise. Have you ever tried raspberry and lemon together? The tartness of lemon lifts the sweetness of raspberry perfectly.
Adding Herbs Or Spices
Herbs and spices can add unexpected depth to your Italian ice. A few fresh mint leaves blended with lime juice bring a cool, refreshing note. You can also experiment with basil paired with strawberries for a subtle, aromatic flavor.
Don’t be afraid to sprinkle in spices like cinnamon or ginger. A pinch of cinnamon in peach Italian ice adds warmth, while fresh grated ginger in lemon creates a zesty kick. What flavor combinations would you dare to try?

Credit: thetastytravelers.com
Credit: www.atasteofmadness.com
Frequently Asked Questions
How Do I Make Italian Ice With Ninja Creami?
To make Italian ice, blend fruit, sugar, and water. Freeze in a container overnight. Use Ninja Creami to process into smooth Italian ice. This method ensures a creamy, refreshing dessert every time.
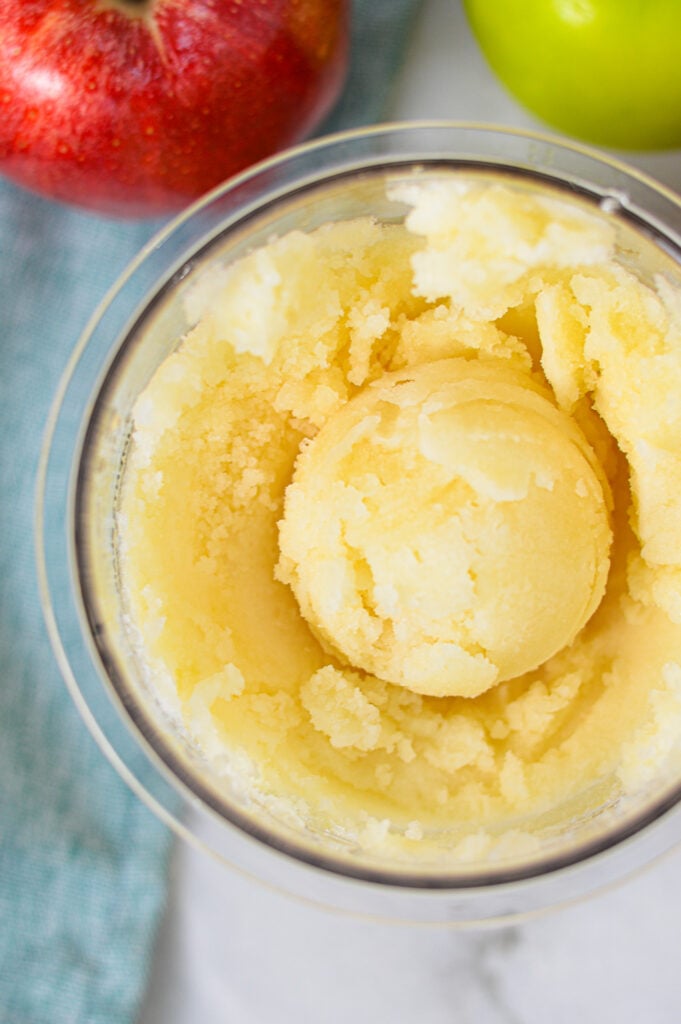
What Fruits Work Best For Ninja Creami Italian Ice?
Citrus fruits like lemon and orange work best. Berries and mango also create flavorful Italian ice. Choose fresh, ripe fruits for optimal taste and texture with Ninja Creami.
Can I Use Artificial Sweeteners In Italian Ice?
Yes, you can replace sugar with artificial sweeteners. Adjust sweetness to taste, as some sweeteners are stronger. This option suits those avoiding sugar but still craving Italian ice.
How Long Does Ninja Creami Italian Ice Take To Prepare?
Preparation involves blending and freezing, which takes about 8-12 hours. The Ninja Creami process itself only takes a few minutes. Plan ahead to enjoy your homemade Italian ice fresh and creamy.
Conclusion
Making Italian ice with the Ninja Creami is simple and fun. You only need a few ingredients and a bit of time. This treat is perfect for hot days or any time you want a cool snack. You can try different flavors to find your favorite.
Enjoy the fresh taste and smooth texture every time. Give it a try and share it with friends or family. Homemade Italian ice can be a tasty, refreshing delight for everyone.