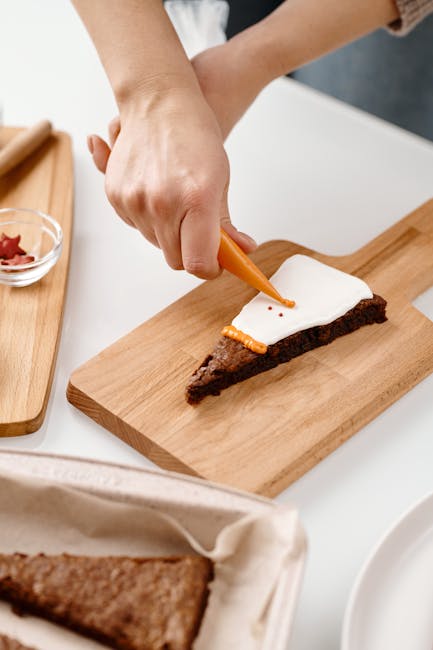
Have you ever wanted to add a fun and creative touch to your cakes or cupcakes? Making carrots from icing is easier than you think, and it can turn your desserts into eye-catching treats that everyone will love.
In this guide, you’ll discover simple steps to shape and color icing into realistic, delicious-looking carrots. Whether you’re a beginner or just looking to impress your guests, you’ll find tips that make the process quick and enjoyable. Keep reading to learn how to transform your baking with this sweet, colorful twist!
Choosing The Right Icing
Choosing the right icing is key to making realistic carrot decorations. The texture, color, and firmness of your icing affect the final look. Icing must hold shape well and be easy to color. Soft icings may lose form while hard icings can crack. Consider the type of icing that works best for piping and sculpting carrot shapes.
Types Of Icing Suitable For Carrots
Buttercream and royal icing are popular choices for carrot decorations. Buttercream is soft and creamy, perfect for smooth carrot bodies. Royal icing dries hard and is great for fine details like carrot tops. Fondant offers a smooth surface and can be molded into carrot shapes too.
- Buttercream:Soft, creamy, easy to pipe, but can lose shape if too soft.
- Royal Icing:Dries hard, holds shape well, ideal for detailed work.
- Fondant:Moldable, smooth finish, good for 3D carrot shapes.
Coloring Your Icing Orange And Green
Use gel or paste food coloring for bright, vivid orange and green shades. These colors blend well without thinning the icing. Start with small amounts and add more to reach the desired color. Mix orange for the carrot body and green for the leafy top. Avoid liquid colors that can make icing runny.
Tools Needed For Decorating
Creating carrot shapes from icing needs the right tools. These tools help shape and add details to your decorations. Simple equipment makes decorating easier and more precise. Choose tools that suit your skill level and project size.
Piping Bags And Tips
Piping bags hold the icing and guide it smoothly. Use disposable or reusable bags based on preference. Small bags offer better control for fine details.
- Round tips create smooth lines for carrot bodies.
- Leaf tips add green leaves on top of carrots.
- Star tips can add texture and depth.
Select tips with small openings to make narrow carrot shapes. Practice pressure control to avoid icing spills.
Additional Decorating Supplies
Other tools improve decoration quality and ease. A small spatula helps spread icing evenly. Toothpicks or fine brushes add tiny details or fix mistakes.
- Food coloring gels create bright carrot and leaf colors.
- Palette knives assist in shaping and smoothing icing.
- Edible markers can draw fine lines and textures.
Use a damp cloth to clean tools during work. Keep all supplies organized for quick access.
Preparing The Icing
Mix powdered sugar with a little water until smooth and thick. Add orange food coloring for a carrot shade. Use green icing for the carrot tops.
Preparing the perfect icing is key to crafting realistic carrot designs. This process involves both skill and creativity. First, focus on achieving the right colors and texture. Each step ensures your icing carrots are convincing and vibrant.Mixing Colors Evenly
Start with a base of white icing. Divide it into portions for each color. Use gel food coloring for vibrant hues. Orange is essential for the carrot body. Green will be for the leaves. Add small amounts of color to the icing. Mix thoroughly to avoid streaks. Adjust as needed for the perfect shade.Achieving The Right Consistency
Consistency is crucial for precise piping. Begin by checking the icing’s thickness. It should be firm yet pliable. Add a few drops of water if too thick. If too runny, add more powdered sugar. The icing should hold its shape but flow smoothly. Test by piping a small line. Adjust until it’s just right.Piping The Carrot Shape
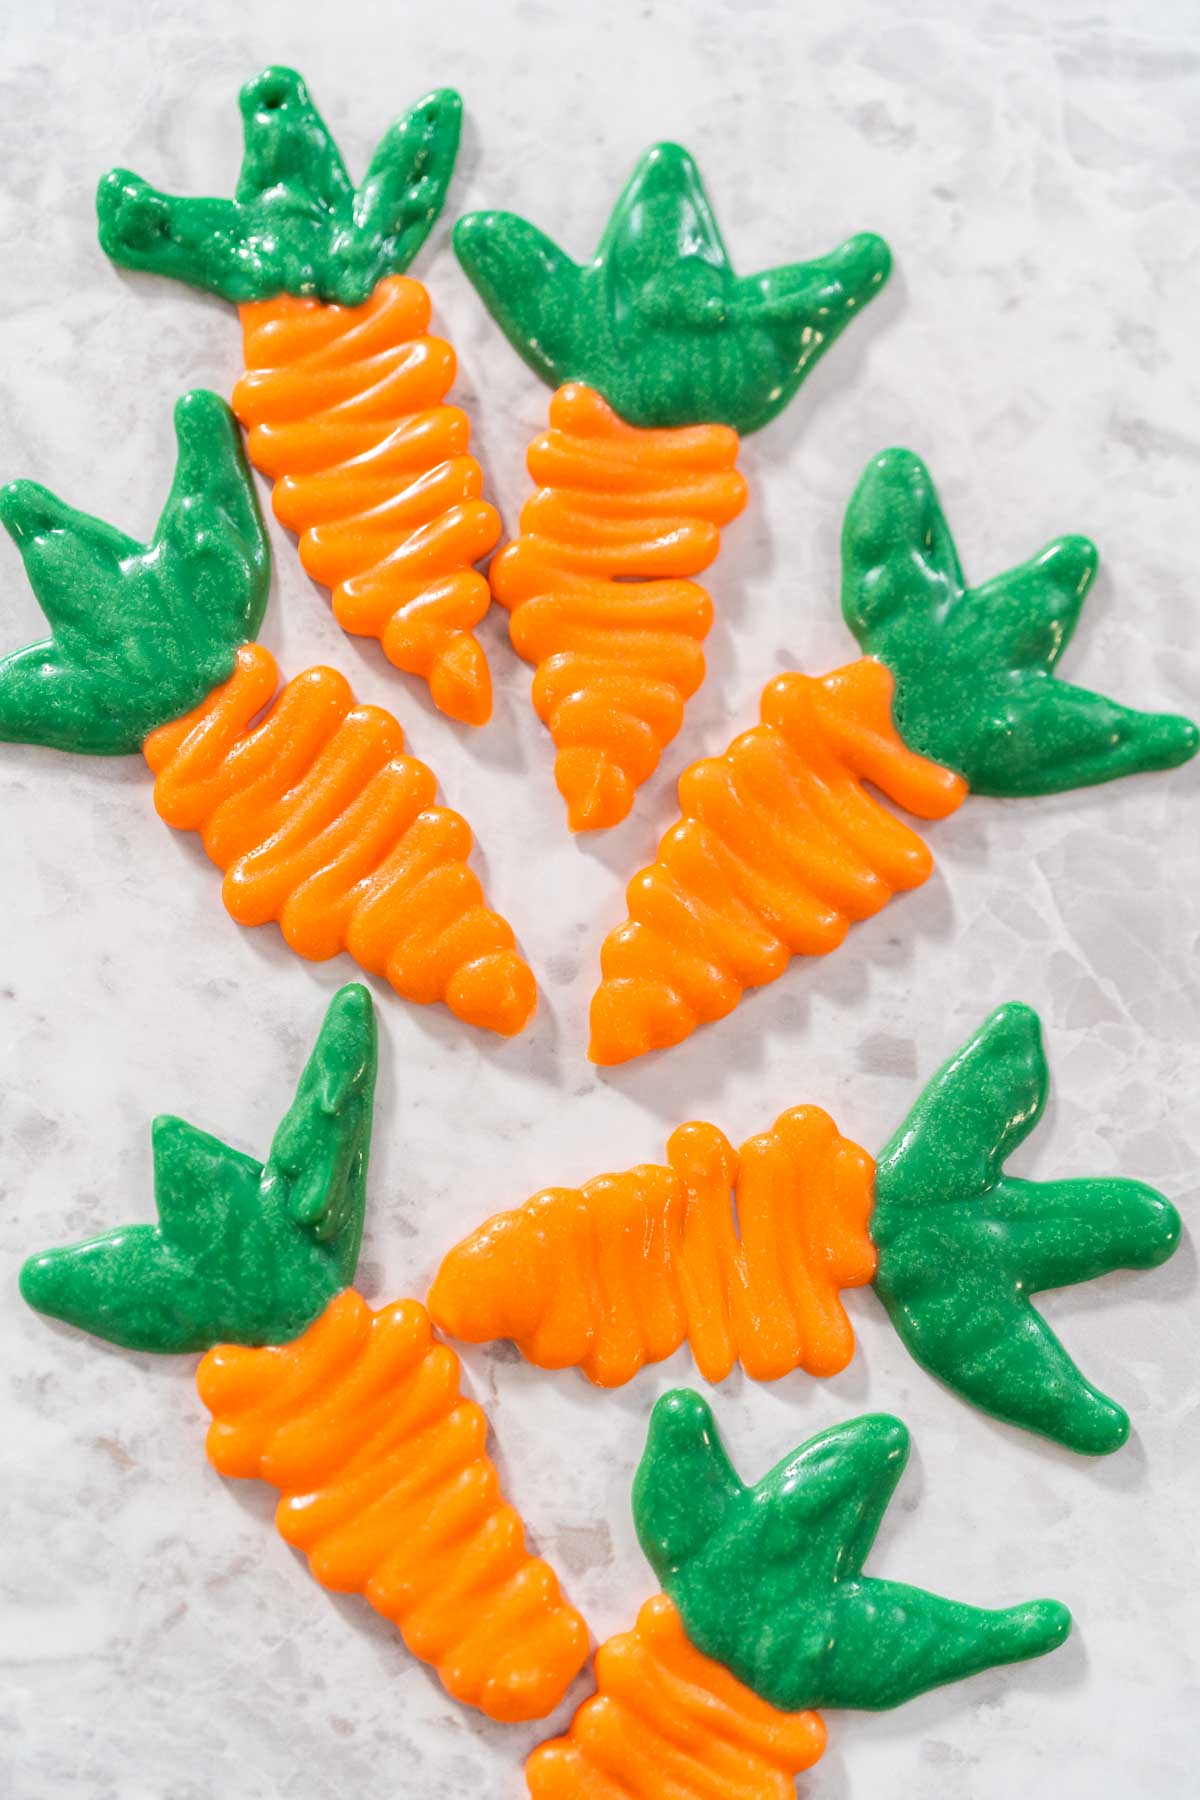
Piping the carrot shape with icing is a fun and creative part of cake decorating. It brings the carrot to life with simple tools and techniques. Using the right piping tip and steady hands helps create a natural look. Focus on shaping the carrot body first, then add the leafy green tops. This step-by-step process makes your icing carrots look fresh and tasty.
Forming The Body Of The Carrot
Use a piping bag fitted with a small round or teardrop tip. Hold the bag at a 45-degree angle to the surface. Start at the narrow tip of the carrot and pipe outward in a curved motion. Create a slightly tapered shape, wider at the top and narrower at the bottom.
Keep the pressure steady to avoid lumps or breaks. The carrot should look smooth and slightly rounded. Add small lines or texture by gently dragging a toothpick or the tip of a knife along the icing. These details mimic natural carrot ridges.
Creating The Green Tops
Switch to a leaf piping tip for the green tops. Use green-colored icing for a fresh look. Pipe short, quick strokes at the wider end of the carrot body. Angle the tip away from the carrot for a natural leaf shape.
Layer the leaves in clusters to create fullness. Vary the length and direction for a realistic effect. Avoid overcrowding the carrot top to keep it neat and appealing. The green tops add contrast and complete the carrot’s look perfectly.
Adding Details And Texture
Adding details and texture to your icing carrots transforms them from simple shapes into eye-catching edible art. This step invites you to play with tools and techniques that bring out the natural look of a carrot’s surface. The more attention you give to these small details, the more realistic and appealing your carrots will become.
Using Different Tips For Realism
Choosing the right piping tips can dramatically change the look of your icing carrots. A leaf tip can create the ridges and grooves that mimic a real carrot’s skin. Meanwhile, a round tip helps you form smooth, tapered edges that look natural.
Try combining tips for varied effects. Use a small star tip to add subtle texture, giving your carrot a slightly rough surface. Switching tips mid-piping might sound tricky, but it’s easier than you think and really boosts realism.
Enhancing With Edible Decorations
Edible decorations add depth and interest beyond just icing shapes. Tiny sugar pearls or coarse sugar crystals can simulate soil or dew drops on your carrot, making it pop visually. You can also brush on a bit of edible dust in orange or brown shades to highlight the carrot’s natural color variations.
Have you considered using edible paint or food coloring pens? These tools let you add fine lines and subtle shading that bring your carrot to life. Experiment with these details—you might be surprised how much they improve the final look.
Credit: arinaphotography.com
Tips For Practice And Perfecting
Practicing is key to making perfect icing carrots. It helps you control the shape and details. Small efforts bring big improvements. Focus on steady hands and smooth motions. Patience makes your icing look natural and neat.
Practice builds confidence. It helps you avoid common mistakes. Keep trying until the carrot shapes look just right. Use the tips below to guide your practice sessions.
Common Mistakes To Avoid
- Using icing that is too runny or too stiff.
- Applying uneven pressure on the piping bag.
- Rushing the piping process, causing uneven shapes.
- Not cleaning the tip often, leading to clogs.
- Ignoring the carrot’s natural tapering shape.
Practicing On Parchment Paper
Parchment paper is a great surface for practice. It allows easy lifting of your icing shapes. Practice piping the carrot base first. Try making small lines to mimic carrot ridges. Test different pressures to find the best flow. This lets you improve without wasting ingredients.
Storing And Using Iced Carrots
Storing and using iced carrots properly keeps them fresh and attractive for your baking projects. These delicate decorations need care to maintain their shape and color. Proper storage prevents them from melting or becoming sticky.
Using iced carrots creatively adds charm to cakes and cupcakes. They bring a bright, fun touch to your dessert designs. Understanding storage and usage helps you make the most of these edible decorations.
Best Storage Practices
- Place iced carrots on a flat surface to avoid bending.
- Use parchment paper between layers if stacking is necessary.
- Store in an airtight container to keep moisture out.
- Keep them in a cool, dry place, away from direct sunlight.
- Avoid refrigeration if possible; it can cause condensation and stickiness.
- Use within a few days for the best texture and appearance.
Incorporating Carrots Into Cake Designs
- Use iced carrots as toppers for carrot cakes or cupcakes.
- Arrange them in clusters to create a playful garden look.
- Mix with green icing leaves for a natural effect.
- Place them on the sides of cakes to add color and texture.
- Combine with other vegetable-shaped decorations for themed cakes.
- Attach gently with a dab of icing to secure in place.

Credit: pudgefactor.com
Credit: creators.yahoo.com
Frequently Asked Questions
How Do You Make Carrots From Icing?
To make icing carrots, mix orange and green icing colors. Shape the orange into carrot bodies and add green leaves on top. Use a piping bag for precision. Chill to set before using as cake decorations.
What Icing Types Work Best For Carrot Shapes?
Buttercream and royal icing work best for carrot shapes. Buttercream is soft and easy to shape, while royal icing hardens well for detailed carrots. Choose based on your desired firmness and decoration style.
How Can I Color Icing To Look Like Real Carrots?
Use orange food coloring for carrot bodies and green for leaves. Mix colors gradually for natural shades. Avoid over-coloring to maintain smooth texture and vibrant, realistic hues.
Can I Store Icing Carrots Before Using Them?
Yes, store icing carrots in an airtight container. Keep them in a cool, dry place or refrigerate if using buttercream. Proper storage maintains shape and freshness until decorating.
Conclusion
Making carrots from icing is easier than you think. Use basic ingredients and simple steps. Shape the icing carefully for best results. Practice a few times to improve your skill. These sweet carrots add charm to any cake or cupcake.
Try different colors to make them look real. Have fun while decorating your desserts. Your treats will impress friends and family. Keep your tools clean and ready for next time. Enjoy creating tasty and pretty icing carrots today!