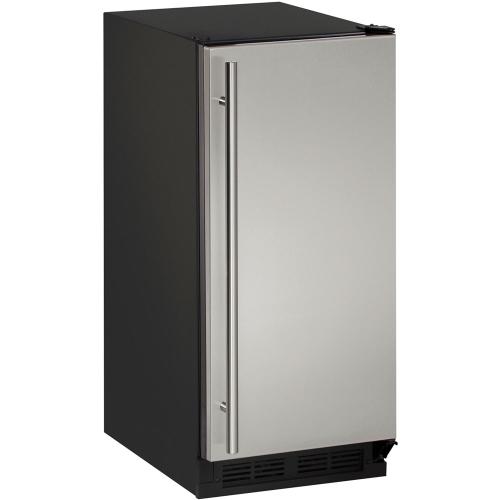
Is your Uline ice maker not making ice as quickly or as clean as it used to? You might be surprised how a simple cleaning can bring it back to peak performance.
Keeping your ice maker spotless isn’t just about looks—it affects the taste, safety, and efficiency of your machine. In this guide, you’ll discover easy steps to clean your Uline ice maker quickly and effectively. By the end, you’ll know exactly how to keep your ice fresh and your machine running smoothly.
Ready to get started? Let’s dive in!
Preparing Your Ice Maker
Preparing your Uline ice maker for cleaning is essential for a thorough and safe process. Proper preparation helps avoid damage and ensures the ice maker works efficiently after cleaning. Taking time to get ready will make the cleaning faster and easier.
Gathering Cleaning Supplies
Collect all necessary supplies before starting. This prevents interruptions and keeps everything organized. You will need:
- Mild dish soap or a specialized ice machine cleaner
- Soft cloths or sponges
- Warm water
- Small brush for scrubbing tight spaces
- Bucket or container for rinsing
- Towels to dry the machine
Using the right supplies protects your ice maker from scratches and damage.
Turning Off And Unplugging
Safety is important before cleaning. Turn off the ice maker using the power switch. Then, unplug it from the electrical outlet. This prevents electric shocks and damage to the machine.
Let the ice maker cool down if it has been running. This avoids burns and helps clean parts easily. Make sure no ice remains inside before you begin cleaning.
Removing Ice And Components
Removing ice and components from your Uline ice maker is a crucial part of the cleaning process. It ensures that every corner is accessible and prevents old ice from contaminating fresh batches. This step requires some care to avoid damaging parts or causing leaks later on.
Emptying The Ice Bin
Start by taking out all the ice from the bin. Use a clean scoop or your hands if the ice isn’t too cold for you. Avoid using any sharp tools that could scratch the bin’s surface.
Once the bin is empty, wipe it with a soft cloth to remove any water or ice residue. This quick action stops ice from melting and refreezing unevenly, which can cause clumping. Have you noticed how leftover ice can sometimes taste stale? Clearing it out helps keep your ice fresh.
Detaching Removable Parts
Next, identify the removable components like the ice scoop holder, ice chute, or water reservoir. These parts usually snap or slide out easily. Don’t force them; if a piece feels stuck, check the user manual or look for hidden clips.
After removing these parts, rinse them with warm water and mild soap. Avoid harsh chemicals that could damage the plastic. Dry each piece completely before reassembling to prevent mold growth.
Taking the time to carefully detach and clean these components extends the life of your ice maker. Have you ever skipped this step and noticed a strange smell or taste? Proper removal and cleaning make all the difference.
Cleaning The Exterior
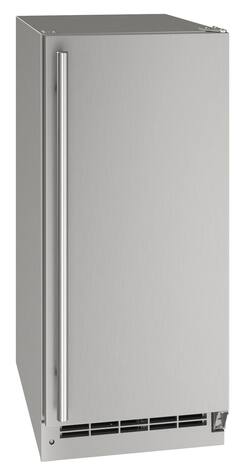
Wipe the Uline ice maker’s exterior with a soft cloth and mild soap. Avoid harsh chemicals to protect the surface and keep it shiny. Regular cleaning prevents dirt buildup and keeps your machine looking new.
Cleaning the exterior of your Uline Ice Maker is an essential part of maintaining its longevity and ensuring it remains a stylish addition to your kitchen. A sparkling exterior not only reflects well on your cleanliness but also ensures the machine functions optimally. Let’s explore practical ways to keep your ice maker looking its best.Wiping Down Surfaces
Begin by gathering a soft cloth and a gentle cleaner or a mixture of warm water and mild detergent. Avoid abrasive materials that might scratch the surface. Carefully wipe down all visible parts, ensuring you cover both the sides and the top. Pay special attention to areas prone to fingerprints and smudges. Regular cleaning prevents the build-up of grime, keeping your appliance gleaming. Have you ever noticed how a quick wipe can instantly make your kitchen feel more inviting?Cleaning Control Panels
The control panel is the brain of your ice maker, and keeping it clean is crucial for smooth operation. Use a slightly damp cloth to gently clean the buttons and surrounding areas. Avoid excessive moisture to prevent any potential damage to the electronics. Consider using a cotton swab for tight spaces, ensuring no dust or debris is left behind. Consistent care of the control panel not only enhances functionality but also adds to the overall aesthetic appeal. Isn’t it satisfying to see all buttons and displays free from dust and dirt? By dedicating a few minutes to these tasks, you ensure your Uline Ice Maker remains a centerpiece in your kitchen, always ready to serve with style.Cleaning The Interior
Cleaning the interior of your Uline ice maker keeps it running smoothly and ensures clean ice. Dirt, mold, and mineral buildup can affect ice quality and machine performance. Regular cleaning prevents these issues and extends the machine’s life.
Using Mild Detergents
Choose a gentle detergent to avoid damage to the ice maker’s interior. Mix the detergent with warm water for effective cleaning. Use a soft cloth or sponge to wipe surfaces carefully. Avoid harsh chemicals or abrasive tools that can scratch or corrode parts. Rinse thoroughly with clean water to remove any soap residue.
Scrubbing Ice Trays And Compartments
Remove ice trays and compartments for a thorough clean. Use a soft brush or sponge to scrub all surfaces, especially corners. Focus on areas where ice and water collect to stop mold growth. Rinse each part under running water until fully clean. Dry completely before putting them back to prevent moisture buildup inside.
Descaling The Ice Maker
Descaling the Uline ice maker is essential to keep it running smoothly. Over time, minerals build up inside the machine. This buildup affects ice quality and slows down ice production. Regular descaling removes these deposits and extends the lifespan of your ice maker.
Choosing A Descaling Solution
Pick a descaling solution that is safe for ice makers. Avoid harsh chemicals that can damage parts or leave residues. Many manufacturers recommend using a mixture of white vinegar and water. Commercial descalers made for ice machines work well too. Check the Uline user manual for approved products.
Use a solution that dissolves mineral deposits quickly. Ensure the product is food-safe and non-toxic. This keeps your ice clean and safe to consume.
Running A Descale Cycle
Empty the ice maker before starting the descale process. Pour the descaling solution into the water reservoir. Turn on the machine and let it run a full cycle. This allows the solution to clean internal parts thoroughly.
After the cycle ends, drain the solution completely. Run several cycles with clean water to rinse out all residues. Check the machine for any remaining buildup. Repeat the process if necessary to ensure a clean ice maker.

Credit: www.abt.com
Rinsing And Drying
Rinsing and drying are essential to keep your Uline ice maker clean and working well. Proper rinsing removes all traces of cleaner that could affect ice taste or safety. Drying prevents mold and mildew from growing inside the machine. Follow these steps carefully for the best results.
Removing Residual Cleaner
After cleaning, rinse all parts with warm water. Make sure no cleaner remains on surfaces. Use a soft cloth or sponge to wipe down the interior and removable parts. Avoid harsh scrubbing that can damage the machine. Rinse multiple times if needed to clear all residues.
Air Drying Components
Allow all parts to dry completely before reassembling. Place removable components on a clean towel or drying rack. Keep them in a well-ventilated area away from direct sunlight. Do not use cloths that leave lint. Air drying helps stop moisture buildup and keeps your ice maker fresh.
Reassembling And Restarting
After thoroughly cleaning your Uline ice maker, it is time to put everything back and get it running again. This step ensures your machine works smoothly and safely. Proper reassembly avoids leaks and malfunctions. Careful attention during this phase helps maintain your ice maker’s efficiency.
Putting Parts Back Together
Start by placing all cleaned parts in their correct spots. Follow the order you took them apart. Align the ice tray and water reservoir carefully. Secure any screws or clips firmly but gently. Check all seals and gaskets for proper fit. Loose parts can cause problems later. Use a soft cloth to wipe any water drops before assembly.
Powering On And Testing
Plug the ice maker back into the power source. Turn on the machine using the control panel. Listen for normal operating sounds like water filling or ice dropping. Watch the indicator lights to confirm proper function. Let the machine run for a full cycle to test. Check for leaks or unusual noises during operation. If everything works well, your ice maker is ready to use.
Credit: www.bestbuy.com
Maintaining Sparkling Ice Maker
Maintaining a sparkling Uline ice maker keeps it working well and producing clean ice. Regular care stops dirt and minerals from building up inside. This helps the machine last longer and keeps ice tasting fresh. Follow simple steps to keep the ice maker in top shape.
Regular Cleaning Schedule
Set a cleaning routine based on how often you use the ice maker. Clean it at least once every 2 to 3 months. For heavy use, clean monthly. Use warm water and mild soap for wiping surfaces. Run a cleaning cycle with a special ice machine cleaner. Rinse thoroughly to remove any residue. Dry all parts before reassembling.
Tips For Prolonging Lifespan
- Always use filtered water to reduce scale build-up.
- Check and replace water filters regularly.
- Keep the area around the ice maker clean and dust-free.
- Inspect and clean the ice bin often to avoid mold.
- Do not overload the ice maker with ice beyond its capacity.
- Follow the manufacturer’s guidelines for maintenance and repairs.

Credit: www.kitchentradition.com
Frequently Asked Questions
How Often Should I Clean My Uline Ice Maker?
You should clean your Uline ice maker every 3 to 6 months. Regular cleaning prevents mold, bacteria, and mineral buildup. This keeps your ice fresh and the machine running efficiently. Follow the manufacturer’s cleaning instructions for best results.
What Is The Best Cleaning Solution For Uline Ice Makers?
Use a mixture of warm water and mild dish soap or a commercial ice machine cleaner. Avoid harsh chemicals that can damage the machine. Always rinse thoroughly to remove any residue before using the ice maker again.
Can I Clean The Uline Ice Maker Myself?
Yes, cleaning your Uline ice maker yourself is simple. Follow the user manual’s step-by-step guide. Unplug the machine, remove ice, and clean all parts carefully. Regular maintenance extends its lifespan and ensures safe ice production.
How Do I Prevent Odor In My Uline Ice Maker?
To prevent odors, clean your Uline ice maker regularly and replace the water filter as needed. Use fresh water and avoid leaving ice in the bin for too long. Proper ventilation also helps keep your ice maker smelling fresh.
Conclusion
Cleaning your Uline ice maker keeps it working well and makes fresh ice. Regular care stops dirt and mold from building up inside. Use gentle cleaners and follow steps carefully for best results. Clean ice means better taste and safer drinks.
Take time to clean your machine every few weeks. This small effort saves money and avoids repairs later. Keep your ice maker fresh and ready for use anytime. Simple steps make a big difference in ice quality. Stay consistent, and enjoy clean, clear ice every day.