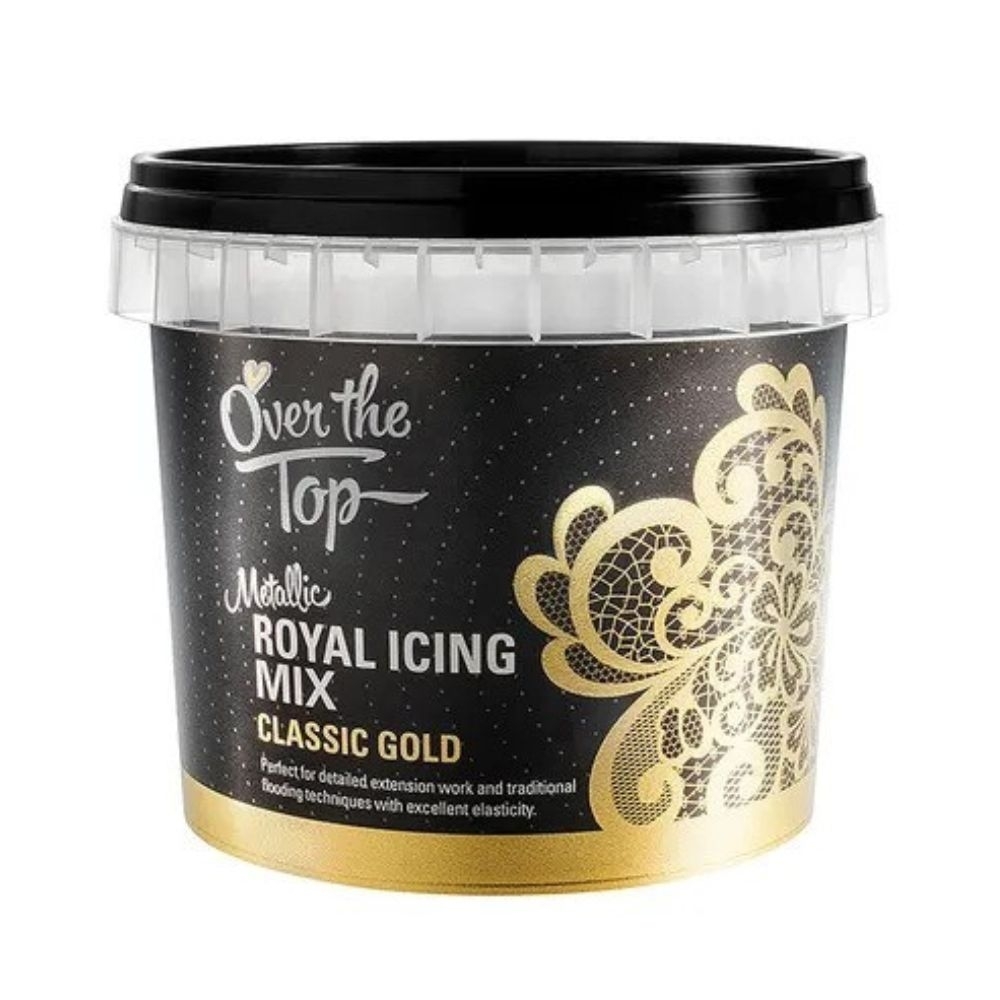
Are you ready to take your baking to the next level? Imagine adding a stunning, shiny gold touch to your cookies or cakes that will wow everyone at your next celebration.
Making metallic gold royal icing is easier than you think, and it’s the secret ingredient to creating show-stopping desserts. In this guide, you’ll learn simple steps to achieve that perfect, rich gold finish that looks professional but is made right in your own kitchen.
Keep reading, and you’ll discover how to turn ordinary icing into edible gold magic!
Credit: sugarandsparrow.com
Ingredients Needed
Creating metallic gold royal icing starts with gathering the right ingredients. Each component plays a crucial role in achieving that smooth, shiny finish you want on your cakes or cookies. Let’s break down the essentials you need to get that perfect golden touch.
Basic Royal Icing Components
- Egg Whites or Meringue Powder:These provide the structure and stability for your icing. If you’re worried about raw egg whites, meringue powder is a safer alternative and works just as well.
- Powdered Sugar:The main sweetener and thickener. Use finely sifted powdered sugar to avoid lumps and get a smooth texture.
- Water:Adds the necessary moisture to make the icing spreadable. Adding it slowly helps you control the consistency.
Have you ever noticed how too much water makes your icing runny? Adjusting water quantity carefully is key to perfect consistency.
Choosing The Right Gold Colorants
- Edible Gold Dust or Luster Dust:Perfect for that rich, metallic sheen. Look for dust labeled as “non-toxic” and “edible.”
- Gold Gel Food Coloring:A concentrated colorant that blends well without thinning your icing. It’s great for a deeper gold tone.
- Edible Gold Paint:Use it to brush on the surface after your icing has dried for a more vibrant metallic effect.
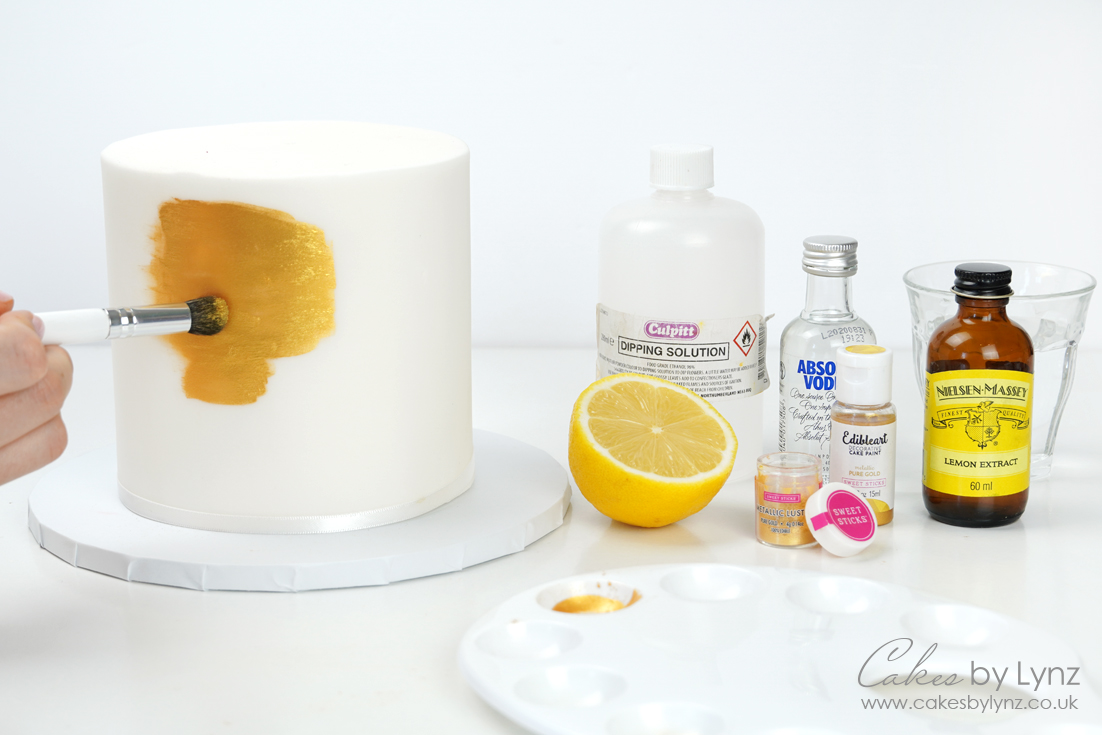
Which type of gold colorant fits your style? Sometimes mixing dust with a little clear alcohol or lemon extract helps you paint directly onto the icing.
Optional Additives For Texture
- Vanilla or Almond Extract:Adds subtle flavor without affecting the icing’s texture.
- Corn Syrup:Keeps the icing shiny and slightly pliable, preventing cracking when it dries.
- Gelatin or Gum Tragacanth:Used occasionally to add extra firmness to your royal icing, especially for detailed piping work.
Have you tried adding a drop of corn syrup to your royal icing? It can make a noticeable difference in the final look and feel.
Preparing Royal Icing
Preparing royal icing is the first key step in creating beautiful metallic gold decorations. The icing must be smooth and glossy for a professional finish. It should also hold its shape well but remain easy to pipe. Achieving this balance requires attention to detail and the right mixing techniques.
Mixing Techniques For Smooth Icing
Use a clean bowl and electric mixer for best results. Start by beating egg whites or meringue powder until foamy. Gradually add sifted powdered sugar while mixing. Beat on medium speed to avoid lumps. Scrape down the sides of the bowl often. Continue mixing until the icing looks shiny and smooth.
Achieving The Perfect Consistency
Royal icing must be thick enough to hold shapes but soft enough to pipe easily. Test the consistency by lifting the beater; the icing should form stiff peaks. For flooding cookies, thin the icing with small drops of water. For outlining, keep it thicker. Adjust water or sugar amounts little by little to get the right texture.
Tips For Preventing Cracks
Cracks ruin the smooth surface needed for metallic finishes. Avoid over-mixing the icing, which can dry it out. Cover the icing bowl with a damp cloth to keep moisture in. Work quickly once the icing is ready. Store unused icing in an airtight container to prevent drying. Add a few drops of glycerin to keep the icing flexible and prevent cracks.
Creating Metallic Gold Effect
Create a shiny metallic gold effect by mixing edible gold dust with a small amount of clear alcohol or lemon extract. Gently brush this mixture onto dry royal icing for a smooth, golden finish. This technique adds a rich, elegant look to your decorated treats.
Creating a metallic gold effect in royal icing adds elegance. This dazzling finish elevates your baked creations. It’s easier than you might think. With a few techniques, achieve that shimmering gold look. Let’s explore various methods to create metallic gold royal icing.Using Edible Gold Dust
Edible gold dust transforms plain icing into a gleaming masterpiece. First, ensure your royal icing is dry. Then, lightly brush the edible gold dust on the icing’s surface. Use a soft brush for even coverage. This technique gives a subtle, elegant sheen. Ideal for intricate designs or accents.Incorporating Gold Luster Spray
Gold luster spray offers a quick, uniform gold finish. After your icing sets, shake the spray can well. Hold it a few inches away and spray lightly. This method provides a smooth, metallic look. Perfect for larger areas or a bold effect. Remember to work in a well-ventilated area.Mixing Gold Paint From Edible Colors
Create gold paint using edible colors for precision. Mix a small amount of gold luster dust with a few drops of vodka or lemon extract. This creates a paint-like consistency. Use a fine brush to apply it to specific areas. This method is excellent for detailed work or highlighting edges.Application Methods
Applying metallic gold royal icing adds a stunning shine to cakes and cookies. Choosing the right application method depends on your design and skill level. Each technique offers a different look and texture. Use these methods to create beautiful, elegant desserts.
Piping Gold Icing On Cakes And Cookies
Piping allows for precise designs with metallic gold royal icing. Use a piping bag fitted with a small round tip. Hold the bag at a 45-degree angle to control the flow. Practice steady pressure for smooth lines and shapes. This technique works well for borders, lettering, and delicate patterns.
Painting Gold Details With Brushes
Brush painting offers creative freedom and detail. Thin the gold royal icing slightly with water for easy spreading. Use a fine, clean brush to paint on dry or slightly set icing. Light strokes build layers of metallic shine. Perfect for leaves, flowers, and accents on cookies and cakes.
Airbrushing For A Smooth Finish
Airbrushing creates an even and polished gold surface. Fill the airbrush with metallic gold royal icing thinned to a sprayable consistency. Spray in light, even coats to avoid drips. Work in a well-ventilated area and keep the airbrush moving. Ideal for full coverage or soft gradients on larger cakes.
Drying And Storage Tips
Proper drying and storage are key to keeping your metallic gold royal icing perfect. The right conditions help maintain its shine and texture. Protect your decorations from damage and moisture to ensure they stay beautiful longer.
Optimal Drying Conditions
Dry your iced decorations in a cool, dry place. Avoid humidity and direct sunlight, which can soften the icing. Air circulation helps the icing harden evenly. It usually takes 12 to 24 hours for royal icing to dry completely. Patience is important for a smooth, firm finish.
Storing Iced Decorations Safely
Use an airtight container to store your dried decorations. Place parchment paper between layers to prevent sticking. Keep the container in a cool, dry spot. Avoid the fridge, as moisture can ruin the icing’s texture. Handle decorations gently to avoid cracks or chips.
Extending Shelf Life Of Gold Icing
Store leftover gold royal icing in an airtight jar. Seal it tightly to keep air out. Refrigerate for up to two weeks. Before use, bring it to room temperature and stir well. For longer storage, freeze icing in small portions. Thaw slowly and mix thoroughly before use.
Troubleshooting Common Issues
Troubleshooting common issues with metallic gold royal icing can save you time and frustration. Achieving that perfect, shiny finish requires attention to detail, and small mistakes can easily dull your work. Let’s look at some practical fixes for the most frequent problems you might face.
Fixing Dull Or Uneven Gold Finish
If your gold finish looks flat or patchy, it might be due to uneven application or the wrong type of luster dust. Try applying a second thin layer of edible gold dust mixed with a clear alcohol like vodka or lemon extract. This helps the dust spread evenly and dries with a shiny effect.
Be careful not to overload your brush with dust—it can cause clumps and dull spots. Also, make sure your royal icing is fully dry before adding the metallic layer, or the color won’t stick well and might appear blotchy.
Avoiding Color Bleeding
Color bleeding happens when the gold dust or paints mix with underlying colored icing, causing a muddy look. To prevent this, apply a thin layer of clear piping gel or edible glue over colored icing before brushing on the gold.
Another tip is to let each layer dry completely. Rushing this step often leads to bleeding because moisture causes the colors to run together. Have you noticed how patience in icing really pays off?
Repairing Cracked Icing
Cracks can appear if your royal icing dries too quickly or if the surface wasn’t smooth before decorating. Gently brush a tiny amount of water or clear alcohol over the cracks to soften them, then smooth the surface with a damp brush or your fingertip.
If the cracks are deep, try piping a thin line of fresh royal icing over the area and then reapplying your gold finish once it dries. This can blend the repair seamlessly into your design.
Creative Design Ideas
Creative design ideas can transform your metallic gold royal icing from simple decoration to stunning art. Using gold icing gives your baked goods a luxurious and eye-catching finish. Let’s explore some ways you can bring elegance and sparkle to your cakes and cookies.
Elegant Borders And Patterns
Adding gold borders around your cakes or cookies instantly elevates their look. Try piping delicate dots, scallops, or lace patterns with your metallic gold icing for a refined finish.
Mix thick and thin lines to create depth and dimension. You can even add tiny gold leaves or swirls to frame your design beautifully.
Have you experimented with combining smooth and textured borders? It can make your work stand out even more.
Gold Accents With Other Colors
Gold pairs wonderfully with many colors, especially deep blues, rich reds, and classic whites. Use your metallic gold royal icing to highlight details like flower centers, lettering, or geometric shapes.
Try outlining colorful patterns with gold or adding small gold dots as accents. This contrast draws attention to the intricate details of your design.
What color combinations excite you the most? Adding gold can turn ordinary palettes into something truly special.
Seasonal And Event Inspirations
Gold icing is perfect for celebrating special occasions. Think gold snowflakes for winter holidays or golden pumpkins for fall-themed treats.
For weddings or anniversaries, use gold to create delicate monograms or elegant scrollwork. It adds a regal touch that guests will remember.
Consider how your event’s mood can guide your use of gold. Are you going for subtle sophistication or bold glamour?

Credit: sugarandsparrow.com
Credit: cakesbylynz.co.uk
Frequently Asked Questions
What Ingredients Are Needed For Metallic Gold Royal Icing?
You need royal icing, edible gold luster dust, and lemon extract or clear alcohol. Mix luster dust into the liquid, then stir into the icing for a shiny gold effect.
How Do I Achieve A Smooth Metallic Gold Finish?
Use a fine brush to apply a thin layer of gold luster dust mixed with alcohol. Let it dry completely for a smooth, reflective finish on your royal icing.
Can I Use Metallic Gold Royal Icing On All Cookies?
Yes, metallic gold royal icing works well on most cookie types. It adds an elegant touch, especially on sugar and gingerbread cookies, enhancing their appearance.
How Long Does Metallic Gold Royal Icing Take To Dry?
Metallic gold royal icing typically dries within 4 to 6 hours at room temperature. Avoid touching it during this time to maintain its shine and smooth finish.
Conclusion
Making metallic gold royal icing can add sparkle to your baked goods. The steps are simple and fun to try at home. Use edible gold dust and mix it well for the best shine. This icing makes cakes and cookies look special for any event.
Practice a few times to get smooth, shiny results. Enjoy decorating with your new golden touch and impress friends and family. Keep experimenting to find your perfect gold icing style. Your treats will stand out with this beautiful finish.