Imagine preparing a succulent, juicy ham in just a fraction of the time it usually takes. Yes, it’s possible with your microwave oven!
You might be skeptical, thinking that a microwave can’t possibly achieve the same mouth-watering results as traditional methods. But what if we told you there’s a way to enjoy a perfectly cooked ham without spending hours in the kitchen? This guide will show you how to harness the power of your microwave to whip up a delicious ham that will have your taste buds dancing.
Curious to discover the secret behind this time-saving culinary hack? Keep reading to unlock the step-by-step process that will transform your microwave into a gourmet tool, simplifying your cooking routine while delivering exceptional flavors.
Choosing The Right Ham
Choosing the right ham is important for cooking it perfectly in a microwave oven. Different hams cook differently, and picking the right type helps avoid overcooking or drying out. Size and weight also affect cooking time and texture. Knowing what to select can make your microwave cooking easy and tasty.
Types Of Ham Suitable For Microwaving
Not all hams work well in a microwave. Some types are better for quick and even cooking.
- Pre-cooked ham: Ready to eat and just needs reheating.
- Boneless ham: Cooks evenly and fits well in microwave dishes.
- Spiral-cut ham: Heats faster because of thin slices.
- Smoked ham: Adds flavor but requires careful heating to avoid drying.
Fresh or raw ham usually needs longer cooking and is less suited for microwaving.
Size And Weight Considerations
Small or medium hams fit better in most microwave ovens. Large hams may cook unevenly.
- Hams under 5 pounds cook quicker and more evenly.
- Larger hams need longer cooking and may dry out.
- Choose a ham that fits comfortably in your microwave dish.
- Consider slicing thick hams before microwaving for better heat distribution.
Proper size and weight help control cooking time and keep the ham juicy.

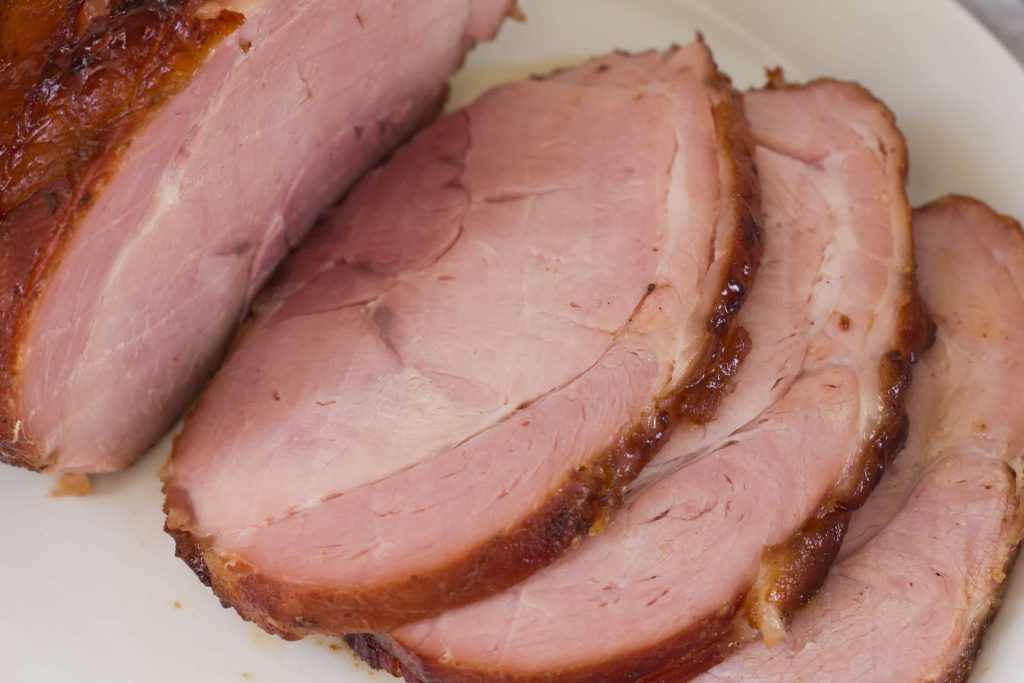
Credit: www.tasteofhome.com
Preparing The Ham
Getting your ham ready before it hits the microwave is key to a juicy, flavorful meal. Proper preparation helps the ham cook evenly and lets the flavors soak in deeply. Let’s look at how to prepare your ham by removing the packaging and skin, then scoring and seasoning it for the best results.
Removing Packaging And Skin
Start by taking your ham out of any plastic wrap or netting. Leaving packaging on can cause uneven cooking and might even be unsafe in the microwave. Be sure to check for any metal clips or ties and remove those carefully.
Some hams come with a thick skin or rind. You can leave this on to help keep moisture locked in, or remove it if you prefer a softer texture. If you keep the skin, make sure it’s clean and dry before cooking.
Scoring And Seasoning Techniques
Scoring the surface of your ham lets the heat and seasoning penetrate better. Use a sharp knife to cut shallow diagonal lines about an inch apart, creating a diamond pattern. This simple step can make a big difference in flavor absorption.
Seasoning is where you get to personalize your ham. You can rub it with a mix of brown sugar, mustard, and a pinch of cloves for a classic taste. Or try a blend of honey and garlic for a sweeter, savory twist.
Have you tried adding fresh herbs like rosemary or thyme before cooking? They can add unexpected depth to your ham’s flavor. Don’t be afraid to experiment—your microwave ham can be as unique as you want it to be.
Microwave Settings And Equipment
Cooking ham in a microwave requires the right settings and tools. Proper microwave power and safe containers ensure even cooking and good flavor. Understanding these details helps you prepare ham quickly and safely.
Power Levels To Use
Microwaves have different power levels to control cooking speed. Use medium or medium-high power for ham. High power can overcook the edges and dry out the meat. Medium power cooks ham evenly and keeps it juicy.
Set the microwave to 50% to 70% power. Cooking time will be longer but results will be better. Check the ham regularly to avoid overheating. Let the ham rest after microwaving for juices to settle.
Recommended Microwave-safe Containers
Use containers that are safe for microwave cooking. Glass, ceramic, and certain plastics work well. Avoid metal or containers with metal trim. Metal causes sparks and can damage the microwave.
Choose a container that fits the ham with space around it. This allows steam to circulate and cook the meat evenly. Cover the container with a microwave-safe lid or plastic wrap. Leave a small vent to release steam safely.
- Glass baking dishes
- Ceramic microwave-safe bowls
- Microwave-safe plastic containers labeled “microwave safe”
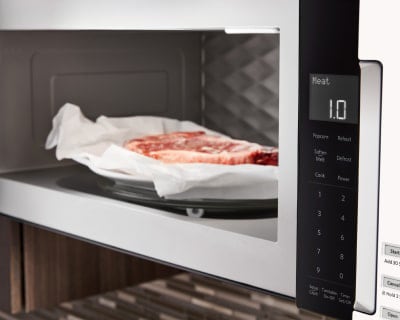
Credit: www.kitchenaid.com
Step-by-step Cooking Process
Cooking ham in a microwave oven can be quick and easy, but it requires attention to timing and temperature to get it just right. The key is to follow a clear process that helps you avoid overcooking or drying out your ham. Let’s break down the essential steps to ensure your ham turns out juicy and flavorful every time.
Initial Cooking Time Guidelines
Start by placing your ham in a microwave-safe dish and cover it with microwave-safe plastic wrap or a lid to retain moisture. As a general rule, cook the ham for about 10 to 15 minutes per pound on medium power (50-70%). This timing works well for pre-cooked hams; if your ham is uncooked, add extra time accordingly.
Remember that microwave ovens vary in strength, so these are just starting points. Use these guidelines to avoid rushing the process and risking uneven cooking.
Checking Doneness And Adjusting Time
After the initial cooking time, check the internal temperature with a meat thermometer. The safe temperature for fully cooked ham is 140°F (60°C), while uncooked ham should reach 160°F (71°C). Insert the thermometer into the thickest part of the ham for an accurate reading.
If the ham hasn’t reached the desired temperature, microwave it in 2-3 minute increments. Check often to prevent overheating, which can dry out the meat. This step lets you control the cooking precisely and keeps the ham tender.
Resting The Ham For Juiciness
Let your ham rest covered for at least 5 to 10 minutes after microwaving. This allows the juices to redistribute, making every bite moist and flavorful. Skipping this step often results in dry edges and less satisfying texture.
Do you usually rush to slice the ham right away? Try waiting and notice how much juicier and tastier your ham becomes. Resting is a simple step that makes a big difference in your final dish.
Adding Flavor Enhancements
Adding flavor enhancements to your microwave-cooked ham can turn a simple meal into something memorable. A plain ham may be quick to prepare, but with the right touches, you can elevate its taste and aroma. You don’t need a long list of ingredients—just a few well-chosen flavors can make a big difference.
Glazes And Sauces
Glazing your ham before microwaving adds a sweet or tangy crust that locks in moisture. Try brushing on honey mustard, brown sugar with a splash of orange juice, or even a store-bought barbecue sauce. These glazes caramelize slightly during cooking, giving your ham a rich, glossy finish.
Don’t be afraid to mix ingredients to create your own sauce. A blend of maple syrup and Dijon mustard works wonders. Just brush it on, cover the ham loosely with microwave-safe wrap, and cook. The glaze will soak in and boost flavor without drying out the meat.
Using Herbs And Spices
Herbs and spices are your best friends when it comes to enhancing ham flavor in the microwave. Sprinkle dried thyme, rosemary, or sage for an earthy touch. Garlic powder and black pepper add warmth and depth without overpowering the ham’s natural taste.
Fresh herbs can also be added after cooking to keep their bright flavors intact. Imagine the fresh zing of chopped parsley or chives sprinkled on just before serving—simple but effective. Have you tried mixing your favorite herbs to create a custom rub? Experimenting with what you have can lead to delicious discoveries.
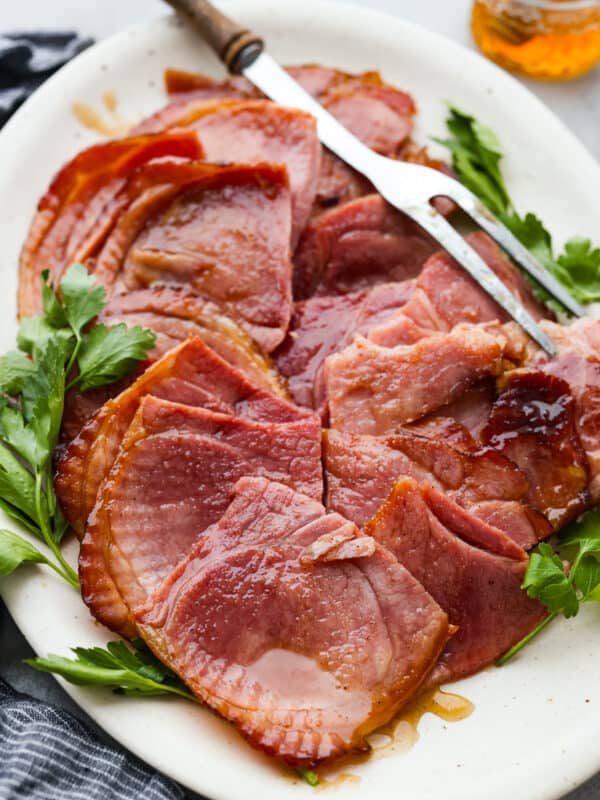
Credit: therecipecritic.com
Safety Tips And Troubleshooting
Cooking ham in a microwave oven can save you time, but it requires careful attention to safety and technique. Knowing how to avoid common problems can make your meal both delicious and safe. Here are some essential tips and troubleshooting advice to help you get it right every time.
Avoiding Overcooking
Microwaves heat food quickly, which means ham can easily become dry or tough if overcooked. Keep a close eye on the cooking time and use the microwave’s power settings to cook at medium or medium-low. This helps the heat penetrate evenly without drying out the meat.
Check the ham’s temperature with a meat thermometer. It should reach at least 140°F (60°C) to be safe to eat but avoid going much higher. Have you noticed how even a minute too long can change the texture? That’s why timing is crucial.
Handling Uneven Heating
Microwaves often heat unevenly, leaving cold spots that may harbor bacteria. To prevent this, rotate or stir the ham halfway through cooking if possible. Using a microwave-safe cover can also trap steam and promote more even heating.
If your microwave doesn’t have a turntable, stop the cooking process several times to manually turn the ham. Uneven heating can be frustrating, but these small adjustments make a big difference. Have you ever bitten into a cold spot? It’s an easy mistake to fix.
Serving Suggestions
Serving ham cooked in a microwave offers many tasty possibilities. You can create a well-rounded meal by pairing it with suitable sides. Proper serving ideas enhance the flavor and enjoyment of your dish. Also, knowing how to store leftovers keeps your ham fresh and safe to eat later.
Side Dishes That Complement Ham
Choose sides that balance the saltiness and richness of ham. Fresh vegetables add color and crunch. Starches help make the meal filling and satisfying.
- Mashed potatoes or roasted sweet potatoes
- Steamed green beans or asparagus
- Glazed carrots or sautéed spinach
- Macaroni and cheese or rice pilaf
- Crisp garden salad with light dressing
Try fruits like pineapple or apples to add natural sweetness. Bread rolls or cornbread offer a soft texture contrast.
Storing Leftovers Safely
Cool the ham quickly after serving to prevent bacteria growth. Store leftovers in airtight containers. Keep ham in the refrigerator for up to four days.
- Wrap tightly with plastic wrap or foil
- Label containers with the date stored
- Reheat only the portion you plan to eat
For longer storage, freeze ham in freezer-safe bags. Use frozen ham within two months for best taste.
Frequently Asked Questions
How Long To Cook Ham In A Microwave Oven?
Microwave ham cooking time depends on weight and power. Generally, cook 10 minutes per pound on medium heat. Always check internal temperature reaches 140°F for fully cooked ham. Let it rest a few minutes before serving to retain juices.
Can I Microwave A Frozen Ham Directly?
It’s best to thaw ham before microwaving for even cooking. Use the defrost setting or thaw in the fridge overnight. Microwaving frozen ham can cause uneven heating and affect texture. Always ensure ham reaches safe internal temperature after cooking.
What Microwave Settings Are Best For Cooking Ham?
Use medium or 50% power to cook ham evenly in the microwave. High power can overcook edges and dry out the meat. Cover ham with microwave-safe wrap to retain moisture. Rotate or flip ham halfway through cooking for uniform heat distribution.
How To Keep Ham Moist When Microwaving?
Cover ham with a microwave-safe lid or damp paper towel while cooking. This traps steam and prevents drying out. Basting occasionally with glaze or broth also helps maintain moisture. Let ham rest covered after cooking to allow juices to redistribute.
Conclusion
Cooking ham in a microwave oven saves time and effort. It heats the ham evenly and keeps it juicy. Use the right power level and cooking time for best results. Cover the ham to avoid drying out. Let it rest before slicing to keep flavors locked in.
This method suits busy days or quick meals. Enjoy your tasty ham without long cooking hours. Try it today and see how easy it can be. Simple steps lead to great meals every time.