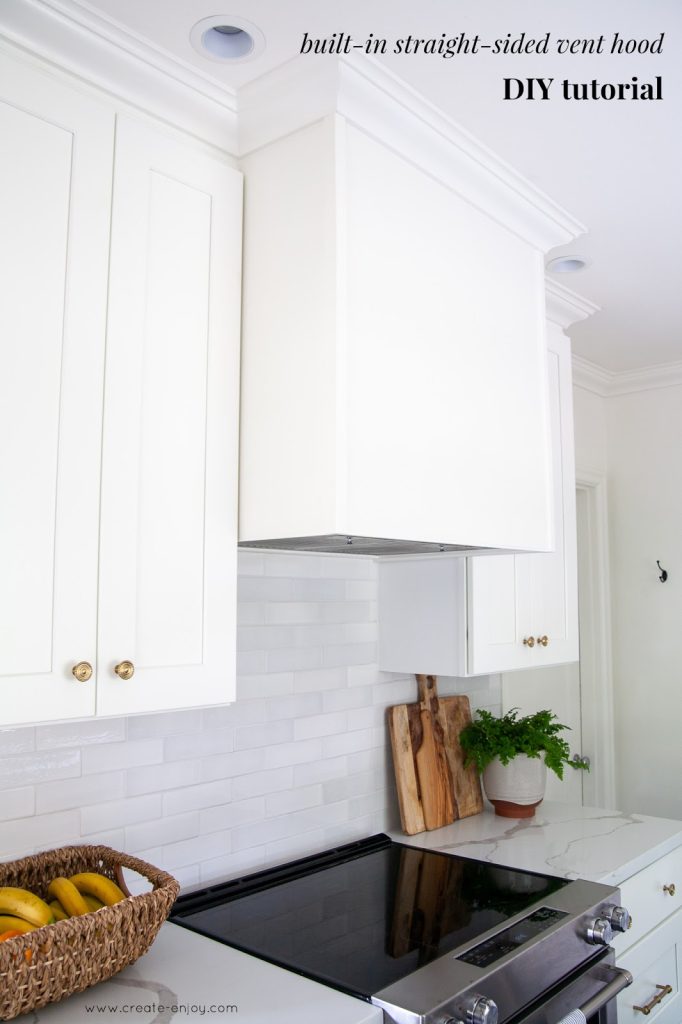
Are you dreaming of a kitchen upgrade that combines style and functionality? Building your own range hood might be the perfect project for you.
Not only does a range hood enhance the look of your kitchen, but it also plays a crucial role in improving air quality by venting smoke and odors. Imagine cooking without worrying about lingering smells or grease build-up. With our step-by-step guide, you’ll discover just how simple it can be to create a custom range hood that suits your needs and complements your kitchen’s design.
Stick around, and you’ll learn everything you need to know—from gathering materials to final installation. Ready to transform your kitchen and impress your guests? Let’s get started!
Choosing The Right Range Hood
Choosing the right range hood is essential for a functional kitchen. It helps remove smoke, odors, and grease. The right hood keeps your kitchen air clean and fresh. It also adds style to your cooking space. Consider several factors to find the perfect fit. Size, type, and material all matter.
Types Of Range Hoods
Range hoods come in several styles. Wall-mounted hoods attach to the wall above the stove. Island hoods hang from the ceiling over a cooking island. Under-cabinet hoods fit under kitchen cabinets. Downdraft hoods rise from the countertop when needed. Each type suits different kitchen layouts.
Size And Ventilation Requirements
Size matters for effective ventilation. The range hood should be as wide as the stove or wider. Measure your cooking surface before buying. Ventilation power is measured in cubic feet per minute (CFM). Higher CFM means stronger airflow. Choose a hood with enough power for your cooking habits.
Materials And Finishes
Material affects durability and appearance. Stainless steel is popular for its strength and easy cleaning. Copper adds a warm, classic look but costs more. Painted or powder-coated finishes offer color choices. Pick a finish that matches your kitchen style and is easy to maintain.
Gathering Tools And Materials
Before you start building your range hood, gathering the right tools and materials is crucial. Having everything at hand saves time and avoids unnecessary trips to the hardware store. It also ensures your project runs smoothly from start to finish.
Essential Tools List
Make sure you have these tools ready before you begin:
- Measuring tape:Accurate measurements prevent costly mistakes.
- Power drill:For drilling holes and driving screws efficiently.
- Screwdrivers:Both flathead and Phillips types for various screws.
- Jigsaw or circular saw:To cut wood or metal pieces precisely.
- Level:Keeps your range hood perfectly horizontal.
- Stud finder:Essential for mounting securely on walls.
- Clamps:To hold pieces steady while assembling.
Do you have these tools, or will you need to borrow or buy some? Having the right equipment makes your build not only easier but safer too.
Required Materials
The materials you choose affect the look and function of your range hood. Here’s a basic list to get you started:
- Wood panels or metal sheets:Depending on the style you want.
- Range hood fan or blower:The heart of your ventilation system.
- Ducting pipes:To channel air outside.
- Screws and nails:For assembly and mounting.
- Paint or finish:Adds protection and style.
- Filters:Important for trapping grease and debris.
Think about your kitchen’s design and ventilation needs when picking materials. What look and performance do you want your range hood to deliver?
Safety Equipment
Safety should never be an afterthought. Protect yourself with the right gear:
- Safety goggles:Shield your eyes from dust and debris.
- Work gloves:Prevent splinters and cuts.
- Ear protection:Useful when using loud power tools.
- Dust mask:Keeps you from inhaling harmful particles.
Wearing safety gear might feel like a hassle, but it keeps you injury-free and focused. Have you set up a safe workspace before starting a project?
Preparing The Installation Area
Preparing the installation area is a crucial step before building a range hood. This phase ensures the hood fits perfectly and functions safely. Taking time to set up the space properly helps avoid problems later.
Measuring And Marking
Start by measuring the wall space above your stove. Use a tape measure to find the width and height available. Mark the spots where the hood will mount using a pencil. Check the manufacturer’s instructions for exact placement. Marking clearly guides your installation and ensures accuracy.
Clearing The Space
Remove any items or appliances near the installation area. Clear cabinets or shelves that might block the hood. Clean the wall and counter surfaces to avoid dust and dirt. A clear workspace improves safety and makes installation easier. Keep tools and materials organized nearby for quick access.
Checking Electrical And Venting Connections
Inspect existing electrical outlets near the installation spot. Confirm the power source matches the range hood’s requirements. Look for an accessible vent or duct for air flow. Measure vent size to match the hood’s vent outlet. Fix any loose wiring or ducts before proceeding. Proper connections are essential for the hood’s performance and safety.

Credit: www.create-enjoy.com
Building The Range Hood Frame
Building the range hood frame is a key part of the project. This frame supports the entire structure and shapes the hood. A strong and well-built frame ensures safety and durability. Follow simple steps to create a solid frame for your range hood.
Cutting And Assembling Wood Panels
Start by selecting quality wood panels. Choose wood that is sturdy and easy to work with, like plywood or hardwood. Measure the dimensions needed for your range hood frame carefully. Use a saw to cut the wood panels to size. Keep cuts straight and smooth for a clean fit.
Assemble the panels by joining them with wood glue and screws. Align the edges precisely to avoid gaps. Use clamps to hold pieces while the glue dries. Check the frame for squareness using a carpenter’s square.
Creating The Hood Shape
Design the hood shape according to your kitchen style. Most range hoods have a tapered or boxy shape. Mark the shape on the wood panels clearly before cutting. Cut the panels to form the sides and top of the hood. Sand the edges to make them smooth and even.
Join the shaped pieces carefully to form the hood. Make sure all corners meet tightly. A well-shaped hood improves air flow and adds style to your kitchen.
Securing The Frame
Secure the frame with screws and brackets for strength. Use metal brackets inside corners to reinforce joints. Check all connections are tight and stable. Add extra supports if the frame feels weak. A solid frame will hold the hood and vent system safely over time.
Test the frame by gently shaking it. No movement means it is secure. Properly securing the frame prevents damage and ensures long-term use.
Installing Ventilation Components
Installing ventilation components is a key part of building a range hood. It ensures smoke, steam, and odors leave your kitchen properly. Proper installation helps the hood work efficiently and quietly. Focus on attaching the fan, setting up ductwork, and sealing all connections well.
Attaching The Fan And Ductwork
Start by mounting the fan securely inside the range hood. Use screws and brackets to hold it firmly. Connect the fan outlet to the ductwork using the right size duct pipe. Choose smooth, rigid ducts for better airflow and less noise. Make sure the duct runs straight and avoids sharp bends. This reduces air resistance and improves performance.
Ensuring Proper Airflow
Good airflow moves smoke and steam out quickly. Check that the duct size matches the fan’s capacity. Avoid long or complicated duct runs. Position the duct outlet outside, above the roof or through an exterior wall. Use a vent cover to prevent rain and pests from entering. Test airflow with the fan on. Make adjustments if air moves slowly or noisily.
Sealing And Insulating
Seal all joints and connections with high-quality foil tape. Avoid using duct tape, as it can break down over time. Proper sealing prevents air leaks and keeps the system efficient. Insulate ductwork in unheated areas to stop condensation. Use foam or fiberglass wrap for insulation. This protects your home from moisture damage and keeps airflow steady.

Credit: www.create-enjoy.com
Finishing Touches
Finishing touches bring your range hood to life. They improve its look and function. This stage transforms a simple structure into a stylish kitchen feature. Focus on smooth surfaces, eye-catching details, and practical lighting. These elements make your range hood both beautiful and useful.
Sanding And Painting
Sanding prepares the hood’s surface for paint. Use fine-grit sandpaper for a smooth finish. Sand gently to avoid damage. Remove dust with a clean cloth before painting.
Choose paint that matches your kitchen style. Use heat-resistant paint for safety. Apply thin, even coats to prevent drips. Let each coat dry fully before the next. This process ensures a lasting, neat finish.
Adding Decorative Elements
Decorative touches enhance the hood’s appeal. Consider molding, trim, or stencils for unique details. Attach metal or wooden accents for texture. Choose elements that fit your kitchen theme.
Keep decorations simple to avoid clutter. Secure all pieces firmly to prevent falls. These details give your range hood character and charm.
Installing Lighting Fixtures
Lighting improves visibility and style. Select fixtures that suit the hood’s size and design. LED lights work well for brightness and energy savings.
Place lights to illuminate the cooking area evenly. Hide wires neatly for a clean look. Test the lighting to ensure it works well before finishing.
Testing And Maintenance Tips
Keeping your range hood in top shape requires regular testing and maintenance. These steps ensure it continues to clear smoke and odors efficiently while extending its lifespan. Let’s dive into some practical tips that make this process straightforward and effective.
Checking Functionality
Start by turning on your range hood and listening carefully. Is the fan running smoothly without unusual noises? If you hear rattling or grinding, it could mean the motor or fan blades need attention.
Next, hold a piece of tissue paper near the vent while the hood is on. Does it stick to the vent? This simple test confirms your hood is pulling air properly. If not, you might have a blockage or weak suction to address.
Cleaning Guidelines
Grease buildup reduces your range hood’s efficiency and can even become a fire hazard. Clean the filters regularly—metal mesh filters usually need washing every month.
- Soak filters in hot water and dish soap.
- Use a soft brush to scrub away stuck grease.
- Rinse thoroughly and let them dry before reinstalling.
For hoods with charcoal filters, replace them every 3 to 6 months as they can’t be washed. Wiping down the exterior and fan blades with a damp cloth also keeps your hood looking and working well.
Troubleshooting Common Issues
Is your range hood not turning on? Check the power supply and fuse first. Sometimes, a loose wire connection or tripped circuit breaker is the culprit.
If the fan runs but airflow feels weak, inspect the ductwork for blockages like bird nests or debris. Also, confirm that the duct size matches your hood’s requirements; undersized ducts reduce performance.
Have you noticed unusual smells or smoke lingering after cooking? This could mean your filters need replacing or the fan speed setting is too low. Adjusting the speed or swapping filters can make a big difference.
How often do you test and clean your range hood? Making these tasks part of your routine can save you from costly repairs and keep your kitchen air fresh and healthy.

Credit: www.create-enjoy.com
Frequently Asked Questions
What Materials Do I Need To Build A Range Hood?
To build a range hood, gather sheet metal, ducting, screws, a fan, and a power source. These materials ensure durability and efficient ventilation.
How Do I Install A Range Hood Vent Correctly?
Install the vent by aligning ductwork with the hood outlet. Seal connections tightly to prevent leaks. Ensure proper airflow direction for effective ventilation.
What Size Range Hood Fits Above My Stove?
Choose a range hood at least as wide as your stove. A wider hood captures more smoke and odors, improving kitchen air quality.
Can I Build A Range Hood Without Professional Help?
Yes, with basic tools and DIY skills, you can build a range hood. Follow safety guidelines and detailed plans for best results.
Conclusion
Building a range hood can improve your kitchen’s air quality. It removes smoke, steam, and cooking odors effectively. With the right tools and steps, anyone can do it. Take your time and follow safety tips closely. A well-made hood looks great and works well.
Enjoy cooking in a fresher, cleaner space every day. Simple projects like this boost your home’s comfort and value. Try it yourself and see the difference.