If you’ve ever cooked a meal only to find your kitchen filled with smoke or lingering odors, you know the importance of having a reliable range hood. Installing an under cabinet range hood vent can transform your cooking experience by keeping your kitchen fresh and clean.
But how do you go about installing one? The process might sound daunting, but with the right guidance, it can be straightforward and satisfying. Imagine the joy of cooking without worrying about smoke, grease, or unwanted odors. In this blog post, you’ll discover easy-to-follow steps to install your under cabinet range hood vent, ensuring your kitchen remains the heart of your home.
Stay with us, and you’ll gain the confidence to tackle this project with ease.
Choosing The Right Range Hood
Choosing the right range hood is crucial for both the functionality and style of your kitchen. It affects how well your cooking area stays clean and odor-free. Understanding the options available can save you time and money while improving your kitchen’s air quality.
Types Of Range Hoods
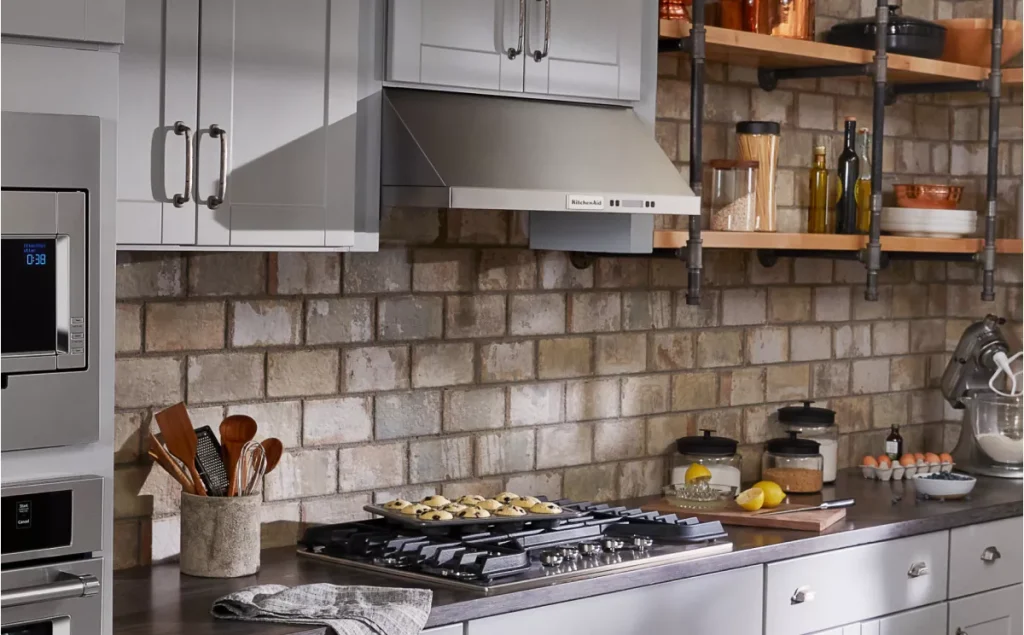
There are several types of range hoods, each suited for different kitchen layouts and needs. Under cabinet range hoods fit neatly beneath your cabinets, offering a streamlined look without taking up extra space.
Wall-mounted hoods attach directly to the wall and often come with a chimney design. Island hoods hang from the ceiling over an island cooktop, providing powerful ventilation and a modern aesthetic.
Choosing the right type depends on your kitchen’s design and how much ventilation power you need. Think about your cooking style: do you fry often or mostly simmer? This affects the hood’s required strength.
Measuring Your Space
Accurate measurements are key before buying a range hood. Measure the width of your cooktop or range first. Your hood should be at least as wide as your cooking surface to capture all smoke and steam effectively.
Also, check the height between your stovetop and the bottom of your cabinets. Most manufacturers recommend installing the hood 20 to 30 inches above the cooktop. This ensures optimal airflow without interfering with your cooking.
Don’t forget to consider cabinet depth and any obstacles like light fixtures or switches that might affect installation. Taking precise measurements upfront avoids surprises during the installation.
Ventilation Options
Ventilation type is a major factor in choosing a range hood. You can pick between ducted and ductless models. Ducted hoods vent air outside your home, removing heat, smoke, and odors completely.
Ductless hoods use charcoal filters to clean the air and recirculate it back into the kitchen. They’re easier to install but may not be as effective at removing strong odors or heavy smoke.
Consider your kitchen layout and whether you can install ductwork easily. If you live in an apartment or have restrictions, a ductless hood might be your best option. What kind of cooking smells and smoke do you deal with daily?
Gathering Tools And Materials
Before installing an under cabinet range hood vent, gather all necessary tools and materials. This preparation saves time and avoids interruptions during installation. A well-organized workspace with everything ready helps the job go smoothly and safely.
Essential Tools
- Power drill with drill bits
- Screwdriver set (flathead and Phillips)
- Measuring tape
- Level
- Stud finder
- Pencil for marking
- Utility knife
- Wire stripper
- Caulking gun
- Safety glasses
Required Materials
- Under cabinet range hood vent
- Ducting pipe (flexible or rigid)
- Vent cap for outside wall or roof
- Screws and wall anchors
- Electrical wire and connectors
- Sealant or caulk
- Mounting brackets (if not included)
- Foil tape for duct sealing
Safety Gear
- Protective gloves
- Safety glasses to protect eyes
- Dust mask to avoid inhaling particles
- Hearing protection if using loud tools
- Non-slip shoes for stable footing
Preparing The Installation Area
Preparing the installation area is a crucial step before mounting your under cabinet range hood vent. Taking the time to organize and measure properly can save you from headaches later. Let’s focus on clearing the space, marking the right spots, and checking the electrical setup to ensure a smooth installation.
Clearing The Cabinet Space
Start by emptying the cabinet above your stove completely. Remove any items that could get in the way or be damaged during installation.
Check the cabinet’s interior for any obstructions like wiring or plumbing that might interfere with the vent. If you find anything unexpected, plan how to work around it or consult a professional.
Have you noticed how a cluttered space can slow down even the simplest tasks? Clearing the area first makes your work faster and safer.
Marking Vent And Mounting Locations
Use a tape measure and pencil to mark where the vent will go. Accurate markings prevent drilling errors that could damage your cabinets or walls.
Don’t forget to mark the mounting holes on the cabinet as well. Double-check these marks with the range hood’s installation template or manual.
Imagine drilling just once instead of multiple times—that’s how precise marking helps you save time and avoid frustration.
Checking Electrical Connections
Before you start drilling, make sure there is an accessible power source near your installation spot. The range hood needs electricity, so confirm the outlet or wiring is ready.
If you’re unsure about the electrical setup, consider using a voltage tester or calling an electrician. Safety is non-negotiable when dealing with electricity.
Ask yourself: Is the power source conveniently located, or will you need to extend wiring? Planning this now prevents last-minute surprises.

Credit: www.create-enjoy.com
Installing The Vent Duct
Installing the vent duct is a key part of setting up your under cabinet range hood. The duct moves smoke, steam, and odors outside your kitchen. Proper installation helps your hood work well and keeps your kitchen air fresh.
The process includes choosing the right duct type, cutting openings, and securing the ductwork. Each step needs care to avoid leaks and ensure good airflow.
Selecting Vent Duct Type
Pick a duct made of rigid metal for best airflow and durability. Common choices include:
- Galvanized steel
- Aluminum
- Stainless steel
Avoid flexible plastic or foil ducts. They trap grease and reduce airflow. Check the diameter matches your hood’s vent outlet to avoid air loss.
Cutting Vent Openings
Mark the wall or cabinet where the vent will exit. Use a level to keep the opening straight. Double-check measurements before cutting.
Use a drill and saw to cut through drywall or wood. Wear safety glasses and a mask to protect from dust. Clean the edges for a smooth fit.
Securing The Ductwork
Attach the duct to the vent hood outlet using metal clamps or foil tape. Avoid screws inside the duct to prevent air blockage.
Support the duct along its path with straps or brackets. Keep the duct straight and avoid sharp bends to maintain airflow.
Seal all joints with high-quality foil tape to stop leaks. Test the vent by turning on the hood and checking for airflow outside.
Mounting The Range Hood
Mounting the range hood is a crucial part of the installation process. It ensures the hood is secure and functions properly. Proper mounting prevents vibrations and noise while cooking. Follow the steps carefully to achieve a sturdy and safe installation.
Aligning The Hood
Start by measuring the space under the cabinet. Mark the center point on the wall or cabinet base. Hold the range hood up to this mark. Check that it is level and straight. Use a spirit level for accuracy. Adjust the position until perfectly aligned. Proper alignment ensures effective venting and a neat look.
Attaching To Cabinet
Locate the mounting holes on the range hood. Match these holes with the marks on the cabinet. Use screws that fit well and are strong enough. Drill pilot holes if needed to avoid wood splitting. Secure the hood firmly with screws. Tighten them but avoid over-tightening to prevent damage.
Ensuring Stability
Double-check the range hood’s firmness by gently shaking it. The hood should not move or wobble. Add extra screws if any looseness appears. Use brackets or support braces for heavier models. Confirm all screws are tight and secure. Stability is key for safe and quiet operation.

Credit: prolinerangehoods.com
Connecting Electrical Wiring
Connecting the electrical wiring for your under cabinet range hood is a crucial step that ensures your appliance works safely and efficiently. It requires careful attention to detail and respect for safety protocols. Before you dive in, remember that electricity can be dangerous, so taking precautions is not optional—it’s essential.
Turning Off Power
Start by switching off the power to the kitchen circuit at your home’s main electrical panel. This step protects you from electric shocks while working on the wiring. Double-check the power is off by testing the light switch or using a voltage tester on the wires you will handle.
Wiring Steps
- Identify the wires: typically, black (hot), white (neutral), and green or bare copper (ground).
- Connect the black wire from the range hood to the black wire in your home wiring using wire nuts.
- Attach the white wires together in the same way.
- Secure the ground wire to the green screw or the grounding wire in the electrical box.
- Make sure all connections are tight and covered with wire nuts to prevent any exposed wires.
Handling the wires can feel intimidating, but focus on making solid, secure connections. If you notice any damaged insulation or frayed wires, replace them before proceeding.
Testing Connections
Once wiring is complete and the range hood is mounted, turn the power back on at the circuit breaker. Test the hood by turning on the fan and light. If it doesn’t work, immediately switch off the power and recheck your wiring connections for any loose or incorrect hookups.
Have you ever missed a tiny step and spent hours troubleshooting? Take your time here—it saves frustration later.
Final Adjustments And Testing
After installing your under cabinet range hood vent, the final adjustments and testing phase ensures everything works smoothly. This step is crucial to avoid future issues like air leaks or poor ventilation. Taking the time to fine-tune your setup guarantees your kitchen stays fresh and smoke-free.
Sealing Gaps
Check carefully around the edges of the vent and cabinet. Any gaps can cause air leaks, reducing the hood’s efficiency. Use high-quality silicone caulk or weatherproof tape to seal these openings tightly.
Don’t rush this part—small gaps can let cooking smells escape into your kitchen. Have a flashlight handy to spot any hidden spaces. You’ll thank yourself later when your kitchen stays clean and odor-free.
Checking Ventilation Flow
Turn on the range hood and feel the airflow at the vent exit. Is the air moving strongly and steadily? Weak airflow might mean blockages or incorrect duct size.
Try using a piece of tissue paper to test suction strength—it should stick firmly at the vent. If it doesn’t, recheck your duct connections and make sure nothing is kinked or obstructed inside the ductwork.
Operating The Range Hood
Run your range hood at different fan speeds and lighting settings. Listen for unusual noises like rattling or buzzing that could signal loose parts or motor problems. Smooth and quiet operation means the installation is solid.
Have you noticed how a properly working hood instantly clears steam and smells? That’s the sign of a job well done. Adjust the settings as needed to match your cooking habits and enjoy a fresher kitchen every day.

Credit: prolinerangehoods.com
Maintenance Tips
Proper maintenance keeps your under cabinet range hood working well. It helps remove smoke, grease, and odors effectively. Regular care also extends the life of the appliance. Simple tasks prevent costly repairs and improve kitchen air quality.
Cleaning Filters
Filters catch grease and dirt during cooking. Clean them every month for best performance. Remove the filters carefully. Wash with warm water and mild soap. Let them dry completely before reinstalling. Replace filters if they are damaged or too dirty.
Inspecting Ducts
Ducts carry air outside your home. Check ducts twice a year. Look for blockages, holes, or loose connections. Clear any dust or debris inside the ducts. Tighten loose parts to avoid air leaks. Clean ducts professionally if needed.
Routine Checks
Test your range hood regularly. Listen for unusual noises or weak suction. Check the lights and buttons to ensure they work. Clean the exterior with a soft cloth and mild cleaner. Address any issues quickly to keep your hood efficient.
Frequently Asked Questions
What Tools Do I Need To Install An Under Cabinet Range Hood Vent?
You need a drill, screwdriver, measuring tape, pencil, level, and ducting materials. Safety glasses and gloves are recommended for protection during installation.
How High Should The Range Hood Be Installed Above The Stove?
Install the range hood 24 to 30 inches above the cooking surface for optimal ventilation. This height balances efficiency and safety in most kitchens.
Can I Install An Under Cabinet Range Hood Myself?
Yes, with basic DIY skills and proper tools, you can install it yourself. Follow the manufacturer’s instructions carefully and ensure electrical connections are safe.
How Do I Connect The Vent Duct To The Outside?
Use rigid or flexible ducting to connect the vent to an exterior wall or roof vent. Seal all joints with foil tape to prevent leaks.
Conclusion
Installing an under cabinet range hood vent improves kitchen air quality. Follow the steps carefully for a safe and secure setup. Use the right tools and materials to avoid problems. Take your time to measure and align the hood perfectly.
A well-installed vent helps remove smoke, odors, and heat. Enjoy a cleaner, fresher cooking space every day. Keep maintenance easy by cleaning the filters regularly. This small project can make a big difference in your kitchen comfort. Simple and effective—just what your home needs.