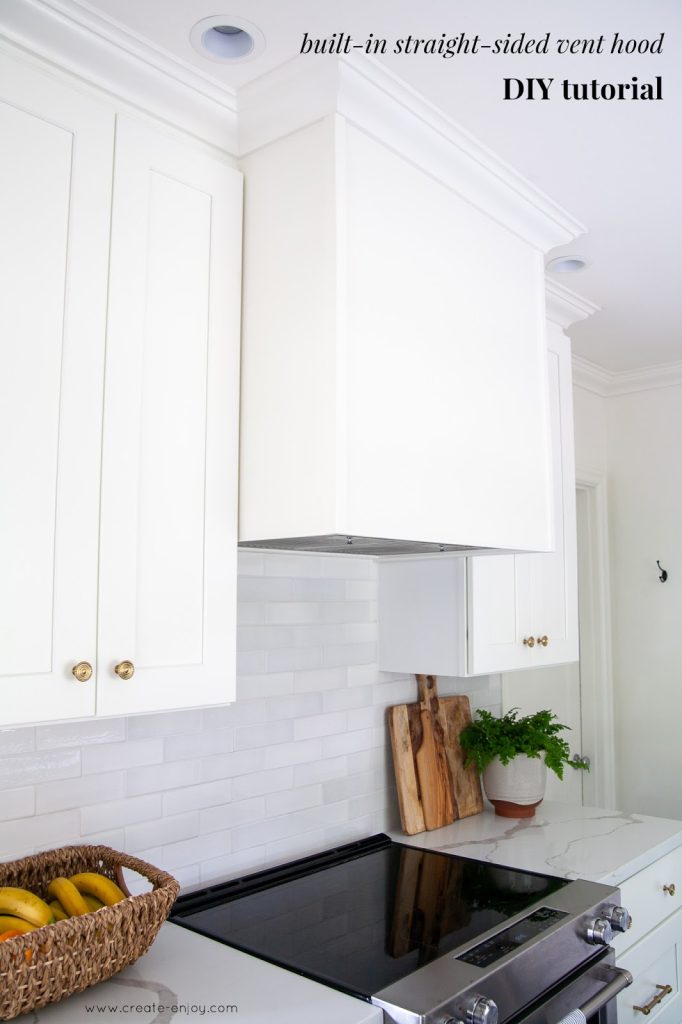
Are you tired of staring at that plain, uninspiring range hood in your kitchen? Imagine transforming it into a stunning focal point that not only enhances the aesthetic appeal of your space but also reflects your personal style.
A beautifully crafted range hood cover can do just that, and the best part? You can build it yourself. Whether you’re a seasoned DIY enthusiast or a beginner looking to tackle your first project, creating a range hood cover is easier than you might think.
In this guide, you’ll discover step-by-step instructions and expert tips to craft a range hood cover that not only looks great but also adds value to your home. Ready to elevate your kitchen’s style and make it uniquely yours? Let’s dive into the process and get started.

Credit: www.create-enjoy.com
Choosing The Right Materials
Choosing the right materials shapes the look and durability of your range hood cover. It affects how well the cover fits your kitchen style and how long it lasts. Picking materials that match your skill level and tools also helps the building process go smoothly.
Wood Types And Finishes
Wood is a popular choice for range hood covers. It offers warmth and style to your kitchen. Common wood types include:
- Pine – Easy to work with and budget-friendly.
- Oak – Strong and has a classic grain pattern.
- Maple – Smooth finish and hard surface.
- Cherry – Rich color that darkens over time.
Finishing wood protects it from heat and moisture. Use finishes like:
- Polyurethane – Durable and water-resistant.
- Oil-based stains – Enhance wood color.
- Paint – Allows color customization.
Tools You’ll Need
Having the right tools makes the project easier and safer. Essential tools include:
- Measuring tape – For accurate dimensions.
- Saw – To cut wood pieces.
- Drill – To make holes and insert screws.
- Sander or sandpaper – To smooth edges.
- Paintbrush or cloth – To apply finishes.
Gather all tools before starting to avoid interruptions.
Measuring Your Space
Exact measurements ensure the cover fits well. Measure the width, height, and depth of your range hood. Check for any obstacles like cabinets or vents. Write down all numbers clearly.
Double-check measurements to avoid mistakes. Remember to leave space for ventilation and cleaning access.
Credit: m.youtube.com
Designing Your Range Hood Cover
Designing your range hood cover is a crucial step that sets the tone for your kitchen’s look and function. It’s not just about aesthetics; it’s about creating a piece that blends seamlessly with your space while working efficiently. Think about how your cover will complement your cabinets, countertops, and overall kitchen style before you start building.
Selecting A Style
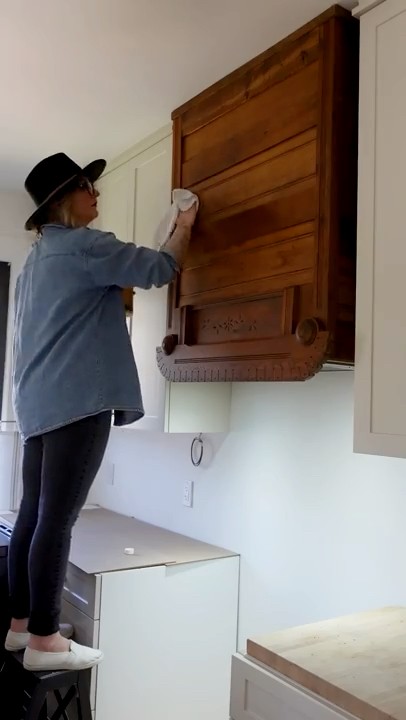
Your range hood cover should reflect your personal taste and the kitchen’s design theme. Are you drawn to a modern, sleek look with clean lines, or do you prefer something rustic with reclaimed wood? Consider styles like shaker, beadboard, or even a minimalist flat panel to match your cabinetry.
Think about materials too—wood offers warmth, metal gives an industrial vibe, and painted MDF can be a budget-friendly option. Which style speaks to you when you walk into your kitchen every day?
Incorporating Ventilation
Ventilation is the heart of your range hood cover’s function. Make sure you plan for proper airflow so smoke and odors don’t linger. You’ll need to leave enough space for vents or grilles without compromising the look of your cover.
Ask yourself: will you use a ducted system that vents outside, or a ductless one with filters? This choice affects the design and placement of openings in your cover. I once designed a cover that blocked airflow because I didn’t leave enough clearance—don’t make the same mistake!
Customizing Dimensions
Every kitchen is unique, so customize your range hood cover’s size to fit your space perfectly. Measure your range and the space above it carefully before cutting any materials. A cover that’s too big or small can look awkward and reduce efficiency.
Consider the height too—if it’s too low, it might hit your head; too high, and it won’t capture smoke well. What dimensions will balance comfort, style, and performance in your kitchen?
Preparing Your Workspace
Preparing your workspace is a crucial first step in building a range hood cover. A clean and organized area helps you work efficiently and safely. Setting up the right environment reduces mistakes and saves time. Take time to clear clutter and arrange everything within easy reach. This preparation makes the building process smoother and more enjoyable.
Safety Precautions
Wear safety glasses to protect your eyes from dust and debris. Use gloves to guard your hands while handling sharp tools. Keep a first aid kit nearby for any minor injuries. Ensure good ventilation if you use paints or adhesives. Avoid loose clothing that can catch on tools or materials. Always unplug power tools when not in use to prevent accidents.
Organizing Materials
Gather all wood, screws, nails, and hardware needed for your project. Sort materials by size and type to find them quickly. Place small items like screws in labeled containers or trays. Keep your materials close to your workbench to avoid extra walking. Check for any damaged or warped wood and set it aside. This helps maintain quality and avoids frustration later on.
Setting Up Tools
Arrange your tools in the order you will use them. Keep hand tools like hammers, screwdrivers, and measuring tape within arm’s reach. Plug in power tools near your workspace but away from water sources. Test tools to ensure they work properly before starting. Use a sturdy workbench or table to support your project. Proper tool setup speeds up your work and keeps you safe.
Building The Frame
Building the frame is the first major step in creating a range hood cover. The frame acts as the skeleton, supporting the entire structure. A strong, well-built frame ensures your cover looks great and lasts long. Focus on accuracy and stability during this phase.
Cutting The Wood
Choose quality wood for durability. Use a tape measure to mark precise cuts. Cut each piece carefully with a saw. Smooth the edges with sandpaper to avoid splinters. Prepare pieces for the top, sides, and front of the frame.
Assembling The Frame
Lay out all cut pieces on a flat surface. Use wood glue on edges to join parts. Clamp pieces together and let the glue dry. Reinforce joints with nails or screws for extra strength. Check all corners to ensure they form right angles.
Ensuring Stability
Add support braces inside the frame for strength. Use corner brackets if needed. Test the frame by gently shaking it. Fix any loose parts by tightening screws. A stable frame will hold the cover securely in place.
Adding Decorative Elements
Adding decorative elements to your range hood cover turns a simple structure into a stylish feature. It enhances the kitchen’s look and blends the hood with other cabinetry. Decorative touches give your kitchen a polished, custom feel without much effort.
Choose details that match your kitchen style. Subtle trim or bold molding can change the entire appearance. Paint or stain adds personality and complements the room’s color palette. Hardware gives the final touch, combining function and charm.
Molding And Trim Options
Molding adds depth and character to your range hood cover. Crown molding creates a classic, elegant look. Simple trim frames the edges for a clean finish.
- Use wood or MDF for easy cutting and shaping.
- Consider beadboard or panel trim for texture.
- Attach with nails or wood glue for a secure fit.
Measure carefully to ensure straight lines. Sand edges smooth before installation. These small details make a big difference in appearance.
Painting And Staining Tips
Choose paint or stain that matches your kitchen style. Paint provides a smooth, colorful finish. Stain highlights the wood’s natural grain and warmth.
- Prime the surface to improve paint adhesion.
- Use multiple thin coats for even coverage.
- Sand lightly between coats for smoothness.
- Apply a clear sealer to protect the finish.
Allow proper drying time between steps. Test colors on a small area first for confidence.
Installing Hardware
Hardware adds charm and practical function. Choose handles or knobs that fit your style and kitchen theme.
- Position hardware at comfortable heights.
- Use a level to ensure straight installation.
- Pre-drill holes to prevent wood splitting.
- Tighten screws firmly but avoid overtightening.
Hardware can be decorative or simple. It completes the look and makes your range hood cover stand out.
Mounting The Range Hood Cover
Mounting your range hood cover is a crucial step that ensures both safety and style in your kitchen. It’s not just about attaching a piece of wood or metal; it’s about making sure everything fits perfectly and stays secure. Let’s break down the process into clear, manageable tasks.
Securing To The Wall
Start by locating the wall studs behind your range hood. Use a stud finder to ensure you’re anchoring into a solid frame rather than just drywall. This is key to supporting the weight of the cover and preventing it from loosening over time.
Mark the spots where you will drill pilot holes for screws. Drill carefully and use long screws designed for heavy-duty mounting. If you don’t hit a stud, use strong wall anchors rated for the weight of your cover.
Aligning With The Hood
Next, align the cover so it sits flush with the range hood beneath it. This might require adjusting the height or angle slightly. A perfectly aligned cover improves the overall look and prevents gaps where grease and dust can accumulate.
Check the alignment from different angles. Step back and view it at eye level to catch any misplacements. Remember, small tweaks now save you from future hassle or uneven wear.
Final Adjustments
After securing and aligning, tighten all screws but avoid overtightening, which can crack wood or strip screws. Test the cover for stability by gently applying pressure in different spots.
Consider adding finishing touches like caulk or trim to cover screw heads and seams. These details keep your cover looking clean and professionally installed. Have you thought about how these small finishes can elevate your kitchen’s appearance?
Maintaining Your Range Hood Cover
Maintaining your range hood cover is essential to keep it looking fresh and working well. Regular care prevents damage and extends its life. Simple tasks done often avoid costly repairs later. Keep the cover clean and free from grease buildup. Touch up any scratches or chips to preserve the finish. Protect it from moisture and heat to avoid warping or discoloration.
Cleaning Techniques
Use a soft cloth or sponge for cleaning. Avoid abrasive materials that can scratch the surface. Mix mild dish soap with warm water for effective grease removal. Wipe gently in circular motions. Rinse with clean water and dry with a soft towel. For tough stains, use a baking soda paste and let it sit briefly. Always clean the cover regularly to prevent buildup.
Touch-up Tips
Keep matching paint or stain handy for touch-ups. Lightly sand the area before applying paint or stain. Use a small brush for precise application. Allow the paint or stain to dry completely before touching the area again. Test touch-up materials on a hidden spot first. Perform touch-ups as soon as you notice any damage. This keeps the cover looking new and avoids further damage.
Long-term Care
- Keep the area well-ventilated to reduce moisture buildup.
- Check for loose screws or fittings and tighten them regularly.
- Avoid hanging heavy objects on the cover to prevent damage.
- Inspect the cover periodically for signs of wear or damage.
- Apply a protective sealant if the material requires it.
- Handle the cover gently during cleaning and maintenance.

Credit: www.create-enjoy.com
Frequently Asked Questions
What Materials Are Best For Building A Range Hood Cover?
Wood is the most popular material for range hood covers. It’s durable, easy to shape, and can be painted or stained. Other options include metal and MDF. Choose materials that match your kitchen’s style and withstand heat and moisture.
How Do I Measure For A Range Hood Cover?
Measure the width and height of your existing range hood. Add extra space for ventilation and design elements. Accurate measurements ensure a snug fit and proper airflow. Double-check measurements before cutting materials.
Can I Build A Range Hood Cover Without Professional Help?
Yes, many DIY enthusiasts build range hood covers successfully. Basic carpentry skills and tools are needed. Follow detailed plans and safety guidelines. Take your time to ensure precise cuts and assembly.
How Do I Finish A Wooden Range Hood Cover?
Sand the wood surface smoothly before applying finish. Use heat-resistant paint or stain for durability. Seal with a protective topcoat to resist moisture and grease. Finishing enhances appearance and protects the cover.
Conclusion
Building a range hood cover adds style and function to your kitchen. Follow each step carefully to get the best results. Use the right tools and materials for safety and durability. Take your time measuring and cutting for a perfect fit.
A well-made cover keeps your kitchen clean and fresh. Enjoy the satisfaction of a project done by yourself. This simple upgrade can change your kitchen’s look easily. Start your project today and see the difference it makes.