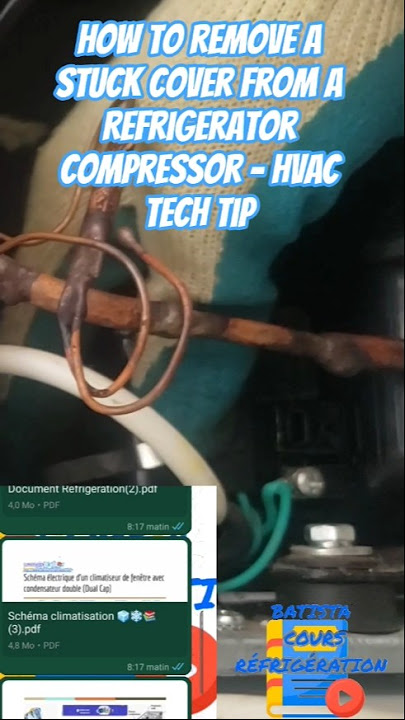
Are you facing issues with your refrigerator and wondering how to remove the compressor safely? Whether you want to replace a faulty compressor or repair your fridge, knowing the right steps can save you time and money.
This guide will walk you through the process in simple, clear terms. By the end, you’ll feel confident handling your refrigerator’s compressor like a pro. Keep reading to discover the easy and effective way to get the job done!

Credit: okmarts.com
Tools Needed
Removing a compressor from a refrigerator requires the right set of tools to make the job safe and efficient. Having these tools on hand before you start will save you from frustration and unexpected delays. Each tool serves a specific purpose, so understanding their roles is key to a smooth process.
Basic Hand Tools
You will need some common hand tools to disconnect and remove the compressor. A set of screwdrivers, both flat-head and Phillips, helps you remove panels and screws easily. Adjustable wrenches and socket sets are essential for loosening bolts that hold the compressor in place.
Specialized Tools
Certain tools are designed specifically for refrigeration work. A refrigerant recovery machine is crucial if you want to capture and safely remove the refrigerant before disconnecting the compressor. You’ll also need a vacuum pump to evacuate air from the system after removal, preventing contamination.
Safety Equipment
Don’t underestimate the importance of safety gear. Protective gloves and safety goggles shield you from sharp edges and refrigerant exposure. A face mask can protect you from inhaling any harmful fumes during the process.
Electrical Testing Tools
Before you remove the compressor, test the electrical connections using a multimeter. This tool helps you check for live wires and avoid electrical shocks. It also assists in diagnosing any electrical faults before you fully disconnect the unit.
Have you gathered all these tools yet? Missing just one can turn a manageable task into a tricky one. Make sure you prepare your workspace and tools thoroughly to keep the process smooth and safe.
Safety Precautions
Removing a compressor from a refrigerator involves working with electrical parts and refrigerants. Taking safety precautions protects you and prevents damage. Proper care is crucial before and during the removal process.
Always prepare your workspace and tools carefully. This preparation helps avoid accidents and keeps the job smooth.
Disconnect The Power Supply
Unplug the refrigerator before starting any work. This step stops electrical shocks and unwanted power flow. Double-check the plug is out of the socket to be safe.
Wear Protective Gear
Use gloves and safety goggles to protect your hands and eyes. The compressor and refrigerant can be dangerous on contact. Proper gear reduces the risk of injury.
Handle Refrigerant Properly
Refrigerants can harm the environment and cause frostbite. Use a certified recovery machine to capture refrigerant safely. Never release it into the air.
Use The Right Tools
Select tools designed for HVAC or refrigerator repair tasks. Using the wrong tools can damage parts or cause injury. Keep all tools organized and in good condition.
Work In A Ventilated Area
Ensure good airflow around your workspace. This reduces the risk of inhaling harmful fumes. Open windows or use fans to improve ventilation.
Follow Manufacturer Guidelines
Check the refrigerator’s manual for specific instructions. Different models may require unique steps or precautions. Following guidelines ensures safe and correct removal.
Preparing The Refrigerator
Preparing the refrigerator is an important first step before removing the compressor. It ensures safety and makes the process smoother. Proper preparation avoids damage to the appliance and prevents accidents.
Unplugging The Appliance
Always unplug the refrigerator from the power source. This stops the flow of electricity and protects you from electric shock. Never work on the appliance while it is plugged in. Use the plug, not the cord, to disconnect it safely.
Emptying The Refrigerator
Remove all food and shelves from inside the fridge. This makes the unit lighter and easier to move. Cleaning the interior also prevents spills and mess during the repair. Keep the door open to air out any odors.
Locating The Compressor
The compressor is usually at the back, near the bottom of the refrigerator. It looks like a black metal cylinder or oval shape. Identifying the compressor clearly helps in planning the removal. Check for any screws or bolts holding it in place.
Draining Refrigerant
Draining refrigerant is a critical step before removing a compressor from your refrigerator. Handling refrigerant improperly can be dangerous and harmful to the environment. It’s essential to approach this task carefully and with the right tools to ensure safety and compliance with regulations.
Understanding Refrigerant Types And Safety
Not all refrigerants are the same, and knowing which type your refrigerator uses is crucial. Common types include R134a and R600a, each requiring different handling methods. Always wear safety goggles and gloves to protect yourself from leaks or accidental exposure.
Have you checked the label on your fridge to find out the refrigerant type? This simple step can save you from costly mistakes and potential hazards.
Using Proper Equipment To Capture Refrigerant
You’ll need a recovery machine or a refrigerant recovery cylinder to drain the refrigerant safely. These devices capture the gas without releasing it into the atmosphere. If you don’t have access to professional equipment, it’s best to call a certified technician.
Using the right tools not only protects the environment but also ensures the refrigerant can be reused or disposed of correctly.
Steps To Drain Refrigerant Safely
- Connect the recovery machine to the service valve on the compressor.
- Turn on the machine and allow it to pull the refrigerant out completely.
- Monitor the pressure gauges to confirm the system is empty.
- Close the valves and disconnect the equipment carefully.
Did you know that even a small leak during this process can cause environmental damage? Take your time and double-check every connection.
Legal And Environmental Considerations
Refrigerants are regulated substances in many countries. Improper release can lead to fines or legal trouble. Make sure to dispose of or recycle the refrigerant according to local laws.
Have you researched local regulations on refrigerant handling? This knowledge can help you avoid penalties and contribute to protecting the planet.
Disconnecting Electrical Connections
Disconnecting electrical connections is a crucial step in removing a compressor from a refrigerator. This process ensures safety and prevents damage to the appliance or injury to yourself. Always start by unplugging the refrigerator from the power source to avoid electric shock.
Next, locate the electrical terminals linked to the compressor. These are usually covered by a plastic or metal panel for protection. Carefully remove this cover to access the wires and connectors.
Identifying The Compressor Wires
Compressor wires typically include a start relay, a capacitor, and power cables. Check the labels or colors on the wires to recognize their purpose. Use the refrigerator’s manual or online diagrams for guidance.
Using The Right Tools For Disconnection
Gather insulated tools such as screwdrivers and pliers before starting. Insulated tools protect you from accidental electrical contact. Avoid using metal tools without insulation.
Disconnecting The Connectors Safely
Gently pull apart the connectors without forcing them. Wiggle the connectors slightly if they seem stuck. Do not cut or damage the wires during this process.
Securing Loose Wires After Disconnection
After disconnecting, tape or cap the exposed wire ends. This prevents short circuits and protects the wires. Keep the wires away from metal parts of the refrigerator.

Credit: okmarts.com
Removing Mounting Bolts
Removing the mounting bolts is a key step in taking out a refrigerator compressor. These bolts hold the compressor firmly in place. Removing them carefully ensures no damage occurs to the compressor or other parts. Use the right tools and follow safety measures for a smooth process.
Gathering The Necessary Tools
Start by collecting the tools needed to remove the bolts. Usually, a socket wrench or a ratchet set works best. Some compressors use hex or Allen bolts, so keep these handy. Having the correct size tools prevents stripping the bolts.
Locating The Mounting Bolts
Look under the refrigerator at the base of the compressor. The mounting bolts are usually visible and easy to access. They connect the compressor to the frame or base plate. Check for any covers or panels that may need removal first.
Loosening The Bolts Safely
Turn the wrench counterclockwise to loosen each bolt. Apply steady pressure and avoid sudden force. Some bolts may be tight or rusty. Use penetrating oil if bolts are hard to turn. Let the oil sit for a few minutes before trying again.
Removing And Storing The Bolts
Once loose, remove the bolts completely by hand. Place them in a small container or magnetic tray. Keeping bolts together prevents loss and simplifies reinstallation. Handle bolts gently to avoid dropping them into hard-to-reach places.
Detaching The Compressor
Detaching the compressor from your refrigerator is a delicate task that requires care and precision. The compressor is the heart of your fridge’s cooling system, so handling it correctly is crucial to avoid damage. Before you begin, make sure the appliance is unplugged and you have the right tools ready.
Locating And Accessing The Compressor
The compressor is usually found at the back of the refrigerator near the bottom. You’ll need to remove the rear panel to access it. Use a screwdriver to carefully take off the panel, exposing the compressor and its connections.
Take a moment to observe how the compressor is attached. Noticing the wires, tubes, and mounting bolts can help you avoid mistakes later.
Start by unplugging the electrical wires connected to the compressor. These are often attached with clips or small screws. Be gentle to avoid breaking the connectors or wires.
Label the wires if necessary, so you know exactly where to reconnect them. This step saves time and headaches when reassembling.
Removing Refrigerant Lines
The compressor is linked to the refrigeration system through metal tubes. These lines contain refrigerant, so releasing them improperly can be hazardous.
It’s best to have the refrigerant safely removed by a professional before you detach these lines. If you’re confident it’s safe, use a wrench to carefully loosen the fittings, avoiding any sudden force.
Unscrewing The Compressor Mounting Bolts
The compressor is secured to the frame with mounting bolts. Use a socket wrench to remove these bolts one by one. Keep the bolts in a safe place; you’ll need them if you install the compressor again.
Support the compressor as you unscrew the bolts. It can be surprisingly heavy and may fall if not handled properly.
Extracting The Compressor
Once all connections are detached and bolts removed, gently pull the compressor out of its compartment. Watch out for any remaining wires or tubes that might still be connected.
Place the compressor on a sturdy surface to avoid damage. Are you surprised at how much care this step demands? It’s a reminder that even small appliances have complex components.

Credit: okmarts.com
Handling And Disposal
Handling and disposing of a refrigerator compressor needs care and attention. This part contains refrigerants and oils that can harm the environment. Proper steps help protect your safety and nature. Follow simple rules to avoid accidents and legal issues.
Safe Handling Tips
- Wear gloves and safety glasses to protect yourself.
- Work in a well-ventilated area to avoid inhaling fumes.
- Disconnect the refrigerator from power before starting.
- Use proper tools to avoid damaging the compressor.
- Keep the compressor upright to prevent oil leaks.
- Avoid puncturing or opening the compressor casing.
- Handle the unit gently to prevent refrigerant release.
Proper Disposal Methods
- Contact local waste management services for guidance.
- Take the compressor to an authorized recycling center.
- Do not throw the compressor in regular trash bins.
- Use certified technicians to remove refrigerants safely.
- Follow local regulations for electronic and hazardous waste.
- Recycle metal parts to reduce environmental impact.
- Keep records of disposal to comply with laws.
Replacing Or Servicing Compressor
Replacing or servicing the compressor in your refrigerator is a task that demands care and attention. The compressor is the heart of the cooling system, and any issues with it can stop your fridge from working properly. Whether you’re fixing a faulty compressor or upgrading to a new one, understanding the process ensures your appliance runs efficiently.
Identifying When To Replace Or Service The Compressor
Not every compressor problem requires a full replacement. Sometimes, servicing can extend its life and save you money. Look for signs like unusual noises, excessive heat, or the fridge not cooling well to decide if servicing is enough.
Have you noticed your fridge running constantly without cooling? That’s a strong hint the compressor needs attention. Checking the compressor’s electrical components and refrigerant levels can help pinpoint the issue before you decide to replace it.
Tools And Safety Precautions You Need
Before you start, make sure you have the right tools: a multimeter, screwdrivers, wrenches, and protective gloves. Unplug your refrigerator to avoid electrical shocks. Handling refrigerant requires special care—if you’re unsure, consider professional help.
Have you prepared a safe workspace? Clear the area around your fridge and wear eye protection. Compressors can be heavy, so plan how you’ll lift and move it to avoid injury.
Steps To Remove The Compressor Safely
- Disconnect power and remove the back panel of the refrigerator.
- Carefully detach the wiring harness connected to the compressor.
- Release the refrigerant by following environmental safety guidelines or have a professional do it.
- Unscrew the compressor mounting bolts and gently lift the unit out.
Each step requires patience and precision. Rushing can damage other components or cause refrigerant leaks, which are harmful and illegal to release improperly.
Choosing The Right Replacement Compressor
Not all compressors fit every refrigerator model. Match the new compressor’s specifications—voltage, capacity, and size—to your original unit. Using the wrong compressor can reduce efficiency and shorten appliance life.
Have you checked the manufacturer’s manual or label on your old compressor? This information is crucial for finding the correct replacement. If in doubt, consult with a refrigeration technician.
Testing And Servicing Tips After Installation
Once installed, test the compressor by plugging in the fridge and listening for smooth operation. Check the temperature inside the fridge after a few hours to confirm proper cooling.
Regular maintenance like cleaning coils and checking refrigerant levels keeps your compressor running longer. Have you scheduled routine checks? Preventive care reduces the chance of costly repairs later.
Frequently Asked Questions
How Do I Safely Remove A Refrigerator Compressor?
To safely remove a refrigerator compressor, first unplug the appliance. Gather necessary tools like a wrench and screwdriver. Carefully detach electrical connections and refrigerant lines. Ensure the refrigerant is properly handled or disposed of. Finally, unbolt the compressor from its mount and lift it out gently.
What Tools Are Needed To Remove A Compressor?
To remove a compressor, you’ll need a wrench, screwdriver, and pliers. These tools help in disconnecting electrical connections and refrigerant lines. Additionally, a refrigerant recovery machine is essential to handle refrigerants safely. Ensuring you have protective gloves and eyewear is also recommended for safety purposes.
Why Would A Refrigerator Compressor Need Removal?
A refrigerator compressor may need removal due to malfunction or failure. Common reasons include excessive noise, failure to cool, or leaking refrigerant. Replacing a faulty compressor can restore the appliance’s efficiency and cooling capability. Regular maintenance can help prevent compressor issues and prolong the refrigerator’s lifespan.
Can I Remove A Compressor Without Professional Help?
Yes, you can remove a compressor without professional help if you have basic mechanical skills. Ensure you follow safety precautions and have the right tools. However, handling refrigerants requires specific knowledge and equipment. If unsure, it’s best to consult a professional to avoid potential hazards or damage.
Conclusion
Removing a compressor from a refrigerator takes care and attention. Follow each step slowly and carefully. Make sure to unplug the fridge before starting. Use the right tools to avoid damage. Keep safety your top priority at all times. Taking your time helps prevent mistakes.
Now, you can handle this task with confidence. A little patience makes the job easier. Try to learn from each step you take. Your fridge will be ready for repair or replacement soon.