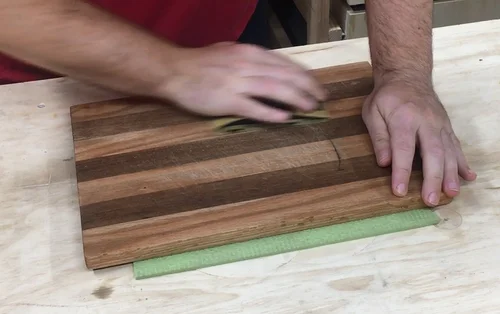
Your cutting board sees a lot of action every day, from chopping veggies to slicing meat. Over time, it can get rough, scratched, and worn out.
But you don’t have to replace it just yet. Learning how to sand your cutting board can bring back its smooth surface and keep it safe for food prep. In this guide, you’ll discover simple steps that anyone can follow, even if you’ve never done it before.
By the end, your cutting board will look and feel like new—and you’ll protect your kitchen tools for years to come. Ready to get started? Let’s dive in.
Choosing The Right Sandpaper
Sanding a cutting board smooths the surface and removes rough spots. Choosing the right sandpaper makes the job easier.
Different sandpaper types and grits work best for each sanding stage. Picking the correct one protects your board.
Grit Sizes Explained
Sandpaper grit shows how rough or smooth the abrasive is. Lower numbers mean rougher grit, higher numbers mean finer grit.
- Coarse grit (40-60) removes deep scratches and rough wood quickly.
- Medium grit (80-120) smooths out the surface after coarse sanding.
- Fine grit (150-220) prepares the wood for finishing by making it very smooth.
- Extra fine grit (320 and above) polishes the surface for a silky feel.
Best Materials For Sandpaper
Sandpaper uses different abrasive materials. Each works better on wood for sanding cutting boards.
| Abrasive Material | Features | Best Use |
| Aluminum Oxide | Durable, long-lasting | General wood sanding |
| Garnet | Soft, smooth finish | Final sanding on hardwood |
| Silicon Carbide | Sharp, cuts fast | Wet sanding and fine finishing |
| Ceramic | Very tough, fast cutting | Heavy sanding and shaping |

Credit: www.reddit.com
Preparing The Cutting Board
Before sanding a cutting board, preparation is key. This helps the sanding go smoothly and protects the wood.
Cleaning and removing old finishes are important steps. They make the board ready for sanding and refinishing.
Cleaning And Drying
Start by washing the cutting board with warm water and mild soap. Use a soft brush or sponge to remove dirt.
Rinse the board well and dry it completely. Let it air dry for several hours or overnight to avoid moisture during sanding.
Removing Old Finish Or Stains
Check the board for any old finish or stains. These can make sanding uneven and affect the new finish.
Use sandpaper or a scraper to gently remove old finishes. For stains, sanding with medium-grit sandpaper helps to even out the surface.
- Start with medium-grit sandpaper (around 120 grit)
- Sand evenly across the entire surface
- Switch to fine-grit sandpaper (220 grit) for a smooth finish
- Wipe off dust with a damp cloth before sanding again
Sanding Techniques
Sanding a cutting board is important to keep it smooth and safe. Good sanding removes rough spots and prepares the surface for finishing.
Using the right sanding techniques helps protect the wood and makes your board look nice and last longer.
Hand Sanding Vs. Power Sanding
Hand sanding gives you more control and is gentle on the wood. It is best for small or detailed areas.
Power sanding saves time and works well on large boards. Be careful not to press too hard and damage the wood.
- Hand sanding is slower but precise.
- Power sanding is faster but can remove too much wood.
- Use hand sanding to finish edges and corners.
- Use power sanding for flat, big surfaces.
Sanding With The Grain
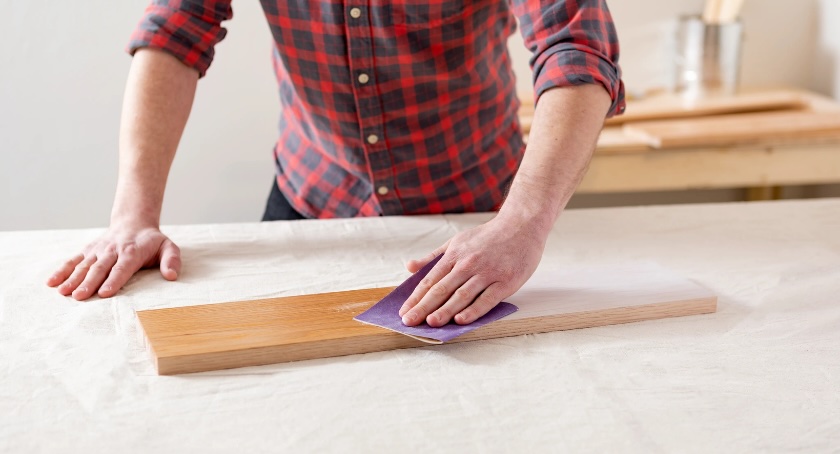
Always sand in the direction of the wood grain. This keeps the surface smooth and avoids scratches.
Sanding against the grain can leave marks that are hard to remove and spoil the look of the board.
- Look closely to find the grain direction.
- Move the sandpaper along the grain lines.
- Use gentle, even strokes.
Avoiding Common Mistakes
Many people press too hard while sanding. This can create uneven spots or damage the board.
Using sandpaper that is too rough or too fine at the wrong time can also cause problems.
- Do not press hard; let the sandpaper do the work.
- Start with medium grit sandpaper, then use finer grits.
- Keep the sandpaper clean and replace it if worn.
- Smooth all edges and corners carefully.
Sanding Progression
Sanding a cutting board makes the surface smooth and safe for food use. It removes rough spots and prepares the wood for finishing.
Use the right sanding progression to get the best results. Start with coarse grit and move toward finer grits for a polished finish.
Starting With Coarse Grit
Begin sanding with coarse grit sandpaper, usually 80 or 100 grit. This grit removes deep scratches and rough wood parts quickly.
Sand along the grain to avoid scratches. Use a sanding block or an orbital sander for even pressure.
- Remove any glue or dirt before sanding
- Keep the sander moving to avoid grooves
- Wear a mask to avoid dust inhalation
Moving To Medium And Fine Grits
After coarse sanding, switch to medium grit like 120 or 150. This smooths the surface further and removes coarse grit scratches.
Next, use fine grit sandpaper, such as 220 grit. This step prepares the wood for finishing and leaves a soft feel.
- Sanding with the grain prevents marks
- Check for smoothness between grits
- Use light pressure with fine grit
Final Polishing Steps
Use very fine grit sandpaper or sanding pads, around 320 grit or higher, to polish the board’s surface. This removes any last scratches.
Wipe the board with a damp cloth to remove dust. Let it dry before applying oil or finish.
- Polish edges and corners carefully
- Clean all sanding dust before finishing
- Inspect the board for smoothness
Post-sanding Care
After sanding your cutting board, proper care is important. It helps keep the board smooth and safe to use.
Cleaning and finishing the board will protect it and make it last longer.
Removing Dust And Debris
After sanding, dust and tiny wood particles cover the surface. Remove them well to avoid rough spots.
Use a soft cloth or brush to wipe the board gently. You can also use a vacuum cleaner with a brush attachment.
- Wipe the board with a clean, dry cloth.
- Use a soft brush to reach corners and edges.
- Vacuum the board to remove fine dust.
- Check the surface for any missed dust before finishing.
Applying Oil Or Finish
Oiling your cutting board seals and protects the wood. It also keeps it from drying out and cracking.
Use food-safe mineral oil or a cutting board finish. Apply it evenly and let it soak in before wiping off the extra.
- Pour a small amount of oil on the board.
- Spread it evenly using a clean cloth or brush.
- Allow the oil to soak for at least 20 minutes.
- Wipe off any excess oil with a dry cloth.
- Repeat the oiling process if the board looks dry.
Credit: www.coatingsworld.com
Maintenance Tips For Longevity
Sanding a cutting board helps keep it smooth and safe for food. Proper care can make your board last longer.
Follow simple cleaning and sanding tips to protect your cutting board and keep it in good shape.
Regular Cleaning Practices
Clean your cutting board after every use. This stops bacteria and keeps the wood healthy.
Use warm water and mild soap. Avoid soaking the board or using harsh chemicals.
- Rinse with warm water right after use
- Use a soft sponge and mild soap
- Dry the board with a clean towel immediately
- Store it in a dry, upright place
When To Resand
Resand your cutting board when it feels rough or has deep cuts. This keeps the surface smooth and safe.
Look for these signs to know it is time to resand:
- Surface feels uneven or rough
- Knife marks are deep and visible
- Food particles get stuck in grooves
- Board looks dull and worn out
Use fine-grit sandpaper and sand gently. After sanding, clean and oil the board to protect it.

Credit: www.reddit.com
Frequently Asked Questions
How Often Should I Sand My Cutting Board?
You should sand your cutting board every few months. This helps maintain its smooth surface and prevents bacteria buildup. Regular maintenance ensures the board remains safe for food preparation.
What Grit Sandpaper Is Best For Cutting Boards?
Start with 120 grit sandpaper for initial sanding. Then, use 220 grit for a smoother finish. This combination effectively removes scratches and enhances the board’s surface.
Can I Use An Electric Sander On A Cutting Board?
Yes, an electric sander can be used on cutting boards. It speeds up the process and provides even sanding. Ensure you use the correct grit sandpaper for best results.
Why Is Sanding A Cutting Board Important?
Sanding removes scratches, stains, and bacteria from the board’s surface. It restores the board’s appearance and extends its lifespan. Regular sanding keeps the board hygienic and safe for food use.
Conclusion
Sanding a cutting board keeps it smooth and safe for food. Use the right sandpaper grit to avoid scratches. Always sand along the grain for best results. Clean the board well before and after sanding. Regular sanding helps remove stains and bacteria.
Keep your cutting board looking new and lasting longer. A little effort goes a long way in care. Try these steps next time your board feels rough. Your kitchen tool will thank you!