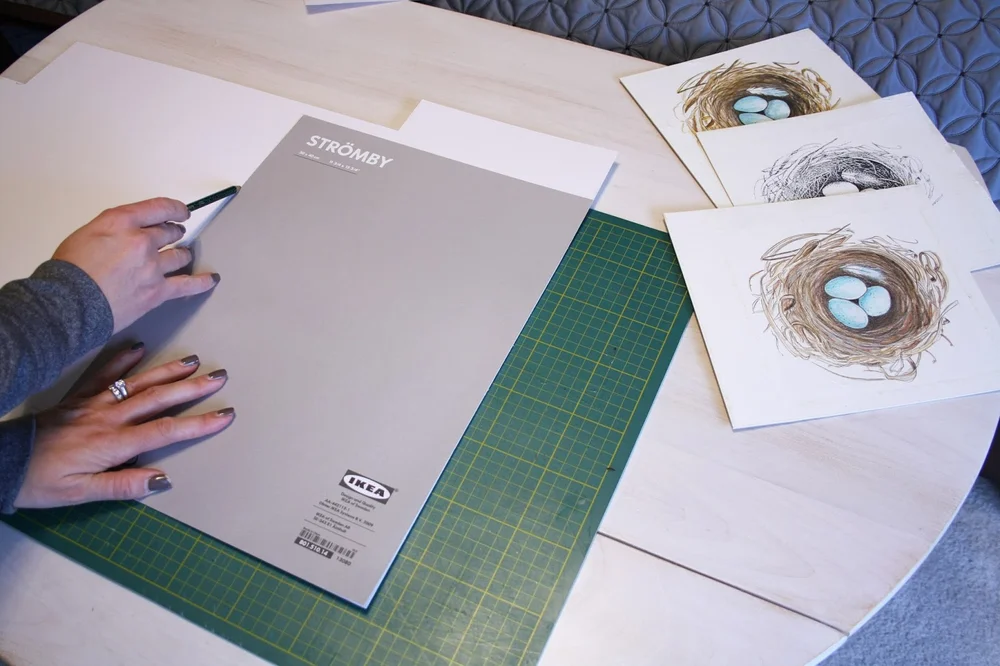
If you’ve ever wanted to give your photos or artwork a polished, professional look, cutting your own mat board is a skill you need. But the idea of measuring, scoring, and cutting can feel tricky and overwhelming.
What if you make a mistake and ruin your piece? Don’t worry—you’re about to learn simple, step-by-step tips that make the whole process easy and stress-free. By the end of this guide, you’ll have the confidence to create clean, sharp edges that highlight your work perfectly.
Ready to transform your framing game? Let’s get started.
Choosing The Right Mat Board
Choosing the right mat board is important for framing art or photos. It protects and enhances the display.
Different mat boards vary in material, thickness, and color. These factors affect the final look and durability.
Types Of Mat Boards
Mat boards come in several types. Each type offers different qualities for framing and protection.
- Paper Core:Standard option. Good for everyday use.
- Alpha Cellulose:Acid-free and archival. Protects artwork long term.
- Balsawood Core:Lightweight and strong. Ideal for thick frames.
- Museum Board:High-quality, acid-free board for valuable pieces.
Thickness And Quality
| Thickness | Use | Quality |
|---|---|---|
| 1/16 inch | Thin, for small or light pieces | Basic quality, less durable |
| 1/8 inch | Standard thickness for most frames | Good balance of strength and appearance |
| 1/4 inch | Thick, for deep frames or heavy art | High durability and stability |
Choose thickness based on the weight and size of your artwork. Higher quality boards last longer and resist warping.
Color Selection Tips
Color of the mat board changes how your art looks. It can highlight or distract from the image.
- Pick neutral colors like white, cream, or gray for a classic look.
- Use colors that match or complement the artwork tones.
- Avoid colors that clash with the frame or wall.
- Test the mat board color with your art before cutting.
Essential Tools For Cutting
Cutting mat boards cleanly needs the right tools. Using proper tools helps you get straight and smooth edges.
This guide covers key tools you need to cut mat boards safely and accurately.
Mat Cutter Options
Mat cutters come in many styles. Some are simple handheld tools. Others are larger and more precise machines.
Choosing the right mat cutter depends on how often you cut and the size of your projects.
- Handheld mat cutters are easy to use and portable.
- Track cutters provide straight, clean cuts for larger boards.
- Rotary mat cutters use a circular blade for smooth edges.
Utility Knives And Blades
Utility knives are common tools for cutting mat boards. A sharp blade cuts cleanly without tearing the board.
Replace blades often to keep cuts smooth and safe. Use a straight edge to guide the knife for accuracy.
- Choose knives with comfortable grips for control.
- Use fresh blades to avoid rough cuts.
- Always cut on a safe surface to protect your work area.
Measuring And Marking Tools
Accurate measuring and marking are key to cutting mat boards correctly. Tools help you mark exact lines before cutting.
Use rulers and pencils that are easy to see and work well with your mat board.
- Metal rulers prevent cuts and help guide knives.
- Use a pencil or fine marker to mark cutting lines.
- A T-square or set square ensures straight and square lines.
Preparing Your Workspace
Cutting a mat board requires a clean and organized workspace. This helps you work safely and get precise cuts. Preparing your area well saves time and avoids mistakes.
Focus on setting up your surface, following safety rules, and arranging your materials. Each part is important for a smooth cutting process.
Surface Setup
Choose a flat, sturdy table to work on. The surface should be large enough to hold your mat board and tools comfortably. Cover the table with a cutting mat to protect it and your blades.
- Clear the table of all unrelated items
- Use a self-healing cutting mat to avoid damage
- Ensure good lighting for better visibility
- Keep your tools within easy reach
Safety Precautions
Safety is key when cutting mat boards. Sharp blades can cause serious injuries if not handled correctly. Follow these safety tips to protect yourself.
- Wear safety gloves to protect your hands
- Use a ruler with a non-slip backing to guide cuts
- Cut away from your body to avoid accidents
- Keep blades sharp to reduce slipping
- Dispose of used blades in a safe container
Organizing Materials
Having all your materials organized helps you work faster and stay focused. Arrange tools and supplies so you can find them easily during the cutting process.
| Material | Purpose | Storage Tip |
|---|---|---|
| Mat board | Main material to cut | Keep flat on a clean surface |
| Cutting knife | Make precise cuts | Store in a blade cover |
| Metal ruler | Guide for straight cuts | Place near your cutting area |
| Cutting mat | Protect work surface | Lay flat and clean regularly |
| Gloves | Protect hands | Keep within reach |
Measuring And Marking
Cutting mat board requires careful measuring and marking to get clean edges. Precise work helps your project look professional.
Use the right tools and techniques to measure and mark accurately before cutting your mat board.
Accurate Measurements
Start by measuring the size of the artwork or photo you want to frame. Add extra space for the mat border.
- Use a ruler or measuring tape for exact dimensions.
- Double-check all measurements before marking.
- Measure twice to avoid mistakes.
- Note the measurements on paper or a device.
Marking Techniques
Mark your mat board gently to avoid permanent marks. Use a pencil with a fine point for clear lines.
| Tool | Purpose |
| Fine pencil | Light, precise marks |
| Metal ruler | Straight edge for lines |
| Square or T-square | Right angle alignment |
| Masking tape | Hold ruler without slipping |
Using Templates
Templates help you mark consistent shapes and sizes on your mat board. They reduce measuring errors.
Here are tips for using templates effectively:
- Choose a template that fits your artwork size.
- Place the template carefully on the mat board.
- Trace the inside edge lightly with a pencil.
- Use a clean template to avoid smudging.
Cutting Techniques
Cutting mat board requires care and precision to get clean edges. Using the right technique helps avoid damage and waste.
Below are key cutting methods and tips to improve your mat board cutting skills. These will help you achieve neat and professional results.
Straight Edge Cuts
Straight edge cuts create clean, sharp borders on your mat board. Use a metal ruler and a sharp craft knife for best results.
- Place the mat board on a cutting mat to protect surfaces.
- Align a metal ruler along the cutting line.
- Hold the ruler firmly to prevent slipping.
- Use a fresh blade for smooth cuts.
- Cut with steady pressure in one direction, avoiding sawing motions.
Bevel Cuts
Bevel cuts add depth and dimension to your mat board edges. They require a special bevel cutter or angled blade.
| Tool | Purpose | Tip |
| Bevel Cutter | Creates angled edges | Adjust blade angle before cutting |
| Craft Knife | For trimming and detail work | Use light, repeated strokes |
| Metal Ruler | Guides cuts | Hold firmly to avoid slips |
Avoiding Common Mistakes
Many beginners face issues like jagged edges and uneven cuts. Avoid these mistakes to get smooth results.
- Using dull blades that tear the board
- Rushing and applying uneven pressure
- Not securing the ruler firmly
- Cutting without a proper cutting surface
- Making cuts in multiple directions on the same line

Credit: www.metroframe.com
Finishing Touches
Cutting a mat board is not complete without some final steps. These steps help make your mat look clean and professional.
Paying attention to small details improves the overall appearance of your framed art or photo.
Cleaning Edges
After cutting, the edges of the mat board may have small bits of paper or dust. Cleaning these edges makes the mat look neat.
Use a soft brush or a clean, dry cloth to remove loose debris. Be gentle to avoid damaging the mat board.
Handling Mistakes
If you cut the mat board too short or uneven, do not worry. Small mistakes can be fixed with care.
You can use a thin strip of matching mat board to cover small errors or carefully trim uneven edges again. Take your time to avoid more mistakes.
Storing Cut Mat Boards
Store your cut mat boards flat to keep them from bending or warping. Use a clean, dry space away from direct sunlight.
Place a piece of clean paper between stacked mats to protect the surface. This helps keep your mats ready for framing.
Tips From Professionals
Cutting mat board cleanly takes skill and the right tools. Professionals follow some key tips to get smooth edges and save time.
Using sharp tools and checking your work helps you create perfect cuts every time. Here are tips from experts to improve your mat board cutting.
Time-saving Hacks
Work quickly without losing accuracy by preparing your materials first. Measure twice and mark clearly before cutting.
Use a straightedge or ruler to guide your cuts. This reduces mistakes and speeds up the process.
- Set up all your tools before starting
- Use a sharp utility knife for faster cuts
- Cut multiple pieces stacked carefully if possible
- Keep a steady hand and cut in one smooth motion
Maintaining Tools
Sharp blades make clean cuts and reduce effort. Change blades often to avoid tearing the mat board.
Clean your cutting tools after each use. Dust and debris can dull blades and cause uneven cuts.
- Store blades in a dry place to prevent rust
- Use a blade sharpener or replace blades regularly
- Check your cutting mat for deep grooves and replace it if worn
- Keep rulers free of nicks that could affect straight cuts
Quality Control
Check each cut for clean edges and straight lines. Smooth edges look professional and help your work stand out.
Use a light source behind the mat to find uneven cuts or mistakes before finishing your project.
- Run your finger along cut edges to feel for rough spots
- Trim small mistakes with fine scissors or a sharp blade
- Keep measurements consistent for all mat board pieces
- Practice on scrap pieces to improve your cutting skills

Credit: www.youtube.com

Credit: www.reddit.com
Frequently Asked Questions
How Do You Cut A Mat Board?
To cut a mat board, use a sharp utility knife or a dedicated mat cutter. Measure and mark your desired dimensions. Align a straightedge with your marks for precision. Apply even pressure while cutting along the straightedge. Ensure your blade is sharp to achieve clean edges.
What Tools Are Needed To Cut Mat Board?
To cut mat board, you’ll need a utility knife or mat cutter, a metal ruler or straightedge, and a cutting mat. Ensure your tools are sharp for precise cuts. A pencil for marking measurements and a corner cutter can also be helpful for professional results.
Can You Cut Mat Board Without A Mat Cutter?
Yes, you can cut mat board without a mat cutter. Use a sharp utility knife and a metal ruler. Ensure you have a cutting mat underneath. Mark your measurements clearly and cut carefully along the lines. A steady hand and patience will help you achieve clean cuts.
How Thick Is Standard Mat Board?
Standard mat board is typically about 1/16 inch thick. This thickness provides enough rigidity for framing purposes. Some specialty mat boards can be thicker, offering more depth and protection. Always check the specifications of the mat board to ensure it meets your framing needs.
Conclusion
Cutting a mat board is easier than it seems. Use the right tools and take your time. Measure twice, cut once. Straight lines and steady hands make a big difference. Practice helps you get better and more confident. With patience, your projects will look clean and sharp.
Now, you can create beautiful frames for your art or photos. Enjoy the process and keep experimenting. Your skills will grow with each cut.