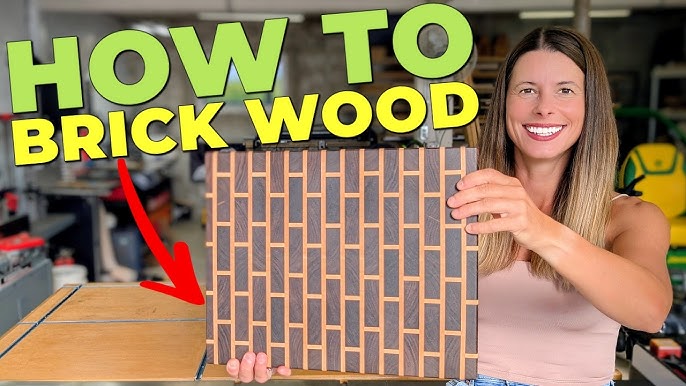
If you love cooking or woodworking, making your own end grain cutting board is a rewarding project you’ll enjoy. Imagine having a sturdy, beautiful board that not only looks great but also protects your knives and lasts for years.
You might think it’s too complicated or time-consuming, but with the right steps, you can create a professional-quality board right at home. In this guide, you’ll discover simple tips and tricks to make the process easy and even fun. Ready to turn your kitchen into a creative workshop?
Let’s get started!
Choosing The Right Wood
Choosing the right wood is very important for making an end grain cutting board. The wood affects how strong, safe, and beautiful the board will be.
Not all wood types work well for cutting boards. You need wood that is hard, safe, and has good grain patterns.
Hardwood Options
Hardwoods are the best choice for end grain cutting boards. They are dense and resist cuts and scratches. Softwoods can get damaged quickly.
Popular hardwoods include maple, walnut, and cherry. These woods are strong and last a long time.
- Maple: Light color, very hard, and durable
- Walnut: Darker wood, strong, and looks nice
- Cherry: Warm reddish color, smooth texture
- Beech: Light wood, good hardness, affordable
Wood Grain Patterns
Grain patterns affect how the cutting board looks and wears. End grain boards show the wood fibers on the surface.
Look for wood with tight, straight grain or interesting patterns. This makes the board strong and attractive.
- Straight grain: Strong and easy to work with
- Curly or wavy grain: Adds beauty but can be harder to cut
- End grain orientation: Shows the wood fibers for durability
Wood Quality And Safety
Choose wood that is free from knots, cracks, and defects. Good quality wood lasts longer and is safer to use.
Use wood that is food safe and not treated with harmful chemicals. Avoid woods with strong odors or toxic oils.
- Check for smooth, clean wood with no cracks
- Avoid wood with knots that can break or trap bacteria
- Use untreated hardwoods safe for food contact
- Stay away from woods like cedar or pine with strong smells

Credit: m.youtube.com
Tools And Materials Needed
Making an end grain cutting board needs specific tools and materials. You must prepare everything before starting.
This guide covers the essential tools, adhesives, finishes, and safety gear you will need.
Essential Tools
You will need woodworking tools to cut and join the wood pieces accurately. Some tools are for shaping and smoothing the board.
- Table saw or circular saw to cut wood strips
- Planer or hand plane to smooth surfaces
- Clamps to hold pieces tightly while glue dries
- Random orbital sander for finishing
- Measuring tape and square for precise measurements
- Chisels for fine adjustments
Adhesives And Finishes
Strong glue is key to hold the wood pieces together. Finishes protect the board and make it look nice.
- Food-safe wood glue for bonding wood pieces
- Mineral oil to protect and condition the board
- Beeswax or board cream to seal and add shine
Safety Gear
Protect yourself while working with tools and finishes. Safety gear reduces injury risks.
- Safety glasses to protect your eyes
- Hearing protection for loud machines
- Dust mask to avoid inhaling sawdust
- Gloves to protect hands from splinters and chemicals
Preparing The Wood
Preparing the wood is the first step to make a strong end grain cutting board. You need to get smooth, flat pieces of wood that fit well together. This part is important for the board’s look and strength.
Good preparation helps the glue stick better and stops the board from warping later. Let’s look at how to cut, plane, and arrange the wood.
Cutting Lumber To Size
Start by cutting your lumber into smaller strips. These strips will be the parts you glue together later. Make sure to cut the strips to the same width and length for a neat look.
Use a table saw or circular saw for straight, clean cuts. Always measure twice and cut once to avoid mistakes.
Planing And Jointing
After cutting, plane each wood strip to make the surface smooth and even. Planing removes rough spots and makes the thickness the same on all pieces.
Joint the edges of the strips to make them flat and square. This step helps the wood pieces fit tightly when glued. You want no gaps between the strips.
- Use a planer to smooth the wood surfaces
- Run edges through a jointer for a flat edge
- Check with a square tool for accuracy
Arranging The Wood Pieces
Lay out the wood strips in a pattern you like. Mixing different wood colors creates a nice design. Make sure the end grain faces up for a durable cutting surface.
Test fit all pieces before gluing. This step lets you check that all strips fit tightly and the pattern looks good.
- Mix light and dark wood for contrast
- Place strips tightly without gaps
- Keep the end grain facing up
- Adjust the order to balance colors

Credit: www.youtube.com
Gluing And Clamping
Gluing and clamping are key steps to build a strong end grain cutting board. Proper glue application ensures the pieces stick well. Clamping holds everything tight until the glue dries.
Careful attention during these stages will help avoid gaps and weak joints in your cutting board.
Applying Glue
Use a good wood glue designed for cutting boards. Spread glue evenly on each edge of the wood pieces. Avoid using too much glue to prevent squeeze-out and mess.
- Apply glue with a small brush or roller for even coverage
- Coat all surfaces that will join
- Work quickly as glue can dry fast
- Wipe off excess glue immediately
Clamping Techniques
Clamping keeps the wood pieces pressed together firmly. Use multiple clamps to apply even pressure across the board. Avoid over-tightening which can squeeze out all the glue.
| Clamp Type | Use | Pressure Level |
|---|---|---|
| Bar Clamps | Good for long boards | Medium |
| Pipe Clamps | Strong pressure, adjustable length | High |
| C-Clamps | Smaller areas, detail work | Low to Medium |
Place scrap wood between clamps and the board to protect surfaces. Check alignment before tightening all clamps.
Drying Time
Let the glued board dry without disturbance. Follow glue manufacturer’s recommended drying time. Usually, 4 to 6 hours is needed for initial set.
- Keep the board clamped and flat during drying
- Do not remove clamps too early to avoid weak joints
- Wait 24 hours before sanding or cutting
Shaping The Board
Shaping your end grain cutting board is an important step. It improves both the look and function. Taking time to shape it well will make it smooth and safe to use.
This section covers trimming the edges, sanding the surface, and adding rounded corners. Each step helps create a polished, durable board.
Trimming Edges
Trim the edges of the board to make all sides even. Use a table saw or circular saw for straight cuts. Check that the board is square by measuring diagonals.
- Set your saw fence for an even cut
- Trim each side slowly and carefully
- Check the board’s squareness after trimming
- Remove any uneven or rough parts
Sanding The Surface
Sanding smooths the surface and removes tool marks. Start with coarse sandpaper and move to finer grits. Always sand in the direction of the wood grain.
| Sandpaper Grit | Purpose |
| 80 | Remove rough spots and glue |
| 120 | Smooth surface and edges |
| 220 | Final smooth finish |
Adding Rounded Corners
Rounded corners make the board safer and more comfortable to handle. Use a router with a round-over bit or sand the corners by hand.
Follow these tips for rounded corners:
- Mark the corner radius with a template or compass
- Use a router with a round-over bit for smooth curves
- If sanding by hand, use a sanding block for even rounding
- Check corners often to keep shapes consistent
Finishing Touches
Finishing your end grain cutting board well keeps it safe and looking good. This part is important for protecting the wood from water and stains.
Good finishing helps your cutting board last longer and stay clean. Let’s look at how to apply oil, polish the board, and keep it in top shape.
Applying Food-safe Oil
Use food-safe oil to protect the wood. Oils like mineral oil soak into the wood and stop it from drying out. Apply the oil with a soft cloth, covering all surfaces.
- Pour a small amount of oil on the board.
- Use a clean cloth to spread the oil evenly.
- Let the oil soak in for a few hours or overnight.
- Wipe off any extra oil with a dry cloth.
Buffing And Polishing
Buffing helps your board look smooth and shiny. Use a soft cloth or buffing pad to rub the surface gently. This step removes any rough spots and makes the board feel nice to touch.
- Use circular motions to buff.
- Do not press too hard.
- Buff until the surface shines.
Maintenance Tips
Keep your cutting board in good shape with regular care. Clean it after each use and reapply oil when the wood looks dry. Avoid soaking it in water or putting it in the dishwasher.
| Maintenance Task | How Often | Details |
| Cleaning | After every use | Wash with warm soapy water and dry immediately. |
| Oiling | Monthly or when dry | Apply food-safe oil as described above. |
| Deep Cleaning | Every few months | Use coarse salt and lemon to scrub the surface, then rinse and dry. |
Common Mistakes To Avoid
Making an end grain cutting board can be rewarding but tricky. Many beginners face problems that affect the board’s durability and beauty.
Knowing common mistakes helps you avoid them. This guide covers wood movement, glue failures, and finishing errors.
Wood Movement Issues
Wood expands and contracts with humidity changes. Ignoring this can cause cracks or warping. Choose wood carefully and allow space for movement.
- Use hardwoods with similar density to reduce uneven movement
- Avoid mixing wood types that move differently
- Seal all sides of the board to balance moisture absorption
- Do not make the board too thick without proper drying
Glue Failures
Using the wrong glue or poor clamping can cause joints to fail. This weakens the board and shortens its life.
| Common Glue Mistakes | How to Avoid |
| Using non-waterproof glue | Use waterproof wood glue |
| Insufficient clamping pressure | Clamp firmly and evenly |
| Not cleaning glue squeeze-out | Wipe excess glue before it dries |
| Applying glue unevenly | Spread glue in thin, even layers |
Improper Finishing
Finishing protects the board and enhances its look. Skipping steps or using wrong products can harm the wood.
- Sand the board smoothly before applying finish
- Use food-safe oils like mineral oil or beeswax
- Apply several thin coats, letting each dry fully
- Avoid finishes that are toxic or peel off easily

Credit: www.youtube.com
Creative Design Ideas
Making an end grain cutting board lets you explore many creative designs. You can add patterns, engravings, or mix wood types for a unique look.
These ideas help make your board both beautiful and functional. Let’s look at some ways to add personal touches and style.
Patterns And Inlays
Patterns and inlays give your cutting board a special look. You can use shapes, stripes, or geometric designs to create eye-catching effects.
- Use contrasting wood colors for stripes or blocks.
- Cut out shapes and fill them with a different wood type.
- Try simple geometric patterns like squares, diamonds, or chevrons.
- Combine small pieces to form larger designs.
Personalized Engravings
Engraving adds a personal touch to your cutting board. You can carve names, dates, or simple images into the wood.
| Engraving Type | Details |
| Name or Initials | Carve the owner’s name or initials for a gift |
| Special Date | Mark a memorable date like a wedding or birthday |
| Simple Images | Add kitchen-themed icons like knives or vegetables |
| Quotes | Engrave short cooking or food quotes |
Mixing Wood Types
Mixing wood types creates contrast and depth in your board’s design. Different woods vary in color and grain texture.
Common wood types to mix include:
- Maple – light color, fine grain
- Walnut – dark brown, rich texture
- Cherry – warm reddish tone
- Oak – strong grain patterns
Arrange these woods in patterns or blocks to highlight their differences. This mix makes your board look handcrafted and unique.
Frequently Asked Questions
What Materials Are Needed For An End Grain Cutting Board?
To make an end grain cutting board, you’ll need hardwoods like maple, walnut, or cherry. You’ll also require wood glue, clamps, a planer, and mineral oil. These materials ensure durability, aesthetics, and functionality of your cutting board. Proper material selection is crucial for a long-lasting and effective cutting surface.
How Do You Maintain An End Grain Cutting Board?
To maintain an end grain cutting board, regularly oil it with mineral oil. This prevents drying and cracking. Clean it with mild soap and water after each use. Avoid soaking or putting it in the dishwasher. Proper maintenance extends the board’s lifespan and keeps it hygienic for food preparation.
Why Choose End Grain Over Other Cutting Boards?
End grain cutting boards are preferred for their durability and knife-friendliness. The wood fibers absorb impact, preserving knife edges. They also self-heal, making knife marks less visible. End grain boards are aesthetically pleasing and offer a unique, handcrafted look. They are an ideal choice for both function and style.
How Long Does It Take To Make One?
Making an end grain cutting board typically takes a few days. This includes time for glue drying and finishing. The process involves cutting, gluing, sanding, and oiling. Patience is key for achieving a high-quality result. With proper time and care, you’ll create a durable and beautiful cutting board.
Conclusion
Creating an end grain cutting board takes time and care. Choose good wood and cut it carefully. Glue the pieces tightly and press them well. Sand the board smooth and finish with oil. This helps protect the wood and keeps it strong.
Your board will last longer and look great. Enjoy making your own kitchen tool. It’s useful and fun to build. Keep practicing to improve your skills. Soon, you’ll have a cutting board you can be proud of.