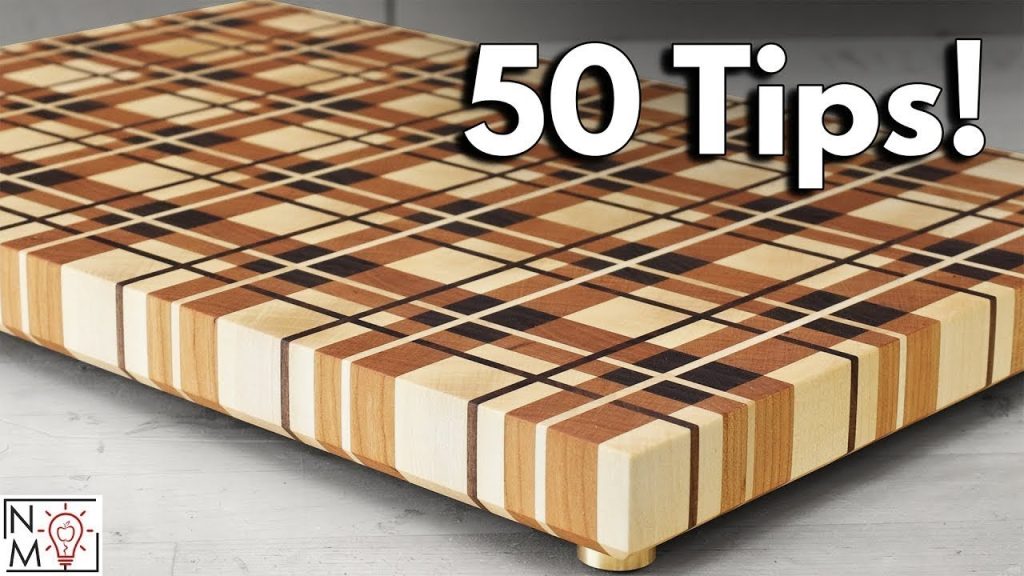
If you love cooking and working with wood, making your own end grain cutting board is a rewarding project you’ll enjoy. Imagine having a beautiful, durable board that not only protects your knives but also adds a unique touch to your kitchen.
You might think it’s complicated or needs special tools, but with the right steps, you can create a professional-quality cutting board right at home. Keep reading, and you’ll discover simple tips and clear instructions that make the process easy and fun.
By the end, you’ll have a cutting board you’re proud to use every day.

Credit: www.youtube.com
Choosing Wood Types
Choosing the right wood is key to making a strong cutting board. The wood must be safe for food and last a long time.
Different woods have different grains and durability. This affects how well your cutting board will work and look.
Best Hardwoods For Cutting Boards
Hardwoods are best because they resist cuts and dents. Soft woods can get damaged fast and may trap bacteria.
- Maple: Very hard and light-colored. Commonly used for cutting boards.
- Walnut: Dark wood with a smooth finish. Durable and looks nice.
- Cherry: Medium hardness and reddish tone. Ages well with use.
- Beech: Hard and pale wood. Has tight grain, good for cutting boards.
- Oak: Strong wood but can be porous. Choose white oak for better durability.
Wood Grain And Durability
| Grain Type | Durability | Notes |
|---|---|---|
| End grain | Very durable | Grain faces up, knife cuts between fibers |
| Edge grain | Durable | Grain runs lengthwise, easier to make |
| Face grain | Less durable | Shows wood pattern, wears faster |
End grain boards heal better from cuts. They last longer and protect knives well.

Credit: m.youtube.com
Gathering Tools And Materials
Making an end grain cutting board needs the right tools and materials. Collecting everything before you start saves time.
This guide helps you gather essential woodworking tools and safety gear. Prepare well for a smooth project.
Essential Woodworking Tools
You need these tools to cut, glue, and finish your cutting board. Having good quality tools makes work easier.
- Table saw or circular saw for cutting wood pieces
- Planer or hand plane for smoothing wood surfaces
- Clamps to hold pieces tightly while glue dries
- Wood glue that bonds well with hardwood
- Orbital sander or sanding block for finishing
- Measuring tape and square for accurate cuts
- Chisels for fine trimming and fitting
Safety Gear Checklist
Safety gear protects you from injuries while working with wood and tools. Always wear proper equipment.
| Safety Gear | Purpose |
| Safety glasses | Protect eyes from dust and wood chips |
| Hearing protection | Reduce noise from power tools |
| Dust mask | Prevent inhaling sawdust |
| Work gloves | Protect hands from splinters and cuts |
| Apron | Keep clothes clean and provide tool pockets |
Preparing The Wood
Preparing the wood is the first important step in making an end grain cutting board. You need to start with clean, dry wood for the best results.
This section covers cutting wood strips and planing and sanding to get the wood ready for assembly.
Cutting Wood Strips
Cut wood into strips that are the right width and length for your board design. Use a sharp saw to get clean cuts.
- Choose hardwood like maple, walnut, or cherry
- Cut strips about 1 to 1.5 inches wide
- Make sure strips have straight edges for tight glue joints
- Keep strips dry and free from dirt
- Label each piece to keep track of grain direction
Planing And Sanding
After cutting, plane and sand the wood strips. This makes the surfaces smooth and flat for gluing.
| Tool | Purpose | Tip |
| Hand Plane | Remove rough edges and create flat surfaces | Plane along the grain to avoid tear-out |
| Orbital Sander | Smooth surfaces and edges | Start with coarse sandpaper, then use fine grit |
| Sandpaper Grit | Levels of smoothness | Begin with 80 grit, finish with 220 grit |

Credit: www.newtonmakes.com
Assembling The Board
Assembling an end grain cutting board takes care and patience. You will join the prepared wood pieces to form a strong, beautiful surface.
Focus on arranging the pieces correctly and using glue and clamps to keep everything tight while drying.
Arranging End Grain Pattern
Lay out your wood blocks with the end grain facing up. This shows the wood’s pattern and strength.
Arrange the pieces so the patterns look balanced and pleasing. Mixing light and dark woods creates a nice design.
- Check the grain direction on each block
- Mix colors for a good balance
- Place blocks tightly to avoid gaps
Applying Glue And Clamping
Spread wood glue evenly on the edges of each block. Use enough glue but avoid excess spilling out.
Press the blocks together and use clamps to hold them tightly while the glue dries. Check for any gaps and adjust.
- Apply glue on all joining edges
- Use bar clamps or pipe clamps
- Tighten clamps evenly to avoid warping
- Leave clamps on for 24 hours for strong bonds
Flattening And Sanding
After assembling your end grain cutting board, flattening and sanding are key steps. These steps remove glue residue and smooth the surface. This makes the board safe and comfortable to use.
Proper flattening ensures the board lays flat on a countertop. Sanding refines the texture, preparing the board for finishing oils or sealers.
Removing Excess Glue
Glue often squeezes out between the wood pieces during clamping. Removing this excess glue is important before sanding. Hardened glue spots can dull sanding tools and ruin the finish.
- Wait at least 1 hour after clamping for glue to set.
- Use a sharp scraper or chisel to carefully remove glue spots.
- Do not gouge the wood while scraping.
- If glue is stubborn, lightly sand with coarse sandpaper.
- Clean dust from the surface before moving on.
Sanding For Smooth Finish
Sanding smooths the board’s surface and edges. It removes small glue spots, tool marks, and rough patches. Use a sanding block or an orbital sander for best results.
| Sandpaper Grit | Purpose |
|---|---|
| 80 grit | Remove glue and flatten high spots |
| 120 grit | Smooth rough surface and edges |
| 220 grit | Final finish for smooth feel |
Applying Finish
Finishing your end grain cutting board is important. It protects the wood and adds beauty.
Choosing the right finish keeps the board safe for food use. It also helps it last longer.
Food-safe Oils And Sealants
Use oils and sealants that do not harm your food. These finishes soak into the wood and block moisture.
- Mineral oil: clear, odorless, and easy to apply
- Beeswax: often mixed with mineral oil for extra protection
- Coconut oil: natural but can go rancid, so use refined versions only
- Walnut oil: a drying oil, but watch for allergies
- Tung oil: food-safe when pure and fully cured
Tips For Long-lasting Protection
Proper care extends your board’s life and keeps it safe. Follow these simple tips after finishing.
| Tip | Reason |
| Apply oil regularly | Keeps wood from drying and cracking |
| Hand wash only | Protects finish and wood from damage |
| Dry completely after washing | Prevents mold and warping |
| Store in a dry place | Avoids moisture buildup |
| Reapply finish as needed | Maintains protection and appearance |
Maintenance Tips
Keeping your end grain cutting board in good shape takes simple care. Regular cleaning and oiling help it last longer and stay safe for food.
Follow these tips to protect your cutting board from damage and keep it looking great.
Cleaning And Drying
Clean your cutting board right after use. Use warm water and mild soap. Avoid soaking it in water to stop warping or cracking.
- Wipe the board with a soft sponge or cloth
- Rinse with warm water only
- Dry with a clean towel immediately
- Stand the board upright to air dry completely
Periodic Oiling Schedule
Oiling your board keeps the wood from drying out and cracking. Use food-safe mineral oil or beeswax-based conditioner.
| Frequency | Action |
| After first use | Apply a generous coat of oil |
| Weekly | Light oil application if used often |
| Monthly | Deep oil treatment for dry boards |
| When wood looks dry | Apply oil until absorbed |
Frequently Asked Questions
What Is An End Grain Cutting Board?
An end grain cutting board is made by arranging wood pieces vertically. This design makes the surface durable and self-healing. It shows less wear over time, as the knife cuts between the wood fibers instead of across them. This type of board is favored by chefs for its longevity and aesthetic appeal.
Why Choose End Grain Over Edge Grain?
End grain boards are more durable and gentle on knives. They are self-healing because the wood fibers close up after cutting. Edge grain boards are less durable and show knife marks more easily. End grain boards also have a unique, checkerboard appearance that many find visually appealing.
What Wood Types Are Best For End Grain?
Hardwoods like maple, walnut, and cherry are ideal for end grain boards. These woods are dense and durable, making them resistant to knife marks. They also have natural antibacterial properties, which helps keep the board hygienic. Avoid softwoods, as they are less durable and can be easily damaged.
How Do You Maintain An End Grain Board?
Regular oiling and cleaning are essential for maintaining an end grain board. Use mineral oil to keep the wood hydrated and prevent cracking. Avoid soaking the board in water. Clean it with mild soap and water after each use, and dry it immediately to prevent warping.
Conclusion
Making an end grain cutting board takes time and care. Follow each step with patience and attention. Choose good wood and tools for best results. Sand well to get a smooth surface. Finish with oil to protect the board. Your board will last long with proper care.
Enjoy a strong, beautiful cutting board in your kitchen. This project builds skills and gives pride in your work. Try it and see how rewarding woodworking can be.