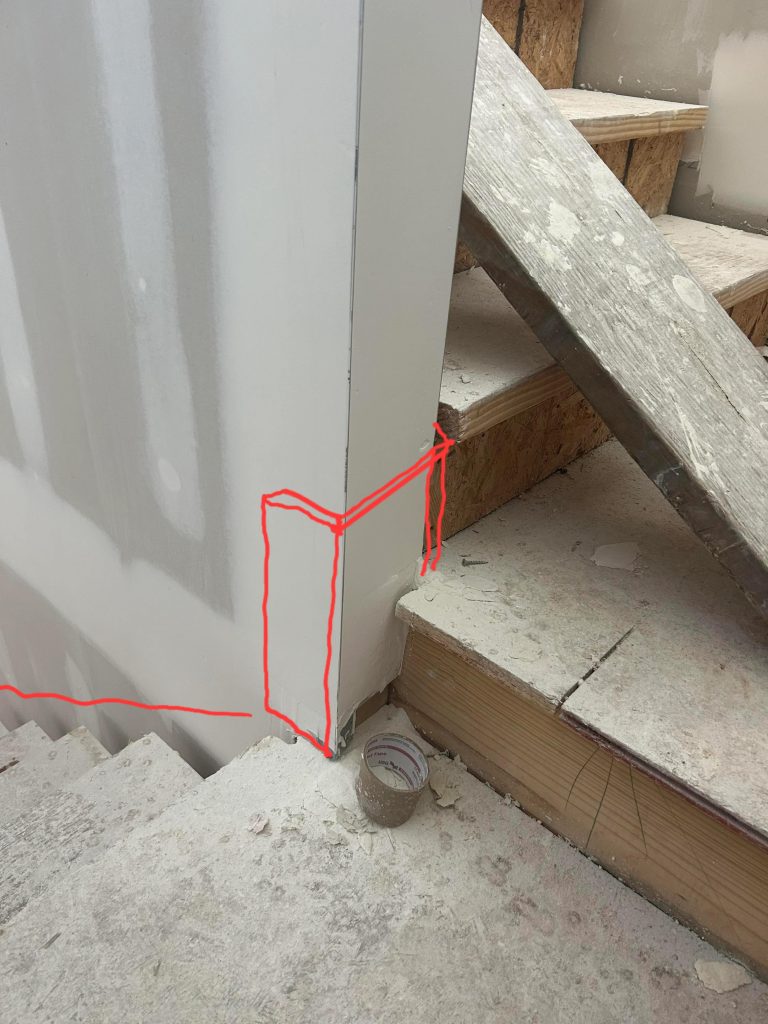
Are you ready to give your staircase a polished, professional look? Cutting a staircase skirt board might sound tricky, but with the right steps, you can do it yourself and save money.
Imagine the satisfaction of seeing your staircase transform with clean, sharp edges that fit perfectly. In this guide, you’ll learn exactly how to cut your staircase skirt board with ease, avoiding common mistakes that can waste time and materials. Keep reading, and by the end, you’ll have the confidence to tackle this project like a pro.
Tools And Materials Needed
Cutting a staircase skirt board requires the right tools and materials. Using proper equipment makes the job easier and safer.
This guide covers the essential cutting tools, measuring instruments, and safety gear you need to complete the task.
Essential Cutting Tools
Cutting tools help shape the skirt board to fit the staircase perfectly. Choose sharp and reliable tools for clean cuts.
- Miter saw for angled cuts
- Jigsaw for curves and detailed cuts
- Hand saw for small adjustments
- Utility knife for trimming edges
- Clamps to hold the board steady
Measuring Instruments
Accurate measurements ensure the skirt board fits the stairs well. Use reliable measuring tools for precision.
- Tape measure for length and width
- Combination square for marking angles
- Spirit level to check evenness
- Pencil or marking knife for clear lines
Safety Gear
Safety gear protects you while cutting and handling materials. Always wear protective equipment to avoid injuries.
- Safety goggles to protect eyes
- Ear protection against loud tools
- Dust mask to avoid inhaling particles
- Work gloves to protect hands
- Proper footwear for stable footing
Preparing The Staircase
Before cutting the staircase skirt board, prepare the area carefully. This helps ensure safety and accuracy in your work.
Proper preparation makes the cutting process smoother and reduces mistakes. Focus on clearing space and checking the skirt board condition.
Clearing The Work Area
Remove all objects near the staircase. This creates enough room to move and use tools safely.
- Take away furniture and decorations
- Sweep the floor to remove dust and debris
- Lay down protective sheets to catch wood chips
- Ensure good lighting for clear visibility
- Keep tools organized and within reach
Inspecting The Skirt Board
Check the skirt board for damage or warping before cutting. This helps avoid errors and ensures a clean fit.
| Inspection Point | What to Check | Action Needed |
| Surface | Look for cracks or dents | Fill or sand as required |
| Edges | Check for chips or uneven cuts | Trim or smooth edges |
| Fit | Measure against stairs for size | Mark cutting lines carefully |
| Moisture | Feel for dampness or swelling | Let dry completely before cutting |
Measuring The Skirt Board
Measuring the skirt board is important for a good fit on your staircase. You need to get the length right before cutting. Taking careful measurements helps avoid mistakes.
This guide focuses on two key steps: taking accurate length measurements and marking cut lines. Follow these to cut your skirt board correctly.
Taking Accurate Length Measurements
Measure the length along the staircase where the skirt board will sit. Use a tape measure and follow the angle of the stairs closely. Measure from the bottom to the top end of the skirt board area.
- Start at the bottom of the staircase, placing the tape measure at the baseboard.
- Run the tape along the angle of the stairs, keeping it tight and straight.
- Stop measuring at the point where the skirt board will end near the top step.
- Record the measurement carefully to avoid errors.
- Double-check by measuring again for accuracy.
Marking Cut Lines
After measuring, mark the cut lines on the skirt board clearly. These lines guide your saw to make precise cuts. Use a pencil and a straightedge or square for accuracy.
| Tool | Purpose | Tip |
|---|---|---|
| Pencil | Mark cut lines | Use a sharp pencil for thin, clear lines |
| Carpenter’s Square | Draw straight lines at the correct angle | Align with the skirt board edges for accuracy |
| Measuring Tape | Confirm measurements before marking | Measure twice to avoid mistakes |

Credit: www.reddit.com
Cutting Techniques
Cutting staircase skirt boards needs care and skill. Good cuts make the skirt board fit perfectly along the stairs.
This guide explains simple cutting techniques to help you get clean and accurate cuts for your skirt board.
Straight Cuts
Straight cuts are the easiest type of cuts for skirt boards. They are used when the board runs along flat walls or straight stair edges.
Measure the length carefully and mark the board before cutting. Use a saw guide or straight edge to keep the cut line straight.
- Use a sharp handsaw or circular saw
- Keep the saw steady and cut slowly
- Check measurements twice before cutting
Angled Cuts For Staircases
Angled cuts are needed when the skirt board meets stairs at a slope. These cuts follow the angle of the stair stringer.
To cut at an angle, measure the stair angle with a protractor or angle finder. Mark this angle on the board before cutting.
- Use a speed square to mark the angle
- Cut slowly to keep the angle clean
- Test fit the board before final installation
Using A Miter Saw
A miter saw helps make straight and angled cuts with ease. It is ideal for cutting skirt boards precisely.
Set the miter saw to the correct angle. Hold the board firmly and cut slowly to avoid splintering the wood.
- Adjust the saw angle for bevel or miter cuts
- Use clamps to hold the board steady
- Wear safety glasses and follow saw safety rules
Fitting The Skirt Board
Fitting the skirt board on a staircase needs careful work. It helps cover gaps between the wall and stairs. Proper fitting makes the staircase look neat and clean.
This guide explains how to dry fit the pieces and adjust for any gaps. Follow these steps to get a perfect fit before final fixing.
Dry Fitting Pieces
Start by placing each skirt board piece along the staircase. Check the fit without nails or glue. This allows you to see where cuts or changes are needed.
- Hold the skirt board against the wall and stair stringer.
- Mark any areas where the board does not sit flush.
- Cut or trim edges as needed for a tight fit.
- Test the fit again after each adjustment.
- Make sure corners meet neatly with no gaps.
Adjusting For Gaps
Small gaps can appear between the skirt board and wall. These happen due to uneven walls or stair shapes. Fix these gaps before final installation.
| Type of Gap | Cause | How to Fix |
|---|---|---|
| Vertical gap | Uneven wall surface | Use flexible caulk or wood filler |
| Horizontal gap | Warped skirt board | Trim edges or lightly bend board |
| Corner gap | Incorrect miter cut | Re-cut angles or add trim strips |
Securing The Skirt Board
Securing the skirt board on a staircase is important for safety and appearance. It keeps the board in place and stops it from moving.
There are different ways to attach the skirt board. You can use nails, screws, or adhesives. Each way has its own benefits.
Nailing And Screwing Methods
Nails and screws are common tools to fix skirt boards. They hold the board tightly against the wall or stair frame. Use finishing nails or wood screws for best results.
Pre-drill holes for screws to stop the wood from splitting. Drive nails or screws at an angle to get a stronger hold. Countersink screws and nails so they sit flush with the wood.
- Use a nail gun or hammer for nails
- Choose screws with a wood thread
- Pre-drill holes for screws
- Drive fasteners at an angle
- Countersink nails and screws
Using Adhesives
Adhesives can help secure skirt boards without visible fasteners. Use a strong wood glue or construction adhesive made for wood and drywall.
Apply the adhesive evenly on the back of the skirt board. Press the board firmly against the wall or stair frame. Hold it in place until the glue sets.
- Choose a strong wood or construction adhesive
- Apply glue evenly on the board
- Press the board firmly in place
- Use clamps or temporary supports
- Let the adhesive dry fully before use
Finishing Touches
After cutting the staircase skirt board, the finishing touches make a big difference. These steps help the board look smooth and blend with your stairs.
Take your time on these final steps. They improve the overall appearance and protect the wood from damage.
Sanding Edges
Sanding the edges removes rough spots and splinters from the cut. This makes the board safe to touch and ready for painting or staining.
Use fine-grit sandpaper and sand along the edges smoothly. Check all corners and curves to make sure they feel even.
- Start with 120-grit sandpaper for rough edges
- Finish with 220-grit sandpaper for a smooth surface
- Wipe off dust with a clean cloth before the next step
Painting Or Staining
Painting or staining protects the skirt board and matches it to your staircase style. Choose paint or stain that fits your wood type.
Apply thin, even coats and let each coat dry well. This prevents drips and gives a clean finish.
- Use a brush or small roller for precise control
- Apply 2 to 3 coats for better coverage and durability
- Lightly sand between coats for a smooth finish

Credit: www.youtube.com
Common Mistakes To Avoid
Cutting a staircase skirt board can be tricky. Avoiding common mistakes will save time and materials.
Pay close attention to measurements and cutting angles. These are the main areas where errors occur.
Incorrect Measurements
Wrong measurements cause the skirt board to not fit properly. Always measure twice before cutting.
Not accounting for the exact length and height of the staircase leads to gaps or overlap.
- Measure the length along the staircase carefully.
- Note the height changes at each step.
- Use a tape measure that is easy to read.
- Double-check measurements before marking the board.
Improper Cutting Angles
Cutting angles incorrectly results in poor joints and visible gaps. Angles must match the staircase slope.
Using a miter saw without setting the right angle causes uneven edges and fitting problems.
- Determine the angle of the staircase rise and run.
- Set the saw blade to the precise angle needed.
- Make test cuts on scrap wood before the final cut.
- Check the fit frequently while working.

Credit: www.reddit.com
Frequently Asked Questions
What Is A Staircase Skirt Board?
A staircase skirt board is a trim piece installed along the wall, parallel to the stairs. It provides a finished look by covering the gap between the wall and the stair treads and risers. This not only enhances aesthetics but also protects walls from scuffs and damage.
How Do You Measure A Skirt Board?
To measure a skirt board, start by measuring the total length of the staircase. Account for angles and curves by measuring along the wall. Ensure to include extra length for miters at the top and bottom. Accurate measurements help in achieving a precise fit during installation.
What Tools Are Needed For Cutting?
For cutting a staircase skirt board, you need a saw, preferably a miter saw for precision. Additionally, have a measuring tape, a carpenter’s square, and a pencil for marking. Sandpaper or a file can be useful for smoothing edges. These tools ensure clean, accurate cuts.
Can I Install A Skirt Board Myself?
Yes, you can install a skirt board yourself with basic carpentry skills. Measure and cut carefully for a good fit. Use appropriate tools like a miter saw, measuring tape, and carpenter’s square. Follow proper installation guidelines, and consider seeking help if needed for complex staircases.
Conclusion
Cutting a staircase skirt board is easier than it seems. With the right tools, measure carefully and mark your cuts clearly. Take your time to follow each step closely. Practice on scrap wood if needed to gain confidence. Clean cuts help your project look neat and professional.
Remember, patience and accuracy make a big difference. Keep safety in mind while working. Soon, you will have a perfectly fitted skirt board that enhances your staircase’s look. Enjoy the satisfaction of doing it yourself.