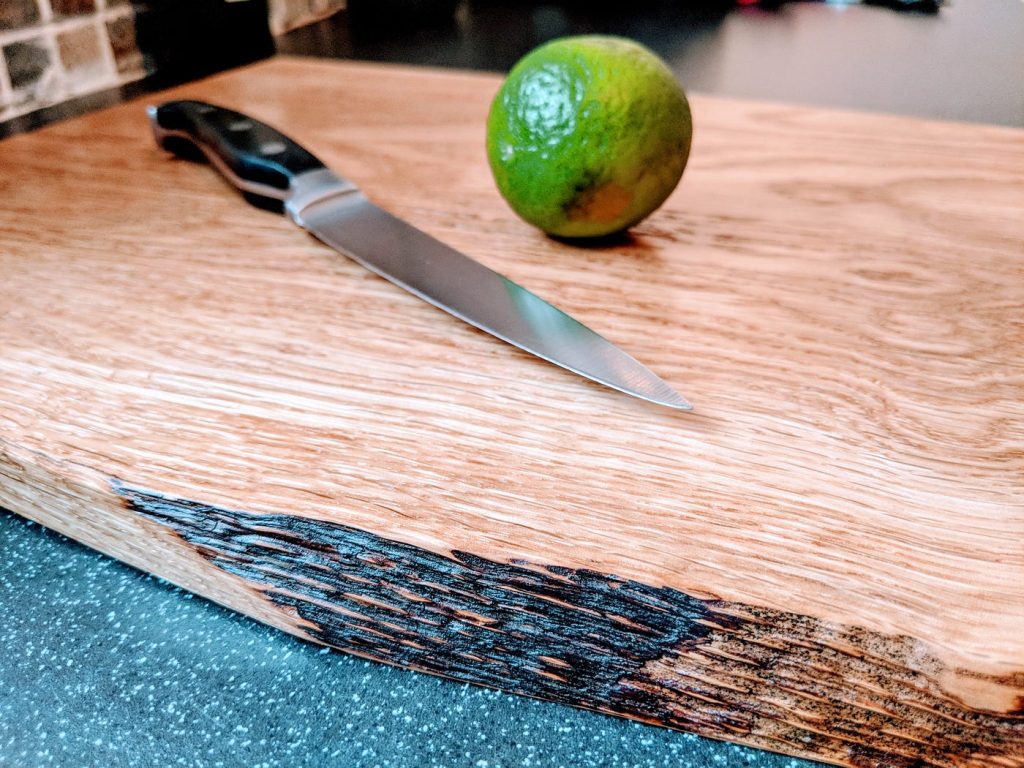
Are you ready to create a beautiful, sturdy cutting board that lasts for years? Making your own cutting board wood is easier than you think, and it gives you full control over the look and quality.
Imagine having a custom board that fits perfectly in your kitchen and feels just right in your hands. In this guide, you’ll discover simple steps to choose the best wood, prepare it properly, and craft a cutting board that’s both functional and stunning.
Keep reading, and by the end, you’ll have everything you need to start your own woodworking project with confidence.
Choosing The Right Wood
Choosing the right wood is important for making a safe and durable cutting board. The wood must be strong, easy to clean, and safe for food use.
Some woods are better than others for cutting boards. Knowing the difference helps you pick the best wood for your project.
Hardwood Vs Softwood
Hardwoods come from trees that lose their leaves each year. Softwoods come from trees that have needles and cones. Hardwoods are usually harder and last longer.
- Hardwoods have tight grains, so they resist cuts and scratches.
- Softwoods have open grains and can get damaged easily.
- Hardwoods do not absorb liquids as much as softwoods.
- Softwoods can harbor bacteria more easily due to their softness.
Best Wood Types For Cutting Boards
Some woods are popular for cutting boards because they are hard, safe, and easy to clean. Here is a simple table of common woods used.
| Wood Type | Hardness | Notes |
| Maple | Hard | Strong and food safe |
| Walnut | Hard | Dark color, durable |
| Cherry | Medium | Good hardness and looks nice |
| Bamboo | Hard | Technically grass but very hard |
| Teak | Hard | Oily wood, water resistant |
Avoiding Toxic And Soft Woods
Some woods are not safe or good for cutting boards. They may be toxic or too soft and get damaged fast.
- Avoid pine and cedar. These are softwoods and can release harmful oils.
- Do not use wood with strong odors or colors that may stain food.
- Check if the wood is treated with chemicals. Never use treated wood.
- Choose wood that is food safe and non-toxic.

Credit: m.youtube.com
Gathering Tools And Materials
Making a cutting board requires the right tools and materials. Gathering these items before starting will make the process smoother. You will need tools for cutting, sanding, and finishing the wood.
Here are the main categories of what you need: woodworking tools, sanding supplies, and finishing oils or sealants. Each plays a key role in creating a durable and beautiful cutting board.
Essential Woodworking Tools
You need basic woodworking tools to shape and join your cutting board. These tools help you cut the wood to size and smooth the edges.
- Table saw or circular saw for cutting wood pieces
- Jointer or hand plane to flatten the wood surface
- Clamps to hold pieces together while gluing
- Wood glue for joining pieces securely
- Measuring tape and square for accurate cuts
- Chisels for detail work or removing small sections
Sanding Supplies
Sanding makes the cutting board smooth and safe to use. You will need several grades of sandpaper and a sanding block or electric sander.
| Sandpaper Grit | Purpose |
| 80-100 | Remove rough edges and shape wood |
| 120-150 | Smooth surface after shaping |
| 220-320 | Final smoothing for a polished finish |
Finishing Oils And Sealants
Oils and sealants protect the wood and keep it safe for food use. They also bring out the natural beauty of the wood grain.
- Food-grade mineral oil to hydrate and protect
- Beeswax for added water resistance and shine
- Tung oil or walnut oil as natural wood finishes
- Cutting board conditioner blends that combine oils and waxes
Preparing The Wood
Preparing wood is a key step in making a cutting board. Proper preparation ensures the board is strong and safe to use. This section covers how to cut, joint, plane, and check the wood for defects.
Each step helps create a smooth, even surface that will last. Taking time here prevents problems later in the project.
Cutting To Size
Start by cutting the wood into pieces close to the size you want. Use a saw that fits the wood type and thickness. Make straight cuts for better joining.
- Measure the wood carefully before cutting
- Mark cut lines with a pencil
- Use a sharp saw for clean cuts
- Wear safety gear like goggles and gloves
- Check each piece after cutting to confirm size
Jointing And Planing
Jointing makes the edges flat and smooth. Planing reduces thickness and evens the surface. Both help the pieces fit together tightly.
| Tool | Purpose | Tip |
|---|---|---|
| Jointer | Flatten edges for gluing | Use steady, even passes |
| Planer | Reduce thickness and smooth surface | Check thickness often |
| Hand Plane | Fine smoothing and shaping | Work with the grain |
Checking For Defects
Inspect the wood for cracks, knots, or warping. Defects can weaken the board or cause uneven surfaces. Fix or remove bad sections before assembly.
- Look for deep cracks that go through the wood
- Avoid pieces with large knots that may fall out
- Check if the wood is warped or twisted
- Use wood filler for small holes or cracks
- Sanding can remove minor surface defects
Assembling The Board
Assembling a cutting board requires careful attention to detail. Proper joining and drying make the board strong and durable.
This guide covers gluing, clamping, and choosing the grain type for your board.
Gluing Techniques
Use wood glue designed for cutting boards. Apply a thin, even layer to all edges. Avoid using too much glue to prevent squeeze-out.
- Spread glue with a brush or small roller.
- Join boards tightly to avoid gaps.
- Check for glue coverage on every joint.
- Wipe excess glue immediately with a damp cloth.
Clamping And Drying
Use clamps to hold the glued boards firmly together. Proper clamping ensures a flat and strong surface.
| Clamping Tips | Reason |
|---|---|
| Apply even pressure across the board | Prevents warping and gaps |
| Use cauls to keep the board flat | Distributes pressure evenly |
| Keep clamps tight for at least 1 hour | Ensures glue sets properly |
| Allow drying for 24 hours before removing clamps | Maximizes joint strength |
Creating End Grain Or Edge Grain Boards
Choose between end grain and edge grain for different looks and durability. End grain boards show wood rings and resist knife marks better.
- End Grain:Arrange short wood pieces with rings facing up.
- Edge Grain:Use long boards with rings running along the side.
- End grain boards need more glue joints but last longer.
- Edge grain boards are easier to make and look traditional.
Shaping And Sanding
Shaping and sanding are key parts of making a cutting board. These steps help create a smooth and safe surface.
Proper shaping ensures the board looks good and feels comfortable. Sanding removes rough spots and prepares the wood for finishing.
Trimming Edges
Use a saw or a router to trim the edges of the wood. Make sure the edges are straight and clean. This helps the cutting board stay stable on surfaces.
Rounding Corners
Rounding the corners makes the board safer and easier to handle. You can use a sanding block or a router with a round-over bit. Smooth, rounded corners prevent cuts and splinters.
- Mark the corners to round
- Use a router or sanding block
- Check for even curves on all corners
- Remove any sharp points carefully
Sanding For Smoothness
Sanding removes rough patches and prepares the board for sealing. Start with coarse grit sandpaper and move to finer grits. Finish by wiping the surface clean.
| Sanding Grit | Purpose |
| 80-100 | Remove saw marks and shape edges |
| 120-150 | Smooth surface and corners |
| 220-320 | Final polish for smooth finish |

Credit: www.youtube.com
Applying Finishes
Applying a finish protects your cutting board and makes it last longer. It also keeps the wood safe for food use.
Choosing the right finish and applying it correctly is important. This helps keep your cutting board looking good and working well.
Food-safe Oils And Waxes
Use oils and waxes that are safe for food. These finishes soak into the wood and stop it from drying out.
Common food-safe oils include mineral oil and walnut oil. Beeswax adds a smooth, protective layer on top.
- Mineral oil is odorless and tasteless
- Walnut oil is natural but may cause allergies
- Beeswax creates a shiny, water-resistant finish
- Avoid toxic or drying oils like linseed
Multiple Coats For Durability
Apply several coats of oil or wax to protect the board well. Each coat adds strength and water resistance.
Let each coat dry completely before adding the next one. This helps the finish soak in and bond with the wood.
- Apply a thin layer with a clean cloth
- Wait 1 to 2 hours for drying
- Lightly buff the surface before next coat
- Repeat 3 to 5 times for best results
Curing And Maintenance Tips
After the last coat, let the board cure for 24 hours. This ensures the finish is fully set and durable.
Keep your cutting board in good shape by cleaning it gently and reapplying oil regularly.
- Wash with mild soap and water only
- Do not soak or put in dishwasher
- Dry board thoroughly after washing
- Reapply oil every few weeks or when dry
Tips For Longevity
Cutting boards made of wood can last a long time if you care for them well. Simple habits can keep your board strong and looking good.
Follow these tips to stop damage and keep your wood cutting board healthy for years.
Proper Cleaning Methods
Cleaning your wooden cutting board the right way removes germs and stops damage. Avoid soaking it in water or using harsh chemicals.
- Wash with warm, soapy water after use
- Rinse and dry with a clean cloth immediately
- Use a scrub brush for tough spots
- Do not put the board in the dishwasher
- Sprinkle coarse salt and rub with lemon for deep cleaning
Avoiding Warping And Cracking
Wood warps and cracks if it gets too wet or too dry. Keep the board away from extreme heat or moisture changes.
| Cause | Effect | Prevention |
| Soaking in water | Warping | Dry board immediately |
| Leaving in sun | Cracking | Store in shade |
| Sudden temperature change | Splitting | Avoid hot surfaces |
Regular Oil Reapplication
Oiling your cutting board keeps the wood from drying out and protects it from stains.
- Use food-safe mineral oil or beeswax
- Apply oil evenly with a soft cloth
- Let the oil soak in for several hours
- Wipe off any extra oil before use
- Oil the board once a month or when it looks dry

Credit: www.youtube.com
Frequently Asked Questions
What Wood Is Best For A Cutting Board?
Hardwoods like maple, walnut, and cherry are ideal for cutting boards. They are durable and resist knife marks. These woods have closed grains, which helps prevent bacteria from penetrating the surface. Maple is most popular due to its hardness and affordability.
Walnut offers a rich color, while cherry adds a warm tone.
How Do I Treat A Wooden Cutting Board?
To treat a wooden cutting board, regularly oil it with mineral oil or beeswax. This helps maintain its durability and prevents drying or cracking. Apply the oil generously, let it soak for a few hours, and then wipe off excess.
Treating your board monthly ensures longevity and maintains its appearance.
Can I Use Softwood For Cutting Boards?
Softwoods like pine are not recommended for cutting boards. They are prone to dents and scratches. Their open grain structure can harbor bacteria and moisture, making them less hygienic. Hardwoods are preferable as they provide durability, resist knife marks, and are easier to clean and maintain.
How Often Should I Oil My Cutting Board?
Oil your cutting board at least once a month. Regular oiling prevents the wood from drying and cracking. If used frequently, oil it more often. Look for signs like dryness or a dull surface to know when it needs oiling.
Proper maintenance ensures your board lasts longer and remains safe to use.
Conclusion
Making your own cutting board wood is a rewarding task. You learn about different types of wood and their qualities. It also helps you create a tool that lasts long. With simple steps and some patience, anyone can do it.
Remember to sand and finish the wood well for safety. Your handmade cutting board will add charm to your kitchen. Enjoy the process and the final product. It’s a great way to combine creativity and function. Give it a try and see the difference yourself.