Are you ready to enjoy cool, refreshing air in your home without waiting for a professional? Installing a split air conditioner yourself might sound tricky, but with the right steps, you can do it smoothly and confidently.
Imagine beating the heat and saving money at the same time. In this guide, you’ll discover simple, clear instructions that make the whole process easy to follow. Keep reading, and you’ll have your new air conditioner up and running before you know it.
Choosing The Right Air Conditioner
Energy efficiency ratingsshow how much power an air conditioner uses. Higher ratings mean lower electricity bills. Check the SEER (Seasonal Energy Efficiency Ratio)or EER (Energy Efficiency Ratio)numbers. These ratings help pick a model that saves energy.
Some air conditioners have an Energy Star label. This means they meet strict energy-saving rules. Choosing such units helps reduce power use and protect the environment.
| Rating Type | What It Means | Ideal Range |
|---|---|---|
| SEER | Efficiency over a cooling season | 14 and above |
| EER | Efficiency at peak cooling | 9 and above |

Credit: extrordinair.com.au
Gathering Necessary Tools And Materials
Gathering the right toolsis key for a smooth installation. Essential tools include:
- Drillfor making holes
- Screwdrivers(flat and Philips)
- Pipe cutterto trim copper pipes
- Vacuum pumpto remove air
- Levelto ensure proper alignment
- Wrenchesfor tightening bolts
- Measuring tapefor accurate placement
- Electrical testerfor safety checks
Materials needed for installation are just as important. These include:
- Copper pipesfor refrigerant lines
- Insulation sleevesto cover pipes
- Mounting bracketsfor the indoor and outdoor units
- Drain hoseto remove condensation
- Electrical wiresfor connections
- Sealantto close holes and gaps
- Remote controlfor operating the unit
Selecting The Installation Location
Indoor unit placementis key for good cooling. Choose a spot high on the wall. It should be away from direct sunlight and heat sources. Keep it clear of obstacles like furniture. This helps air flow freely around the room. The unit must be close to a power source. Make sure there is enough space for maintenance and filter cleaning.
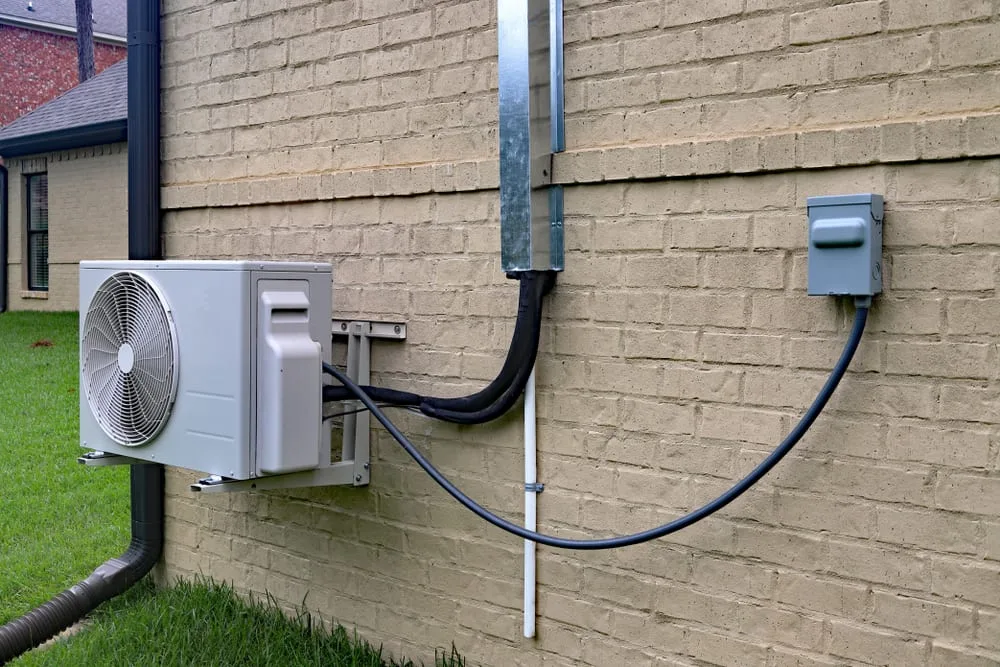
Outdoor unit positionneeds careful thought too. Place it on a flat, stable surface. Avoid dusty or smoky areas. The unit must have good air flow to cool well. Keep it away from places where noise can disturb neighbors. Allow space around it for easy service access. Avoid direct sunlight to protect the unit.

Credit: m.youtube.com
Installing The Indoor Unit
Secure the mounting bracket on a strong wall. Use a level tool to keep it straight. Ensure the bracket is fixed tightly with screws. This holds the indoor unit firmly in place.
Choose a spot for the indoor unit that is high on the wall. Avoid direct sunlight and heat sources. Leave space around the unit for good air flow.
- Keep at least 6 inches above the unit to the ceiling.
- Leave 12 inches of space on the sides.
- Make sure the unit is not near doors or windows that open often.
- Keep the unit away from places where people sit or sleep directly.
Installing The Outdoor Unit
The outdoor unit must be placed in a well-ventilatedarea. Avoid spots with direct sunlight or heavy rain. Choose a location with stable groundto reduce noise and vibration. Keep the unit away from dust and dirt sources.
Secure the unit using a strong metal bracketor a concrete base. Make sure the unit is levelto ensure proper drainage. Use anti-vibration padsto reduce noise. Tighten all bolts firmly to prevent movement.
Connecting The Refrigerant Piping
Use a pipe cutter to trim the copper pipes to the needed length. Avoid squeezing or deforming the pipes. Carefully bend pipes using a pipe bender to keep the shape intact. Sharp bends can damage the pipes and reduce airflow.
Wrap the pipes with foam insulation sleeves to stop heat loss. Cover all exposed sections, especially near joints. Secure the insulation with tape to prevent slipping. Proper insulation keeps the system efficient and lowers energy waste.
Wiring The Electrical Components
Connect the indoor unit wiring carefully to ensure safety. Use a copper wireof the right gauge for power and signal connections. Make sure wires are stripped properly and inserted firmly into the terminal block. Tighten screws securely to avoid loose connections. Check polarity and color coding for correct wiring.
For the outdoor unit, connect the power cable to the circuit breaker. Use a dedicated power supplyto avoid overload. Connect the earth wire for safety against electrical faults. The outdoor unit wiring must be weatherproof and sealed to prevent damage. Confirm all connections are tight before turning on the power.

Credit: www.youtube.com
Vacuuming And Charging The System
Removing air and moisture from the system is very important. Use a vacuum pump to evacuate all airinside the pipes. This helps prevent damage and keeps the system working well. Connect the vacuum pump to the service valve and run it until the pressure is very low. This process can take 15 to 30 minutes.
After evacuation, check for leaks by observing the vacuum gauge. If pressure rises, a leak may be present. Fix leaks before adding refrigerant.
Adding refrigerant must be done carefully. Use the correct type and amount for your system. Connect the refrigerant cylinder to the service valve. Open the valve slowly and let refrigerant flow into the system. Watch the pressure gauge to avoid overcharging. Stop when the pressure reaches the recommended level.
Testing The Air Conditioner
Check the air conditioner for leaksby applying soapy water on joints. Bubbles show where air or refrigerant escapes. Fix leaks immediately to avoid damage.
Ensure the unit runs smoothly by turning it on. Listen for unusual soundslike rattling or buzzing. These may mean loose parts or wiring issues.
Test if the air is cooling properly. The airflow should be steady and cold. Weak or warm air means a problem with the system.
Make sure the remote control works and the settings respond correctly. Check for consistent temperatureover time.
Regular Maintenance Tips
Cleaning filtershelps the air conditioner work well and saves energy. Take out the filters carefully and wash them with water. Let them dry fully before putting them back. Do this every month or two. Dirty filters block air flow and make the AC less cool.
Inspecting componentskeeps the unit safe and lasts longer. Check the indoor and outdoor parts for dust and dirt. Look for any loose wires or parts. Clean the fan blades and coils with a soft brush. Tighten screws if needed. This stops small problems from getting bigger.
Frequently Asked Questions
How Do I Install A Split Air Conditioner Indoors?
First, mount the indoor unit on a sturdy wall bracket. Ensure it is level and at a height for optimal airflow. Connect the refrigerant pipes, drain hose, and electrical cables carefully following the manufacturer’s guide.
What Tools Are Needed To Install A Split Ac?
You need a drill, screwdriver, pipe cutter, wrench, vacuum pump, and level. These tools help mount units, connect pipes, and ensure proper sealing and alignment during installation.
How Far Should The Outdoor Unit Be From The Wall?
Place the outdoor unit at least 10-12 inches away from the wall. This gap ensures proper airflow and efficient heat dissipation, improving the AC’s performance and lifespan.
Can I Install A Split Ac Myself Safely?
Yes, if you have basic DIY skills and follow safety guidelines. However, handling refrigerant and electrical connections often requires a licensed technician to ensure safe, compliant installation.
Conclusion
Installing a split air conditioner can be simple with clear steps. Always follow safety rules and read the manual carefully. Choose the right place for the indoor and outdoor units. Use proper tools and check connections well. Test the system after installation to ensure it works correctly.
Taking time and care helps your air conditioner run smoothly. Enjoy cool air in your home this summer without stress. Good installation saves money and avoids future problems. Easy to do with patience and the right guide.