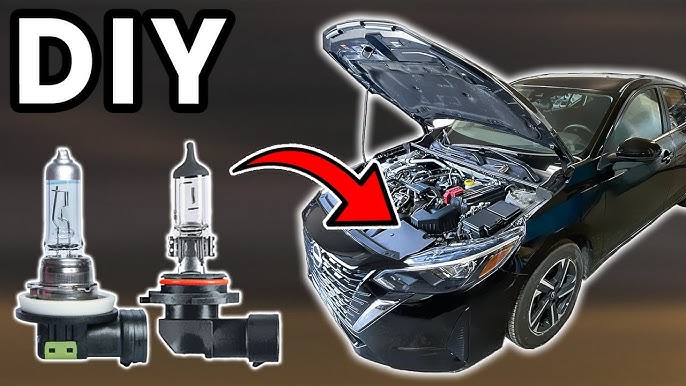
Your car’s headlights are crucial for safe driving, especially at night or in bad weather. When one bulb burns out, it’s more than just annoying—it’s a safety risk and could even lead to a ticket.
But don’t worry, replacing a headlight bulb is easier than you might think. In this guide, you’ll learn simple, step-by-step instructions to get your headlights shining bright again in no time. Keep reading, and you’ll save money, avoid hassle, and stay safe on the road.
Tools And Materials Needed
Replacing a car headlight bulb is a simple task with the right tools. You need some basic items to do the job safely and correctly.
Gathering all tools and materials before starting saves time. It also prevents damage to your car or the new bulb.
Basic Tools
You will need these common tools to access and replace the headlight bulb.
- Screwdrivers (flathead and Phillips)
- Socket wrench set
- Gloves to protect your hands
- Clean cloth or microfiber towel
- Flashlight for better visibility
Materials And Replacement Parts
Select the correct replacement bulb for your vehicle. Check your car manual or existing bulb for type and size.
| Material | Description |
| Replacement Bulb | Match type and wattage of the original bulb |
| Dielectric Grease | Optional, prevents corrosion on electrical contacts |
| Headlight Cleaner | Optional, cleans lens after bulb replacement |
Safety Equipment
Use safety gear to avoid injury or damage to the bulb.
- Gloves to avoid oil from hands touching the bulb
- Safety glasses to protect eyes from debris
- Protective clothing to keep clean
Identifying The Type Of Headlight Bulb
Knowing the type of headlight bulb your car uses is important before replacing it. Different cars need different bulbs. Using the wrong bulb can cause poor lighting or damage.
This guide helps you find and identify the correct headlight bulb type for your vehicle. It covers common bulb types and how to check your car’s bulb.
Check Your Vehicle’s Manual
Your car’s manual is the easiest place to find the bulb type. Look in the lighting or maintenance section. The manual usually lists the exact bulb model and size.
Look At The Old Bulb
Remove the headlight bulb carefully and check for markings. Most bulbs have a code printed on the base or glass. This code tells the bulb type and size.
Common Types Of Headlight Bulbs
- Halogen: Most common, affordable, and easy to replace.
- HID (High-Intensity Discharge): Brighter, uses gas, needs special ballast.
- LED (Light Emitting Diode): Long-lasting, energy efficient, often sealed units.
- Laser: Newer, very bright, found in some luxury cars.
Use Online Tools Or Apps
Many websites and apps let you enter your car’s make and model. They show the correct bulb type for your headlights. This can save time and avoid mistakes.
Compare Bulb Types In A Table
| Bulb Type | Brightness | Energy Use | Average Lifespan |
|---|---|---|---|
| Halogen | Medium | High | 500 to 1,000 hours |
| HID | High | Medium | 2,000 to 3,000 hours |
| LED | High | Low | 15,000 to 30,000 hours |
| Laser | Very High | Low | 20,000+ hours |
Safety Precautions
Replacing a car headlight bulb is simple but requires care. Safety comes first to avoid injury or damage.
Follow these safety tips to protect yourself and your car during the process.
Turn Off The Engine And Lights
Always switch off the car engine and headlights before you start. This prevents electrical shocks and burns.
Waiting a few minutes lets the bulb cool down, reducing the risk of burns.
Wear Gloves And Eye Protection
Wear clean gloves to protect your hands from dirt and heat. Gloves also stop oil from your skin reaching the bulb.
Use safety glasses to shield your eyes from dust and possible glass shards if the bulb breaks.
Handle Bulbs Carefully
Do not touch the glass part of the new bulb with your fingers. Oils can cause the bulb to burn out quickly.
- Hold the bulb by its base only
- Keep bulbs in their packaging until use
- Place used bulbs safely to avoid breakage
Work In A Safe Environment
Park your car on a flat surface and apply the parking brake. This stops the car from moving while you work.
Make sure the area is well-lit and dry to avoid slips or mistakes.
Disconnect The Battery If Needed
Disconnect the car battery if the manual suggests it. This prevents electrical shorts and shocks.
Use a wrench to loosen the battery terminals safely. Reconnect only after you finish replacing the bulb.

Credit: www.youtube.com
Accessing The Headlight Assembly
Replacing a car headlight bulb starts with reaching the headlight assembly. This part holds the bulb and must be accessed carefully.
Knowing how to open the hood and find the headlight housing helps you work safely and quickly.
Opening The Hood
First, find the hood release inside your car. It is usually under the dashboard or near the driver’s seat.
Pull the hood release lever. This will pop the hood open slightly. Next, go to the front of the car.
Look for the safety catch under the hood. Slide or lift the catch to fully open the hood. Use the hood prop rod to keep it open.
Locating The Headlight Housing
The headlight housing is the part that holds the bulb. It sits behind the clear front lens of the headlight.
Look inside the engine bay near the front corners of your car. You will see a round or square cover on the back of the headlight.
- The cover protects the bulb and wiring
- It may twist off or have clips to remove
- Removing it gives access to the bulb socket
Removing The Old Bulb
Replacing a car headlight bulb starts with removing the old one. This process needs care to avoid damage.
Follow simple steps to disconnect and release the bulb safely from the headlight housing.
Disconnecting The Power Connector
First, locate the power connector at the back of the headlight bulb. It supplies electricity to the bulb.
Gently press the tab or clip on the connector and pull it straight back. Avoid pulling on the wires.
- Find the connector attached to the bulb’s base
- Press the release tab or clip
- Pull the connector straight away from the bulb
- Do not yank on the wires to prevent damage
Releasing The Bulb
After disconnecting the power, the bulb must be released from its holder. This step varies by car model.
Most bulbs twist out by turning counterclockwise. Some bulbs use clips or screws to hold them in place.
- Turn the bulb counterclockwise to unlock it
- If clips hold the bulb, gently press or lift them
- Unscrew any fasteners if present
- Pull the bulb straight out once released
Installing The New Bulb
Installing a new headlight bulb is a simple task. It requires care to avoid damage. This guide helps you install the bulb safely and securely.
Follow the steps carefully. This ensures the bulb works well and lasts longer.
Handling The New Bulb Carefully
Always hold the new bulb by its base. Avoid touching the glass part with your fingers. Oils from your skin can shorten the bulb’s life.
- Wear clean gloves or use a cloth to hold the bulb.
- Keep the bulb away from dirt and dust.
- Check the bulb for any damage before installing.
Securing The New Bulb In Place
Place the bulb into the socket carefully. Make sure it fits snugly. A loose bulb can cause poor lighting or damage.
| Action | Details |
| Insert Bulb | Align the bulb base with the socket and push gently. |
| Lock Bulb | Turn or clip the bulb to secure it in place. |
| Reconnect Wiring | Attach the power connector firmly to the bulb. |
| Test | Turn on headlights to check if the bulb works. |
Testing The New Headlight
After replacing a car headlight bulb, testing it ensures it works properly. This step helps confirm safety and visibility.
Testing is quick and simple. It checks brightness, alignment, and bulb stability before driving.
Turn On The Headlights
Start by turning on the car’s headlights. Use the switch inside the vehicle to power the lights.
Check if the new bulb lights up immediately. If it stays off or flickers, the bulb might be loose or faulty.
Check The Brightness
Stand in front of your car and observe the brightness of the new headlight. It should be as bright as the other side.
A dim light means the bulb or wiring may have issues. Replace or fix parts as needed to improve brightness.
Inspect The Light Alignment
Check if the headlight beam points in the correct direction. The beam should aim slightly downward and straight ahead.
Misaligned headlights can blind other drivers or reduce your vision. Adjust the bulb or headlight housing if needed.
Test The High Beams
Switch to high beams to test their function. The new bulb should switch easily between low and high beam modes.
Make sure the high beams are brighter and reach farther than low beams. Both beams must work well for safe driving.
Secure The Bulb And Cover
After testing, ensure the bulb is tightly in place. A loose bulb can cause flickering or damage.
Replace the headlight cover or dust cap securely. This protects the bulb from dirt and moisture.

Credit: www.youtube.com
Troubleshooting Common Issues
Replacing a car headlight bulb is usually simple. Sometimes, problems can appear after installation.
Knowing common issues helps you fix them quickly and safely.
Bulb Does Not Light Up
If the new bulb does not turn on, check the bulb’s connection first. The socket might be loose or dirty.
- Make sure the bulb is firmly in place.
- Clean the socket contacts with a dry cloth.
- Inspect the fuse for the headlight circuit.
- Test the bulb in another socket if possible.
Bulb Burns Out Quickly
When a bulb burns out fast, it may be due to incorrect handling or electrical issues.
Touching the glass part of the bulb with bare hands leaves oils that cause overheating.
Headlight Flickers Or Is Dim
Flickering or dim lights can indicate wiring problems or poor connections.
| Issue | Possible Cause | Solution |
| Flickering light | Loose wiring | Secure all wiring connections |
| Dim light | Dirty bulb or lens | Clean bulb and lens carefully |
| Dim light | Old or weak bulb | Replace with a new bulb |
| Flickering light | Faulty switch or relay | Check and replace switch/relay |
Bulb Socket Is Corroded
Corrosion in the socket stops the bulb from working properly. It can be caused by moisture or dirt.
To clean a corroded socket:
- Disconnect the battery to avoid electric shock.
- Remove the bulb carefully.
- Use a small wire brush or sandpaper to clean corrosion.
- Apply electrical contact cleaner.
- Let it dry fully before reinstalling the bulb.
Headlight Alignment Is Off
After bulb replacement, the headlight beam may point in the wrong direction. This affects visibility and safety.
Check your car manual for instructions to adjust the headlight alignment properly.
Maintenance Tips For Longer Bulb Life
Replacing a car headlight bulb is simple, but keeping it lasting longer takes care. Proper maintenance helps bulbs shine brighter and last more miles.
Here are useful tips to maintain your car’s headlight bulbs. Follow these steps to avoid frequent replacements and stay safe on the road.
Handle Bulbs Carefully
Touching the glass part of a headlight bulb can shorten its life. Oils from your skin create hot spots that burn out the bulb fast.
- Wear clean gloves or use a cloth when installing bulbs.
- Avoid touching the bulb glass directly.
- Keep bulbs in their packaging until ready to install.
Keep Headlight Lenses Clean
Dirty or cloudy lenses reduce light output and force bulbs to work harder. Clean lenses help bulbs last longer and improve visibility.
Use mild soap and water to clean the lenses regularly. Avoid harsh chemicals that can damage the plastic cover.
Check Electrical Connections
Loose or corroded connections cause flickering and early bulb failure. Inspect wiring and connectors often for damage or rust.
| Issue | Effect on Bulb |
| Loose connection | Flickering light |
| Corroded contacts | Reduced power |
| Damaged wiring | Short circuits |
Avoid Excessive Vibration
Strong vibrations from rough roads shake the bulb filament. This weakens the bulb and causes it to break sooner.
- Check your car’s suspension and shocks regularly.
- Drive carefully on rough surfaces to reduce jarring.
- Use high-quality bulbs designed for your vehicle.
Use Proper Bulb Type And Wattage
Installing the wrong bulb type or wattage can cause overheating. This damages the bulb and the headlight housing.
Always check your car’s manual for the correct bulb specifications before buying replacements.

Credit: www.familyhandyman.com
Frequently Asked Questions
How Do I Know When To Replace A Headlight Bulb?
A headlight bulb should be replaced when it dims or burns out. Flickering or inconsistent light also signals replacement. Regular checks help ensure safety and compliance with road laws.
What Tools Are Needed To Replace A Headlight Bulb?
Typically, you need a screwdriver, gloves, and the correct replacement bulb. Some cars may require additional tools like pliers or socket wrenches. Always consult your vehicle’s manual for specific instructions.
Can I Replace A Headlight Bulb Myself Safely?
Yes, replacing a headlight bulb is a simple DIY task. Always wear gloves to avoid skin oils on the bulb. Disconnect the car battery before starting for added safety.
How Do I Choose The Right Replacement Bulb?
Check your vehicle’s manual or existing bulb for the correct type. Bulbs differ by size, wattage, and base type. Using the right bulb ensures proper fit and performance.
Conclusion
Replacing a car headlight bulb is simple with the right steps. You save money and stay safe on the road. Always check your car manual before starting. Take your time and handle parts carefully. A bright headlight helps you see better at night.
Regularly check your lights to avoid surprises. Now, you can fix a bulb without stress. Drive safely and keep your car lights working well.