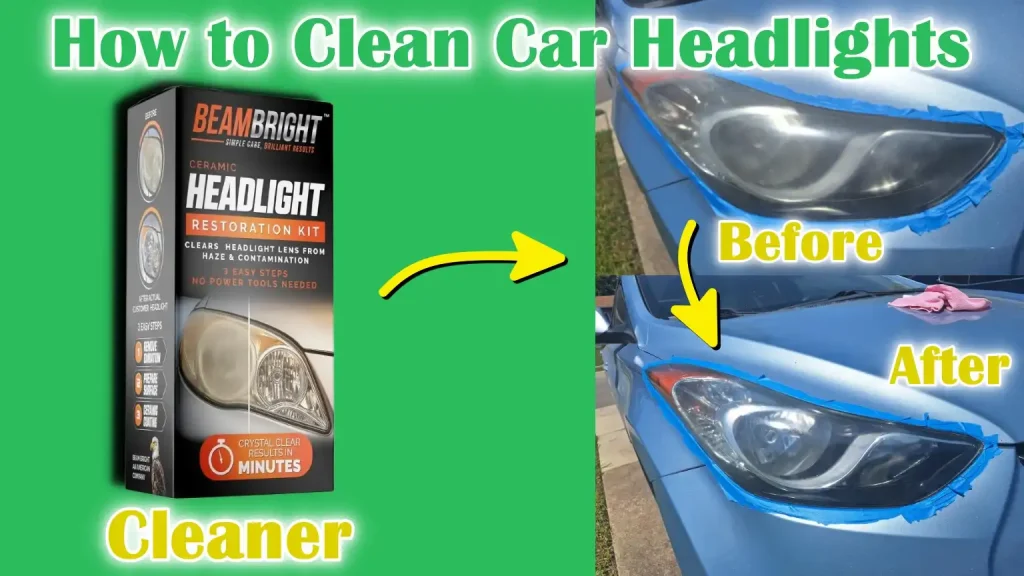
Are your car’s headlights looking dull or cloudy? This can make driving at night harder and even unsafe.
You might think you need to buy new headlight covers, but often, a simple cleaning can bring back their shine. You’ll be surprised how easy it is to restore your headlights to clear, bright condition. Keep reading, and you’ll discover simple steps you can take right now to clean your car headlight covers and improve your visibility on the road.

Credit: www.whocanfixmycar.com
Causes Of Headlight Cloudiness
Car headlight covers often become cloudy over time. This cloudiness reduces the light your headlights give off. It can make driving at night unsafe.
Several factors cause this cloudiness. Understanding these can help you clean and protect your headlights better.
Exposure To Uv Rays
Sunlight contains ultraviolet (UV) rays that damage plastic headlight covers. The rays break down the plastic’s surface. This causes the covers to turn yellow and cloudy over time.
UV damage makes the headlight surface rough. Light scatters instead of shining clearly. This lowers the brightness of your headlights at night.
Road Debris And Dirt
Driving exposes headlights to road debris and dirt. Small stones, dust, and grime hit the covers often. These particles scratch and wear down the plastic surface.
- Small scratches gather dirt and grime
- Sticky dirt blocks light from passing through
- Frequent exposure makes covers look dull
Cleaning regularly helps reduce the effects of debris and dirt. It keeps your headlights clearer for longer.
Weather Effects
| Weather Condition | Effect on Headlight Covers |
| Rain | Water spots and mineral deposits form on the surface |
| Snow and Ice | Freeze-thaw cycles cause cracks and cloudiness |
| Heat | Expands plastic, weakening it over time |
| Cold | Makes plastic brittle and prone to damage |
These weather effects combine to wear down headlight covers. Protecting your car from extreme weather can help keep headlights clear.
Tools And Materials Needed
Cleaning car headlight covers needs the right tools and materials. These help remove dirt and restore clarity.
Using proper items makes the process easier and protects the headlights from damage.
Cleaning Solutions
Choose the right cleaning solution to dissolve grime and oxidation on headlight covers. Mild cleaners work best.
- Car soap mixed with water
- Vinegar and water solution
- Baking soda paste
- Commercial headlight cleaner
Sandpaper And Polishing Pads
Sandpaper and polishing pads help remove scratches and smooth the surface. Different grits are needed for best results.
| Item | Use |
| 400-grit sandpaper | Remove heavy oxidation |
| 800-grit sandpaper | Smooth rough areas |
| 1500-grit sandpaper | Prepare surface for polishing |
| Polishing pad | Apply polish evenly |
Protective Gear
Protective gear keeps you safe during cleaning. It also prevents damage to your skin and eyes.
- Gloves to protect hands from chemicals
- Safety glasses to shield eyes from debris
- Mask to avoid inhaling dust or fumes
Preparing The Headlights
Cleaning car headlight covers starts with good preparation. Proper preparation helps you clean well and avoid damage.
Before cleaning, you need to wash the surface and protect the areas around the headlights.
Washing The Surface
First, rinse the headlights with water to remove loose dirt. Use a soft cloth and mild soap to wash the surface gently.
Cleaning removes dust and grime that can scratch the cover during polishing or sanding.
- Use clean water and mild soap
- Apply with a soft cloth or sponge
- Rinse thoroughly to remove soap
- Dry with a soft towel before next steps
Masking Surrounding Areas
Protect the paint and trim around the headlights by covering them with masking tape. This prevents damage during cleaning.
Apply tape carefully along the edges of the headlight covers. Make sure the tape sticks well and covers all nearby surfaces.
- Use painter’s tape for easy removal
- Cover edges of headlights and nearby paint
- Press tape firmly to avoid gaps
- Remove tape carefully after cleaning
Cleaning With Household Items
Car headlight covers get dirty and cloudy over time. Cleaning them improves visibility and car look.
You can clean headlights using simple items found at home. These are safe and easy to use.
Using Toothpaste
Toothpaste can help remove dirt and fog from headlight covers. It works as a mild abrasive cleaner.
Apply a small amount of toothpaste on a soft cloth. Rub it gently on the headlight in circular motions.
- Use white, non-gel toothpaste for best results
- Rub for about 5 minutes on each headlight
- Rinse with clean water after rubbing
- Dry the headlight with a soft towel
Baking Soda Paste Method
Baking soda is another household item that cleans headlights well. It removes grime without damage.
Make a paste by mixing baking soda with water. The paste should be thick but spreadable.
- Mix 2 tablespoons baking soda with 1 tablespoon water
- Apply paste to headlights using a soft cloth
- Rub in small circles for several minutes
- Rinse off with water and dry the surface
Step-by-step Sanding Process
Cleaning car headlight covers with sanding helps remove yellowing and scratches. It makes headlights clear and bright again.
This process uses sandpaper to smooth the surface. You must follow steps carefully for the best results.
Choosing The Right Grit
Sandpaper grit means how rough or fine it is. Start with a coarse grit to remove damage.
Use finer grits later to smooth the surface and avoid scratches. Pick these grit levels:
- 800 grit for heavy yellowing or damage
- 1200 grit for medium scratches
- 2000 grit for finishing and smoothing
Wet Sanding Technique
Wet sanding uses water to reduce dust and heat. It keeps the headlight surface safe during sanding.
Keep the headlight and sandpaper wet while sanding. Use a spray bottle or a wet cloth.
- Dip sandpaper in water before use
- Spray water often during sanding
- Sand gently in circular motions
- Wipe off dirt and check progress regularly
Polishing For Shine
Cleaning car headlight covers can make your vehicle look new. Polishing helps bring back the shine and clarity of the headlights.
Polished headlights improve visibility at night. Let’s learn how to polish them for maximum shine.
Applying Polish
Start with a clean headlight surface. Use a soft cloth to apply a small amount of polish.
Rub the polish in small circles over the headlight cover. This helps spread the product evenly.
- Ensure the headlight is dry before applying polish
- Use only a small amount of polish to avoid residue
- Apply in a cool, shaded area to prevent drying too fast
Buffing Tips
Buff the headlight covers after applying the polish. Use a clean, dry cloth for the best results.
Buffing removes excess polish and brings out the shine. Move the cloth in circular motions for a smooth finish.
- Use a microfiber cloth for buffing
- Buff in sections for even results
- Check for any missed spots and buff again if needed
Sealing And Protecting Headlights
Cleaning car headlight covers is important for clear vision and safety. After cleaning, sealing and protecting them helps keep the headlights bright. This guide explains how to use UV sealants and maintain your headlights regularly.
Sealing headlights prevents yellowing and damage caused by sunlight and weather. Proper care extends the life of your headlights and improves nighttime driving.
Uv Sealants
UV sealants protect headlight covers from sun damage and oxidation. These sealants form a clear layer that blocks harmful UV rays.
- Choose a high-quality UV sealant made for automotive headlights.
- Apply the sealant on clean, dry headlights for best results.
- Use a microfiber cloth to spread the sealant evenly.
- Allow the sealant to dry fully before driving or washing the car.
- Reapply the sealant every few months for continued protection.
Regular Maintenance Tips
Regular maintenance keeps headlights clear and bright. Small actions can prevent dirt buildup and yellowing.
| Maintenance Task | Frequency | Purpose |
| Clean headlights with mild soap and water | Weekly | Remove surface dirt and grime |
| Inspect for cracks or damage | Monthly | Prevent moisture and dirt entry |
| Apply UV sealant | Every 3-4 months | Protect from sun damage |
| Polish headlights if cloudy | As needed | Restore clarity |

Credit: www.youtube.com
When To Replace Headlight Covers
Headlight covers protect your car’s lights and help you see clearly at night. Over time, these covers can wear out or get damaged. It is important to know when to replace them for safety and better vision.
Cleaning headlight covers can improve their look, but sometimes cleaning is not enough. Knowing the signs of damage and weighing the cost versus repair helps you decide when to get new covers.
Signs Of Damage
Look for cracks, deep scratches, or yellowing on the headlight covers. These damages reduce light output and make driving at night unsafe. Cloudy or foggy covers also block light.
- Visible cracks or chips on the cover
- Yellow or brown discoloration
- Scratches that cannot be removed by cleaning
- Foggy or cloudy appearance
- Moisture or water inside the headlight
Cost Vs. Repair
Repairing headlight covers is often cheaper than replacing them. Light scratches can be polished away. Cleaning and polishing restore some clarity. Severe damage needs new covers.
New headlight covers cost more but last longer. Sometimes, replacing is safer and saves money in the long run. Consider the damage level and your budget before deciding.
| Option | Cost | Effectiveness | When to Choose |
|---|---|---|---|
| Cleaning & Polishing | Low | Good for minor scratches | Light damage or yellowing |
| Repair Kits | Moderate | Fixes small cracks and chips | Small, isolated damage |
| Replacing Covers | High | Restores full clarity and protection | Severe damage or cloudiness |

Credit: www.youtube.com
Frequently Asked Questions
How Often Should I Clean Car Headlight Covers?
Clean your car headlight covers every 3 to 6 months. Frequent cleaning prevents yellowing and maintains brightness. Regular upkeep improves night visibility and car appearance.
What Household Items Clean Headlight Covers Effectively?
Use toothpaste or baking soda with water to clean headlights. These mild abrasives remove grime and oxidation gently. Always rinse thoroughly and dry for best results.
Can Car Headlight Covers Be Restored Without Replacement?
Yes, restoration kits and DIY methods can revive headlight covers. Sanding, polishing, and sealing remove yellow haze and scratches. This saves money and extends cover lifespan.
Is It Safe To Use Harsh Chemicals On Headlights?
Avoid harsh chemicals as they damage plastic covers. Use gentle cleaners designed for automotive use. Harsh agents cause cloudiness and cracks, reducing headlight effectiveness.
Conclusion
Cleaning car headlight covers keeps your lights bright and safe. Use simple household items like toothpaste or baking soda for good results. Regular cleaning stops yellowing and cloudiness from building up. Clear headlights help you see better at night and in bad weather.
Try to clean your headlights every few months for best care. A little effort goes a long way in keeping your car looking nice. Bright headlights also make driving safer for you and others on the road.