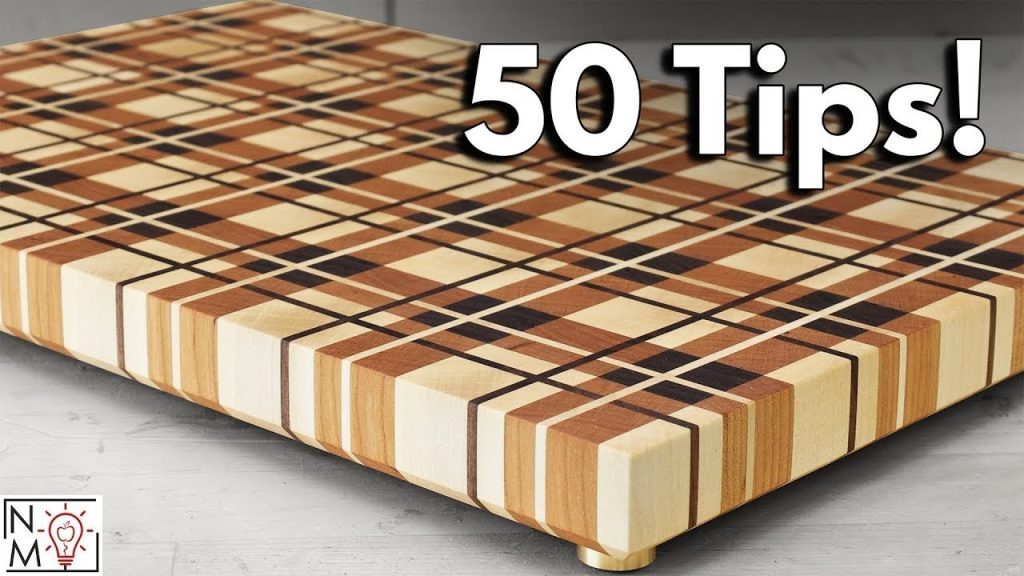
If you love cooking or enjoy working with wood, making your own end grain wood cutting board is a project you’ll want to try. Imagine having a sturdy, beautiful board that not only protects your knives but also lasts for years.
You might think it’s complicated, but with the right steps, you can create a cutting board that looks professional and feels great to use. In this guide, you’ll discover simple techniques and insider tips to make your own end grain cutting board from start to finish.
Ready to impress yourself and anyone who sees your work? Let’s get started!
Choosing The Right Wood
Picking the right wood is key for making a strong cutting board. The wood must be durable and safe for food use.
Different woods offer various looks and qualities. Choose wood that works well for your needs.
Hardwood Options
Hardwoods are the best choice for end grain cutting boards. They resist cuts and last long.
Popular hardwoods include maple, walnut, and cherry. Each has good strength and looks nice.
- Maple: Light color, hard, and common for cutting boards
- Walnut: Dark brown, strong, and adds a rich look
- Cherry: Warm reddish tone, smooth texture, and durable
Wood Grain Patterns
End grain boards show the wood’s grain ends. This creates a unique pattern and makes the board strong.
Look for straight or tight grain. Wide or loose grain can weaken the board and cause cracks.
- Straight grain gives a clean, uniform look
- Tight grain means the wood fibers are close together
- End grain shows small circles or dots on the surface
Wood Safety Considerations
Use woods that are safe for food contact. Avoid woods that may cause allergies or toxins.
Some woods are naturally antibacterial. Always finish your board with food-safe oil for protection.
- Avoid softwoods like pine; they can absorb bacteria
- Check that wood is untreated and free of chemicals
- Use mineral oil or beeswax to seal the board
Gathering Tools And Materials
Creating an end grain wood cutting board requires the right tools and materials. Preparing beforehand ensures a smooth process and high-quality result.
Let’s explore the essential tools and finishing supplies you’ll need to get started.
Essential Tools
Having the right tools is crucial for cutting and assembling your wood pieces accurately.
- Table Saw
- Chop Saw
- Planer
- Belt Sander
- Clamps
- Router
Finishing Supplies
Finish your cutting board with the right supplies to ensure durability and a smooth surface.
| Supply | Purpose |
| Mineral Oil | Seals and protects wood |
| Sandpaper (various grits) | Smoothens surface |
| Wood Conditioner | Prepares wood for oil |
| Lint-free Cloth | Applies oil evenly |
Preparing The Wood Blocks
Preparing the wood blocks is an important part of making an end grain cutting board. Good preparation ensures the board is strong and looks nice.
You will need to cut, plane, and sand the wood blocks before gluing them together. Each step helps create a smooth and even surface.
Cutting To Size
Start by cutting your wood into small blocks. The size depends on your design and how big the cutting board will be.
Use a saw to make clean, straight cuts. Try to keep all blocks the same size for a neat look.
- Measure each block carefully
- Cut blocks with a table saw or miter saw
- Check for even edges after cutting
Planing And Jointing
After cutting, plane and joint the blocks to make flat and smooth faces. This helps the blocks fit tightly together.
Use a planer to remove rough surfaces. Then run the edges through a jointer to make straight edges.
- Plane the face of each block until flat
- Joint the edges for perfect right angles
- Check blocks fit tightly without gaps
Sanding For Smoothness
Sanding smooths the wood blocks even more. It removes small marks and prepares the surface for glue.
Start sanding with medium-grit paper, then use fine-grit paper for a silky finish. Make sure all sides are smooth.
- Use 120-grit sandpaper first
- Follow with 220-grit sandpaper
- Wipe blocks clean after sanding

Credit: www.youtube.com
Gluing The Blocks Together
Gluing the blocks is a key step to make a strong end grain cutting board. You need to join the wood pieces tightly.
Use the right glue and tools to avoid gaps or weak joints. This guide explains how to apply glue, clamp blocks, and let them dry.
Applying Glue
Spread wood glue evenly on all block surfaces that will touch. Use a brush or glue bottle to cover every edge.
Make sure not to use too much glue. Excess glue can squeeze out and make a mess. Too little glue causes weak joints.
- Use high-quality wood glue for best hold
- Apply a thin, even layer on all block faces
- Check that all blocks have glue before joining
Clamping Techniques
Clamp the glued blocks tightly to keep them in place while drying. Use clamps that cover the whole board length.
Place cauls or scrap wood between clamps and blocks. This protects the wood from clamp marks and spreads pressure evenly.
- Use bar clamps or pipe clamps for even pressure
- Place cauls on both sides of the board
- Tighten clamps until blocks do not move
- Check clamps after 10 minutes and adjust if needed
Drying Time
Let the glue dry fully before removing clamps. Drying time depends on glue type and room temperature.
Wait at least 24 hours for strong bonds. Avoid moving or stressing the board during this time.
- Use slow-dry glue for stronger joints
- Keep the board in a warm, dry place
- Check glue instructions for exact drying time
Shaping The Board
Shaping your end grain cutting board gives it a smooth and polished look. This step helps the board fit well in your kitchen and feel comfortable to use. You will trim the edges, round the corners, and create juice grooves.
Each part of shaping makes the board safer and more practical. Take your time and use the right tools for the best results.
Trimming Edges
Start by trimming the edges to make the board perfectly square. Use a table saw or a circular saw for straight cuts. Check that all sides are even and smooth.
Trim edges to remove any rough or uneven parts. This makes the board look clean and helps it sit flat on the counter.
Rounding Corners
Rounding the corners softens the board’s shape. Use a router with a round-over bit or sandpaper to smooth the corners. This prevents sharp edges that can hurt your hands.
- Mark the corners before rounding
- Use a router or sanding block
- Check each corner for smoothness
- Repeat sanding if needed
Creating Juice Grooves
A juice groove catches liquids and keeps the board dry. It also helps when cutting fruits and meats. Use a router with a straight bit to cut a shallow groove near the edges.
| Tool | Groove Depth | Groove Width |
|---|---|---|
| Router with straight bit | 1/8 inch (3 mm) | 1/4 inch (6 mm) |
| Hand chisel (alternative) | 1/8 inch (3 mm) | 1/4 inch (6 mm) |
Sanding And Finishing
Sanding and finishing are key steps to make your end grain cutting board smooth and safe. These steps protect the wood and make it last longer.
Good sanding removes rough spots. Finishing seals the wood and helps keep it clean and healthy for food use.
Progressive Sanding Steps
Start sanding with coarse grit sandpaper to even the surface. Then use finer grits to smooth the board. This process removes scratches and rough patches.
- Begin with 80 grit sandpaper for rough sanding
- Use 120 grit to smooth the surface
- Finish with 220 grit for a silky feel
- Sand all sides, including edges and corners
- Wipe off dust after each sanding stage
Applying Food-safe Oil
Apply food-safe oil to protect the wood from moisture and stains. Oil also brings out the natural grain and color of the wood.
Use a clean cloth to rub the oil into the board. Let it soak in, then wipe off any extra oil to avoid sticky spots.
- Choose mineral oil or beeswax-based oil
- Apply oil generously with a soft cloth
- Let the board absorb oil for at least 20 minutes
- Remove excess oil with a dry cloth
- Repeat oiling once a month or as needed
Maintaining The Board
Keep your cutting board clean and oiled to extend its life. Regular maintenance prevents cracks and keeps the wood smooth.
After washing, dry the board right away. Avoid soaking it in water or putting it in the dishwasher.
- Wash with mild soap and warm water
- Dry immediately with a towel
- Oil the board monthly or after heavy use
- Avoid direct heat or sunlight
- Sand lightly if the surface becomes rough
Tips For Longevity
End grain wood cutting boards are sturdy and beautiful. Taking care of them helps keep their look and use for years.
Simple daily habits can protect your board from damage and wear. Follow easy tips to keep it strong and clean.
Cleaning Practices
Clean your cutting board right after use. Avoid soaking it in water to stop wood from warping. Use mild soap and warm water for washing.
- Wipe the board with a damp cloth after washing
- Dry it standing upright or on a rack
- Use white vinegar or lemon juice to remove odors
- Never put the board in the dishwasher
Avoiding Damage
Protect the wood by avoiding harsh tools and conditions. Sharp knives and heavy chopping can cause cuts and dents.
| Type of Damage | How to Prevent |
| Deep Knife Marks | Use a sharp knife and cut gently |
| Cracks | Keep board dry and avoid extreme heat |
| Stains | Clean spills quickly and dry the surface |
| Warping | Store board in a dry place upright |
Periodic Re-oiling
Re-oiling your board keeps wood moist and strong. Use food-safe mineral oil or beeswax oil for best results.
- Apply a generous amount of oil on the clean surface
- Let the oil soak in for a few hours or overnight
- Wipe off any excess oil with a soft cloth
- Repeat oiling every month or when wood looks dry

Credit: www.youtube.com

Credit: www.reddit.com
Frequently Asked Questions
What Wood Types Are Best For End Grain Cutting Boards?
Hardwoods like maple, walnut, and cherry are ideal for end grain boards. They resist cuts and bacteria well and are durable for long-term use.
How Do You Glue Wood Pieces For End Grain Boards?
Use waterproof wood glue and apply it evenly on all edges. Clamp tightly and let dry for 24 hours for a strong bond.
Why Is End Grain Better For Cutting Boards?
End grain boards show wood fibers vertically, absorbing knife impact. This reduces dulling and extends the board’s lifespan.
How Do You Finish An End Grain Cutting Board?
Apply food-safe mineral oil or beeswax after sanding. This protects the wood and enhances its natural beauty.
Conclusion
Making an end grain wood cutting board takes time and care. Choose good wood pieces and cut them precisely. Glue the pieces tightly and let them dry well. Sand the board smooth for safe use. Finish with oil to protect and shine.
This project brings joy and pride in crafting. Your kitchen will gain a strong, lasting cutting board. Try it step by step and enjoy the process. A handmade board adds warmth and style to cooking. Keep it clean and oiled to stay useful for years.