You’ve just crafted a beautiful wood cutting board, and now it’s time to give it the perfect finish. But how do you make sure your board not only looks great but also lasts for years?
Finishing your wood cutting board the right way protects it from water, stains, and wear while bringing out its natural beauty. In this post, you’ll discover simple, effective techniques that anyone can follow to achieve a smooth, durable finish. Keep reading to unlock the secrets that will turn your cutting board into a kitchen staple you’ll be proud to use and show off.
Choosing The Right Finish
Finishing a wood cutting board protects it and adds beauty. The right finish keeps your board safe for food use.
This guide covers common finishes and their benefits. You will learn which finish suits your needs best.
Food-safe Oils And Waxes
Oils and waxes keep wood hydrated and safe for food contact. They soak into the wood and prevent drying and cracking.
- Mineral oil is a popular, odorless, and tasteless choice.
- Beeswax adds a slight shine and extra protection.
- Walnut oil is natural but may cause allergies.
- Coconut oil can go rancid and is not recommended.
Polyurethane And Varnishes
Polyurethane and varnishes form a hard, protective layer on wood. They resist water and stains but may not be food-safe.
| Type | Food Safe | Durability | Appearance |
| Oil-based Polyurethane | No | High | Glossy or satin |
| Water-based Polyurethane | No | High | Clear, less odor |
| Varnish | Depends on product | Medium to high | Glossy |
| Shellac | Yes if pure | Medium | Glossy |
Natural Vs Synthetic Options
Natural finishes come from plants or animals. Synthetic finishes are man-made chemicals.
Advantages of Natural Finishes:
- Food safe and non-toxic
- Easy to apply and maintain
- Environmentally friendly
Advantages of Synthetic Finishes:
- More durable and water-resistant
- Long-lasting shine and protection
- Less frequent reapplication

Credit: www.amazon.ca
Preparing The Board
Finishing a wood cutting board makes it smooth and long-lasting. Preparing the board is the first step in this process.
Proper preparation will help the finish adhere better and protect the wood. Follow these steps to ensure your board is ready.
Sanding Techniques
Sanding smooths the surface and removes rough spots. Start with coarse sandpaper and finish with fine sandpaper.
Sand in the direction of the wood grain for best results. This avoids scratches and keeps the board looking nice.
- Begin with 80-grit sandpaper
- Progress to 120-grit sandpaper
- Finish with 220-grit sandpaper
Cleaning And Drying
Cleaning removes any dirt or grease from the board. Use a damp cloth to wipe the surface.
Make sure the board is completely dry before applying any finish. This prevents moisture from getting trapped.
- Use a soft, damp cloth
- Let the board air dry completely
- Check for any damp spots
Removing Dust And Debris
After sanding, dust and debris can settle on the board. Use a clean, dry cloth to wipe it off.
Ensure all particles are removed. This helps the finish to adhere smoothly to the surface.
- Wipe with a dry cloth
- Inspect for leftover particles
- Repeat if necessary
Applying Oil Finishes
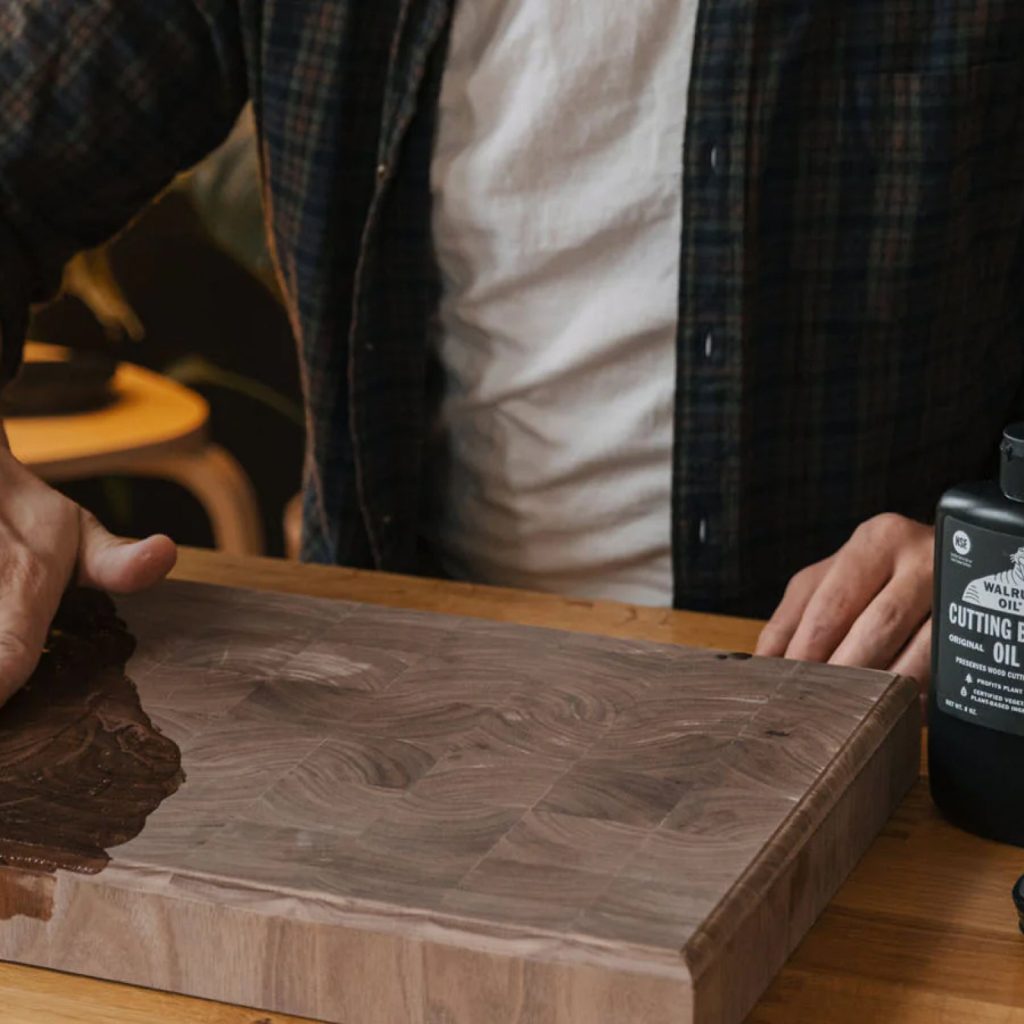
Finishing a wood cutting board with oil helps protect the wood. It also keeps the board looking fresh and clean. Oil soaks into the wood to prevent drying and cracking.
This guide explains how to apply oil finishes to wood cutting boards. It covers the best oils to use, application methods, and how to dry and reapply the oil.
Best Oils For Wood Boards
Not all oils are safe or effective for cutting boards. Choose food-safe oils that soak into wood well. These oils protect without leaving a sticky surface.
- Mineral oil: A clear, odorless oil that is easy to apply and safe for food.
- Walnut oil: A natural oil that hardens slightly and adds a warm color.
- Beeswax and mineral oil mix: Adds extra protection and water resistance.
- Food-grade tung oil: Penetrates deeply and creates a durable finish.
Application Methods
Apply oil evenly to keep the wood healthy. Use a clean cloth or brush for best results. Rub the oil into the wood in the direction of the grain.
- Pour a small amount of oil onto the board.
- Use a soft cloth to spread oil across all surfaces.
- Work oil into the wood with circular or back-and-forth motions.
- Let the oil soak in for 15-20 minutes.
- Wipe off any extra oil with a dry cloth.
Drying And Reapplication
Let the oil dry fully before using the board. Drying time depends on the type of oil and room temperature. Some oils need several hours or overnight to dry.
Reapply oil regularly to keep the board in good shape. How often depends on use. Usually, once a month is enough for regular use.
- Allow oil to dry for at least 8 hours or overnight.
- Check if the board feels dry and not sticky before use.
- Repeat oil application 2-3 times on a new board for best protection.
- Apply oil monthly or when the board looks dry.

Credit: walrusoil.com
Using Wax For Extra Protection
Finishing a wood cutting board with wax adds extra protection. It helps keep the wood safe from moisture and stains.
Wax also makes the surface smooth and easy to clean. It enhances the natural look of the wood.
Types Of Wax
There are different waxes you can use on a cutting board. Each one has its own benefits.
- Beeswax: Natural and safe for food use. It seals the wood well.
- Carnauba wax: Harder than beeswax and gives a shiny finish.
- Mineral oil wax blends: Easy to apply and keep the wood moist.
How To Apply Wax
Before waxing, clean and dry the cutting board completely. This helps the wax stick better.
Use a soft cloth or brush to spread a thin layer of wax. Cover the whole surface evenly.
- Apply wax in small amounts at a time.
- Work in circular motions for full coverage.
- Let the wax sit for about 20 minutes.
Buffing For Shine
After the wax sets, buff the board to bring out a shine. This also smooths the surface.
Use a clean, soft cloth to rub the board in circles. Keep buffing until you see a nice glow.
- Buffing removes excess wax.
- It creates a smooth, shiny finish.
- Regular buffing helps maintain the protection.
Sealing With Polyurethane
Sealing your wood cutting board with polyurethane protects it from water and stains. It also makes the surface smooth and long-lasting. This guide helps you seal your board safely and well.
Using the right type of polyurethane and applying it correctly keeps your cutting board safe for food use. Follow the tips below for best results.
Choosing Food-safe Polyurethane
Not all polyurethane finishes are safe for food contact. Look for products labeled as food-safe or non-toxic once cured. Oil-based and water-based options exist, each with pros and cons.
- Choose polyurethane marked as food-safe or FDA-approved.
- Water-based polyurethanes dry faster and have less odor.
- Oil-based polyurethanes create a harder finish but take longer to dry.
- Avoid products with added solvents or chemicals that are not food safe.
Brushing Techniques
Apply polyurethane with a clean, natural-bristle brush for smooth coverage. Use thin coats and brush with the wood grain to avoid streaks and bubbles.
- Work in a dust-free area.
- Use long, even strokes along the wood grain.
- Do not over-brush or rework the finish.
- Let each coat dry fully before applying the next.
Curing Time And Care
Polyurethane needs time to cure fully. This process can take several days, depending on the product and conditions. Avoid heavy use during this time to keep the finish strong.
| Type | Dry to Touch | Full Cure Time | Care Advice |
| Water-Based Polyurethane | 1-2 hours | 7 days | Keep dry and avoid heavy use until cured. |
| Oil-Based Polyurethane | 6-8 hours | 21 days | Avoid water contact and rough use until fully cured. |

Credit: www.amazon.ca
Maintaining Your Cutting Board
Keeping your wood cutting board in good shape helps it last longer. Proper care stops cracks and stains.
Regular cleaning and finishing keep the board safe for food. Learn how to care for your cutting board below.
Regular Cleaning Tips
Clean your board after every use to stop bacteria growth. Use warm water and mild soap.
Never soak the board in water. Dry it quickly with a clean towel to avoid warping.
- Use a soft sponge or cloth to wash
- Rinse with warm water only
- Dry immediately after cleaning
- Sanitize with vinegar or lemon juice if needed
Reapplying Finish
Oiling your board keeps the wood strong and water-resistant. Apply finish every few weeks or months.
Use food-safe mineral oil or beeswax. Rub it in evenly and let it soak overnight.
- Clean and dry the board before oiling
- Use a soft cloth to apply oil
- Let the oil soak for several hours
- Wipe off extra oil with a clean cloth
Avoiding Damage
Protect your cutting board by not using it for hot pots or knives that cut deep grooves. These can harm the wood.
Store your board standing up or on a flat surface. Avoid direct sunlight or very dry places.
- Do not put board in dishwasher
- Avoid cutting on one spot repeatedly
- Keep away from heat and sunlight
- Store in a dry, cool place
Frequently Asked Questions
How Do You Seal A Wood Cutting Board?
To seal a wood cutting board, use food-safe mineral oil or beeswax. Apply evenly with a cloth. Let it soak overnight. Reapply until the wood no longer absorbs the oil. This protects the board from moisture and prevents cracking.
What Is The Best Finish For Cutting Boards?
Food-safe mineral oil and beeswax are the best finishes. They protect wood without harmful chemicals. Avoid polyurethane or varnishes that can be toxic. Regular application keeps your board safe, durable, and looking great.
How Often Should You Finish A Wood Cutting Board?
Finish your wood cutting board every 1 to 3 months. Frequent use requires more frequent oiling. This maintains moisture balance and prevents drying or cracking. Always apply finish when the wood looks dry or dull.
Can I Use Vegetable Oil On Cutting Boards?
Avoid vegetable oils because they can go rancid. Use mineral oil or specialized cutting board oils instead. These oils are odorless, tasteless, and safe for food contact. They keep your board conditioned without sticky residue.
Conclusion
Finishing a wood cutting board keeps it safe and long-lasting. Choose the right finish to protect the wood from water and stains. Apply it evenly and let it dry well. Regular care helps the board stay smooth and clean. A well-finished board looks good and works better in the kitchen.
Take your time and enjoy the process. Your hands will thank you every time you use it.