A tear in your tent can turn a great camping trip into a stressful situation fast. But don’t worry—fixing that rip is easier than you might think.
Imagine being able to repair your tent quickly, saving your gear and keeping you dry no matter where you are. In this guide, you’ll discover simple, effective ways to patch up your tent so you can get back to enjoying the outdoors with confidence.
Ready to learn how to fix your tent tear like a pro? Let’s dive in.
Identify The Tear
Finding the tear in your tent is the first step to fixing it. You need to see exactly where the fabric is damaged.
Knowing the tear’s size and type helps you choose the right repair method and materials.
Locate The Damage
Look carefully over the whole tent to find the tear. Check all sides, seams, and corners.
Use good light or a flashlight to spot small holes or cuts. Sometimes tears hide under dirt or folds.
- Spread out the tent flat on a clean surface
- Inspect both inside and outside fabric
- Check around zippers and poles
- Look for holes, rips, or worn spots
Assess Tear Size And Type
Measure how big the tear is with a ruler or tape. Small tears need different fixes than large ones.
Check if the tear is a clean cut, a hole, or a fabric pull. This helps decide the best patch or glue to use.
- Small hole: less than 1 inch across
- Medium tear: 1 to 6 inches long
- Large tear: over 6 inches or along seams
- Type: cut, rip, puncture, or abrasion

Credit: www.reddit.com
Gather Repair Materials
Fixing a tent tear requires the right materials. It ensures the repair is durable and effective.
Gathering the correct tools and kits saves time and ensures a smooth repair process.
Essential Tools
Having the right tools is crucial for fixing a tent tear. It makes the process easier and more efficient.
- Scissors for cutting patches
- Needle and thread for stitching
- Sandpaper for smoothing edges
- Brush for applying adhesive
Recommended Repair Kits
Repair kits are handy for fixing tent tears. They contain everything you need in one package.
Look for kits that match your tent material. This ensures a proper fix.
- Fabric repair kits with patches
- Adhesive kits for quick fixes
- Waterproof sealants for rain protection
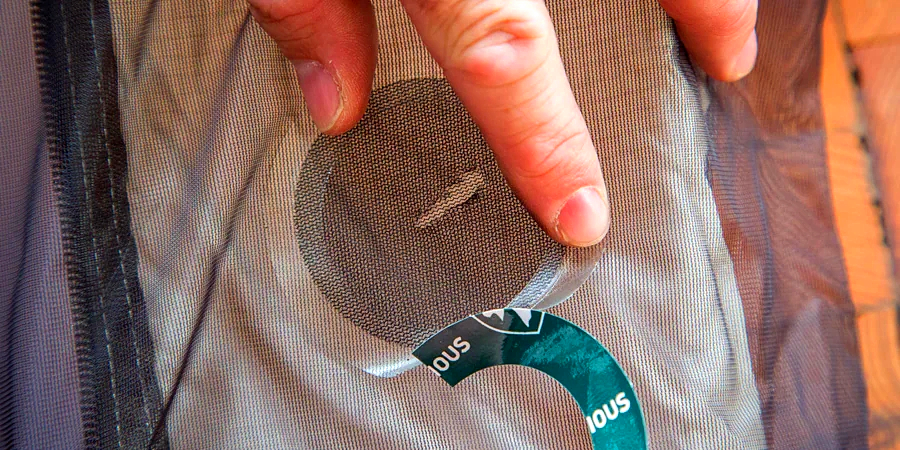
- Mesh repair kits for screen tears
Clean The Area
Fixing a tent tear starts with cleaning the damaged area. Dirt and moisture can stop patches from sticking well.
Carefully clean and dry the fabric before applying any repair materials. This helps the fix last longer.
Remove Dirt And Debris
Clear away all dirt and debris around the tear. Even small bits can weaken the patch bond.
- Brush off loose dirt with a soft brush or cloth
- Use a damp cloth to wipe stubborn spots gently
- Do not use harsh chemicals that can damage the fabric
- Make sure no sand or small stones remain on the surface
Dry The Fabric
Dry the cleaned fabric completely before repairing. Moisture stops adhesives from working well.
| Drying Method | Description |
|---|---|
| Air Dry | Leave the tent in a warm, dry place for several hours |
| Towel Dry | Pat the area gently with a dry towel to remove excess water |
| Sunlight | Use indirect sunlight to speed up drying, avoid direct harsh sun |
Credit: www.pomoly.com
Apply Patch Repair
Fixing a tear in your tent is important to keep it safe and dry. Applying a patch is a simple way to repair small to medium tears.
This guide will help you choose the right patch and apply it correctly to make your tent strong again.
Choosing The Right Patch
Select a patch that matches your tent fabric. Look for waterproof and durable materials.
Patches come in different types: adhesive, sew-on, or iron-on. Choose one that fits your tear size and location.
- Adhesive patches are easy and quick to use.
- Sew-on patches last longer but need sewing skills.
- Iron-on patches require heat to stick well.
- Clear patches work well for small tears.
Step-by-step Patch Application
Clean the torn area well before applying the patch. Dirt can stop the patch from sticking.
Cut the patch so it covers the tear with extra space around it. Round the edges to prevent peeling.
- Dry the area completely.
- Place the patch over the tear.
- Press firmly to stick the patch if adhesive.
- If sewing, stitch around the edges securely.
- For iron-on, follow the heat instructions carefully.
- Let the patch set for several hours before use.
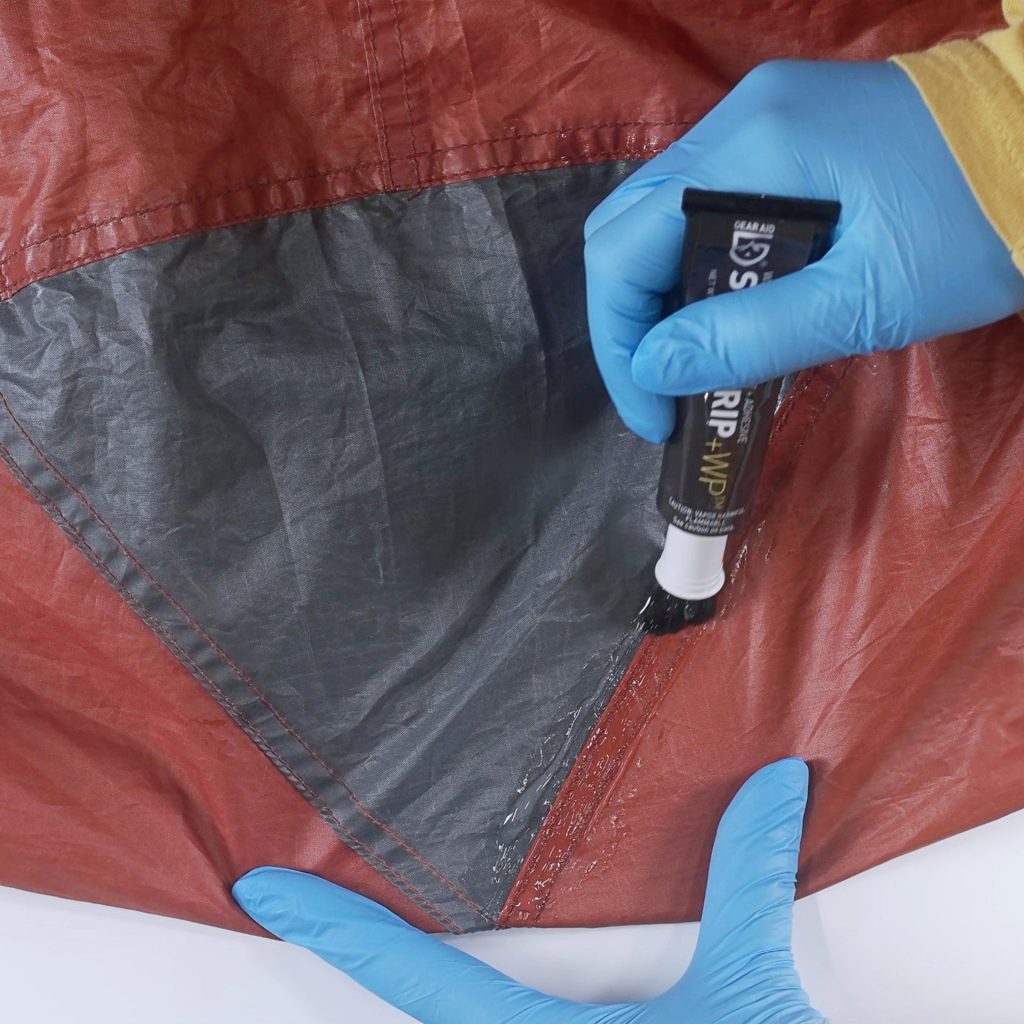
Use Seam Sealer
Fixing a tear in your tent is important to keep it waterproof. Seam sealer helps protect the damaged area from water leaks. It works by sealing the stitches and any small holes.
Using seam sealer is simple, but you must know when and how to apply it. This will make your repair last longer and keep you dry inside your tent.
When To Apply Seam Sealer
Apply seam sealer if your tent has small holes or leaks at the seams. It is best for fixing stitched areas that let water in. Use it after you clean and dry the tent fabric.
- If you notice water seeping through the seams
- When the thread in the seams looks worn or loose
- After patching a small tear near a seam
- Before storing your tent for a long time to keep seams waterproof
Application Tips
| Tip | Details |
| Clean the area | Use mild soap and water, then dry fully |
| Use a small brush | Apply seam sealer evenly on the seams |
| Allow drying time | Wait at least 24 hours before use |
| Apply multiple coats | For extra protection, apply 2 or 3 thin layers |
| Store properly | Keep tent dry and away from direct sun after sealing |
Temporary Fixes On The Trail
Tent tears can happen anytime during camping trips. Fixing them quickly keeps you dry and safe.
This guide covers easy ways to patch a tent tear using items you carry or find on the trail.
Duct Tape Solutions
Duct tape is a strong and sticky fix for small tent tears. It works well on most tent fabrics.
Clean the area around the tear before applying tape. Press the tape firmly to seal the hole.
- Cut a piece larger than the tear
- Round the edges of the tape to prevent peeling
- Apply tape on both sides if possible
- Press hard to remove air bubbles
Improvised Repairs
If you don’t have duct tape, use other gear to cover the tear temporarily. Plastic bags or bandanas work well.
Secure the patch with string, shoelaces, or strips from clothing to keep water out.
- Place a plastic bag over the tear
- Tie it tightly with string or strips
- Use a bandana folded several times for extra cover
- Attach with clips or safety pins if available
Prevent Future Tears
Tent tears can spoil your outdoor trip. Preventing new tears is easier than fixing old ones.
Good care and setup help keep your tent strong and safe for many trips.
Proper Tent Setup
Setting up your tent correctly lowers the risk of tears. Avoid sharp objects and keep tension even on the fabric.
- Clear the ground of rocks, sticks, and debris before pitching.
- Use a footprint or groundsheet to protect the tent floor.
- Do not over-tighten the guy lines; keep fabric taut but flexible.
- Choose a flat spot away from heavy branches or thorny bushes.
- Anchor the tent securely to prevent flapping in the wind.
Regular Maintenance Tips
Check your tent often for small damages. Fixing tiny tears early stops bigger problems.
| Maintenance Task | Frequency | Details |
| Inspect seams and fabric | Before and after trips | Look for holes, worn spots, and loose stitches |
| Clean tent fabric | After every use | Use mild soap and water, avoid harsh chemicals |
| Store tent dry | Always | Prevent mold by storing in a cool, dry place |
| Apply seam sealer | Once a year | Protect seams from water and wear |

Credit: www.amazon.com
Frequently Asked Questions
How Do I Repair A Small Tear In My Tent?
To fix a small tear, clean the area and use a tent repair patch or tape. Apply adhesive evenly, press firmly, and let it dry. This stops water leaks and prevents the tear from growing, ensuring your tent stays durable during your next camping trip.
What Materials Are Best For Tent Tear Repairs?
Use waterproof tent repair tape or patches made from ripstop nylon or polyester. These materials match most tent fabrics and provide strong, flexible, and weather-resistant repairs. Avoid regular duct tape as it may fail in wet or windy conditions.
Can I Sew A Tear In My Tent Safely?
Yes, sewing can fix large tears if done carefully. Use a strong, UV-resistant thread and a fine needle. Stitch tightly along the tear, then reinforce with a waterproof patch and seam sealer for added protection against moisture.
How Long Does A Tent Repair Last?
A proper tent repair can last several camping seasons if done correctly. Using quality materials and sealing the repair well ensures durability. However, frequent exposure to harsh weather may require periodic reapplication or patch replacement.
Conclusion
Fixing a tent tear helps keep you safe and dry outdoors. Small tears do not need costly repairs. Use simple tools like patches and glue to seal holes. Clean the torn area before you start. Let the patch dry completely for best results.
Regularly check your tent for new damage. A well-maintained tent lasts through many trips. Stay prepared and enjoy your camping without worry. Easy repairs save money and time on the trail.