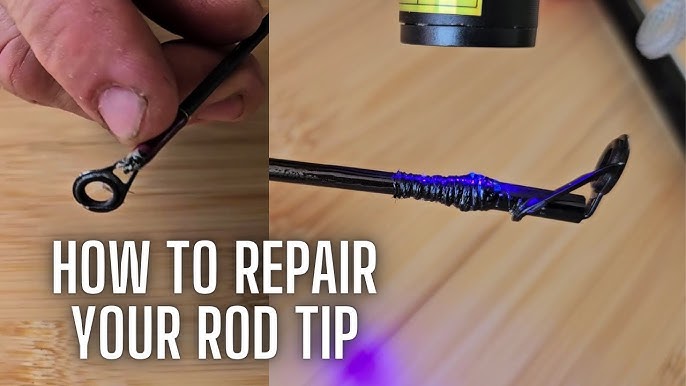
Your fishing rod tip just snapped, and you’re wondering if it’s worth fixing or if you need a whole new rod. The good news?
Repairing your fishing rod tip is easier than you think, and it can save you time and money. Imagine getting back on the water quickly with a rod that feels just like new. In this guide, you’ll discover simple steps to fix your rod tip yourself, even if you’ve never done it before.
Keep reading, and you’ll be casting again sooner than you expect.
Tools And Materials Needed
Fixing a fishing rod tip needs the right tools and materials. Having these ready makes the repair easier and safer.
Below are the main items to gather before you start your repair work on the fishing rod tip.
Essential Repair Tools
You need certain tools to handle the delicate parts of the fishing rod tip. These tools help you remove the old tip and attach the new one firmly.
- Small needle-nose pliers
- Fine sandpaper or emery cloth
- Heat source like a lighter or heat gun
- Precision knife or blade
- Ruler or measuring tape
Choosing The Right Replacement Tip
Picking a replacement tip that fits your rod is crucial. It ensures the rod works well and lasts long after the fix.
| Tip Type | Description | When to Use |
| Spinning Tip | Thin and flexible, for spinning rods | For light to medium fishing rods |
| Baitcasting Tip | Sturdy and thick, for baitcasting rods | For heavy-duty fishing |
| Fly Rod Tip | Very light and delicate | Used on fly fishing rods |
Additional Supplies For A Smooth Fix
Besides tools and the replacement tip, some extra supplies help make the repair neat and lasting. These items protect and secure the tip.
- Rod tip glue or epoxy
- Thread for wrapping the tip
- Clear nail polish or rod finish
- Cotton swabs for cleaning
- Masking tape to hold parts
Assessing The Damage
Before fixing a fishing rod tip, check the damage carefully. This helps you decide the right repair method.
Look closely at the tip and understand what kind of problem you face. This guide helps you assess the damage.
Identifying Common Tip Issues
Fishing rod tips can have several common problems. Knowing these helps you spot what needs fixing.
- Broken or cracked tip top guide
- Bent or twisted tip section
- Missing or loose tip guide ring
- Frayed or damaged wrapping near the tip
- Loose or cracked ferrule at the tip joint
Determining Repair Or Replacement
Decide if the tip needs repair or full replacement. Some damages are easy to fix, others need new parts.
| Damage Type | Repair Needed | Replacement Recommended |
| Small crack on tip guide | Yes | No |
| Broken tip top guide ring | Sometimes | Yes |
| Bent rod tip | Yes, if minor | Yes, if severe |
| Loose wrapping near tip | Yes | No |
| Severe crack on tip section | No | Yes |
Removing The Broken Tip
Fixing a fishing rod tip starts with removing the broken part. You must do this carefully to avoid more damage.
This guide explains how to soften the old epoxy and safely detach the damaged tip from your rod.
Softening The Old Epoxy
Epoxy glue holds the tip tightly in place. To remove it, you need to soften the epoxy first.
Use a heat source like a hairdryer or heat gun. Warm the epoxy gently until it becomes soft.
- Set heat device to medium or low
- Move heat slowly around the tip area
- Keep heating for 3 to 5 minutes
- Do not overheat to avoid rod damage
Safely Detaching The Damaged Tip
After softening the epoxy, carefully pull the broken tip off the rod. Use steady, gentle force.
If the tip does not come off easily, apply more heat. Avoid using tools that might scratch or break the rod.
- Hold the rod firmly
- Twist the broken tip gently
- Use pliers with padding if needed
- Do not pull too hard to prevent damage

Credit: www.reddit.com
Preparing The Rod For Repair
Repairing a fishing rod tip is a task many anglers face. It is important to prepare the rod properly. This ensures a successful repair and extends the rod’s life.
Before starting the repair, focus on cleaning and sanding the rod. These steps help the new tip adhere better.
Cleaning The Rod End
Cleaning the rod end removes dirt and debris. This is crucial for a strong bond. Follow these steps for effective cleaning:
- Use a soft cloth to wipe the rod end.
- Apply mild soapy water for stubborn dirt.
- Rinse with clean water and dry thoroughly.
Sanding For Better Adhesion
Sanding the rod end creates a rough surface. This improves adhesion for the new tip. Use fine-grit sandpaper for this process.
Important Note: Always sand in one direction to avoid damaging the rod.
Once sanding is complete, clean the area again. This removes dust and prepares the rod for the next steps in the repair process.
Attaching The New Tip
Fixing a broken fishing rod tip needs care and patience. You must attach the new tip firmly to keep your rod working well.
Follow simple steps to attach the new tip correctly. This will help your rod stay strong and last longer.
Applying Epoxy Correctly
Use epoxy glue to hold the new tip in place. Apply it evenly inside the tip and on the rod end.
Too much epoxy can make a mess. Too little may not hold the tip well. Use just the right amount.
- Mix epoxy as per instructions.
- Use a small brush to spread epoxy inside the tip.
- Coat the rod end lightly with epoxy.
- Do not let epoxy drip or pool.
- Work quickly but carefully before epoxy sets.
Aligning The Tip Precisely
Align the new tip so it matches the rod’s line guides. This keeps your fishing line running smooth and straight.
Hold the tip in place and check the angle before the epoxy hardens. Make small adjustments to get it right.
- Slide the new tip onto the rod.
- Look along the rod to see if guides line up.
- Turn the tip slightly to match the guides.
- Hold steady until epoxy starts to set.

Credit: anglersresource.net
Finishing Touches
Repairing a fishing rod tip needs care at the end. Finishing touches help make your fix last longer and look neat.
Two key parts of finishing are removing extra epoxy and letting the repair dry well. Each step matters for a strong rod tip.
Removing Excess Epoxy
After applying epoxy to fix the tip, extra epoxy can cause lumps or rough spots. Removing it makes the rod smooth and balanced.
- Use a small piece of paper towel to gently wipe the wet epoxy.
- Be careful not to move the tip or weaken the repair.
- For hardened epoxy, lightly sand the area with fine sandpaper.
- Clean the surface with a soft cloth to remove dust.
Allowing Proper Drying Time
Drying time is key for strong epoxy bonds. Rushing this can weaken the repair or cause the tip to break again.
| Condition | Recommended Drying Time |
| Room Temperature (70°F / 21°C) | 24 hours |
| Cool or Humid Areas | 48 hours |
| Warm and Dry Areas | 12 to 18 hours |
Keep the rod tip steady and avoid touching it during drying. This helps the epoxy cure properly and keeps the tip aligned.
Testing The Repair
After fixing your fishing rod tip, it is important to test the repair. This helps make sure the rod works well again. Testing shows if the repair is strong and flexible.
Take time to carefully check your repair. This will help you avoid breaking the rod tip again while fishing.
Checking Strength And Flexibility
First, gently bend the rod tip to test its strength. The tip should bend without cracking or feeling weak. This means the repair is holding well.
Next, check the flexibility by moving the tip back and forth slowly. It should return to its original shape smoothly. This shows the repair allows natural movement.
- Use light pressure to avoid new damage
- Look for cracks or soft spots
- Make sure the tip is not stiff or stuck
Tips For Preventing Future Damage
Prevent future damage by handling your rod tip carefully. Avoid bending it too far or dropping it. Store the rod in a safe place when not in use.
Regularly check the rod tip for small cracks or wear. Fix minor problems early to stop bigger breaks later.
- Use a rod cover during transport
- Keep rod away from sharp objects
- Clean and dry the rod after each use
- Avoid high pressure on the tip

Credit: www.youtube.com
Frequently Asked Questions
How Can I Fix A Broken Fishing Rod Tip?
To fix a broken fishing rod tip, clean the area first. Use epoxy glue to attach a replacement tip guide. Let it dry completely before use to ensure durability and proper function.
What Materials Do I Need To Repair Rod Tips?
You need epoxy glue, replacement tip guides, sandpaper, and a small brush. These materials ensure a strong bond and smooth finish for the repair.
How Long Does Fishing Rod Tip Repair Take?
Typically, repairing a fishing rod tip takes about 30 minutes. Drying time for epoxy glue may add several hours for full strength.
Can I Repair Fishing Rod Tips At Home?
Yes, you can repair fishing rod tips at home with simple tools and materials. Follow step-by-step instructions for a successful DIY repair.
Conclusion
Fixing a fishing rod tip can save you money and time. Small damages do not mean you must buy a new rod. Follow the steps carefully to make your rod work well again. Take your time and use the right tools for best results.
A repaired tip helps you enjoy fishing longer and catch more fish. Keep your rod in good shape to avoid future problems. Simple repairs keep your gear ready for every fishing trip. Try it yourself and see how easy it can be.