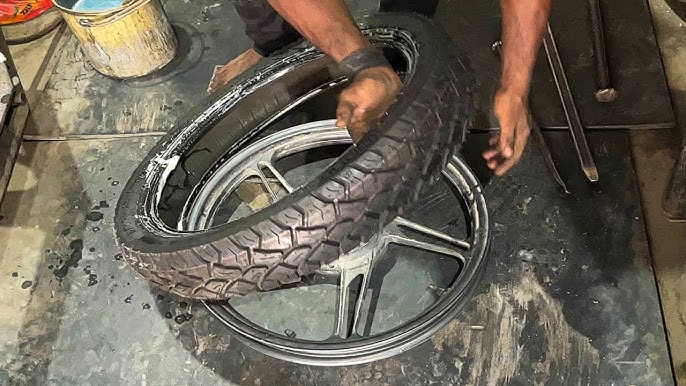
Are you noticing your motorcycle tire wearing out or feeling less stable on the road? Replacing a motorcycle tire might seem tricky, but with the right steps, you can do it yourself and save time and money.
In this guide, you’ll learn exactly how to replace your motorcycle tire safely and efficiently. By the end, you’ll feel confident tackling this task on your own, keeping your ride smooth and secure. Ready to get started? Let’s dive in.

Credit: www.lowbrowcustoms.com
Tools And Materials Needed
Replacing a motorcycle tire is a task you can do at home. You need the right tools and materials. This guide helps you prepare for the job.
Gathering everything before you start saves time. It also makes the process safer and easier.
Essential Tools
You need special tools to remove and install motorcycle tires. These tools help protect your bike and yourself.
- Tire irons or levers to pry the tire off the rim
- Bead breaker to loosen the tire bead
- Air compressor or tire pump for inflation
- Valve core remover to deflate the tire
- Balancing stand or weights for proper tire balance
- Wrenches or sockets to remove the wheel
- Lubricant or soapy water to ease tire removal and installation
Choosing The Right Tire
Choose a tire that fits your motorcycle’s size and style. Check the owner’s manual for the correct size and type.
Picking the right tire keeps your bike safe and improves performance. Different tires work for different road conditions.
- Match the tire size to your wheel
- Select the tread type for your usual roads
- Consider tire brand and quality
- Check the tire’s speed and load ratings
Safety Gear
Wear safety gear to protect yourself during the tire change. This task can cause injuries if you are not careful.
Good safety gear includes gloves, eye protection, and sturdy clothing. These items keep you safe from sharp tools and flying debris.
- Protective gloves to prevent cuts and bruises
- Safety glasses to shield your eyes
- Long sleeves and pants to protect your skin
- Closed-toe shoes for foot safety

Credit: www.youtube.com
Preparing The Motorcycle
Before replacing a motorcycle tire, prepare the bike carefully. Proper preparation keeps you safe and makes the job easier.
This guide covers how to secure the bike, remove the wheel, and deflate the tire safely.
Securing The Bike
Make sure the motorcycle is stable before you start. Use a stand or blocks to stop it from moving or tipping.
- Park on a flat, firm surface.
- Use a center stand or paddock stand if available.
- Place wheel chocks or blocks around the tires.
- Engage the parking brake or put the bike in gear.
Removing The Wheel
Take off any parts blocking the wheel. Loosen the axle nuts carefully, then lift the wheel out.
| Tool | Purpose |
|---|---|
| Wrench or socket set | Loosen and remove axle nuts |
| Screwdriver | Remove brake caliper or guards |
| Rubber mallet | Gently tap axle if stuck |
Deflating The Tire
Before removing the tire, let the air out fully. This makes the tire easier to work with and safer to handle.
To deflate the tire:
- Locate the valve stem on the tire.
- Press down on the valve core using a small tool or valve cap.
- Allow all air to escape until no hissing sound remains.
- Check the tire feels soft before proceeding.
Removing The Old Tire
Replacing a motorcycle tire starts with removing the old one. You must do this carefully to avoid damage.
Follow these steps to remove the tire safely from the rim. Each step is important for a smooth process.
Breaking The Bead
The bead is where the tire seals against the rim. Breaking it means loosening this seal.
Use a bead breaker tool or a heavy object to press down around the tire edge. Work slowly around the rim.
- Place the wheel on a flat surface.
- Press the bead breaker tool against the tire sidewall near the rim.
- Move the tool around the tire to break the seal.
- Be careful not to damage the rim or tire.
Using Tire Levers
Tire levers help lift the tire off the rim. They make the job easier and safer.
Insert the levers under the tire bead and gently pry it up. Use two or more levers to work around the rim.
- Start at a point opposite the valve stem.
- Insert the first lever under the tire bead.
- Hook the second lever a few inches away and pry the tire upward.
- Move levers around the rim until the bead loosens.
Taking Off The Tire
After loosening the bead with levers, you can remove the tire from the rim.
Pull the tire off by hand or with the help of levers. Be patient to avoid damage.
- Push one side of the tire off the rim.
- Work around the rim to free the tire completely.
- Remove the inner tube if your tire has one.
- Inspect the rim for any damage before installing a new tire.
Installing The New Tire
Installing a new motorcycle tire requires care and the right steps. This guide helps you place the tire on the rim safely.
Follow each part closely to ensure the tire fits well and performs safely on the road.
Lubricating The Bead
Lubricate the tire bead before fitting it on the rim. This helps the tire slide on easily and prevents damage.
- Use a tire lubricant or soapy water.
- Apply evenly around the tire bead.
- Do not use oil or grease as they can damage the tire.
Fitting The Tire Onto The Rim
Place the tire on the rim carefully to avoid pinching or breaking the bead.
| Tip | Reason |
|---|---|
| Start with the side opposite the valve | Allows easier alignment of the tire |
| Push the bead over the rim edge | Prevents damage to the tire and rim |
| Work around the rim evenly | Ensures the tire seats properly |
| Avoid using sharp tools | Protects the tire from cuts or punctures |
Seating The Bead
After fitting, seat the bead by inflating the tire carefully. This helps the tire lock in place on the rim.
- Check tire and rim alignment before inflating.
- Inflate the tire slowly to seat the bead.
- Listen for popping sounds as the bead sets.
- Stop inflating when the bead is fully seated.
- Check tire pressure with a gauge and adjust as needed.
Inflating And Balancing
Replacing a motorcycle tire is not complete without proper inflation and balancing. These steps ensure safety and smooth rides. Proper tire care also extends tire life and improves performance.
This guide covers how to inflate and balance your motorcycle tire correctly. It also explains how to check for leaks after installation.
Proper Inflation Techniques
Use a reliable tire pressure gauge to check the tire pressure. Inflate the tire to the pressure recommended by the motorcycle manufacturer. Do not overinflate or underinflate the tire.
Inflate the tire slowly and evenly. Check pressure frequently during inflation. Avoid inflating the tire when it is hot from riding. Let it cool down first.
- Use a good quality air compressor or pump
- Check tire pressure before and after inflating
- Follow the motorcycle’s manual for pressure values
- Inflate tire at room temperature for accuracy
Balancing The Wheel
Balancing the tire prevents vibrations while riding. It also reduces wear on the tire and suspension parts. Use a wheel balancer to find heavy spots on the tire.
Attach small wheel weights to the rim opposite the heavy spot. Spin the wheel again to check if it is balanced. Repeat until the wheel spins smoothly and evenly.
- Use a static or dynamic wheel balancer
- Place wheel weights carefully on the rim
- Spin the wheel gently during balancing
- Remove and adjust weights if needed
Checking For Leaks
After inflating and balancing, check the tire for air leaks. Use soapy water on the tire bead and valve area. Look for bubbles that show escaping air.
Fix leaks by reseating the tire or tightening the valve core. If leaks continue, replace the damaged part or consult a professional.
- Apply soapy water around tire edges and valve
- Watch for bubbles to spot leaks
- Tighten or replace valve core if needed
- Reseat tire bead to stop leaks
Reinstalling The Wheel
After changing the motorcycle tire, you need to put the wheel back on. This step is important for safe riding. Taking your time will help the wheel fit correctly.
Follow these steps carefully to ensure the wheel is installed properly. This will keep your bike balanced and ready to ride.
Aligning The Wheel
Start by placing the wheel between the forks or swingarm. Make sure the axle fits into the slots properly. The wheel should be straight and centered.
Check the chain or belt alignment if your motorcycle has one. A misaligned wheel can cause poor handling and tire wear.
- Slide the wheel carefully into place
- Ensure axle holes line up exactly
- Center the wheel between forks or swingarm
- Check chain or belt alignment
Tightening Bolts
Once the wheel is aligned, insert the axle and start tightening the bolts. Use a torque wrench to get the correct tightness. Loose bolts can be dangerous.
Follow the torque specifications in your motorcycle manual. Tighten bolts evenly to avoid stress on the wheel and forks.
- Insert axle fully into place
- Hand-tighten bolts first
- Use a torque wrench for final tightening
- Tighten bolts evenly and to spec
Final Safety Checks
After tightening, spin the wheel to check for smooth movement. Listen for any strange noises. The wheel should not wobble or rub.
Check brake function and chain tension again. Make sure everything feels secure before riding.
- Spin the wheel to check smoothness
- Look for wobbling or rubbing
- Test brakes for proper function
- Recheck chain or belt tension
- Confirm all bolts are tight
Maintenance Tips
Keeping your motorcycle tires in good shape is important for safety and ride quality. Regular care helps you avoid problems on the road.
These tips will help you maintain your tires and know when to replace them.
Tire Pressure Monitoring
Check your tire pressure before every ride. Proper pressure keeps your tires lasting longer and improves handling.
Use a reliable gauge to measure the pressure. Inflate or deflate tires to match the recommended levels found in your owner’s manual.
- Low pressure causes poor grip and faster wear
- High pressure can reduce comfort and traction
- Check pressure when tires are cold for accuracy
Regular Inspections
Look at your tires often to spot damage early. Check for cuts, cracks, or objects stuck in the tread.
Inspect the tread depth. Tires with worn tread do not grip the road well, especially on wet surfaces.
- Examine sidewalls for bulges or cracks
- Remove stones or debris from tread grooves
- Listen for unusual vibrations when riding
When To Replace Tires
Replace tires if the tread is too low. Most tires have wear indicators to show this point.
Change tires if you see deep cuts, cracks, or sidewall damage. Old tires can dry out and lose strength.
- Tread depth below 1/32 inch needs replacement
- Visible cords or fabric means unsafe tires
- Replace tires after 5 to 6 years even if unused

Credit: www.dirtrider.com
Frequently Asked Questions
How Often Should I Replace A Motorcycle Tire?
Replace motorcycle tires every 5,000 to 15,000 miles. Check for wear, cracks, or uneven tread regularly. Replace immediately if you notice damage or poor traction. Proper tire maintenance ensures safety and optimal performance on the road.
What Tools Are Needed To Replace A Motorcycle Tire?
You need tire irons, valve core remover, bead breaker, rim protectors, and an air compressor. Also, wear gloves and use lubricant for easier tire removal. Having the right tools makes the replacement process safer and smoother.
Can I Replace A Motorcycle Tire Myself?
Yes, with proper tools and knowledge, you can replace it at home. Follow safety steps carefully and work in a clean, flat area. However, if unsure, consider professional help to avoid damage or injury.
How Do I Check Tire Pressure After Replacement?
Use a reliable tire pressure gauge to check pressure. Inflate tires to manufacturer’s recommended PSI. Check pressure when tires are cold for accurate readings. Proper tire pressure improves handling and tire lifespan.
Conclusion
Replacing a motorcycle tire is easier than you think. Follow the steps carefully and take your time. Proper tools make the job simpler and safer. Always check tire pressure after installation. Regular maintenance keeps your bike in good shape. Safe riding begins with a reliable tire.
Practice these skills to save money and time. Share these tips with fellow riders. Enjoy the freedom of riding with confidence. Stay safe on the road, and happy riding!