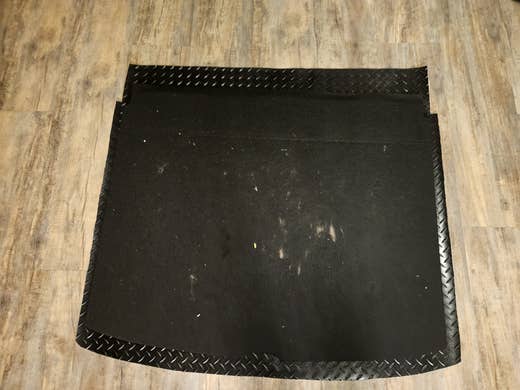
Are you tired of dirty, worn-out car floor mats that ruin the look of your vehicle’s interior? What if you could create your own custom mats that fit perfectly and reflect your style?
Making your own car floor mats is easier than you think—and it saves you money. In this guide, you’ll discover simple steps to craft durable, personalized mats that protect your car and impress anyone who steps inside. Ready to transform your ride from the ground up?
Let’s dive in and make mats you’ll love.
Materials Needed
Making car floor mats needs specific materials. These materials keep the mats strong and easy to clean.
Choosing the right materials helps the mats last longer. It also makes them fit your car well.
Choosing The Right Fabric
Pick a fabric that can handle dirt and water. The fabric should be thick to protect your car floor.
Look for fabrics that are easy to clean and dry fast. Some fabrics also resist stains and wear.
- Heavy-duty carpet fabric
- Rubber or vinyl for waterproofing
- Neoprene for durability and water resistance
- Polyester blends that dry quickly
Essential Tools
You need some basic tools to cut and shape the mats. These tools help you work safely and precisely.
Having the right tools makes the job easier. You can create mats that fit well and look neat.
- Sharp fabric scissors or rotary cutter
- Measuring tape or ruler
- Chalk or fabric marker
- Heavy-duty sewing machine or strong needle
- Straight pins or clips
- Utility knife for trimming edges
Additional Supplies
Some extra supplies improve the mats’ fit and durability. These supplies also make the mats safer.
Adding a non-slip backing keeps the mats in place. Strong thread holds all parts together firmly.
- Non-slip rubber backing or grip pad
- Heavy-duty thread, such as nylon or polyester
- Adhesive spray for bonding layers
- Edge binding tape for a clean finish
- Templates or patterns for correct shapes

Credit: www.amazon.ca
Measuring Your Car Floor
Measuring your car floor is the first step to making custom floor mats. It helps you get the right size and shape.
Accurate measurements make sure the mats fit well and protect your car’s floor fully.
Taking Accurate Dimensions
Start by cleaning the car floor to see all edges clearly. Use a tape measure for exact lengths and widths.
Measure from the front edge near the pedals to the back edge under the seat. Note the width at the widest points.
- Measure length from front to back
- Measure width at widest spots
- Check for curves or unusual shapes
- Write down all measurements carefully
Marking The Template
Use the measurements to draw a template on cardboard or thick paper. This will guide cutting your mat material.
Mark the edges and any curves clearly. Cut the template and place it on the car floor to check the fit.
- Draw the shape on cardboard
- Mark all edges and curves
- Cut out the template carefully
- Place it in your car to check size
Cutting The Fabric
Cutting the fabric is a key step in making car floor mats. This process shapes the mat to fit your vehicle perfectly.
Using the right tools and methods helps create clean, accurate cuts. This ensures the mats look good and stay in place.
Using The Template
Start by placing your template on the fabric. Secure it with pins or weights to prevent movement.
Trace around the template using tailor’s chalk or a fabric marker. Make sure lines are clear but easy to remove later.
- Use a template made from cardboard or plastic for durability.
- Check that the template matches your car’s floor shape before tracing.
- Mark any cutouts or extra details needed for pedals or seat mounts.
Tips For Precision
Cutting fabric precisely improves the fit and finish of your floor mats. Use sharp scissors or a rotary cutter for smooth edges.
| Tip | Reason |
| Cut slowly and steadily | Prevents jagged edges |
| Keep fabric flat | Avoids distortion in shape |
| Follow marked lines exactly | Ensures proper fit |
| Use a cutting mat under fabric | Protects surfaces and tools |

Credit: www.amazon.in
Sewing And Assembly
Making car floor mats involves sewing different layers of material together. This process keeps the mat strong and durable.
Assembly includes putting all parts in place and adding features that improve the mat’s performance.
Stitching The Layers
Start by placing the fabric, foam, and backing layers on top of each other. Use pins to hold them steady.
Sew around the edges with a strong thread. Use a straight stitch for a clean look. Make sure stitches are even and tight.
- Use heavy-duty thread for durability
- Sew slowly to avoid mistakes
- Check for loose threads and trim them
Adding Reinforcements
Reinforcements help the mat last longer in high-wear areas. Add extra stitches or patches where feet rest the most.
Use thick fabric or rubber pieces for these parts. Attach them securely with strong stitching or adhesive.
- Focus on heel and toe areas
- Double stitch reinforced parts
- Use materials that resist wear and tear
Customizing Your Mats
Customizing your car floor mats lets you create a unique look. It also improves safety and comfort while driving.
You can add special features to your mats. These features help keep the mats in place and look good.
Adding Non-slip Backing
Non-slip backing stops your mats from moving around. It keeps the mats steady on the car floor.
You can use materials like rubber or foam for backing. These materials grip the floor and prevent slipping.
- Rubber backing provides strong grip on most surfaces
- Foam backing adds extra cushion and prevents sliding
- Check that backing covers the full mat for best hold
- Apply backing with strong glue or heat for durability
Decorative Elements
Decorative elements make your mats look nice. You can add colors, patterns, or logos to match your style.
Use fabric paint, embroidery, or patches for decoration. These options add personality and make your mats stand out.
- Fabric paint lets you create custom designs easily
- Embroidery adds texture and a professional look
- Iron-on patches can show logos or fun shapes
- Choose waterproof materials to keep mats clean
Maintaining Your Diy Mats
DIY car floor mats need regular care to keep them looking good. Proper maintenance helps your mats last longer and stay clean.
Simple cleaning and care routines can protect your mats from damage and wear. This guide shares easy tips for maintenance.
Cleaning Tips
Clean your mats regularly to remove dirt and stains. Use mild soap and water to avoid damaging the material.
Dry mats completely before placing them back in the car. Wet mats can cause mold and bad smells.
- Shake out loose dirt outdoors
- Use a soft brush to scrub gently
- Rinse mats with clean water
- Air dry mats in sunlight
Extending Durability
Protect your mats by avoiding harsh chemicals and rough surfaces. These can cause tears or fading.
Place your mats correctly to prevent slipping and wear. Check them often and repair small damage quickly.
- Use fabric protectors designed for mats
- Avoid exposure to direct sunlight for long times
- Keep mats flat and secure in place
- Fix small holes or loose threads early

Credit: www.youtube.com
Frequently Asked Questions
What Materials Are Best For Making Car Floor Mats?
The best materials for car floor mats are rubber, carpet, and vinyl. Rubber offers durability and easy cleaning. Carpet provides comfort and style. Vinyl is water-resistant and budget-friendly. Choose based on your car use and climate for optimal results.
How Do I Measure My Car Floor Mats Correctly?
To measure car floor mats, use a tape measure. Measure the length and width of your car’s floor area. Note the shape, including curves and edges. Accurate measurement ensures a perfect fit and better protection for your car’s flooring.
Can I Customize Car Floor Mats At Home?
Yes, you can customize car floor mats at home. Use materials like rubber or carpet sheets. Cut to size using your measurements. Add designs or logos with fabric paint or embroidery. Custom mats add personal style and protect your car’s interior.
How Do I Clean Homemade Car Floor Mats Effectively?
Clean homemade car floor mats with mild soap and water. Scrub gently using a soft brush for carpet mats. For rubber mats, rinse with a hose and dry completely. Regular cleaning maintains appearance and extends mat lifespan.
Conclusion
Creating car floor mats at home is simple and rewarding. With basic materials and tools, you can craft mats tailored to your taste. Plus, it’s cost-effective and lets you personalize your car’s interior. Follow the steps, and you’ll have custom mats in no time.
Enjoy the process, and take pride in your handiwork. Share your creations with friends and inspire them too. Remember, practice makes perfect. Keep experimenting with designs and materials. Your car will thank you with a fresh look and added protection.