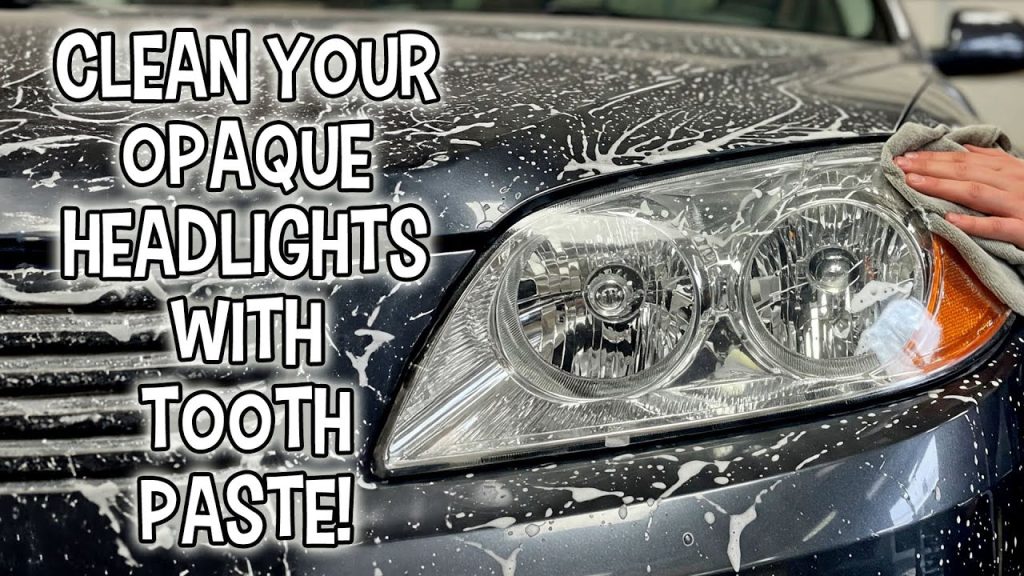
Are your car headlights looking dull or foggy? This can make driving at night unsafe and even get you pulled over.
The good news is, you don’t need to spend a lot of money or time to fix them. With a few simple steps, you can restore your headlights to clear, bright condition. Keep reading, and you’ll learn easy, effective ways to clean your car headlights yourself—saving money and improving your safety on the road.
Why Headlight Cleaning Matters
Clean headlights improve how well you see the road. Dirt and grime can make lights dim and unclear.
Keeping headlights clean helps you drive safer and keeps your car looking good.
Impact On Night Driving
Dirty headlights reduce the brightness of your lights. This makes it harder to see at night.
- Less light means shorter visibility distance
- Harder to spot road signs and obstacles
- Increased risk of accidents after dark
- Other drivers may not see your car clearly
Effects On Vehicle Appearance
Cloudy or yellow headlights make your car look old and worn. Clean headlights improve the car’s look.
| Headlight Condition | Vehicle Appearance |
|---|---|
| Clean and Clear | Fresh and well-maintained look |
| Foggy or Yellowed | Old and neglected appearance |
Safety Considerations
Clear headlights help you and others stay safe on the road. They improve your ability to react in time.
- Better visibility lowers accident risks
- Clear lights alert other drivers and pedestrians
- Proper lighting helps you follow traffic rules
- Regular cleaning saves money on repairs later
Credit: www.msn.com
Common Causes Of Headlight Cloudiness
Cloudy headlights reduce light and make driving at night harder. Many reasons cause headlights to become cloudy over time.
Understanding these causes helps you clean and protect your headlights better.
Uv Damage
Sunlight contains ultraviolet (UV) rays that harm the plastic lens of headlights. UV rays break down the plastic surface, making it dull and yellow.
- Sun exposure fades the headlight’s clear coating.
- Plastic becomes brittle and cracks over time.
- Yellowing reduces the light that passes through.
Oxidation
Oxidation happens when oxygen reacts with the plastic surface. This causes a cloudy, white film on the headlights. Moisture and heat speed up this process.
| Oxidation Cause | Effect on Headlights |
| Exposure to air and moisture | White cloudy film forms |
| Heat from the sun and engine | Plastic surface weakens |
| Age of headlights | More oxidation build-up |
Road Debris And Dirt
Small stones, dirt, and bugs hit the headlights while driving. This causes scratches and grime buildup. Dirt blocks light and makes headlights look foggy.
- Road debris scratches the plastic lens.
- Dirt and dust stick to the headlight surface.
- Cleaning is harder if dirt builds up over time.
Tools And Materials Needed
Cleaning your car headlights keeps them clear and bright. Using the right tools makes the job easier. Gather all materials before you start.
This guide covers important items for cleaning solutions, polishing compounds, and protective gear. Each section explains what you need.
Cleaning Solutions
Cleaning solutions help remove dirt and grime from headlights. Choose a solution that is gentle but effective.
- Soap and water mix
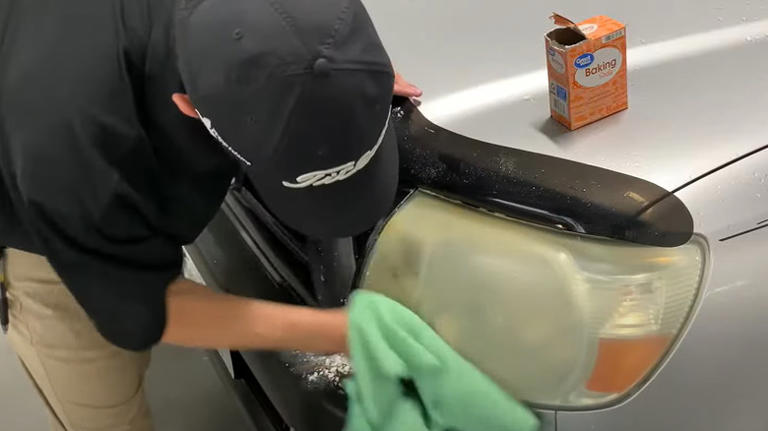
- Vinegar and baking soda paste
- Commercial headlight cleaner
- Isopropyl alcohol
Polishing Compounds
Polishing compounds restore the headlight’s shine. They remove scratches and cloudiness.
| Compound Type | Use |
|---|---|
| Rubbing compound | For heavy scratches and oxidation |
| Polishing compound | For light scratches and smooth finish |
| Fine polish | For final shine and clarity |
Protective Gear
Wear protective gear to keep yourself safe during cleaning. Some materials can irritate skin or eyes.
- Rubber gloves to protect your hands
- Safety goggles to protect your eyes
- Mask to avoid inhaling dust or fumes
- Old clothes or apron to protect your skin
Step-by-step Cleaning Process
Cleaning car headlights helps improve visibility and safety while driving. Over time, headlights get cloudy and dirty from dirt, sun, and weather.
This guide shows you how to clean your headlights with simple steps. You will need some basic materials and a little time.
Initial Wash
Start by washing the headlights with soap and water. This removes dirt and grime from the surface.
Use a soft cloth or sponge to avoid scratching the lens. Rinse well and dry with a clean towel.
- Mix car soap with water
- Use a soft cloth or sponge
- Rinse thoroughly
- Dry with a clean towel
Sanding Techniques
If your headlights are cloudy, sanding can help smooth the surface. Use fine sandpaper to remove the top layer of oxidation.
Start with wet 1000-grit sandpaper, then use 1500-grit for a finer finish. Keep the surface wet while sanding.
- Wet the sandpaper and headlight
- Sand in horizontal strokes with 1000-grit
- Switch to 1500-grit and sand in vertical strokes
- Keep surface wet to avoid scratches
Applying Polish
After sanding, apply polish to restore clarity and shine. Use a plastic polish or headlight restoration product.
Apply polish with a microfiber cloth in circular motions. Buff until the surface looks clear and smooth.
- Put polish on a microfiber cloth
- Rub polish in small circles
- Buff until the headlight is clear
- Wipe off excess polish
Sealing The Surface
Seal the headlights to protect them from future damage. Use a UV sealant or clear coat spray made for headlights.
Apply the sealant evenly and let it dry. This step helps keep your headlights clear longer.
- Choose a UV sealant or clear coat spray
- Spray or apply evenly on the headlight
- Let it dry fully before driving
- Repeat every few months for best protection
Diy Vs Professional Cleaning
Cleaning car headlights keeps them clear and bright. You can do it yourself or hire a professional. Each choice has its benefits and drawbacks.
This guide compares DIY and professional cleaning by cost, time, effort, results, and how long they last.
Cost Comparison
DIY cleaning costs less upfront. You only buy supplies like polish or sandpaper. Professionals charge for labor and service fees.
| Type | Estimated Cost |
| DIY Supplies | $10 – $30 |
| Professional Service | $50 – $150 |
Time And Effort
DIY cleaning takes your time and work. You must prepare, clean, and polish carefully. Professional cleaning is faster and needs less effort from you.
- DIY requires buying materials and learning steps
- DIY may take 1 to 3 hours depending on skill
- Professionals finish within 30 to 60 minutes
- Professional cleaning requires no special tools on your part
Results And Longevity
Professional cleaning often gives better results. They use strong tools and products. The finish usually lasts longer. DIY results vary by skill and materials.
- Professionals restore clarity and remove deep haze
- DIY may not remove tough yellowing fully
- Professional treatments can last 6 to 12 months
- DIY might need repeating every few months

Credit: www.youtube.com
Preventing Future Headlight Damage
Keeping your car headlights clear is important for safe driving. Dirt and wear can make headlights dim or yellow. You can stop damage before it starts by caring for them regularly.
This guide shares easy ways to protect your headlights. Follow these tips to keep them bright and clear for a long time.
Regular Maintenance
Clean your headlights often with mild soap and water. Avoid harsh chemicals that can eat away at the plastic. Check for cracks or chips and fix them fast.
- Wash headlights every two weeks
- Use a soft cloth or sponge
- Avoid abrasive cleaners
- Inspect for damage monthly
- Repair small cracks quickly
Protective Coatings
Applying a protective coating can stop UV rays and dirt from hurting your headlights. Use a clear sealant designed for car lights. This layer keeps plastic from yellowing and scratches.
| Type of Coating | Benefits |
| UV Sealant | Blocks sun damage |
| Anti-scratch Film | Prevents minor scratches |
| Water Repellent | Keeps water from sitting |
Parking Tips
Where you park affects headlight life. Avoid strong sunlight and rough surfaces. Try to park in shady or covered spots to lower damage risks.
- Choose shaded parking areas
- Park away from gravel or dirt roads
- Use a car cover if parked outside long
- Avoid parking too close to bushes or trees

Credit: www.carsales.com.au
Frequently Asked Questions
How Often Should I Clean My Car Headlights?
Clean your headlights every 3 to 6 months. Frequent cleaning maintains brightness and improves nighttime visibility. Regular care prevents yellowing and grime buildup, ensuring safer driving conditions.
What Household Items Can Clean Car Headlights Effectively?
Use toothpaste or baking soda mixed with water. These mild abrasives remove dirt and oxidation gently. Apply with a soft cloth, then rinse and dry for clearer headlights.
Can Headlight Cleaning Improve Night Driving Safety?
Yes, clean headlights enhance light output. Clear lenses provide better road illumination, reducing accident risks. Properly maintained headlights help you see obstacles and road signs clearly at night.
Is Professional Headlight Restoration Worth It?
Professional restoration offers deep cleaning and polishing. Experts remove severe oxidation and scratches effectively. It’s ideal for heavily clouded headlights, providing longer-lasting results than DIY methods.
Conclusion
Maintaining clear headlights is crucial for safe driving at night. Regular cleaning prevents foggy lenses and improves visibility. Use household items like toothpaste or baking soda. Gently scrub the headlights to remove dirt and grime. Rinse thoroughly and dry with a clean cloth.
Proper cleaning saves money on replacements. Plus, it extends the life of your headlights. Enjoy a safer driving experience with clear, bright lights. Keep your headlights shining with consistent care. Regular maintenance ensures better visibility and safety on the road.
Clean headlights mean a safer drive for you and others.