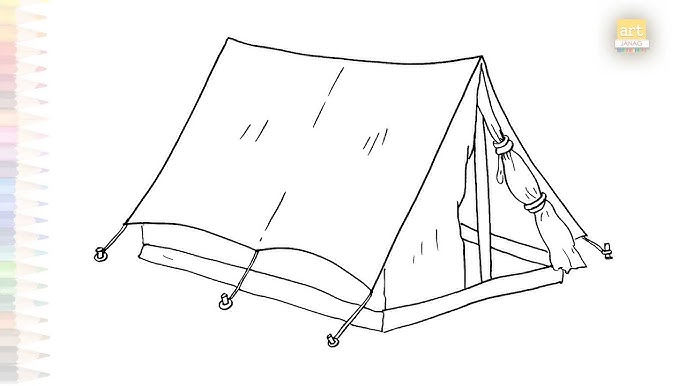
Are you ready to create your own tent drawing quickly and without any hassle? Whether you want to add a camping scene to your sketchbook or just try something new, learning how to draw a tent easy can boost your confidence and creativity.
You don’t need special skills or fancy tools—just a few simple steps, and you’ll have a neat tent drawing to show off. Keep reading, and by the end, you’ll know exactly how to bring your tent to life on paper.
Let’s get started!
Materials Needed
Drawing a tent is simple and fun. You only need a few basic materials to start.
Gather these items before you begin your drawing. This will help you stay organized.
Paper
Use a clean sheet of paper for your drawing. Plain white paper works best.
You can use drawing paper, printer paper, or sketch paper. Choose what is easy to find.
Pencil
A pencil lets you draw and erase mistakes easily. Use a sharp pencil for clear lines.
Start with a light pencil like an HB or 2B. You can darken lines later if needed.
Eraser
An eraser helps fix mistakes and clean your drawing. Use a soft eraser to avoid tearing paper.
Keep your eraser nearby so you can correct lines as you go along.
Colored Pencils Or Crayons
Colored pencils or crayons add color to your tent drawing. Pick colors like green, brown, or blue.
These colors make your tent look real and bright.
Ruler
A ruler helps draw straight lines. This is useful for the tent’s edges and poles.
Use the ruler to make your tent look neat and clean.
Basic Tent Shapes
Tents come in many shapes. Each shape has simple lines and forms.
Knowing basic tent shapes helps you draw tents easily and clearly.
Triangle Tent
The triangle tent is the easiest to draw. It looks like a big triangle.
This shape has two slanting sides meeting at the top and a flat base.
Dome Tent
Dome tents have curved tops. They look like half circles or domes.
- Start with a rounded arch shape.
- Add a horizontal line at the base.
- Draw the door as a curved shape inside.
A-frame Tent
The A-frame tent looks like the letter A. It has straight lines.
| Part | Shape |
| Roof | Two slanting lines meeting at a point |
| Base | Straight horizontal line |
| Door | Rectangle or triangle in the middle |
Step-by-step Drawing Guide
Drawing a tent can be easy with the right steps. This guide breaks down the process simply.
Follow these steps to create a clear and simple tent drawing. Use a pencil for sketching first.
Sketching The Outline
Start by drawing a triangle shape for the main tent body. This will be the tent’s front.
Add a rectangle at the base to show the tent floor. Keep the lines light for easy changes.
Adding Tent Details
Draw a zipper line down the middle of the tent front. This shows the entrance.
Add small lines for stitches or fabric folds. This makes the tent look more real.
- Draw a small rectangle for the tent door flap
- Add curved lines for fabric wrinkles
- Sketch a few stitches along edges
Drawing Tent Poles
Sketch two straight lines inside the tent shape. These are the tent poles.
Make the poles slightly angled to show support. Add small circles at the ends for pole caps.
- Draw one pole from the front left to top center
- Draw another pole from front right to top center
- Add small circles at pole ends
Creating Tent Flaps
Draw two curved lines starting from the zipper line outwards. These are the tent flaps.
Show the flaps slightly open by adding a small gap in the middle. Add folds on the edges.
- Draw curved flap edges extending from the zipper
- Include small fold lines on flap edges
- Leave a gap to show the tent door opening

Credit: www.youtube.com
Shading And Coloring Tips
Shading and coloring make your tent drawing look real and interesting. These tips help you add depth and life to your simple tent sketch.
Use light and shadow to show the shape of the tent. The right colors can make it stand out on paper.
Use Light And Shadow
Imagine where the light hits your tent. Shade the opposite side darker to show shadows. This makes the tent look three-dimensional.
Use soft strokes to blend the shaded areas. This helps the shadow look natural and smooth.
- Decide the light source direction
- Shade the side away from light
- Blend shadows softly for a smooth look
Choose Simple Colors
Pick a few colors for your tent. Use one main color and two shades for highlights and shadows. This keeps your drawing clear and easy.
Use lighter colors on areas that catch light. Use darker colors on shaded parts to add depth.
- Main color for most of the tent
- Lighter shade for light areas
- Darker shade for shadowed areas
Add Texture With Light Strokes
Use small, light strokes to add fabric texture. This makes the tent surface look more real and less flat.
Draw lines that follow the shape of the tent. This shows how the fabric folds and bends.
- Use light pencil or brush strokes
- Follow tent shape with your strokes
- Keep strokes soft and subtle
Highlight Tent Edges
Use a lighter color or white to highlight the tent edges. This shows where light hits the fabric directly.
Highlights make the tent look crisp and clear. They help separate the tent from the background.
- Apply highlights on light-facing edges
- Use a small brush or pencil for fine lines
- Keep highlights bright but not too large
Common Mistakes To Avoid
Drawing a tent can be simple, but some mistakes make it hard to look right. Avoiding these errors helps your tent look clear and neat.
Focus on the shape, lines, and details to make your tent drawing easy and realistic. Watch out for these common mistakes.
Ignoring Basic Tent Shape
Many beginners draw tents with wrong shapes. A tent usually looks like a triangle or a cone. Avoid drawing tents that look flat or uneven.
Keep the main triangle shape clear before adding details. This keeps your drawing simple and easy to understand.
Forgetting Tent Poles Or Supports
Tent poles give structure to the tent. If you skip drawing poles, your tent will look like it is floating or collapsing.
Show the poles inside or outside the tent. This detail adds realism and helps the tent look stable.
Drawing Uneven Lines
Uneven or shaky lines make your tent look messy. Use steady strokes to keep lines smooth and straight.
Use a ruler or draw lightly first, then go over the lines to fix mistakes.
Skipping Tent Flaps Or Doors
Tent flaps or doors show how people enter the tent. Leaving these out makes your drawing less clear.
Add simple lines or shapes to show flaps. This makes your tent look more complete.
Not Showing Tent Shadows Or Depth
Flat drawings miss the tent’s shape and size. Adding shadows or darker areas shows depth and makes the tent look 3D.
Shade one side of the tent lightly to create a shadow effect. This helps the drawing look more real.
Overloading With Too Many Details
Adding too many lines or decorations can confuse the drawing. Keep details simple to keep the tent easy to see.
- Focus on main shapes first
- Add only important details
- Use clear and simple lines

Credit: www.youtube.com
Practice Ideas For Improvement
Drawing a tent can be fun and simple. To get better, you need to practice often. Try different ways to draw a tent and see what works best.
Use these practice ideas to improve your skills step by step. They will help you understand shapes, lines, and details in tent drawings.
Start With Basic Shapes
Begin by drawing simple shapes like triangles and rectangles. These shapes form the main parts of a tent. Practice drawing these shapes neatly and in the right size.
Use Different Angles
Try drawing tents from front, side, and top views. This helps you understand how tents look from all sides. It also makes your drawings more interesting.
Add Details Gradually
Start with the tent’s outline. Then add details like poles, ropes, and flaps. Adding details step by step makes your drawing clear and neat.
- Draw the tent shape first
- Add tent poles inside
- Sketch ropes attached to poles
- Draw the tent flap open or closed
Practice Shading And Texture
Shading makes your tent look real. Practice light and dark areas to show folds and shadows. Use soft strokes for fabric texture.
- Shade one side darker for shadow
- Use light strokes for fabric folds
- Blend pencil marks smoothly
- Highlight edges for light spots
Compare Your Drawings
Look at your old drawings and compare them with new ones. Notice what you improved and what needs more work. Use this to focus your next practice.
| Practice Focus | What to Check |
| Shape Accuracy | Are the shapes neat and correct? |
| Details Added | Did you include poles and ropes? |
| Shading | Is shading smooth and realistic? |
| Perspective | Does the tent look 3D from different angles? |

Credit: www.youtube.com
Frequently Asked Questions
How Do I Start Drawing A Simple Tent?
Begin by sketching a basic triangle shape for the tent’s front. Add a horizontal line at the base for the ground. This forms the tent’s front face and sets the structure’s foundation. Use light lines for easy adjustments.
What Materials Are Best For Drawing Tents?
Use pencils for initial sketches and fine liners for outlines. Colored pencils or markers add depth and color. Paper with a smooth texture helps achieve clean lines and shading. These tools help create precise and vivid tent drawings.
How Can I Add Shading To A Tent Drawing?
Shade one side of the tent darker to show light direction. Use soft pencil strokes or blending tools for smooth transitions. This creates a realistic 3D effect. Highlight edges where light hits directly for contrast.
What Are Common Mistakes To Avoid When Drawing Tents?
Avoid uneven lines and incorrect angles for tent sides. Don’t neglect perspective; tents need depth to look realistic. Over-shading can obscure details. Keep shapes simple and check proportions regularly to maintain accuracy.
Conclusion
Drawing a tent is simple with practice. Start with basic shapes. Use straight lines for structure. Add details like flaps and poles. Practice will make your drawings better. Don’t worry about mistakes. They help you learn. Keep your lines neat and clear.
Experiment with different tent styles. Enjoy the process. Drawing should be fun and relaxing. Share your artwork with friends. Get feedback and improve. Soon, you will draw tents easily. Keep practicing and enjoy the journey.