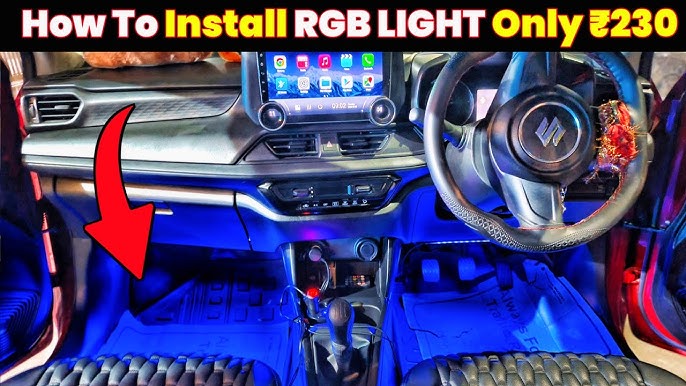
Are you ready to transform your car’s interior with a sleek, modern glow? Installing LED light strips inside your car is easier than you think, and it can instantly boost your driving experience.
Imagine cruising at night with customizable colors lighting up your footwells or dashboard, making every ride feel unique and stylish. In this guide, you’ll discover simple, step-by-step instructions to install LED strips quickly and safely—no special tools or skills needed.
Keep reading to learn how you can upgrade your car’s look and feel in just a few easy steps!

Credit: www.comoros.ubuy.com
Choosing The Right Led Strips
Installing LED light strips inside your car adds style and visibility. Choosing the right type of LED strip is important. It affects brightness, color, and durability.
Consider your needs before buying. This guide covers types, brightness options, and waterproof features for car LED strips.
Types Of Led Strips For Cars
There are several LED strip types for cars. Each has different features and uses. Choose one that fits your car’s interior and your style.
- Single Color LED Strips:These strips show one color only. They are simple and easy to install.
- RGB LED Strips:These can change colors using a remote or app. You can pick many colors and effects.
- Addressable LED Strips:These allow control of each LED separately. They create moving light effects and patterns.
Brightness And Color Options
Brightness is measured in lumens. Higher lumens mean brighter light. Choose brightness based on where you want to place the strips.
| Brightness Level | Use Case |
| Less than 300 lumens | Accent lighting inside car doors |
| 300 to 600 lumens | Dashboard and footwell lighting |
| Over 600 lumens | Main interior lighting or bright accents |
Color options vary by strip type. Single color strips offer simple light. RGB and addressable strips provide many colors and modes.
Waterproof And Durability Features
Car interiors can get hot or humid. Choose LED strips with waterproof and durable designs for long life.
- Non-waterproof strips:Best for dry areas inside the car.
- Water-resistant strips:Can handle small spills or moisture.
- Fully waterproof strips:Ideal for areas near windows or doors.
Preparing Your Car Interior
Installing LED light strips inside your car needs careful preparation. A clean and organized space makes the job easier and safer.
Before starting, you should prepare the interior by cleaning, gathering tools, and following safety steps. This helps ensure a good installation.
Cleaning Installation Areas
Clean the spots where you will place the LED strips. Dirt and dust can stop the adhesive from sticking well. Wipe the area with a damp cloth and let it dry fully.
- Remove dust using a soft cloth
- Use rubbing alcohol to clean sticky or oily spots
- Dry the area completely before installation
- Avoid cleaning with harsh chemicals that may damage surfaces
Gathering Necessary Tools
Collect all tools before you start. Having everything ready saves time and avoids interruptions during installation.
| Tool | Purpose |
| LED Light Strips | Main lighting component |
| Cleaning Cloth | Cleaning installation areas |
| Rubbing Alcohol | Removing grease and dirt |
| Measuring Tape | Measuring strip length |
| Scissors | Cutting strips if needed |
| Electrical Tape | Securing wiring connections |
| Screwdriver | Opening panels if required |
Safety Precautions
Follow safety rules to protect yourself and your car. Working carefully reduces risks and prevents damage.
- Disconnect the car battery before starting
- Work in a well-lit area
- Use gloves to avoid cuts or skin irritation
- Keep tools and small parts organized
- Do not force wires or strips into tight spaces
- Check your car manual for electrical warnings
Planning The Installation Layout
Installing LED light strips inside your car needs a clear plan. You must decide the best places to put the strips and how to connect them.
This guide helps you plan the layout by selecting spots, measuring strips, and mapping wires carefully.
Selecting Placement Spots
Choose locations where the lights will be visible but not in the way. Common spots include under the dashboard, along door edges, and under seats.
- Look for flat, clean surfaces for good adhesion
- Avoid areas with heavy foot traffic or moving parts
- Pick spots near power sources if possible
- Consider areas that enhance the car’s interior style
Measuring And Cutting Led Strips
Measure the exact length needed before cutting the LED strips. Most strips have marked lines where you can safely cut.
| Tip | Details |
| Use a tape measure | Measure the surface length where the strip will go |
| Cut only at marks | Prevent damage to the LED circuits |
| Check strip voltage | Ensure it matches your power supply |
Mapping Wire Routes
Plan the wiring path to keep cables hidden and protected. Wires should run along edges or under panels.
Consider this simple wiring checklist:
- Trace the shortest path from lights to power source
- Avoid sharp bends or pinch points
- Secure wires with clips or tape
- Leave some slack for adjustments
Connecting The Led Strips To Power
Installing LED light strips inside your car adds a cool look. To make them work, you must connect them to power. This guide helps you connect LED strips safely and correctly.
Knowing where to get power and how to connect wires is important. Follow simple steps to avoid damage and ensure your lights turn on.
Identifying Power Sources
LED strips need a power source from your car’s electrical system. You can use the car battery or fuse box for power. Choose a source that works when you want the lights on.
Many people use the 12V power from the fuse box or cigarette lighter socket. Check your car manual to find the correct wires and fuses.
- Use the fuse box for switched power (turns off with car)
- Use the battery for constant power (always on)
- Avoid tapping into high power wires like ignition or starter
Using Connectors And Adapters
Connectors and adapters link LED strips to power safely. They help join wires without cutting or damaging the car’s cables. Use proper connectors to avoid loose connections.
Common connectors include quick splice connectors, fuse tap adapters, and plug-in adapters. These tools make installation easier and cleaner.
- Quick splice connectors attach to existing wires without cutting
- Fuse tap adapters connect to fuse box slots safely
- Plug-in adapters fit into cigarette lighter sockets
Ensuring Secure Electrical Connections
Good electrical connections keep the LED strips working well. Make sure wires are tight and insulated. Loose connections can cause flickering or damage.
Use electrical tape or heat shrink tubing to cover exposed wires. Check the connections by turning on the lights before final installation.
- Strip wires properly before connecting
- Use wire connectors or solder joints
- Wrap connections with electrical tape or heat shrink
- Test the lights before fixing strips permanently
Mounting And Securing Led Strips
Installing LED light strips inside a car needs careful mounting. Proper securing keeps the lights safe and working well.
Follow these steps to make sure your LED strips stay in place and look neat.
Peeling And Sticking The Strips
Most LED strips come with a sticky backing. Peel off the cover to reveal the adhesive side.
Press the strip firmly against a clean, dry surface inside your car. Avoid dusty or oily spots for better stickiness.
- Clean the mounting area with alcohol wipes
- Peel the protective film from the strip
- Stick the strip slowly, pressing as you go
Using Clips And Adhesives
For extra security, use mounting clips or stronger adhesives. Clips hold strips firmly without damage.
Special adhesives like double-sided tape or glue can secure strips on rough or curved surfaces.
- Choose clips sized for your LED strips
- Apply adhesive evenly on clips or strip backs
- Fix clips on the car surface, then snap strips in place
Testing Adhesion Strength
After mounting, gently pull the strip to check if it stays fixed. Strong adhesion prevents falling during driving.
If the strip moves or peels, add more clips or adhesive. Wait a few hours before driving to let glue set well.
- Pull lightly along the strip to test hold
- Add more clips or tape if needed
- Let adhesive dry fully before use
Testing And Troubleshooting
After installing LED light strips inside your car, you need to test them. Testing ensures the lights work well and show the right colors.
If the lights do not work properly, troubleshooting helps find and fix problems quickly.
Powering On The Leds
First, check if the LED strips turn on. Connect the power source and switch on the lights.
If the LEDs do not light up, check the power supply and connections again.
- Make sure the car battery or adapter is charged
- Confirm the LED strip is connected to the power source
- Switch on the LED controller or remote
Checking For Faulty Connections
Loose or bad connections stop the LED strips from working. Check all wires and plugs carefully.
Look for broken wires, loose plugs, or poor solder joints. Fix any issues you find.
- Inspect connectors for dirt or damage
- Secure any loose wires with tape or clips
- Replace damaged wires or connectors
Adjusting Brightness And Colors
Most LED strips allow you to change brightness and colors. Use the remote or app to adjust settings.
Set brightness low at first. Raise it slowly to avoid glare. Pick colors that match your style.
- Use remote buttons or app sliders
- Test different colors for comfort and look
- Save your favorite settings for easy use
Maintaining Led Strips
LED light strips inside your car need care to keep them bright and working well. Regular maintenance helps avoid damage and keeps the lights looking good.
Simple steps like cleaning and checking the strips can make them last longer. This guide shows easy ways to maintain your car’s LED strips.
Cleaning Tips
Dust and dirt can dull the LED strips and affect their glow. Clean the strips gently to keep them shining.
Use a soft cloth or microfiber towel. Avoid harsh chemicals that can damage the lights or the strip surface.
- Turn off the LED strips before cleaning
- Use a damp cloth with mild soap if needed
- Dry the strips fully to prevent moisture damage
- Clean regularly to avoid buildup of dust
Replacing Damaged Sections
Sometimes parts of the LED strip may stop working or get broken. Replace only the damaged sections to save money and effort.
Check the strip carefully to find the damaged part. Cut it out and attach a new piece made for your LED strip model.
- Turn off power before handling LED strips
- Use proper connectors or soldering tools
- Match the new section’s voltage and color
- Test the strip after replacement to ensure it works
Upgrading Led Features
You can upgrade your LED strips with new features like remote control or color change. This adds more fun and flexibility to your car lighting.
Choose upgrades that fit your current setup. Make sure the power supply and connectors support the new features.
- Add a controller for color and brightness adjustment
- Use smartphone apps for easy control
- Install motion sensors for automatic lighting
- Upgrade to longer or brighter LED strips if needed

Credit: www.amazon.com

Credit: www.walmart.com
Frequently Asked Questions
How Do I Prepare The Car Interior For Led Strip Installation?
Clean the surface where you will attach the LED strips. Remove dust and grease using alcohol wipes. Ensure the area is dry before installation for better adhesion.
What Tools Are Needed To Install Led Light Strips In A Car?
You need LED strips, double-sided tape, wire cutters, electrical tape, a fuse tap, and a screwdriver. These tools help secure and connect the strips safely and neatly.
Can Led Strips Be Connected To The Car’s Battery Directly?
No, connect LED strips to a fuse box or a 12V accessory power source. This prevents battery drain and protects the vehicle’s electrical system from damage.
How To Hide Wiring For Led Strips Inside The Car?
Use the car’s existing trim and panels to conceal wires. Secure wires with zip ties and avoid loose hanging cables for a clean and safe installation.
Conclusion
Installing LED light strips inside your car is simple and fun. Enhance your car’s interior with vibrant colors. Follow the steps carefully for a successful installation. Choose quality strips for durability and brightness. Measure spaces to ensure a perfect fit.
Secure the strips properly to avoid loose connections. Connect to a power source safely. Test the lights to ensure they work as expected. Enjoy your new ambiance and unique style. With these tips, your car will glow beautifully. Take pride in your creative upgrade.
It’s a rewarding DIY project. Happy driving with your new lights!