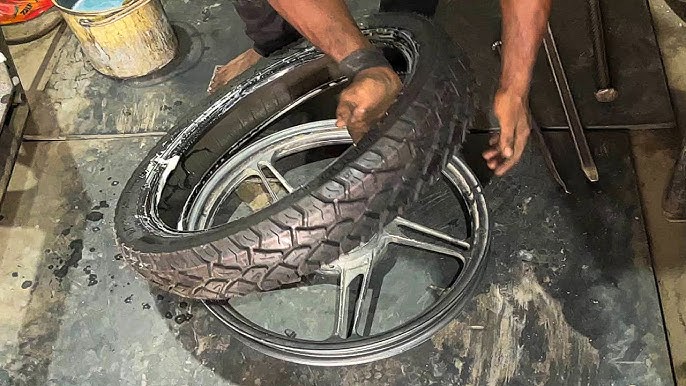
Changing a motorcycle tire might seem tricky, but it’s easier than you think. If you want to save time and money, knowing how to do it yourself is a game-changer.
Imagine being ready for the road without waiting for help or costly repairs. In this guide, you’ll get simple, step-by-step instructions that anyone can follow. By the end, you’ll feel confident handling your bike’s tire like a pro. Ready to take control and keep your ride smooth?
Let’s get started.
Tools Needed
Changing a motorcycle tire requires the right tools for safety and efficiency. Gathering these tools before starting helps the job go smoothly.
Some tools are essential, while others make the process easier. Knowing both sets saves time and effort.
Essential Equipment
You must have these tools to remove and install a motorcycle tire correctly. Without them, the job is risky or impossible.
- Tire irons or spoons:Used to pry the tire off the rim.
- Valve core remover:Needed to deflate the tire fully.
- Bead breaker:Helps separate the tire bead from the rim.
- Air compressor or pump:For inflating the new tire.
- Lubricant or soapy water:Makes tire removal and installation easier.
- Wheel balancing weights:To balance the wheel after tire replacement.
- Wrench set:For loosening and tightening axle nuts.
Optional Tools For Ease
These tools are not required but can make changing a tire easier and safer. They reduce physical strain and speed up the work.
| Tool | Purpose |
| Tire mounting stand | Holds the wheel steady during work |
| Impact wrench | Speeds up loosening and tightening nuts |
| Bead seating tool | Helps seat the tire bead quickly and safely |
| Torque wrench | Ensures nuts are tightened to correct specs |
| Work gloves | Protect hands from sharp edges and dirt |
| Rim protectors | Prevent scratching the rim during tire removal |

Credit: www.lowbrowcustoms.com
Preparing The Motorcycle
Changing a motorcycle tire begins with proper preparation. You must get the bike ready to work on safely and effectively.
This guide covers securing the bike and removing the wheel. Follow these steps carefully for the best results.
Securing The Bike
Before you start, make sure the motorcycle is stable and won’t move. This keeps you safe during the tire change.
- Place the bike on a flat, solid surface to prevent tipping.
- Use a center stand if your motorcycle has one.
- If no center stand is available, use a paddock stand or a sturdy block under the frame.
- Engage the parking brake to stop the bike from rolling.
- Turn off the engine and remove the key.
Removing The Wheel
After securing the bike, you can remove the wheel. This step requires some tools and care.
| Tool | Purpose |
| Wrench or socket set | Loosen and remove axle nuts or bolts |
| Screwdriver or tire iron | Help separate tire from rim after wheel removal |
| Gloves | Protect your hands during the process |
First, loosen the axle nut but do not remove it completely. Then lift the bike so the wheel is off the ground.
Remove any chain or brake components attached to the wheel. Finally, pull the axle out and take the wheel off carefully.
Removing The Old Tire
Removing an old motorcycle tire takes care and the right tools. You need to work slowly to avoid damage. This guide shows how to safely remove the tire.
First, you must deflate the tire completely. Next, break the bead to loosen the tire edges. Finally, take off the tire from the rim carefully.
Deflating The Tire
Start by removing the valve cap. Use a valve core remover tool to take out the valve core. This lets all the air escape fast. Make sure the tire is fully deflated before moving on.
Breaking The Bead
The bead is the edge of the tire that seals against the rim. Breaking the bead frees the tire from the wheel. Use a bead breaker tool or a strong pry bar to press down on the tire sidewall near the rim.
- Place the wheel on a flat surface.
- Position the bead breaker next to the rim edge.
- Apply steady pressure to push the bead away from the rim.
- Move around the tire to break the bead evenly on both sides.
Taking Off The Tire
After breaking the bead, you can remove the tire. Use tire irons or levers to lift the tire over the rim edge. Work slowly to avoid bending or damaging the rim. Remove one side first, then pull out the inner tube if your tire has one.
| Tool | Purpose |
|---|---|
| Valve Core Remover | Remove valve core to deflate tire |
| Bead Breaker | Separate tire bead from rim |
| Tire Irons | Lift and pry tire off rim |
Installing The New Tire
Installing a new motorcycle tire is a careful process. It takes patience and the right tools.
Follow these steps to install the new tire safely and correctly on the rim.
Lubricating The Bead
Lubricate the tire bead to help it slide onto the rim. Use a special tire lubricant or soapy water.
Apply the lubricant evenly around the tire bead. This reduces friction and prevents damage.
- Use a brush or sponge for even coverage
- Do not over-lubricate to avoid mess
- Choose a lubricant that dries quickly
Mounting The Tire On The Rim
Start by placing one side of the tire onto the rim. Push it down so the bead sits inside the rim edge.
Use tire levers carefully to lift the other side over the rim. Avoid pinching the tube if you use one.
- Work around the rim evenly
- Apply firm but gentle pressure
- Check that the bead stays inside the rim edge
Seating The Bead
After mounting, inflate the tire to seat the bead. The bead will press firmly against the rim.
Listen for popping sounds as the bead sets. Stop inflating once the bead is fully seated.
- Inflate the tire slowly and evenly
- Check the bead line around the rim
- Do not exceed the recommended pressure
Inflating The Tire
Inflating a motorcycle tire correctly is very important. It helps the bike ride smoothly and safely.
Use the right tools and follow the steps carefully to avoid damage or accidents.
Recommended Pressure
Check the tire pressure recommended by the motorcycle manufacturer. This is usually found in the owner’s manual or on a sticker near the bike’s frame.
- Use a reliable tire pressure gauge to measure the current pressure.
- Inflate the tire with an air compressor or hand pump until it reaches the recommended level.
- Do not overinflate; this can cause poor handling and tire damage.
- Check pressure when tires are cold for the most accurate reading.
Checking For Leaks
After inflating, check the tire for any leaks. Leaks can cause the tire to lose air quickly, which is unsafe.
| Leak Check Method | What to Look For |
| Soap Water Test | Look for bubbles forming on the tire or valve area |
| Valve Inspection | Ensure the valve is tight and not damaged |
| Listen Carefully | Hear for any hissing sounds of escaping air |

Credit: www.youtube.com
Reattaching The Wheel
After changing a motorcycle tire, you need to put the wheel back on. This step is important for safety and smooth riding.
Follow careful steps to make sure the wheel fits right and stays secure. This keeps your bike stable on the road.
Aligning The Wheel
Place the wheel between the forks or swingarm. Make sure it fits evenly on both sides. The axle hole should line up perfectly.
Check that the brake disc or drum lines up with the brake caliper or shoes. This prevents damage and ensures proper braking.
- Slide the axle through the wheel and fork or swingarm
- Make sure the wheel spins freely without rubbing
- Check alignment marks if your bike has them
Securing Fasteners
Once the wheel is aligned, tighten the axle nut or bolts. Use a torque wrench to apply the correct tightness. This keeps the wheel safe during rides.
Also secure any pinch bolts or spacers. Double-check all fasteners to avoid loose parts. Loose fasteners can cause accidents.
- Tighten axle nut to the manufacturer’s torque specs
- Secure pinch bolts firmly
- Reinstall any safety clips or cotter pins
- Spin the wheel to check for smooth movement
Final Checks
After changing a motorcycle tire, it is important to perform final checks. These checks ensure safety and proper function before riding.
Follow the steps below to confirm the tire and brake system are ready for use.
Spin Test
Spin the wheel by hand to check for smooth rotation. The tire should turn without wobbling or noise.
- Lift the motorcycle securely off the ground.
- Grab the tire and spin it slowly.
- Watch for any side-to-side movement.
- Listen for rubbing or grinding sounds.
- If you notice problems, recheck tire installation.
Brake Inspection
Check the brake system to confirm it works properly after tire change.
| Brake Part | Check | What to Look For |
|---|---|---|
| Brake Pads | Visual Inspection | No cracks or excessive wear |
| Brake Rotor | Surface Check | Smooth and free of deep grooves |
| Brake Lever | Function Test | Firm feel without sponginess |
| Brake Fluid | Level Check | Within recommended range |
Tire Pressure Confirmation
Set the tire pressure to the recommended level. Proper pressure ensures good handling and tire life.
- Find the recommended pressure in your motorcycle manual.
- Use a reliable tire pressure gauge.
- Remove the valve cap and press the gauge firmly.
- Compare the reading to the recommended pressure.
- Add or release air to match the proper level.
- Replace the valve cap securely.
Tips For Tire Maintenance
Proper tire care keeps your motorcycle safe and running smoothly. Regular maintenance helps avoid unexpected problems on the road.
Understanding how to inspect, inflate, and store tires can extend their life. Follow these simple tips to maintain your motorcycle tires.
Regular Inspections
Check your tires before every ride. Look for cracks, cuts, or objects stuck in the tread. Uneven wear can signal alignment or suspension issues.
- Inspect tread depth to ensure enough grip
- Look for bulges or deformities on the sidewalls
- Remove stones or debris lodged in the tire
- Replace tires if damage or wear is severe
Proper Inflation
Keep tires inflated to the pressure recommended by the manufacturer. Too low or too high pressure affects handling and tire life.
| Pressure Level | Effect on Tire |
| Under-inflated | More wear on edges, poor fuel efficiency |
| Correct inflation | Even wear, good grip, safe handling |
| Over-inflated | Wear in center, harsher ride, less traction |
Storage Advice
Store tires in a cool, dry place away from sunlight. Avoid contact with oil, solvents, or sharp objects that may damage rubber.
- Keep tires upright or hang them to avoid flat spots
- Cover tires to protect from dust and UV rays
- Avoid stacking heavy items on stored tires

Credit: www.dirtrider.com
Frequently Asked Questions
How Do I Remove A Motorcycle Tire Safely?
To remove a motorcycle tire safely, first secure the bike with a stand. Deflate the tire completely and loosen the bead with tire irons. Use proper tools and avoid forcing parts to prevent damage or injury.
What Tools Are Needed To Change A Motorcycle Tire?
Essential tools include tire irons, a bead breaker, valve core remover, tire lube, and an air compressor. These tools help remove the old tire, install the new one, and ensure proper sealing and inflation.
How Do I Install A New Motorcycle Tire Correctly?
Apply tire lube on the bead area, then position the tire onto the rim. Use tire irons to seat the tire evenly. Inflate gradually to seat the beads, ensuring no damage to the tire or rim.
How Often Should Motorcycle Tires Be Replaced?
Replace motorcycle tires every 5-6 years or when tread depth is below 2/32 inch. Inspect for cracks, punctures, or uneven wear regularly to maintain safety and performance.
Conclusion
Changing a motorcycle tire may seem hard, but it’s doable. With the right tools, you can handle it smoothly. First, ensure safety by securing the bike. Then, follow each step carefully. Practice makes perfect; try doing it a few times.
Soon, it will feel easier and faster. Remember, patience is key. A well-maintained tire ensures a safe ride. Keep your bike in top shape. Save money and learn new skills. Enjoy the freedom of the open road with confidence. Happy riding!