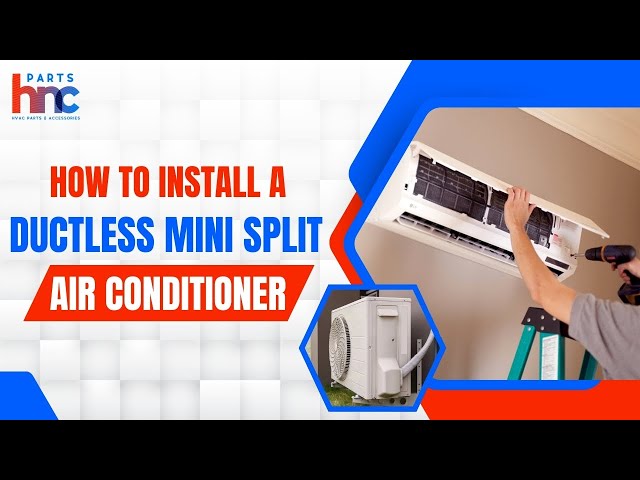
Thinking about installing a ductless air conditioner yourself? You’re in the right place.
Installing one can save you money and give you control over your home’s comfort. But without clear steps, it might feel overwhelming. This guide breaks down the process into simple, easy-to-follow instructions. By the end, you’ll know exactly how to set up your ductless AC, so you can start enjoying cool air without the hassle.
Ready to get started? Let’s dive in!

Credit: www.youtube.com
Choosing The Right Ductless Ac
Selecting the right ductless air conditioner is important for comfort and cost savings. You need to consider the size of the room and the features of the unit.
Energy use is also a key factor. This guide helps you find the best ductless AC for your needs.
Assessing Room Size
Measure the room where you want to install the ductless AC. The size affects the cooling power needed.
Large rooms need units with higher capacity. Small rooms use smaller units for efficiency.
- Measure length and width of the room
- Multiply to get square footage
- Consider ceiling height for large or tall rooms
- Note the number of windows and sunlight exposure
- Check room insulation quality
Selecting Capacity And Features
The capacity of a ductless AC is shown in BTUs. Choose a unit that fits the room size.
Extra features can improve comfort and control. Look for units with remote controls, timers, and quiet operation.
| Room Size (sq ft) | Recommended BTU | Suggested Features |
| Up to 300 | 6,000 – 8,000 | Basic controls, quiet mode |
| 300 – 500 | 9,000 – 12,000 | Timer, remote control |
| 500 – 700 | 12,000 – 18,000 | Energy saver, sleep mode |
| 700 and above | 18,000+ | Multiple zones, smart features |
Evaluating Energy Efficiency
Energy efficiency lowers electricity bills and reduces environmental impact.
Look for the Seasonal Energy Efficiency Ratio (SEER) and Energy Star label.
- Higher SEER means better efficiency
- Energy Star models meet strict energy use standards
- Inverter technology saves power by adjusting compressor speed
- Check if the unit has eco-friendly refrigerants

Credit: www.thisoldhouse.com
Tools And Materials Needed
Installing a ductless air conditioner requires the right tools and materials. Having these ready makes the process easier and safer.
Below is a guide to the basic tools, accessories, and safety equipment you need for installation.
Basic Installation Tools
These tools help you mount and connect the air conditioner units properly. You will need measuring and cutting tools, as well as tools for electrical work.
- Power drill with drill bits
- Screwdrivers (flathead and Phillips)
- Pipe cutter for refrigerant lines
- Level to ensure proper mounting
- Wrenches and pliers
- Vacuum pump for removing air from refrigerant lines
- Manifold gauge set to check pressures
- Wire stripper and crimper
Required Accessories
You will need some accessories to connect the indoor and outdoor units and ensure proper operation.
| Accessory | Purpose |
|---|---|
| Refrigerant line set | Connects indoor and outdoor units |
| Mounting brackets | Supports the outdoor unit |
| Electrical wire | Connects power supply |
| Insulation tape | Prevents heat loss on refrigerant lines |
| Drain pipe | Removes condensation from indoor unit |
| Sealant | Seals holes and gaps |
Safety Equipment
Safety equipment protects you during installation. Always use these to reduce risks.
- Safety glasses to protect your eyes
- Work gloves for hand protection
- Dust mask to avoid inhaling particles
- Hearing protection if using loud tools
- Non-slip footwear for stable footing
Preparing The Installation Site
Installing a ductless air conditioner needs careful site preparation. This ensures the system works well and lasts long.
Focus on choosing the right place, checking walls and power needs, and clearing the area before installation.
Finding The Ideal Location
Pick a spot with good air flow and easy access for maintenance. Avoid direct sunlight and places near heat sources.
- Place the indoor unit high on a wall for better air circulation
- Keep it away from furniture and curtains
- Ensure the outdoor unit is on a flat, stable surface
- Locate it where noise will not disturb neighbors
Checking Wall And Electrical Requirements
Make sure the wall can hold the indoor unit’s weight. Check for studs or solid materials behind the wall.
| Requirement | Details |
| Wall Strength | Solid wood or concrete preferred |
| Electrical Outlet | Dedicated circuit with proper voltage |
| Clearance | At least 6 inches from ceiling and corners |
| Drainage | Near a drain for condensate water |
Clearing The Workspace
Clear the room and outdoor area around the installation site. Remove obstacles and cover furniture to avoid dust.
- Move furniture away from walls
- Clear floor space near outdoor unit
- Protect floors with drop cloths
- Ensure easy access to power source

Credit: apexelectricmechanical.ca
Mounting The Indoor Unit
Mounting the indoor unit of a ductless air conditioner is an important step. It ensures proper cooling and safe installation. Follow these simple guidelines to mount the unit correctly.
We will cover installing the wall bracket, securing the indoor unit, and connecting drain pipes. Each part is key for a reliable setup.
Installing The Wall Bracket
First, choose a strong wall to hold the bracket. Use a level to make sure the bracket is straight. Mark the holes, then drill them carefully. Secure the bracket with screws and wall anchors if needed.
- Find a sturdy wall free of pipes or wires
- Use a level to align the bracket
- Mark drill points on the wall
- Drill holes and insert anchors if necessary
- Screw the bracket tightly to the wall
Securing The Indoor Unit
After the bracket is ready, carefully lift the indoor unit. Hang it on the bracket hooks and check it fits securely. Tighten any screws or locks to keep the unit stable. Make sure the unit does not move or tilt.
| Task | Details |
| Lift Unit | Hold firmly and align with bracket |
| Hang Unit | Place hooks on bracket securely |
| Check Stability | Ensure no movement or tilt |
| Tighten Screws | Lock unit in place safely |
Connecting Drain Pipes
Connect the drain pipes to the indoor unit to remove condensation. Use the correct pipe size and slope it downwards to allow water to flow out. Secure the pipes with clamps. Check for leaks to avoid water damage.
- Use the drain pipe supplied with the unit
- Attach pipe firmly to the drain outlet
- Make sure pipe slopes downward for drainage
- Secure pipe with clamps or tape
- Inspect connections for leaks
Installing The Outdoor Unit
Installing the outdoor unit of a ductless air conditioner is a key step. It affects how well the system works and lasts.
You need to pick the right spot and secure the unit properly. This guide covers what you should do.
Choosing A Stable Surface
Pick a flat and solid surface for the outdoor unit. It should hold the unit’s weight without shifting.
- Concrete pads are the best option.
- Wooden platforms can work if strong and treated.
- Avoid soft soil or uneven ground.
- Check that the surface will not flood easily.
Mounting The Unit Securely
Secure the unit using brackets or mounting feet. This stops vibration and movement during use.
| Mounting Method | Details |
| Wall Brackets | Use heavy-duty metal brackets fixed to a strong wall. |
| Ground Mount | Place on a concrete pad with anti-vibration pads. |
| Roof Mount | Install with secure brackets and check roof strength. |
Ensuring Proper Clearance
Leave enough space around the unit for airflow and service access. Proper clearance keeps the unit cool and easy to maintain.
- Keep at least 12 inches from walls or fences.
- Leave 24 inches above the unit free of obstructions.
- Clear 36 inches in front of the unit for airflow.
- Do not block the fan or vents.
Connecting Refrigerant Lines
Connecting refrigerant lines is a key part of installing a ductless air conditioner. Proper connection ensures efficient cooling and prevents leaks.
This section explains how to measure and cut tubing, flare and connect pipes, and perform leak testing.
Measuring And Cutting Tubing
Measure the tubing length carefully to fit between the indoor and outdoor units. Add a little extra length for bends and connections.
- Use a tape measure for accuracy.
- Mark the cutting point with a permanent marker.
- Cut the tubing straight using a tubing cutter.
- Deburr the edges to remove sharp metal pieces.
Flare And Connect Pipes
Flare the ends of the tubing to create a tight seal with the pipe fittings. This step prevents refrigerant leaks.
| Tool | Purpose |
|---|---|
| Flare tool | Shapes the tubing end for connection |
| Torque wrench | Tightens flare nuts to recommended torque |
| Pipe wrench | Holds pipes steady during connection |
After flaring, connect the pipes by hand first. Then tighten them with a torque wrench to avoid over-tightening.
Leak Testing
Leak testing ensures no refrigerant escapes from the connections. Use a pressure gauge and soapy water for this test.
- Pressurize the system with nitrogen or dry air.
- Apply soapy water to all flare connections.
- Look for bubbles that indicate leaks.
- Tighten any loose fittings and retest.
Electrical Wiring And Power Setup
Installing a ductless air conditioner needs proper electrical wiring. This ensures the unit runs safely and efficiently.
You must follow electrical codes and use the right tools for power setup. This guide covers key steps to help you.
Running Electrical Cables
First, run electrical cables from your breaker panel to the air conditioner location. Use cables rated for the unit’s power needs.
Keep cables away from sharp edges and heat sources. Secure them with cable clips or conduit for protection.
- Use copper wires for better conductivity
- Choose wire gauge based on unit’s amperage
- Avoid long cable runs to reduce voltage drop
- Protect cables inside conduit if needed
Connecting To Power Supply
Turn off the main power before making any connections. Connect the air conditioner wires to a dedicated circuit breaker.
Match the wires by color: black or red for hot, white for neutral, and green or bare for ground. Tighten all connections securely.
- Use a circuit breaker sized for the unit’s electrical load
- Install a disconnect switch near the unit
- Follow manufacturer’s wiring diagram carefully
- Check all terminal screws are tight
Grounding And Safety Checks
Ground the air conditioner properly to prevent electrical shocks. Connect the ground wire to a grounding point or rod.
Inspect all wiring for damage and test the circuit with a voltage meter. Confirm the breaker and disconnect switch work correctly.
- Use a ground wire that meets local electrical codes
- Check for tight and corrosion-free ground connections
- Test power with a multimeter before turning on
- Verify no exposed wires remain outside terminals
Final Checks And Testing
After installing your ductless air conditioner, it is important to complete final checks. These ensure the system works well and lasts long. Testing the system confirms proper operation and comfort.
This guide covers vacuuming the system, starting it up, and adjusting settings for comfort. Follow each step carefully for best results.
Vacuuming The System
Vacuuming removes air and moisture from the refrigerant lines. This step protects the system from damage and improves efficiency. Use a vacuum pump and follow these key points:
- Connect the vacuum pump to the service port.
- Run the pump for at least 30 minutes.
- Check for leaks during the vacuum process.
- Close valves to keep the vacuum seal before disconnecting.
System Startup
Start the air conditioner system to verify proper operation. Watch for unusual sounds or error codes. The following table shows what to check during startup.
| Check Point | What to Look For | Action If Issue Found |
|---|---|---|
| Power Supply | Stable voltage, no flickering | Inspect wiring and circuit breaker |
| Indoor Unit | Fan runs smoothly | Clean or replace filters |
| Outdoor Unit | Compressor starts without noise | Contact a technician if noisy |
| Refrigerant Lines | No frost or leaks | Check connections, repair leaks |
Adjusting Settings For Comfort
Adjust the air conditioner settings to ensure comfort and efficiency. Use the remote control or wall panel. Important settings include temperature, fan speed, and mode.
Common settings to adjust:
- Set temperature between 72°F and 78°F for comfort.
- Choose fan speed: low, medium, or high.
- Select mode: cooling, heating, or auto.
- Set timer for automatic on/off.
Maintenance Tips For Longevity
Keeping your ductless air conditioner in good shape helps it last longer. Regular care saves money and avoids problems.
Simple maintenance tasks can keep your system running smoothly. Follow these tips to protect your investment.
Cleaning Filters Regularly
Dirty filters block air and make your system work harder. Clean them every month to keep air flowing well.
Remove filters gently and wash with warm water. Let them dry fully before putting back.
- Turn off the unit before cleaning
- Use a soft brush for dust
- Check for tears or damage
- Replace filters if worn out
Inspecting Components
Look at the indoor and outdoor parts for dirt, damage, or wear. Early checks stop small issues from growing.
Check the pipes, wiring, and drain line. Clear any blockages and tighten loose parts if needed.
- Check pipes for leaks
- Inspect wiring for cracks
- Clear the drain line of debris
- Listen for unusual noises
Scheduling Professional Servicing
Hire a technician once a year to check the system deeply. Experts find hidden problems and fix them fast.
Professional service includes cleaning coils, checking refrigerant, and testing system performance.
- Book service before summer starts
- Keep service records for reference
- Ask about parts that may need replacing
- Follow technician advice for care
Frequently Asked Questions
What Tools Are Needed To Install A Ductless Air Conditioner?
You need a drill, screwdriver, level, wrench, hole saw, and mounting brackets. Safety gear like gloves and goggles is recommended. Proper tools ensure a smooth and secure installation process.
How Long Does It Take To Install A Ductless Air Conditioner?
Installation typically takes 2 to 4 hours for a professional. DIY installations may take longer depending on experience. Proper setup ensures efficient cooling and system longevity.
Can I Install A Ductless Air Conditioner Myself?
Yes, if you have basic DIY skills and follow instructions carefully. Electrical work may require a licensed electrician. Proper installation is crucial for optimal performance and safety.
Where Should The Indoor Unit Be Installed?
Install the indoor unit high on a wall with no obstructions. Avoid direct sunlight or heat sources for better efficiency. Proper placement improves air circulation and cooling comfort.
Conclusion
Installing a ductless air conditioner is a straightforward task. Follow the steps carefully. Ensure you have all necessary tools ready. Safety should be your top priority. Always turn off the power before starting. Mount the indoor unit securely. Position the outdoor unit on a stable surface.
Connect the pipes and cables with precision. Test the system to ensure it’s working well. A properly installed unit cools efficiently. It also saves energy. Enjoy a comfortable home environment with your new air conditioner.