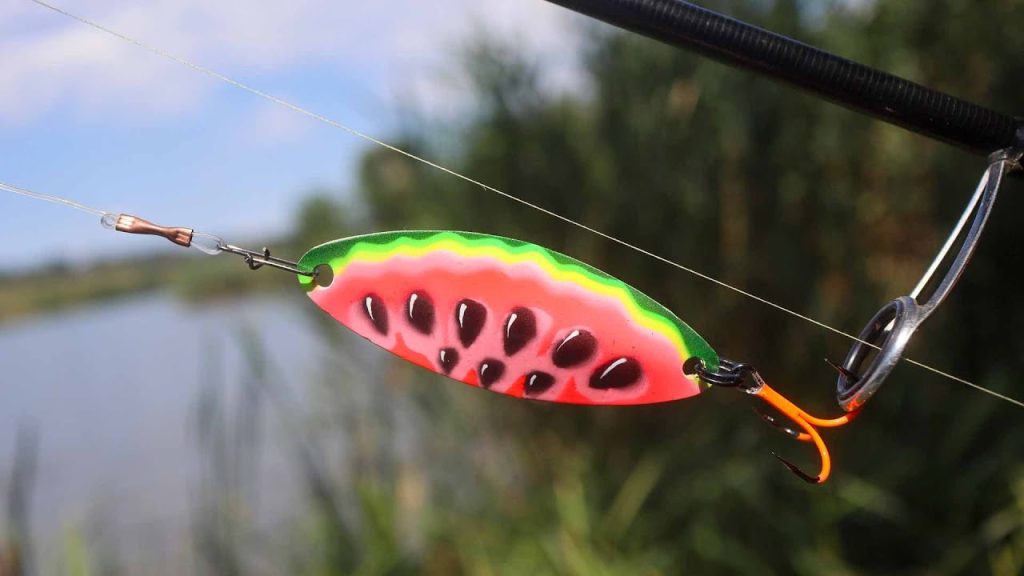
Are you tired of using the same old fishing lures that everyone else has? Imagine catching more fish with lures you made yourself.
Making handmade fishing lures is easier than you think, and it can give you an edge on the water. In this guide, you’ll discover simple steps to create lures that attract fish like never before. Ready to boost your fishing game and impress your friends?
Keep reading to learn how to craft your own effective, unique fishing lures today.

Credit: www.battlbox.com
Choosing Materials
Making handmade fishing lures needs good materials. The right choice helps your lure work well.
This guide covers wood and plastic, hooks and eyes, and paints and finishes.
Selecting Wood And Plastic
Wood gives your lure a natural weight and feel. Plastic is light and easy to shape. Choose based on the type of fish you want to catch.
- Use balsa wood for light lures that float.
- Try cedar or basswood for heavier, sinking lures.
- Pick clear plastic for see-through designs.
- Use hard plastic for durable lures that last long.
Picking Hooks And Eyes
Hooks need to be strong and sharp to catch fish. Eyes add realism and attract fish by reflecting light.
| Material | Best Use |
| Stainless steel hooks | Resist rust in saltwater |
| Carbon steel hooks | Sharp and strong for freshwater |
| Plastic eyes | Lightweight and easy to glue |
| Glass eyes | Reflect light and add realism |
Choosing Paints And Finishes
Paints give your lure color and style. Finishes protect your work from water and damage.
Here are tips for paints and finishes:
- Use waterproof acrylic paints for bright colors.
- Apply thin layers to avoid cracking.
- Choose clear epoxy resin for a strong, shiny finish.
- Use matte finish for a natural look.

Credit: www.youtube.com
Basic Tools Needed
Making handmade fishing lures is a fun and creative process. You need some basic tools to get started. These tools help you shape, finish, and decorate your lures.
Below, you will find the main categories of tools you will use. Each group has specific tools that make lure making easier and more precise.
Cutting And Shaping Tools
Cutting and shaping tools help you form the basic shape of your fishing lure. You will need sharp and reliable tools for clean cuts and smooth shapes.
- Utility knife or craft knife for detailed cuts
- Small saw or coping saw for cutting wood or plastic
- Files in different shapes for shaping curves
- Wire cutters for trimming metal parts
Sanding And Drilling Equipment
Sanding tools smooth the lure’s surface. Drilling tools create holes for hooks and eyes. Both are important for a finished and functional lure.
| Tool | Purpose |
| Sandpaper (various grits) | Smooths rough surfaces |
| Needle files | Refines small areas |
| Electric drill or hand drill | Drills holes for hardware |
| Drill bits (small sizes) | Used for precise holes |
Painting And Sealing Supplies
Paint and seal your lure to add color and protect it. You need brushes and sealants to finish the lure well.
Essential painting and sealing tools include:
- Fine paintbrushes for detail work
- Acrylic paints in various colors
- Clear spray sealant to protect paint
- Masking tape to create clean paint lines
Designing Your Lure
Designing a fishing lure is a fun and creative part of making handmade lures. It helps your lure look attractive to fish.
Good design includes the shape, size, color, and how the lure moves in water. These details can catch more fish.
Sketching Shapes And Sizes
Start by drawing different shapes for your lure. Try long, short, thin, or thick shapes to see what looks best.
Consider the size based on the fish you want to catch. Small fish need small lures, big fish like bigger ones.
- Long and slim shapes mimic minnows
- Round shapes can look like frogs or bugs
- Wide shapes work well for slow water
Deciding On Colors And Patterns
Choose colors that match the fish’s natural food or the water type. Bright colors work in dark water.
Patterns can help make your lure stand out. Use spots, stripes, or shiny finishes to attract fish.
- Natural colors blend in for clear water
- Bright colors catch attention in muddy water
- Shiny finishes reflect light like real fish scales
Adding Weight And Buoyancy
Weight helps your lure sink or move in the water. Add small weights inside to control this.
Buoyancy decides if the lure floats, sinks, or stays in the middle. Use foam or air bubbles for floaters.
- Heavier lures sink faster
- Light lures float or stay near the surface
- Balanced lures can swim at different depths
Shaping The Lure Body
Shaping the lure body is an important part of making fishing lures by hand. It affects how the lure moves and attracts fish.
You start with a raw piece of material and shape it to look like a small fish or other bait.
Cutting The Base Shape
Begin by drawing the lure shape on your wood or plastic block. Use a pencil to mark the outline clearly.
Cut the shape carefully using a saw or carving knife. Follow the lines closely to keep the shape accurate.
- Use a coping saw for curved shapes
- Cut slowly to avoid mistakes
- Wear safety glasses to protect your eyes
Sanding For Smoothness
After cutting, use sandpaper to smooth the lure’s surface. Start with rough grit and move to fine grit.
Sanding helps the lure look better and swim more naturally in the water.
- Use 80-grit sandpaper first
- Finish with 220-grit or finer
- Sand all sides evenly
Drilling Hook And Eyelet Holes
Mark where the hooks and eyelets will go on the lure. Use a small drill bit to make holes in these spots.
Drill slowly to avoid splitting the lure body. Make sure the holes are the right size for hooks and eyelets.
- Use a drill bit slightly smaller than the hook eye
- Drill straight holes for better fit
- Test fit hooks before finishing
Painting And Finishing
Painting and finishing are key steps in making fishing lures look real and last long. Good painting attracts fish and protects the lure.
This part focuses on base coats, adding patterns, and sealing the lure for strength.
Applying Base Coats
Start by applying a base coat to your lure. This coat gives a smooth surface for other colors.
Use spray paint or brush paint in thin layers. Let each layer dry before adding the next.
- Choose light colors like white or silver for a bright base
- Use multiple thin coats to avoid drips
- Allow full drying time between coats
Detailing With Patterns
Add patterns to make your lure look like real fish or bugs. Patterns help attract fish by creating movement illusions.
Use fine brushes, stencils, or markers for details like stripes, spots, or scales.
- Paint small dots or stripes for natural effects
- Layer colors for depth and realism
- Work slowly and carefully for neat details
Sealing For Durability
Sealing protects your paint from water and damage. It also gives the lure a shiny finish.
Use clear varnish or epoxy resin. Apply thin coats and let dry fully before use.
- Choose waterproof sealers for fishing use
- Apply multiple coats for best protection
- Allow enough drying time between coats
Attaching Hooks And Hardware
Adding hooks and hardware is a key step in making handmade fishing lures. This step affects how well the lure works in water.
Choosing the right hooks and attaching them correctly keeps your lure strong and effective.
Choosing Hook Sizes
Pick hook sizes that match the size and type of your lure. Small lures need smaller hooks, while larger lures require bigger hooks.
- Use size 8 to 12 hooks for small lures.
- Choose size 4 to 6 hooks for medium lures.
- Select size 1/0 to 3/0 hooks for large lures.
- Consider the fish species you want to catch when picking sizes.
Securing Hooks Safely
Secure hooks tightly to keep them from loosening or falling off. Use strong glue and wrap thread around the hook eye and lure body.
- Place the hook in the desired position on the lure.
- Wrap strong thread several times around the hook and lure.
- Apply waterproof glue to the wrapped thread.
- Let the glue dry completely before using the lure.
- Check the hook tightness regularly after fishing.
Adding Split Rings And Eyes
Split rings and eyes help connect hooks and add movement to your lure. Choose the right size and type for your lure’s design.
| Hardware Part | Purpose | Tip |
| Split Rings | Attach hooks to lure | Use pliers to open and close safely |
| Eyes | Connect line or add weight | Glue securely and check alignment |
Testing Your Lure
Testing your handmade fishing lure is key to see how it performs in water. This step helps you find out if the lure moves naturally to attract fish. You want to check if it floats well and swims with the right action.
Proper testing also shows if the lure needs changes in weight or balance. This way, you can make small fixes before using it on a real fishing trip.
Checking Buoyancy And Action
Start by placing the lure in a clear container filled with water. Watch if it floats, sinks, or suspends in the water. The lure should have the right buoyancy for the type of fishing you want.
Next, pull the lure slowly through the water to see how it moves. The action should mimic the motion of real baitfish. Look for wobbling, spinning, or darting motions that attract fish.
- Floaters stay on the surface
- Suspenders stay mid-water
- Sinkers go to the bottom
- Action can be tight or wide wobble
- Check for smooth, natural movement
Adjusting Weight And Balance
If the lure does not float or move right, adjust its weight. Add small weights inside the body or use heavier hooks. Balance affects how the lure swims and how easy it casts.
| Issue | Cause | Fix |
| Lure sinks too fast | Too heavy | Remove weight or use lighter hooks |
| Lure floats too much | Too light | Add weight or heavier hooks |
| Lure spins oddly | Imbalanced weight | Shift weights inside lure |
| Lure swims unevenly | Incorrect balance | Adjust weight placement |
Field Testing Tips
Take your lure outside to test it in a real fishing spot. Cast it several times and watch how it moves in the current. Try different retrieval speeds to see what works best.
- Test in calm and moving water
- Use different rod speeds
- Observe fish reactions if possible
- Note any snags or line twists
- Make small changes after each test
Tips For Success
Making handmade fishing lures is fun and rewarding. Care and skill help you create lures that catch fish well.
Follow simple tips to improve your lure making. This guide shares advice on common mistakes, care, and customization.
Common Mistakes To Avoid
Many beginners make lures too heavy or too light. This can stop the lure from swimming right in water.
Using poor glue or paint can cause lures to break or fade quickly. Choose good quality materials for longer use.
- Do not make lures too heavy or unbalanced
- Avoid weak glue that breaks easily
- Do not use paint that peels off fast
- Test lures in water before fishing
Maintaining Your Lures
Keep your lures clean after every fishing trip. Dirt and salt can damage them if not washed off.
Store lures in a dry box to stop rust on hooks. Replace hooks if they become dull or bent.
- Rinse lures with fresh water after use
- Dry lures completely before storage
- Keep lures in a tackle box with compartments
- Sharpen or change hooks as needed
Customizing For Different Fish
Different fish like different colors and sizes of lures. Learn what your target fish prefers.
Change lure shape and color based on water clarity and weather. Bright colors work well in murky water.
- Use small lures for trout and panfish
- Pick bright colors for cloudy water
- Choose natural colors for clear water
- Match lure size to fish size

Credit: www.amazon.com
Frequently Asked Questions
What Materials Are Needed For Handmade Fishing Lures?
You need wood, hooks, paint, glue, and eyes for handmade fishing lures. These basics help create effective, durable lures.
How Do I Shape A Fishing Lure Properly?
Shape the lure using a carving knife or a lathe. Smooth edges ensure better water movement and attract fish.
What Types Of Paint Work Best For Lures?
Use waterproof, non-toxic acrylic or enamel paint. These paints provide vibrant colors and protect the lure from water damage.
How Long Does It Take To Make A Fishing Lure?
It typically takes 1 to 3 hours to make a lure. Time varies based on design complexity and drying times.
Conclusion
Creating handmade fishing lures is a rewarding hobby. You craft unique designs. Personalize them to catch specific fish. The process is simple but requires patience. Gather materials, follow steps, and let creativity guide you. Test your lures in local waters.
Notice the difference they make. Share your creations with fellow fishing enthusiasts. Enjoy the satisfaction of a successful catch. Handmade lures add a personal touch to fishing adventures. They make each trip more exciting. Discover the joy of using something you made.
Dive into this fulfilling hobby today.