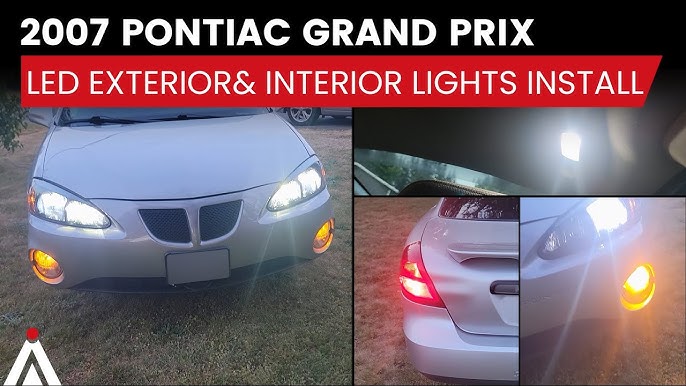
Are you ready to give your car a sleek, modern look that turns heads wherever you go? Installing LED lights on your car’s exterior is one of the easiest and most effective ways to upgrade its style and visibility.
But maybe you’re wondering where to start or worried it might be too complicated. Don’t worry—you’re in the right place. This guide will walk you through every step, making the process simple and doable, even if you’ve never worked with car lighting before.
Keep reading, and soon your car will shine brighter than ever.
Choosing The Right Led Lights
Installing LED lights on your car’s exterior can improve visibility and style. Choosing the right lights is important for performance and safety.
This guide helps you understand different types of LED lights, what to consider before buying, and legal rules to follow.
Types Of Led Lights For Cars
There are several LED light types for car exteriors. Each type has a different use and brightness level.
- LED Headlights:Bright lights for night driving and better road vision.
- LED Fog Lights:Low-mounted lights to improve visibility in fog or rain.
- LED Strip Lights:Flexible strips used for accent lighting on bumpers or grills.
- LED Brake Lights:Red lights that signal braking to other drivers.
- LED Turn Signals:Amber lights that indicate turning or lane changes.
Factors To Consider Before Buying
Before buying LED lights, check several key factors. These affect how well the lights work and last.
| Factor | What to Look For |
| Brightness | Measured in lumens; higher means brighter light. |
| Color Temperature | Kelvin scale; 5000K is bright white, 3000K is warm yellow. |
| Power Consumption | Lower watts save battery power and reduce heat. |
| Durability | Waterproof and shockproof designs last longer outdoors. |
| Compatibility | Check if lights fit your car model and wiring. |
Legal Regulations And Safety
Different places have rules about car lighting. Follow these rules to avoid fines and drive safely.
- Only use colors allowed for each light type (white for headlights, red for brake lights).
- Do not install lights that blind other drivers or distract traffic.
- Check local laws for light brightness limits and placement.
- Use certified LED lights to meet safety standards.
- Test your lights after installation to ensure proper function.
Tools And Materials Needed
Installing LED lights on your car exterior requires the right tools and materials. Using proper equipment helps the job go smoothly.
Gather everything before you start. This guide lists what you need to install LED lights safely and correctly.
Essential Tools
You need some basic tools to install LED lights on your car. These tools help you connect and fix the lights firmly.
- Screwdrivers (Phillips and flathead) for removing panels
- Wire stripper to remove insulation from wires
- Crimping tool for secure wire connections
- Electric drill with drill bits for mounting lights
- Multimeter to check electrical connections
- Heat gun to shrink wire tubing
- Measuring tape to position lights evenly
Additional Supplies
Besides tools, you will need some supplies to complete the LED light installation. These help protect and power your lights.
- LED light strips or pods designed for car exterior use
- Electrical tape for securing wires
- Heat shrink tubing to cover wire joints
- Wire connectors or butt connectors
- Zip ties to keep wires tidy
- Fuse holder and fuse for safety
- Switch to control the lights
- Power wires compatible with your car’s battery
Safety Gear
Wear safety gear to protect yourself during installation. Safety helps prevent injuries and accidents.
- Safety glasses to protect your eyes from debris
- Gloves to avoid cuts and electrical shocks
- Long sleeves to protect your arms
- Mask if you work in dusty or dirty areas
Preparing The Car Exterior
Installing LED lights on your car’s exterior starts with good preparation. You need a clean and ready surface for the lights to stick well.
Preparing the area also helps you find the best spots for the lights. This guide covers cleaning, locating spots, and removing old parts.
Cleaning The Surface
Clean the car surface where you want to install the LED lights. Dirt, dust, and grease can stop the lights from sticking.
Use soap and water first, then dry the area with a soft cloth. For oily spots, use rubbing alcohol to remove residue.
- Wash with mild soap and water
- Dry fully with a clean cloth
- Wipe oily areas with rubbing alcohol
- Wait until the surface is completely dry
Locating Installation Points
Look for flat and smooth areas on your car’s exterior. These spots hold LED lights better and make installation easier.
Avoid curved or rough surfaces. Check near the edges of bumpers, under mirrors, or along door frames for good spots.
- Choose flat, smooth surfaces
- Avoid curved or textured areas
- Check near bumpers and mirrors
- Make sure spots are visible and safe
Removing Existing Fixtures
Take off any old lights or covers where you want to install the new LEDs. This clears space and avoids interference.
Use the right tools like screwdrivers or plastic trim removers. Be gentle to avoid damage to the car’s paint or parts.
- Use screwdrivers for screws
- Use plastic tools to pry covers
- Work slowly to avoid scratches
- Keep old parts safe for reuse or disposal

Credit: auxito.com
Wiring And Electrical Setup
Installing LED lights on your car’s exterior needs careful wiring. Good electrical setup keeps lights safe and working well.
This guide explains how to wire LED lights step-by-step. You will learn how to find power sources, connect wires safely, and use fuses and relays.
Identifying Power Sources
First, find a power source to connect your LED lights. The power source must match the light’s voltage and current needs.
Common power sources include the car battery, fuse box, or existing light wiring. Using the battery is easy but needs a fuse for safety.
- Battery terminals provide direct power
- Fuse box has switched power options
- Existing light wires can share power
Connecting Wires Safely
Use the right wire size for your LED lights. Thin wires can overheat and cause problems. Thicker wires carry current safely.
Always use proper connectors. Avoid twisting wires by hand. Secure connections prevent shorts and loose wires.
- Choose wires rated for car use
- Strip wire ends cleanly before connecting
- Use crimp connectors or solder joints
- Wrap connections with electrical tape or heat shrink
Using Fuses And Relays
Fuses protect your car and lights from electrical damage. If too much current flows, the fuse breaks the circuit.
Relays allow you to control high current safely with a low current switch. They help avoid overloading switches.
- Choose fuse rating slightly above LED current
- Place fuse close to the power source
- Use a relay if LEDs draw high current
- Connect relay coil to the control switch
Mounting The Led Lights
Mounting LED lights on your car’s exterior needs care and attention. Proper mounting keeps lights safe and working well.
Use the right tools and parts to fix the lights. This guide helps you mount LED lights correctly.
Attaching Lights Securely
First, clean the area where you will mount the lights. Dirt can stop the lights from sticking well.
Use screws or strong double-sided tape to attach the lights. Make sure they do not move or fall off.
- Check the surface is dry and smooth
- Use screws for a stronger hold
- Apply double-sided tape on clean surfaces
- Test the lights to ensure they are tight
Adjusting Angles And Positions
Set the lights to point where you want the light beam. Angles affect how well the lights show the road.
Try small changes and check the brightness and coverage. Adjust until you get the best view and look.
- Start with the lights facing forward
- Move them up or down to avoid glare
- Turn left or right for wider coverage
- Test in dark places to see the effect
Sealing And Weatherproofing
Protect the lights from rain and dust by sealing edges. Use silicone or waterproof sealant around mounts.
Check for gaps where water can enter. Proper sealing stops damage and keeps lights working longer.
- Apply waterproof sealant on mounting edges
- Cover wires with protective tubing
- Inspect seals regularly for cracks
- Replace damaged seals quickly
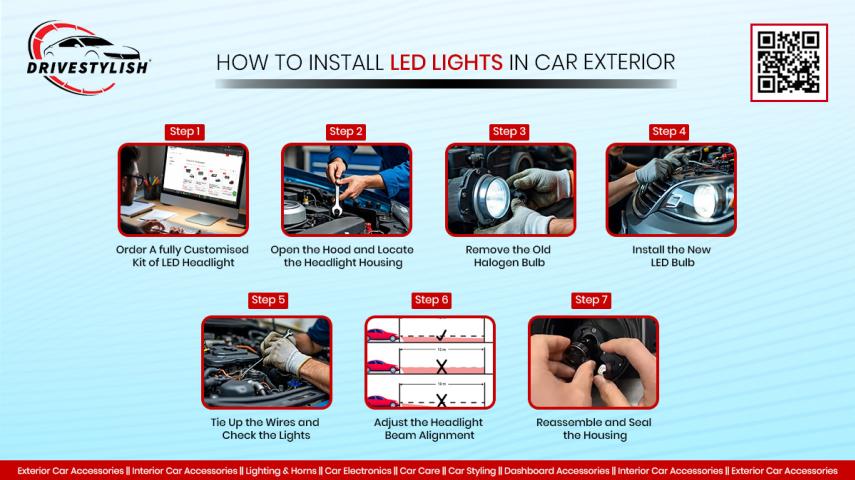
Credit: www.promoteproject.com
Testing And Troubleshooting
After installing LED lights on your car exterior, testing is important. Testing ensures all lights work as expected. Troubleshooting helps fix any problems quickly.
Follow simple steps to check your LED lights. This guide helps you find common issues and keep your lights working well.
Checking Light Functions
Turn on your car lights to test each LED strip or bulb. Check if all lights turn on and shine evenly. Look for flickering or dim areas.
Test each mode, like brake lights, turn signals, and running lights. Make sure they respond correctly when you activate them.
- Switch on headlights and check LED brightness
- Activate turn signals to see blinking lights
- Press brake pedal to test brake lights
- Check for uneven light or dead spots
Common Issues And Fixes
Sometimes LED lights may not work properly. Some common problems include no light, flickering, or weak brightness. These issues often have easy fixes.
Check wiring connections first. Loose or damaged wires can cause problems. Replace any broken fuses or bulbs. Also, clean the light surface to remove dirt.
- No light: Check fuse and wiring connections
- Flickering: Tighten loose wires or connectors
- Dim light: Inspect for dirty or damaged LEDs
- Wrong color or mode: Verify the controller settings
Maintaining Performance
Keep your LED lights working well by cleaning them regularly. Use a soft cloth and mild cleaner. Avoid harsh chemicals that can damage lights.
Check wiring and connections every few months. Replace any parts showing wear or damage. Proper care extends the life of your car’s LED lights.
- Clean lights monthly to remove dirt and grime
- Inspect wires and connectors for damage
- Replace faulty fuses or bulbs promptly
- Avoid water exposure to electrical parts
Enhancing With Custom Features
Installing LED lights on your car exterior can improve its look and safety. Custom features add more control and style to your lighting setup.
These features let you change colors, sync lights with your car, and upgrade to smart systems for easier use.
Adding Controllers Or Remotes
Controllers and remotes help you change LED light colors and patterns easily. You do not need to touch the lights directly.
Some remotes let you turn lights on or off from a distance, giving you more convenience and safety.
- Wireless remotes for easy access
- Color-changing options with buttons
- Multiple modes for different effects
- Brightness control for day or night
Syncing With Car Systems
Syncing LED lights with your car system lets lights react to sounds or signals. This adds a dynamic look to your car.
You can connect lights to your car’s music or indicators. Lights can flash or change with the beat or when you turn.
- Connect lights to car stereo for music sync
- Link lights to turn signals for safety
- Use engine status to change light patterns
Upgrading To Smart Lighting
Smart lighting systems use apps or voice commands for control. This upgrade makes using LED lights simple and fun.
With smart lights, you can schedule light changes or use presets. Some systems work with smart home assistants too.
- Control lights via smartphone apps
- Set timers and schedules for lights
- Use voice commands with assistants
- Customize scenes and modes easily

Credit: auxito.com
Frequently Asked Questions
How Do I Install Led Lights On Car Exterior?
To install LED lights, clean the surface first. Connect the wiring to the car battery. Secure lights with adhesive or screws. Test the lights before finalizing the setup.
What Tools Are Needed For Led Car Light Installation?
You need a screwdriver, wire stripper, electrical tape, and adhesive. A multimeter helps check connections. Optional tools include a drill and heat shrink tubing.
Are Led Exterior Lights Safe For Cars?
Yes, LED lights are safe when installed properly. They consume less power and last longer. Ensure wiring is insulated to prevent shorts and follow local regulations.
Can I Install Led Lights Without Professional Help?
Yes, with basic tools and instructions, you can install LED lights yourself. Follow a reliable guide carefully and test connections before securing the lights.
Conclusion
Installing LED lights on your car exterior can be simple. Follow the steps carefully for a successful installation. First, gather all necessary tools and materials. Then, ensure you understand the wiring. Safety is key, so take precautions. Test the lights before finalizing the setup.
Enjoy the enhanced look and visibility of your car. Proper installation extends the lifespan of your lights. Regularly check the connections for any issues. This small upgrade can make a big difference. Feel proud of your car’s new appearance. Your efforts will shine through.