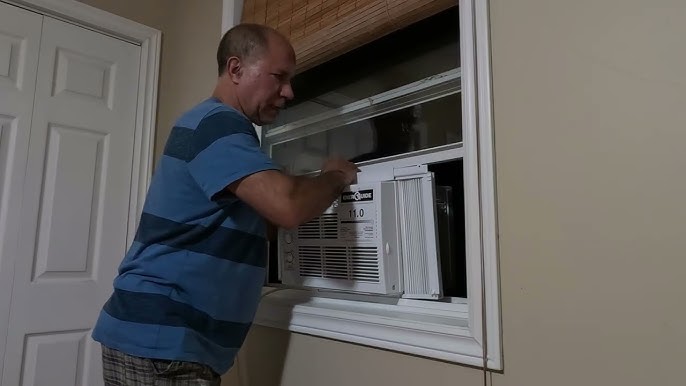
Are you tired of struggling with window air conditioners that block your view or don’t fit right? Installing a through the wall air conditioner might be the perfect solution for your home.
It keeps your windows clear, saves space, and cools your room efficiently. But how do you get started? Don’t worry—you don’t need to be an expert or hire expensive help. In this guide, you’ll learn exactly how to install a through the wall air conditioner step by step.
By the end, you’ll feel confident and ready to enjoy cool, comfortable air all summer long. Keep reading, and let’s make your home a cooler place today!
Choosing The Right Air Conditioner
Measure the room size first. This helps to find the right air conditioner size. A unit too small will not cool well. Too big wastes energy and money.
Check the air conditioner’s cooling power. It is shown as BTU (British Thermal Units). Rooms need different BTUs:
- Small rooms: about 5,000-6,000 BTU
- Medium rooms: 7,000-10,000 BTU
- Large rooms: 12,000 BTU or more
Look for the Energy Efficiency Ratio (EER). Higher EER means less electricity use. It saves money on bills and helps the planet.
| BTU | Room Size (sq ft) | Energy Efficiency |
|---|---|---|
| 5,000-6,000 | Up to 150 | Look for EER 10 or higher |
| 7,000-10,000 | 150 to 350 | Choose EER 10 or more |
| 12,000+ | Over 350 | Pick EER 11 or higher |
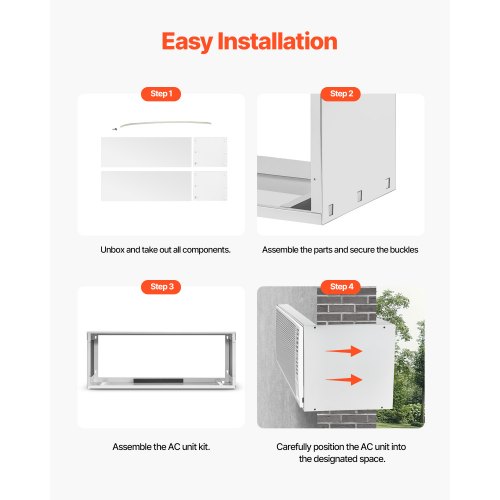
Credit: www.vevor.ca
Gathering Tools And Materials
Gathering the right toolsis key for a smooth installation. Prepare a measuring tapeto check wall size. A drillhelps make holes for the unit. Have a screwdriverready for screws. A levelkeeps the air conditioner straight. Use a jigsaw or handsawto cut the wall opening.
Extra supplies improve the setup. Use caulk or weather strippingto seal gaps. Get mounting bracketsto hold the air conditioner firmly. A support bracketmight be needed for heavy units. Safety glasses and gloves protect during work.
| Essential Tools | Additional Supplies |
|---|---|
| Measuring Tape | Caulk or Weather Stripping |
| Drill | Mounting Brackets |
| Screwdriver | Support Bracket |
| Level | Safety Glasses & Gloves |
| Jigsaw or Handsaw |
Preparing The Wall
Choose a wall spot that faces outside for venting. Check for pipes, wires, or studs inside the wall. Clear space is key for a good fit and safe use.
Use a tape measure to mark the air conditioner’s size on the wall. Make sure the marks are level and square. Double-check measurements before cutting.
Cutting The Wall Opening
Safetyis very important before cutting the wall. Wear protective gogglesand gloves to avoid injuries. Make sure the area is clear of electrical wires and pipes. Use a stud finderto check for studs inside the wall. Turn off power to that part of the wall to be safe.
Use a penciland a level to mark the exact size of the hole. A jigsawor reciprocating sawworks best for cutting through drywall and wood. Cut slowly and carefully along the lines to avoid mistakes. Keep the saw steady to make a clean cut.
After cutting, the edges can be rough and sharp. Use sandpaperor a fileto smooth them. This helps the air conditioner fit snugly and prevents damage to it or the wall. Clean the area from dust and debris before installing the unit.
Installing The Support Bracket
The support bracket must be placed at the right height on the wall. It should line up with the bottom of the air conditioner unit. This helps the unit stay level and secure.
Check the wall for strong studs or solid material before fixing the bracket. Use a level tool to make sure the bracket is perfectly horizontal. Mark the drill holes clearly.
Use heavy-duty screws and anchors to fasten the bracket tightly. Tighten all screws firmly to avoid any movement. The bracket must hold the full weight of the air conditioner safely.
- Locate studs or solid wall areas.
- Use a level to position the bracket evenly.
- Mark holes for drilling carefully.
- Use screws and anchors that fit the wall type.
- Tighten screws until the bracket feels very secure.

Credit: www.youtube.com
Placing The Air Conditioner
Slide the air conditioner carefully into the wall opening. Make sure it fits snugly without forcing it. Check the unit’s position to avoid gaps where air can escape. The unit should sit evenly inside the wall.
Use a level tool to check if the air conditioner is straight. Adjust the unit until it is perfectly horizontal. A level unit works better and prevents water leaks. Small shifts can make a big difference.
Secure the air conditioner with the provided screws or brackets. Tighten all fasteners firmly to keep the unit stable. Double-check that the unit does not move or wobble. Proper securing helps the air conditioner last longer.
Sealing And Insulating
Apply weatherproof sealantaround the air conditioner’s edges. This stops air leaks and keeps water out. Use a caulking gun for an even layer. Make sure to cover all gaps and cracks. Let the sealant dry fully before proceeding.
Adding insulationaround the unit helps keep the room cool or warm. Use foam or fiberglass insulation to fill the space between the unit and the wall. This reduces energy loss and improves efficiency. Cut insulation to fit snugly without gaps. Secure it well to prevent it from falling out.

Credit: www.doityourself.com
Electrical Connections
Check the air conditioner’s power needs. Most through-the-wall units require a dedicated electrical circuit.
Use the right circuit breaker size. It prevents electrical overloads and fires.
Connect the unit to a properly grounded outlet. This ensures safety during operation.
Plug the unit securely. Loose plugs can cause sparks or damage.
After plugging in, turn on the unit and testall functions. Listen for strange noises and check airflow.
Make sure the unit cools properly. If not, recheck connections or call an electrician.
Final Checks And Maintenance Tips
Check the air conditioner’s fit in the wall. Make sure it is stable and sealed. Look for gaps or cracks around the unit. These can let air or water in.
Test the unit by turning it on. Listen for strange sounds. Check if it cools the room well. Inspect the power cord and plug for damage.
- Clean or replace the air filter every month.
- Wipe the exterior with a damp cloth to remove dust.
- Keep the vents clear of furniture or curtains.
- Remove debris from the outside unit regularly.
- Turn off the unit when not in use to save energy.
Frequently Asked Questions
How Do I Measure For A Through The Wall Air Conditioner?
Measure the wall opening’s width, height, and depth accurately. Ensure the space matches the air conditioner’s specifications for a secure fit.
What Tools Are Needed To Install A Wall Air Conditioner?
You’ll need a drill, screwdriver, level, measuring tape, caulk gun, and possibly a saw for the installation.
Can I Install A Through The Wall Ac Myself?
Yes, with proper tools and instructions, DIY installation is possible. Follow safety guidelines and manufacturer steps carefully for best results.
How Do I Seal Gaps After Installing The Ac Unit?
Use weatherproof caulk or foam sealant around the unit edges. This prevents air leaks and improves energy efficiency.
Conclusion
Installing a through the wall air conditioner can be simple. Follow the steps carefully for a successful installation. Make sure you have all the tools ready before starting. Measure the wall and unit accurately. This ensures a good fit. Cut the wall opening with precision.
Secure the unit in place firmly. Double-check all connections for safety. Regular maintenance keeps it running efficiently. Enjoy a cooler home with your new air conditioner. Stay comfortable and refreshed during hot days. Happy cooling!