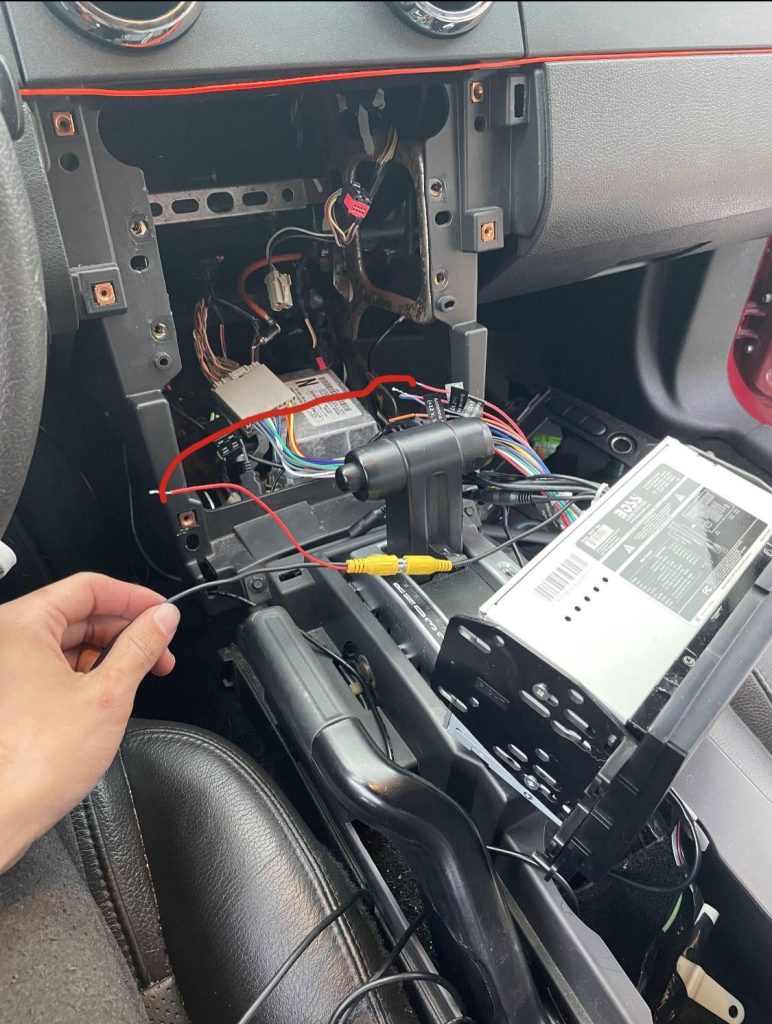
Is your car’s reverse camera acting up right when you need it most? You’re not alone.
A faulty reverse camera can make parking tricky and even dangerous. But don’t worry—you don’t always need to rush to a mechanic or spend a fortune. You’ll discover simple, clear steps to fix your reverse camera yourself. By the end, you’ll feel confident getting your camera back in shape, making every backup smooth and safe.
Keep reading to learn how to solve this common problem quickly and easily.
Common Reverse Camera Issues
Reverse cameras help drivers see behind the car. They make parking and backing up safer. Sometimes, these cameras stop working right.
Knowing common problems can help you fix the camera faster. Here are some frequent issues and how to check them.
No Image Display
If the screen stays black or blank, the camera might not send a signal. This can happen if the camera is off or the wire is loose.
Check the following to fix no image display:
- Make sure the car is in reverse gear.
- Inspect the camera connection and wiring for damage.
- Check the fuse related to the camera system.
- Test the display unit to ensure it works properly.
Flickering Screen
A flickering screen can distract the driver. This issue often means a loose connection or electrical interference.
Try these tips to stop the flickering:
- Secure all camera and monitor connections.
- Check for worn or damaged cables.
- Keep power cables separate from signal wires.
- Replace any faulty wires or connectors.
Distorted Or Blurry View
A blurry or distorted image reduces visibility. Dirt, moisture, or damage can cause this problem.
| Cause | Fix |
| Dirty camera lens | Clean with soft cloth and mild cleaner |
| Water or moisture inside camera | Dry camera or replace if sealed poorly |
| Damaged lens or camera | Replace camera unit |
| Wrong camera angle | Adjust camera position |
Camera Not Activating
Sometimes the camera does not turn on when you shift to reverse. This can be a wiring or power issue.
Follow these checks to solve activation problems:
- Verify the reverse light switch works correctly.
- Check the camera’s power supply and ground connection.
- Inspect the video signal cable for breaks.
- Test the camera with a direct power source if possible.
- Replace faulty parts as needed to restore function.

Credit: www.reddit.com
Tools And Materials Needed
Fixing a reverse camera in your car requires the right tools and materials. Using proper items makes the process easier.
This guide lists the basic tools, replacement parts, and cleaning supplies you need to get started.
Basic Tools
These tools help you open, test, and fix the camera system safely and quickly.
- Screwdrivers (Phillips and flathead)
- Multimeter for electrical testing
- Plastic pry tools to remove panels
- Wire strippers and cutters
- Electrical tape
- Socket wrench set
- Flashlight or headlamp
Replacement Parts
You may need to replace some parts if they are damaged or worn out.
| Part | Description |
| Reverse Camera Module | The main camera unit mounted on the car |
| Wiring Harness | Connects the camera to the car’s electrical system |
| Fuse | Protects the circuit from electrical damage |
| Video Cable | Transmits the camera image to the display screen |
Cleaning Supplies
Clean parts ensure better camera performance and longer life.
- Microfiber cloth for gentle cleaning
- Isopropyl alcohol to remove dirt and grease
- Compressed air can to blow away dust
- Soft brush for hard-to-reach areas
Inspecting The Camera And Connections
If your car’s reverse camera is not working, the problem might be the camera or its connections. Checking these parts can help find the issue.
Start by inspecting the camera lens and then look at the wiring and connectors. Finally, test the power supply to the camera.
Checking The Camera Lens
Look at the camera lens for dirt, scratches, or damage. A dirty or broken lens can cause a blurry or no image.
Clean the lens gently with a soft cloth and some water. Avoid using strong chemicals that can harm the lens.
Examining Wiring And Connectors
Check the wires leading to the camera for cuts, breaks, or loose connections. Damaged wires can stop the camera from working.
Look at the connectors and plugs. Make sure they are tight and free from dirt or rust. Clean or replace any damaged parts.
- Inspect wires for cracks or wear
- Ensure connectors fit tightly
- Remove dirt or corrosion from plugs
- Replace damaged wires or connectors
Testing Power Supply
Use a multimeter to check if the camera gets power. Without power, the camera will not turn on.
Check the fuse box for blown fuses related to the camera. Replace any blown fuses with the right type.
- Test voltage at camera power wires
- Check fuse for camera circuit
- Replace blown fuses carefully
Cleaning And Maintenance Tips
Keeping your car’s reverse camera clean helps maintain clear images. Dirt and moisture can blur the view and cause problems.
Regular care improves the camera’s performance and extends its life. Follow simple steps to protect it from damage.
Removing Dirt And Debris
Clean the camera lens gently to avoid scratches. Use a soft cloth and mild cleaner to remove dust and grime.
- Use a microfiber cloth for wiping
- Apply water or lens cleaner, not harsh chemicals
- Avoid using abrasive materials or brushes
- Clean the lens after rain or mud splashes
Protecting Against Moisture
Moisture can cause fogging or damage inside the camera. Keep the camera dry and sealed properly.
| Method | Details |
| Check seals | Inspect rubber seals around the camera for cracks |
| Use waterproof covers | Install protective covers if available for your model |
| Park in shade | Reduce moisture buildup by parking in covered areas |
| Dry after washing | Wipe the camera dry after car washes or rain |
Regular Maintenance Schedule
Set a routine to check and clean the camera. Regular care prevents issues and keeps the image clear.
- Inspect the camera lens every two weeks
- Clean the lens and surrounding area as needed
- Check for moisture or fogging monthly
- Test the camera image quality regularly
- Seek professional help if image problems persist
Step-by-step Repair Guide
Fixing a reverse camera in your car can improve safety while parking. This guide shows you easy steps to repair the camera.
Follow the steps carefully to avoid damage and ensure the camera works well again.
Disconnecting The Battery
Always disconnect the car battery before starting repairs. This prevents electric shock and protects your car’s electronics.
Locate the negative terminal and use a wrench to remove the cable. Keep the cable away from the battery.
Removing The Camera
Find the camera usually mounted near the rear license plate. Remove any screws or clips holding it in place.
Carefully disconnect the camera’s wiring connector. Avoid pulling on the wires directly to prevent damage.
Repairing Or Replacing Components
Check the camera lens and wiring for dirt or damage. Clean the lens with a soft cloth if dirty.
If wiring is broken or the camera does not work, replace the faulty parts. Use parts made for your car model.
- Inspect the camera lens for cracks or scratches
- Check wiring for cuts or loose connections
- Test the camera with a multimeter if possible
- Replace damaged camera or wires as needed
Reinstalling The Camera
Connect the camera’s wiring back into its connector securely. Mount the camera firmly in its original spot.
Use screws or clips to hold the camera in place. Make sure it does not move or shake when installed.
Testing The Repair
Reconnect the car battery’s negative terminal. Turn on your car and put it in reverse to check the camera.
Look at the display screen to see if the camera shows a clear image. Adjust the camera angle if needed.
- Check for a clear, stable image on the screen
- Listen for any unusual sounds from the camera
- Test multiple times to ensure consistent work

Credit: www.youtube.com
Troubleshooting Advanced Issues
Fixing a reverse camera can be tricky when basic checks do not work. Some problems come from software or settings.
Use these tips to handle advanced issues with your car’s reverse camera system.
Software And Firmware Updates
Outdated software or firmware may cause the reverse camera to fail. Check if updates are available for your system.
Update the camera or head unit firmware to fix bugs and improve performance.
- Visit the car manufacturer’s website for updates.
- Use a USB drive or SD card to install updates.
- Follow update instructions carefully to avoid damage.
- Restart the system after updating to apply changes.
Checking Monitor Settings
Sometimes the monitor settings cause the reverse camera image to look wrong or not show.
Check brightness, contrast, and input source on the monitor to ensure they are correct.
- Adjust brightness and contrast to improve image clarity.
- Set the input source to the camera or video input.
- Look for a “camera view” or “reverse camera” mode.
- Reset the monitor to factory settings if needed.
Consulting Vehicle Manual
Your car’s manual has important information about the reverse camera system.
Look for troubleshooting tips and special instructions for your model.
- Find wiring diagrams and camera location details.
- Check recommended maintenance and reset steps.
- Follow safety warnings before starting repairs.
- Use the manual to understand system features.
When To Seek Professional Help
Fixing a reverse camera in your car can be simple or tricky. Some problems need expert care.
Knowing when to call a professional saves time and keeps your car safe.
Complex Electrical Problems
Reverse cameras connect to your car’s electrical system. Some issues need expert tools.
If wires are damaged or connections are unclear, a professional can fix them safely.
- Intermittent camera display
- No power to the camera
- Short circuits or blown fuses
- Damaged wiring harness
Warranty And Safety Concerns
Some cars have warranty rules about repairs. Fixing yourself might void the warranty.
Safety is key. Improper repairs can cause electrical fires or other hazards.
- Check if your car’s warranty covers camera repairs
- Follow safety guidelines for electrical work
- Use proper tools to avoid damage or injury
Finding A Reliable Technician
Choose a skilled technician to fix your reverse camera. Look for experience with car electronics.
A good technician uses the right tools and tests the camera after repair.
- Ask for referrals or read reviews
- Check certifications and training
- Compare service costs and warranties
- Ensure clear communication about the problem
Credit: luview.com
Frequently Asked Questions
How Do I Troubleshoot A Faulty Reverse Camera?
Check the camera lens for dirt or damage. Inspect wiring for loose connections. Restart your car’s infotainment system to reset it.
Why Is My Reverse Camera Showing A Black Screen?
A black screen often means power issues or disconnected cables. Verify the camera’s power supply and check all wiring connections carefully.
Can I Fix A Reverse Camera Myself?
Yes, you can fix minor issues like cleaning the lens or reconnecting cables. Complex problems may need professional help for safety.
What Causes A Blurry Reverse Camera Image?
Blurriness is usually due to dirt, moisture, or damage on the lens. Clean the lens gently and ensure it’s dry to improve clarity.
Conclusion
Fixing a reverse camera can be simple. Start with basic checks. Ensure connections are secure and clean. Inspect the wiring for any damage. Often, software updates solve issues. If problems persist, consult a professional. Cameras enhance safety, so keep them functional.
Regular maintenance prevents future issues. Don’t ignore small problems. They can grow bigger and costlier. Stay proactive with vehicle technology. Your safety and convenience depend on it. Follow these steps for a reliable reverse camera. Enjoy peace of mind on every drive.