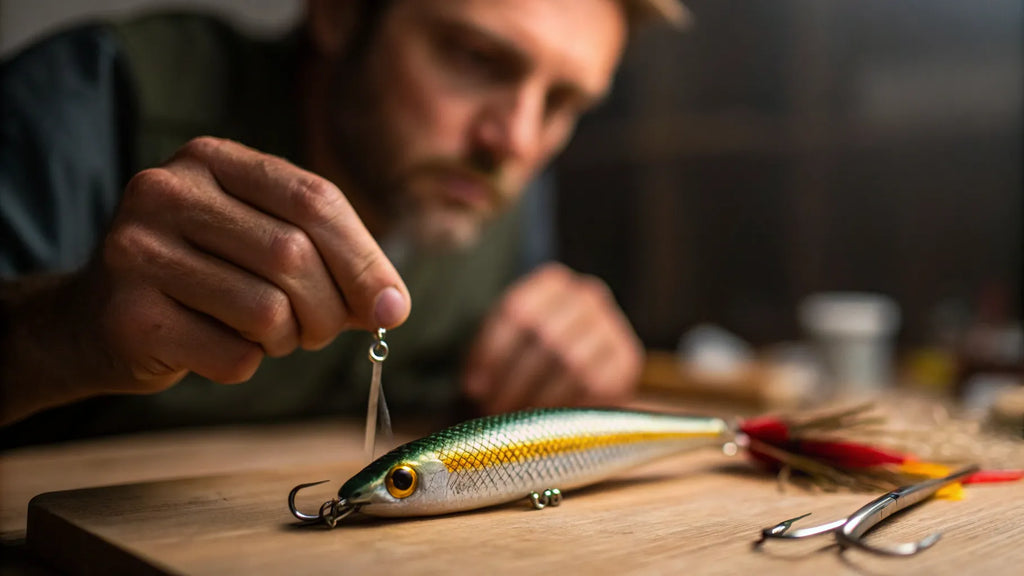
Ever wondered how to make a fishing lure at home? You’re in the right place.
Imagine the thrill of catching a fish with a lure you’ve crafted yourself. It’s not just a rewarding hobby; it can also save you money and let you customize lures to your specific needs. You’ll discover step-by-step instructions on creating your own fishing lures from materials you might already have.
Get ready to dive into a world where creativity meets practicality, and unlock the secrets to enhancing your fishing experience. Stick around, and let’s turn your DIY dreams into reality!
Choosing Materials
Making a fishing lure at home starts with picking the right materials. The materials affect how the lure looks and works in water.
Choose materials that are easy to shape and strong enough to last. This guide helps you select wood, plastic, and small parts.
Types Of Wood And Plastic
Wood and plastic are common materials for fishing lures. Wood floats well and is easy to carve. Plastic can be molded into many shapes.
Some woods to try are balsa and cedar. Balsa is light and soft. Cedar is tougher and lasts longer. For plastic, use old containers or craft sheets.
- Balsa wood:lightweight, easy to carve
- Cedar wood:durable, good for water resistance
- Plastic sheets:shapeable, can be painted
- Recycled plastic:use bottles or containers
Using Household Items
You can find many useful materials at home. Old toothbrushes, buttons, and bottle caps work well for lure parts. These items add texture and color.
Try using small beads or pieces of aluminum foil to make your lure shiny. Use glue or tape to attach these parts firmly.
- Toothbrush bristles for tail or fins
- Buttons for eyes or decoration
- Bottle caps for weight or shape
- Aluminum foil for shine
- Beads for added color
Selecting Hooks And Eyes
Hooks and eyes are important for your lure to catch fish. Choose hooks that match the size of your lure. Small hooks suit small fish, big hooks suit bigger fish.
Use metal or plastic eyes for your lure. They help make the lure look real. Secure the eyes well so they do not fall off when fishing.
- Pick hooks sized for your target fish
- Use rust-resistant hooks for durability
- Plastic or metal eyes add realism
- Glue eyes firmly on the lure body
Designing Your Lure
Making a fishing lure at home starts with a good design. The lure needs the right shape, size, and color to attract fish.
This guide covers basic shapes, colors, patterns, and ways to add shine to your lure.
Basic Shapes And Sizes
Choose a shape that matches the fish you want to catch. Different fish prefer different lure shapes.
- Small minnows: 2 to 3 inches long, slim body
- Crayfish: 3 to 4 inches, wider and shorter
- Worms: 2 to 5 inches, long and thin
- Frogs: 3 to 4 inches, rounder with legs
Pick a size that fits the local fish and water conditions. Smaller lures work well in clear water.
Color And Pattern Ideas
Colors help your lure stand out. Use shades that look like real bait or bright colors to catch attention.
| Color | Best Use |
| Natural (brown, green) | Clear water, sunny days |
| Bright (red, orange) | Murky water, low light |
| Metallic (silver, gold) | Deep water, attracting predatory fish |
| Dark (black, blue) | Night fishing or cloudy days |
Patterns like stripes or spots make your lure look more real. Paint or markers work well for this.
Adding Reflective Elements
Reflective parts make your lure shine and move light underwater. This attracts fish from far away.
Here are some reflective elements you can add:
- Small pieces of aluminum foil
- Reflective tape strips
- Shiny beads or sequins
- Glossy paint or clear coat finishes
Crafting Techniques
Making a fishing lure at home needs careful work. You shape, smooth, and paint the lure. These steps help create a lure that looks good and works well.
Each step needs simple tools and some patience. You can make a lure that attracts fish by following basic crafting methods.
Cutting And Shaping
Start with a block of wood or plastic for the lure body. Use a saw or knife to cut the rough shape. Carve the edges and details with smaller tools. Make sure the shape fits the type of fish you want to catch.
Sanding And Smoothing
Sanding helps remove rough spots and shapes the lure perfectly. Use sandpaper in this order:
- Start with coarse grit (80-100) to shape and remove marks.
- Use medium grit (150-180) to smooth the surface.
- Finish with fine grit (220-320) for a polished look.
Check the lure with your hand to find any rough areas. Smooth all surfaces before painting.
Painting And Sealing
Painting adds color and helps attract fish. Use water-resistant paint for the best results. Apply thin coats and let each dry before the next coat.
| Paint Type | Use | Dry Time |
| Acrylic | Easy to apply, good color | 30 minutes |
| Enamel | Durable, shiny finish | 1 hour |
| Lacquer | Fast drying, smooth | 15 minutes |
Seal the painted lure with clear varnish. This protects the paint and lasts longer in water.

Credit: www.amazon.com
Assembling The Lure
Once you have your lure body ready, the next step is to put it all together. Assembling the lure correctly helps it work well in water.
Pay close attention to how you attach hooks, add split rings, and balance the lure. These details affect how the lure moves and catches fish.
Attaching Hooks Securely
Hooks must be attached tightly to avoid losing fish. Use strong knots or wire to hold them in place.
Make sure the hooks do not move freely. Loose hooks can cause the lure to snag or fail to hook fish.
- Use split rings or strong wire to link hooks
- Tighten knots or crimps firmly
- Check hooks for sharpness before attaching
- Test the hook’s movement to avoid loose parts
Adding Split Rings
Split rings connect hooks and other parts. They allow the lure to move naturally in water.
Choose split rings that match the size of your lure and hooks. Small rings work for light lures, bigger ones for heavy lures.
- Use pliers to open split rings carefully
- Attach rings between hooks and lure body
- Close rings tightly to avoid slipping
- Replace rings if they show signs of rust or damage
Balancing For Proper Action
Balance affects how the lure swims. A well-balanced lure moves like a real fish.
Add small weights if the lure tilts or spins too much. Test the lure in water to see its action.
- Place weights inside or under the lure body
- Check if the lure floats level in water
- Adjust weight placement to fix tilt or spin
- Try casting and retrieving to test movement
Testing Your Lure
Testing your homemade fishing lure is important to see how it works in water. You need to watch how it moves and floats. This helps you know if fish will like it.
Try your lure in different conditions to find any problems. Small changes can make your lure better and catch more fish.
Water Trials
Start by dropping your lure into a bucket or small pond. Watch how it sinks or floats. See if it swims straight or spins around.
Try pulling the lure slowly and quickly. This shows how it moves when you reel it in. Look for any odd behavior like diving too deep or floating too high.
Adjusting Weight And Buoyancy
If your lure sinks too fast, add lighter materials or remove some weight. If it floats too much, add small weights inside.
Test different weights to find the right balance. The goal is to make the lure move naturally in water without sinking or floating too much.
- Use small metal or lead weights
- Add foam or cork for buoyancy
- Test each change in water
Refining Movement
Look closely at how your lure moves when pulled. It should wiggle or dart like a real fish or insect.
If the lure does not move well, try changing the shape or adding fins or lips. Small changes can create better action.
- Test different shapes for better movement
- Add small fins or lips for action
- Pull lure at different speeds
Safety Tips
Making a fishing lure at home can be fun and rewarding. Safety is important while crafting your lure.
Follow these safety tips to avoid accidents and keep your workspace safe.
Handling Tools Carefully
Use sharp tools like knives and scissors with care. Always cut away from your body.
Wear gloves if needed to protect your hands from cuts and splinters.
- Keep tools clean and sharp
- Store tools properly after use
- Focus on your work to avoid mistakes
Using Non-toxic Materials
Choose non-toxic paints, glues, and finishes. These keep you safe and protect the environment.
Read labels to check for harmful chemicals before buying materials.
- Use water-based paints and glues
- Avoid materials with strong fumes
- Work in a well-ventilated area
Proper Storage
Store your tools and materials safely after each use. Keep them out of reach of children and pets.
Label containers clearly to avoid confusion and accidents.
- Use sealed containers for paints and glues
- Organize tools in a toolbox or drawer
- Clean your workspace regularly
Tips For Success
Making fishing lures at home is a fun and rewarding activity. It takes patience and practice to get good results. These tips can help you improve your skills.
Focus on learning from your mistakes, trying new designs, and keeping records of your work. These steps will guide you toward better lures.
Learning From Mistakes
Not every lure will work perfectly at first. Pay attention to what does not work and why. This will help you avoid the same errors in the future.
- Note which lure shapes attract fish less.
- Check if colors fade or chip quickly.
- Test different weights to see what sinks best.
- Observe if hooks bend or break easily.
Experimenting With Designs
Try different shapes, sizes, and colors for your lures. Experimenting helps you find what works best for your fishing spots and target fish.
| Design Aspect | What to Try | Effect to Watch |
| Shape | Round, flat, or elongated | Swimming action |
| Color | Bright, dark, or natural | Visibility in water |
| Weight | Light, medium, heavy | Sinking speed |
| Material | Wood, plastic, metal | Durability and movement |
Documenting Your Creations
Keep a record of all your lure designs and results. Writing notes or taking pictures will help you remember what worked and what didn’t.
- Write down lure shape and size
- Note colors and materials used
- Record fishing conditions and catch results
- Take photos of each lure

Credit: fishgenix.com

Credit: www.amazon.com
Frequently Asked Questions
What Materials Do I Need To Make A Fishing Lure At Home?
You need basic materials like wood or plastic, hooks, paint, and glue. Additional items include wire, beads, and feathers to customize your lure.
How Do I Shape A Homemade Fishing Lure?
Shape the lure using a knife or sandpaper to form the body. Smooth edges and create a realistic shape to attract fish effectively.
What Type Of Paint Is Best For Fishing Lures?
Use waterproof, non-toxic acrylic paints for durability and safety. These paints withstand water exposure and maintain vibrant colors underwater.
How Can I Add Movement To My Homemade Lure?
Attach a small propeller, spinner blade, or flexible tail. These additions create lifelike motion that attracts fish during retrieval.
Conclusion
Making a fishing lure at home can be fun and rewarding. It saves money and lets you try new ideas. Use simple materials and follow clear steps. Practice helps you improve your skills over time. Each lure you make can attract different fish types.
Enjoy the process and learn from mistakes. Soon, you will have your own unique lures ready for fishing. Give it a try, and see how it feels to catch fish with your own bait. Simple, creative, and satisfying.