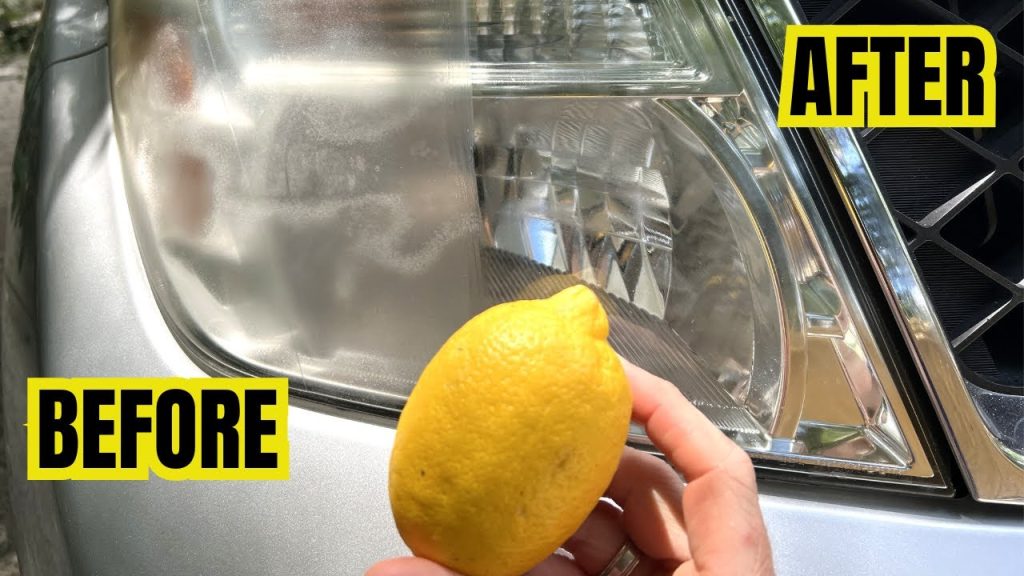
Are your car’s headlights looking dull or foggy? This can make driving at night harder and even unsafe.
But don’t worry—cleaning your headlights is easier than you think. With just a few simple steps, you can restore their shine and improve your visibility on the road. Keep reading to discover how you can quickly and effectively clean your headlights, saving money and making your car look great again.
Your safety and clear vision start here.

Credit: www.carsales.com.au
Why Headlights Get Cloudy
Car headlights can become cloudy over time. This happens because of damage and dirt on the light covers.
Cloudy headlights reduce the light that passes through. This makes driving at night harder and less safe.
Causes Of Headlight Fogging
Headlight fogging happens for several reasons. The main cause is the plastic lens getting old and worn.
Sunlight, dirt, and chemicals can wear down the plastic. This creates a cloudy or yellow look on the headlights.
- UV rays from the sun break down the plastic surface
- Dirt and grime build up on the headlight lens
- Water moisture gets trapped inside the headlight
- Oxidation causes the lens to become cloudy or yellow
- Car washes with harsh chemicals can damage the plastic
Effects On Visibility And Safety
Cloudy headlights make it hard to see the road clearly. This lowers your visibility during night or bad weather.
Reduced light can cause accidents. Other drivers may also find it hard to see your car at night.
- Less light reaches the road ahead
- Objects and signs are harder to see
- Increased risk of accidents at night
- Other drivers may not see you clearly
Tools And Materials Needed
Cleaning your car headlights is important for safety and looks. You need the right tools to do the job well.
Some tools you may already have at home. Others come in special kits made for headlights.
Common Household Items
You can clean headlights using simple items from your home. These items help remove dirt and cloudiness.
- Soap and water for basic cleaning
- Toothpaste to polish the surface
- Baking soda mixed with water for scrubbing
- Soft cloths or old t-shirts for wiping
- Masking tape to protect the paint around headlights
- Sandpaper with fine grit for stubborn stains
These items work well for light cleaning and small foggy spots on headlights.
Specialized Cleaning Kits
Special kits include all materials needed for deep cleaning and restoring headlights.
- Cleaning solution designed for headlights
- Polishing compound to remove scratches
- Sandpaper of different grits for sanding
- Microfiber cloths for smooth finishing
- Applicator pads for applying solutions evenly
Kits offer a step-by-step process and better results for cloudy or yellowed headlights.
Preparing Your Car For Cleaning
Cleaning your car’s headlights starts with proper preparation. This helps you work safely and protects your vehicle.
Taking a few simple steps before cleaning makes the process easier and prevents damage to your car and surroundings.
Parking And Safety Tips
Choose a safe spot to park your car before cleaning the headlights. The area should be flat and stable to avoid accidents.
- Park in a shaded area to prevent cleaning products from drying too fast.
- Turn off the engine and set the parking brake.
- Make sure the headlights are cool to the touch.
- Remove any loose objects near the car to avoid tripping.
- Wear gloves and eye protection for safety.
Protecting Surrounding Areas
Protect your car’s paint and nearby surfaces from cleaning chemicals or scratches during the process.
| Area | Protection Method |
|---|---|
| Car Paint near Headlights | Use painter’s tape to cover edges |
| Windshield and Hood | Cover with a soft cloth or plastic sheet |
| Nearby Plants or Grass | Sprinkle water or cover with plastic to avoid chemicals |
Step-by-step Cleaning Process
Dirty or cloudy headlights reduce your visibility on the road. Cleaning them improves safety and car appearance. Follow these simple steps to clean your headlights well.
This guide uses easy techniques anyone can try at home. Gather basic supplies before you start.
Initial Wash And Dry
Start by washing the headlights with soap and water. This removes surface dirt and grime.
Use a soft cloth or sponge to avoid scratches. Rinse with clean water and dry the headlights completely.
- Use mild car soap and warm water
- Gently scrub headlights with a sponge
- Rinse thoroughly with water
- Dry with a clean microfiber towel
Sanding Techniques
Sanding removes the yellowed layer on headlights. Use wet sandpaper with different grits for best results.
Start with coarse grit and finish with fine grit to smooth the surface. Keep the headlight wet while sanding.
- Use 1000 grit sandpaper first
- Move to 2000 grit for finer sanding
- Keep the surface wet at all times
- Sand in a circular motion evenly
Applying Cleaning Solutions
Cleaning solutions help remove deeper stains and haze from headlights. Use a plastic-safe cleaner or polishing compound.
Apply the solution with a soft cloth or applicator pad. Rub gently but firmly in small circles.
- Choose a plastic-friendly headlight cleaner
- Put a small amount on a soft cloth
- Rub the surface in circular motions
- Wipe off excess cleaner with a clean cloth
Polishing And Sealing
Polishing makes headlights shiny and smooth. Use a headlight polish or car wax for this step.
After polishing, seal the headlights to protect them from future damage. Use a UV-resistant sealant or wax.
- Apply polish with a soft cloth
- Buff headlights until clear and shiny
- Use a UV sealant or wax to protect
- Reapply sealant every few months
Alternative Cleaning Methods
Dirty headlights reduce your car’s visibility at night. You can clean them using simple items at home. These alternative methods work well and save money.
Below are three easy ways to clean your headlights without harsh chemicals. Each method uses common household products or available solutions.
Using Toothpaste
Toothpaste contains mild abrasives that help remove grime and oxidation from headlights. It polishes the surface gently and makes the lens clearer.
- Apply a small amount of toothpaste to a soft cloth.
- Rub the toothpaste in circular motions on the headlight surface.
- Continue for about five minutes to remove buildup.
- Rinse with water and dry with a clean cloth.
Baking Soda And Vinegar Mix
This natural mixture breaks down dirt and oxidation. It is safe and effective for cleaning headlights without harsh chemicals.
| Ingredient | Amount |
|---|---|
| Baking Soda | 2 tablespoons |
| White Vinegar | 1 tablespoon |
| Water | 3 tablespoons |
Mix these ingredients to form a paste. Apply it on the headlight and scrub gently with a cloth. Rinse and dry after cleaning.
Commercial Products
Many stores sell kits made for headlight cleaning. These products often include polish and protective sealant to keep headlights clear longer.
- Read product instructions carefully before use.
- Use gloves to protect your hands during application.
- Apply polish with a soft cloth or applicator included in the kit.
- Allow sealant to dry fully for best protection.
Maintaining Clear Headlights
Clear headlights improve your car’s visibility at night. Dirt and grime can make headlights cloudy. Keeping them clean helps you see better and stay safe.
Regular care of headlights also makes your car look well maintained. You can clean them at home with simple tools and products.
Regular Cleaning Routine
Clean your headlights often to avoid buildup of dirt and oxidation. Use gentle methods to protect the plastic cover.
- Wash headlights with car soap and water weekly.
- Use a soft cloth or sponge to avoid scratches.
- Dry headlights completely with a microfiber towel.
- Remove bugs and tar with a special cleaner if needed.
- Check headlights for cracks or damage regularly.
Protective Coatings And Treatments
Applying a protective coating can keep headlights clear longer. Coatings prevent UV rays from causing yellowing and fading.
| Type of Coating | Benefits | How Often to Apply |
| UV Protection Film | Blocks sun damage | Every 1-2 years |
| Headlight Sealant | Prevents dirt buildup | Every 6 months |
| Wax or Polish | Restores shine | Every 3 months |
When To Replace Headlights
Headlights are important for safe driving at night. Cleaning them can help if they are foggy or dirty.
Sometimes, cleaning is not enough. You may need to replace headlights to keep your car safe.
Signs Of Irreparable Damage
Check headlights for cracks or deep yellowing. These problems often cannot be fixed by cleaning.
If the light is dim or flickers even after cleaning, it means the bulb or lens may be broken.
- Cracks on the headlight lens
- Severe yellow or cloudy discoloration
- Water or moisture inside the headlight
- Light flickering or very dim light
- Damaged or broken headlight housing
Choosing Replacement Options
You can replace headlights with original parts or aftermarket options. Choose based on quality and price.
LED headlights use less power and last longer. Halogen lights are cheaper but need more changes.
- Original Equipment Manufacturer (OEM) headlights
- Aftermarket headlights with similar quality
- LED headlights for better brightness and efficiency
- Halogen headlights for budget-friendly options
- Check compatibility with your car model

Credit: www.carsales.com.au

Credit: www.youtube.com
Frequently Asked Questions
How Often Should I Clean My Car Headlights?
Clean headlights every 3 to 6 months to maintain brightness. Regular cleaning prevents yellowing and improves night visibility. Frequency depends on weather and driving conditions.
What Materials Are Best For Cleaning Headlights?
Use mild soap, water, microfiber cloth, and toothpaste or baking soda. These materials effectively remove dirt and oxidation without damaging the lens.
Can I Use Toothpaste To Clean Headlights?
Yes, toothpaste is mildly abrasive and removes grime well. Apply with a soft cloth, rub gently, then rinse. It’s an affordable, easy DIY solution.
How Do I Prevent Headlights From Fogging Again?
Apply a UV sealant or protectant after cleaning. This creates a barrier against sun damage and oxidation, keeping headlights clear longer.
Conclusion
Cleaning car headlights is simple with the right steps. Start by gathering your cleaning materials. Use mild soap and water for a basic wash. For stubborn dirt, try a vinegar solution. Polish with toothpaste for a clear finish. Regular cleaning keeps your lights bright.
It ensures safe driving at night. Clean headlights improve your car’s appearance too. Maintain them regularly for the best results. Anyone can do this task at home. It saves money and time. Clean headlights lead to safer journeys. So, take care of them today.
Your car will thank you.