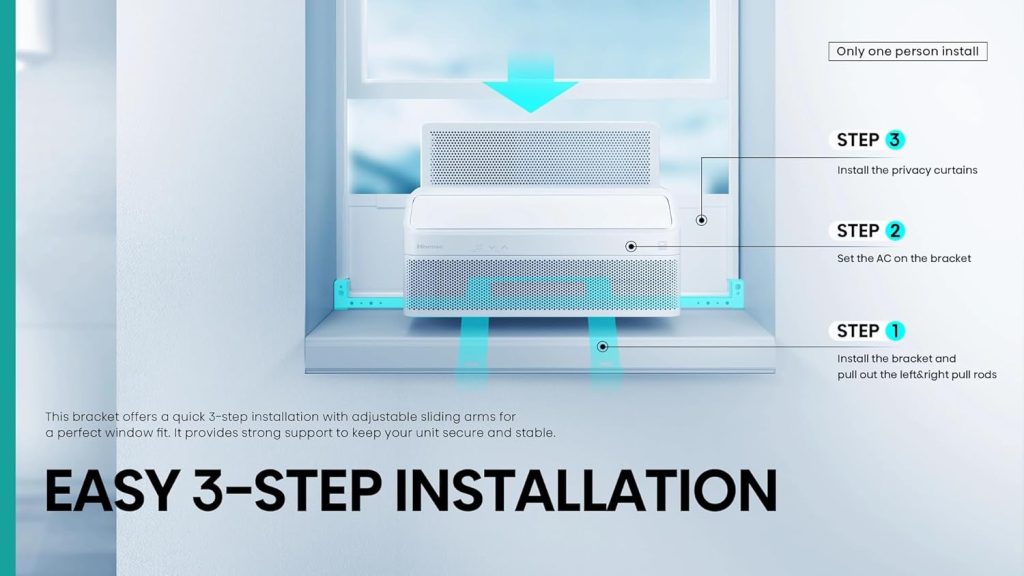
Are you ready to beat the heat and stay cool with your new Hisense window air conditioner? Installing it yourself might seem tricky, but it’s easier than you think.
With the right steps and a little guidance, you can have your unit up and running quickly. This guide will walk you through the entire process, saving you time and money. Keep reading to discover simple tips that make installation smooth and hassle-free—your perfect cool breeze is just around the corner!
Prepare For Installation
Gather all the tools neededbefore starting. This includes a screwdriver, level, tape measure, and sealant. Having tools ready saves time and stress.
Choose the right windowfor installation. The window should be sturdy and fit the air conditioner size. It must open and close easily.
| Window Type | Compatibility | Notes |
|---|---|---|
| Double-hung | Best fit | Widely used for window AC units |
| Sliding | Works well | Check unit size for fit |
| Casement | Not ideal | May need extra support |
Check if the air conditioner fits the window size. Measure the window width and height. Ensure the unit’s electrical needs match your outlet.

Credit: www.youtube.com
Measure And Assemble
Measure the window width and height carefully. Use a tape measure for accuracy. Check if the window frame is strong enough for the air conditioner. The unit should fit snugly without gaps.
Assemble the mounting brackets before placing the air conditioner. Attach brackets to the unit using screws provided. Ensure brackets are secure to hold the weight safely.
Install the side panels by sliding them into place. Adjust panels to fill the window gap completely. Lock them to prevent air leaks and provide stability.
Install The Air Conditioner
Position the unitcarefully in the window opening. The bottom of the air conditioner should rest on the window sill. Make sure the unit is centered and tilted slightly outside. This helps water drain away from the house. Keep the window sash down to hold the unit in place.
Secure the unit and panelsby attaching the side panels to fill the gaps on each side. Use the screws or brackets that came with the air conditioner. This stops the unit from moving or falling out of the window. Check that the panels fit tightly.
Seal gaps and insulatearound the air conditioner using weather stripping or foam sealant. This blocks air leaks and keeps your room cool. Make sure no gaps remain between the window frame and the unit. Proper sealing improves energy efficiency and comfort.

Credit: manuals.plus
Connect And Test
Plug the air conditioner into a power outlet that matches its voltage. Press the power button to turn it on. Listen for the fan and compressor starting. This shows the unit is working.
Use the remote or control panel to set the temperature. Choose the cooling, fan, or auto mode based on your needs. Adjust the fan speed to low, medium, or high.
- Check if cool air comes out after a few minutes.
- Make sure the air flows smoothly through the vents.
- Listen for any unusual noises or vibrations.
- Verify the unit turns off when you press the power button.
Proper operation means the unit cools well and runs quietly. If problems appear, check the power source and settings again.
Maintenance Tips
Clean or replace filtersregularly to keep the air fresh and cool. Dirty filters block airflow and reduce efficiency. Check filters every month during heavy use. Wash reusable filters with warm water and mild soap. Let them dry fully before reinstalling. Replace disposable filters if they look worn or clogged.
Store the unit during off-seasonto protect it from dust and damage. Remove and clean filters first. Cover the air conditioner with a plastic sheet or bag. Store it in a dry, cool place. Avoid places with heavy moisture to prevent rust.
| Common Issue | Possible Cause | Quick Fix |
|---|---|---|
| Unit not cooling | Dirty filter or low refrigerant | Clean filter; call a technician if needed |
| Water leaking inside | Clogged drain or wrong installation | Clear drain; check installation angle |
| Unit won’t turn on | Power issues or blown fuse | Check power; replace fuse |

Credit: www.reddit.com
Frequently Asked Questions
How Do I Prepare My Window For Hisense Ac Installation?
Clean the window area and remove obstacles. Ensure the window frame is sturdy and fits the unit. Measure the dimensions to confirm compatibility with your Hisense window AC.
What Tools Are Needed To Install A Hisense Window Ac?
You will need a screwdriver, measuring tape, level, and mounting brackets. Some models require foam sealant or weather stripping for insulation. Check the manual for specific tool recommendations.
How To Secure The Hisense Window Ac Properly?
Place the unit on the window sill and use mounting brackets. Tighten screws to stabilize the unit. Seal gaps with foam or weather stripping to prevent air leaks and improve efficiency.
Can I Install A Hisense Window Ac Alone?
Yes, but having a helper is safer. The unit can be heavy and awkward to handle. Assistance ensures proper positioning and reduces installation risks.
Conclusion
Installing a Hisense window air conditioner is simple and quick. Follow each step carefully for best results. Check the unit fits your window before starting. Secure the air conditioner well to avoid leaks and noise. Clean the filters regularly to keep it running smoothly.
Enjoy cool air during hot days and save energy. With proper care, your unit will last longer. Stay comfortable and beat the heat easily.