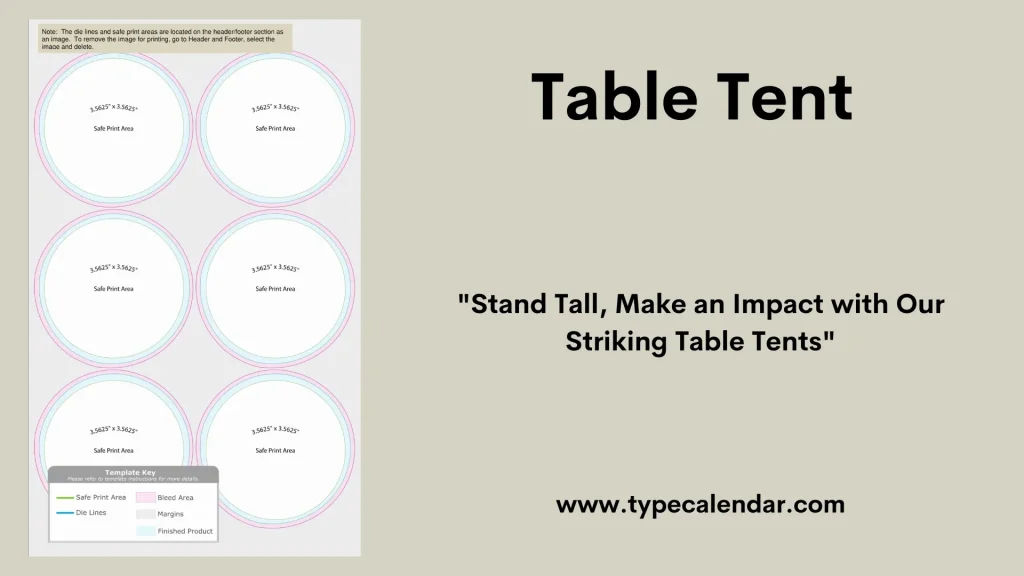
Are you looking for a simple yet powerful way to grab attention and boost your message right where it matters? Table tents are the perfect tool to do just that.
Whether you’re promoting a special offer, sharing important information, or adding a personal touch to your event, creating your own table tents can make a big difference. You’ll discover easy steps to design and make table tents that stand out and engage your audience.
Ready to turn ordinary tables into eye-catching displays? Let’s dive in and unlock the secrets to creating table tents that work for you.
Benefits Of Table Tents
Table tents are small signs placed on tables or counters. They catch the attention of customers easily. Many businesses use them to share messages or offers.
Using table tents can help improve how customers interact with your brand. They also help increase sales and make your brand more visible.
Enhancing Customer Interaction
Table tents give customers clear information right where they sit. They can show menus, promotions, or special events. This makes customers more likely to engage with your business.
- Provide easy access to important details
- Encourage customers to try new products
- Help answer common questions without staff help
- Create a friendly and informative atmosphere
Increasing Sales Opportunities
Table tents can highlight deals and upsell items. They remind customers about offers they might miss. This leads to more purchases and higher revenue.
| Benefit | How It Helps Sales |
| Showcasing Specials | Draws attention to limited-time offers |
| Suggesting Add-ons | Encourages buying extra items |
| Promoting New Products | Introduces customers to new choices |
Improving Brand Visibility
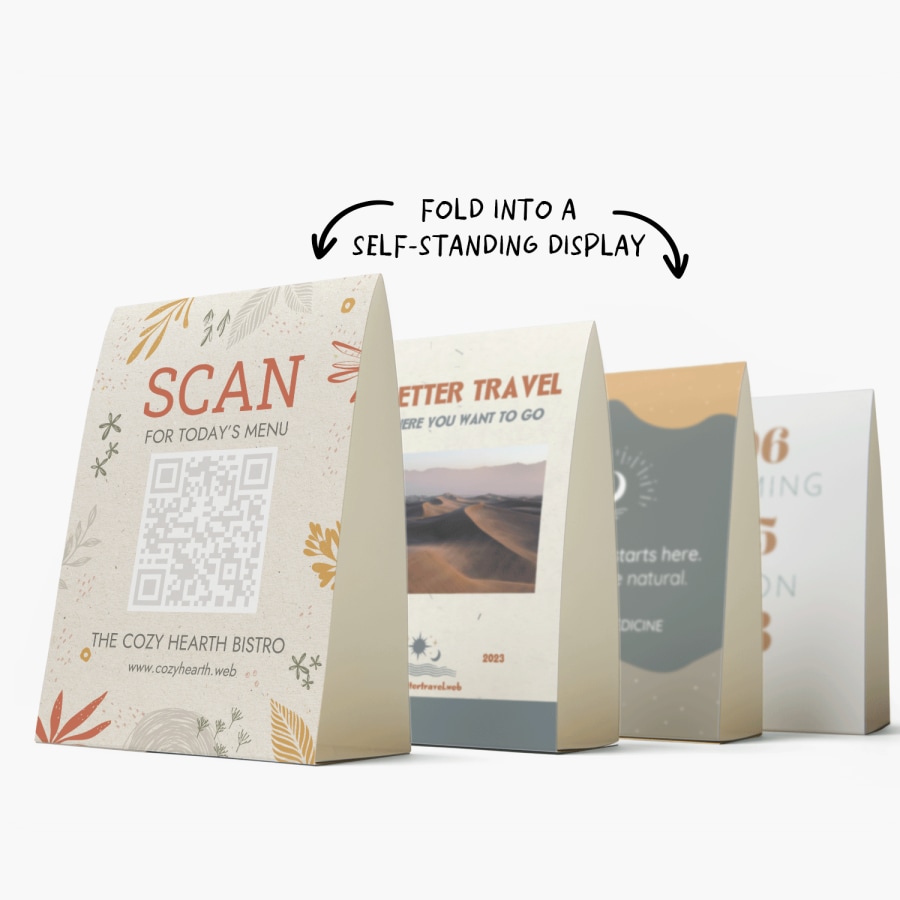
Table tents increase brand exposure in a subtle way. They keep your logo and colors visible to customers. This constant presence helps customers remember your brand.
Key Brand Visibility Tips
- Use consistent brand colors and fonts
- Place table tents in high-traffic areas
- Keep designs simple and eye-catching
Credit: www.vistaprint.ca
Choosing The Right Size And Shape
Table tents help share information clearly on tables. Picking the right size and shape makes them easy to see.
The size and shape affect how much you can show and how the tent fits the space.
Common Table Tent Dimensions
Table tents come in several standard sizes. These sizes work well for most uses and fit on tables easily.
- 4 x 6 inches – Small and compact, good for short messages
- 5 x 7 inches – Medium size, balances text and images
- 6 x 9 inches – Larger, great for detailed information
- 8.5 x 11 inches – Full sheet, best for menus or large displays
Creative Shape Options
Table tents do not have to be just rectangles. Different shapes can catch attention and suit your style.
- Triangle shapes stand firmly and look modern
- Circle tents create a friendly and soft look
- Custom shapes like stars or logos add brand identity
- Folded or layered tents add depth and interest
Matching Venue And Audience
Choose table tent size and shape based on where you will use it. Also, think about who will see it.
Large tents work well in busy places with lots of space. Small tents fit cozy or crowded spots better.
- Casual cafes might prefer colorful, playful shapes
- Formal events need simple and elegant tents
- Trade shows use large tents to show lots of info
- Restaurants often use medium tents for menus or specials
Design Tips For Impact
Creating table tents that stand out helps attract attention to your message. Good design makes sure your information is easy to read and remember.
Use colors, fonts, and images that support your brand and catch the eye of your audience. Each element should work together to create a strong impact.
Eye-catching Colors And Fonts
Choose colors that match your brand but also stand out on a table. Use contrasting colors for text and background to make reading easier.
- Pick two or three main colors to keep the design simple
- Use bold colors for headings and important points
- Select fonts that are clear and easy to read from a distance
- Limit font styles to two to avoid clutter
- Make sure font size is large enough for quick reading
Clear And Concise Messaging
Keep your message short and to the point. People should understand your offer or information at a glance.
| Message Tip | Why It Works |
| Use simple words | Easy to read and understand quickly |
| Focus on one idea | Prevents confusion and keeps attention |
| Include a call to action | Encourages people to act |
| Use short sentences | Improves readability |
Using Images And Graphics
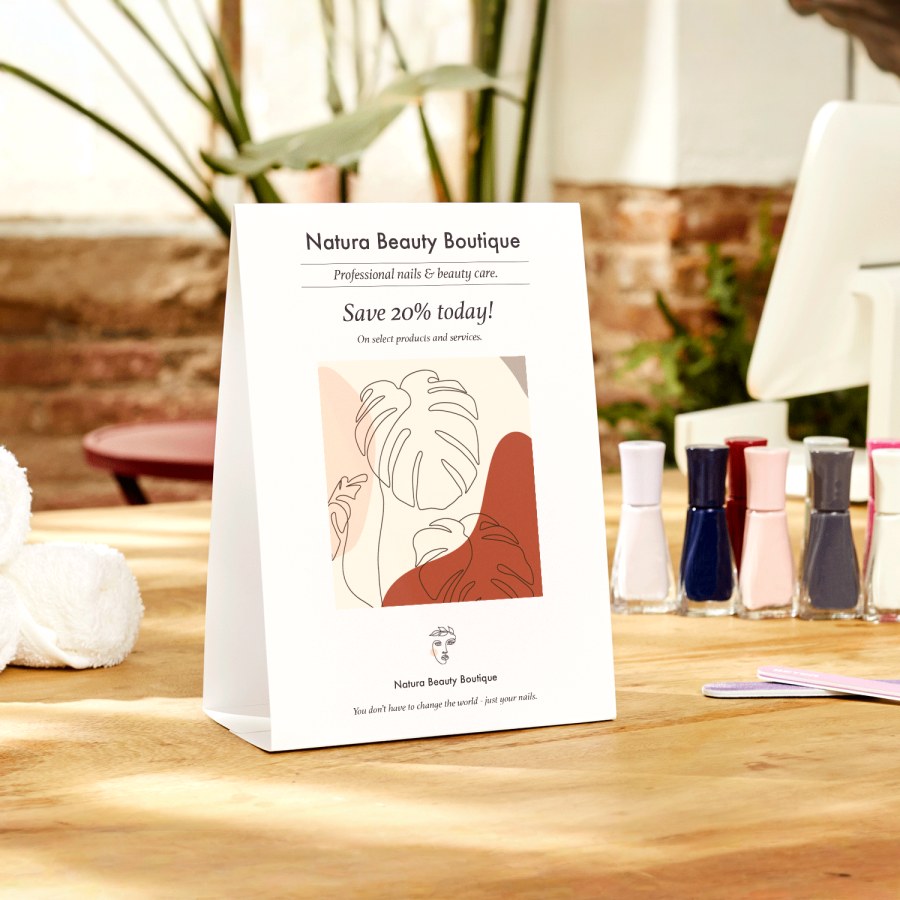
Images and graphics make your table tent more attractive. They help explain your message without using many words.

Use clear, relevant images that support your message.
Selecting Materials And Printing
Choosing the right materials and printing methods is key to making strong table tents. The materials affect durability and look.
Printing quality affects how clear your message appears. This guide covers paper, finishing, and printing options.
Paper Types And Thickness
Paper choice impacts the sturdiness and feel of your table tents. Thicker paper holds shape better.
- Cardstock:Common for table tents, firm and smooth surface.
- Coated Paper:Adds shine and resists moisture.
- Matte Paper:Non-glossy, reduces glare, good for readability.
- Thickness:Usually 80 lb to 120 lb cover stock works well.
Lamination And Finishing Options
Lamination protects the paper and adds a professional look. It also increases durability.
| Finish | Description | Benefits |
|---|---|---|
| Glossy Lamination | Shiny and smooth surface | Enhances colors and resists dirt |
| Matte Lamination | Soft, non-reflective finish | Reduces glare and fingerprints |
| UV Coating | Glossy, thick coating | Strong protection and vibrant look |
| Spot UV | Glossy coating on selected areas | Highlights logos or text |
Printing Techniques
Choosing the right printing method affects color accuracy and cost. Some methods suit short runs better.
- Digital Printing:Fast, good for small runs, and allows color changes.
- Offset Printing:Best for large runs, sharp images, lower cost per piece.
- Screen Printing:Uses stencils, good for bold colors on thick materials.
- UV Printing:Prints directly on coated surfaces with quick drying.
Step-by-step Creation Process
Table tents are small folded cards used to share information on tables. They work well in restaurants, events, and offices. Creating table tents needs careful steps to make them clear and attractive.
This guide shows you how to make table tents by planning, designing, and finalizing your work. Follow these simple steps to create effective table tents.
Planning Content And Layout
Start by deciding what message your table tent will share. Keep the text short and clear. Think about the size and shape that fits your space.
Plan where to place images and text. Make sure the most important information stands out. Use headings, bullet points, or numbers to organize content.
- Choose a simple message
- Select a size that fits tables
- Decide on a two or three-panel fold
- Arrange text and images clearly
- Highlight key points with bold or color
Designing With Software Tools
Use design software like Canva, Adobe Illustrator, or Microsoft Publisher. These tools help create neat and professional designs. Start with a blank template matching your planned size.
Add your text and images according to your layout plan. Use easy-to-read fonts and balanced colors. Check alignment and spacing to keep the design clean.
- Pick a template or create a custom size
- Insert text and images
- Use simple fonts and readable sizes
- Choose colors with good contrast
- Check margins and alignment
Proofreading And Finalizing
Review your table tent carefully. Check spelling, grammar, and facts. Make sure the text is easy to understand and error-free.
Ask someone else to read it for feedback. Make final changes to improve clarity. Save your file in the right format for printing.
- Check for typos and errors
- Confirm all information is correct
- Read aloud to test clarity
- Get feedback from others
- Save as PDF or print-ready file
Credit: www.vistaprint.ca
Placement Strategies For Maximum Impact
Table tents are small but powerful marketing tools. Their placement can make a big difference in attracting attention.
Choosing the right spots helps your message reach more people and boosts engagement.
High-traffic Areas
Place table tents where many people pass by or stop. This increases the chance they will see your message.
- Near entrances and exits
- By cash registers or checkout counters
- At busy tables or communal seating
- In waiting areas or lounges
- Along main aisles or walkways
Pairing With Promotions
Table tents work well when placed alongside special offers or events. They help highlight deals and catch customer interest.
| Promotion Type | Suggested Table Tent Placement |
| Discount Coupons | On dining tables and near registers |
| New Menu Items | At entrances and on waitstaff trays |
| Event Announcements | In waiting areas and bars |
| Seasonal Specials | Near popular seating spots |
Adjusting Based On Feedback
Watch how customers react to your table tents. Use their feedback to move or change your designs.
- Ask staff which spots get the most views
- Note which table tents lead to more sales
- Move tents to new locations if needed
- Change messages to fit customer interests
Measuring Engagement Success
Measuring how well your table tents engage customers helps improve your marketing. Tracking different types of data shows what works best.
Use simple tools to collect and analyze information. This helps you make smart choices for future campaigns.
Tracking Customer Responses
Watch how customers react to your table tents. Look for signs like people reading or asking about the content.
- Count how many customers stop near the table tents
- Note if customers take a flyer or coupon from the tent
- Check social media for mentions or shares related to the table tent offer
Analyzing Sales Data
Compare sales before and after using table tents. Look for changes in product or service purchases linked to the display.
| Time Period | Sales Volume | Notes |
| Before Table Tents | 100 units | Baseline sales data |
| After Table Tents | 130 units | 25% increase in sales |
| With Special Offer | 150 units | Offer boosted sales further |
Gathering Direct Feedback
Ask customers what they think about the table tents. Direct feedback gives clear ideas for improvement.
Try these questions when talking to customers:
- Did the table tent catch your eye?
- Was the message clear and easy to understand?
- Did it make you interested in buying?
- What would you change about the design or text?
Common Mistakes To Avoid
Creating table tents can be simple and effective. Avoiding common mistakes makes them look professional. This guide highlights key errors to watch out for.
Pay attention to design, brand, and material choices. These areas often cause problems in table tent creation.
Overcrowding The Design
Too much information or too many images can confuse viewers. A crowded design reduces the impact of the message.
- Keep text short and clear.
- Use white space to separate elements.
- Limit the number of images.
- Focus on one main message per table tent.
Ignoring Brand Consistency
Using colors, fonts, and logos that do not match your brand can confuse customers. Consistent branding builds trust and recognition.
| Brand Element | Common Mistake | Best Practice |
|---|---|---|
| Logo | Wrong size or placement | Use correct size and position |
| Colors | Using off-brand colors | Match brand color palette |
| Fonts | Mixing too many fonts | Stick to brand fonts |
Poor Material Choices
Choosing the wrong material can cause table tents to wear out fast or look cheap. Material affects durability and appearance.
- Use sturdy cardstock or plastic.
- Choose a finish that matches your setting.
- Avoid materials that easily bend or tear.
- Consider water-resistant options for outdoor use.
Creative Ideas To Try
Table tents are a great way to catch attention on any table. They offer space for messages, menus, or promotions. You can make them fun and engaging with creative touches.
Use different styles and tools to make your table tents stand out. Try interactive features, seasonal looks, or digital links. Each idea can bring new life to your display.
Interactive Elements
Interactive table tents invite people to engage directly. They can include puzzles, QR codes, or writable surfaces. This approach makes your table tents more than just static displays.
- Include trivia questions related to your theme
- Add a scratch-off area to reveal prizes or messages
- Use chalkboard or whiteboard surfaces for guest notes
- Incorporate spinning wheels or sliders to change messages
Seasonal Themes
Changing your table tents with the seasons adds freshness. Use colors and images that fit holidays or weather. This keeps your display timely and appealing.
| Season | Color Palette | Design Ideas |
| Spring | Pastels | Flowers, raindrops, bright green leaves |
| Summer | Bright yellows and blues | Sun, beach themes, fruits like watermelon |
| Autumn | Oranges and browns | Leaves, pumpkins, warm patterns |
| Winter | Blues and whites | Snowflakes, pine trees, holiday icons |
Qr Codes And Digital Integration
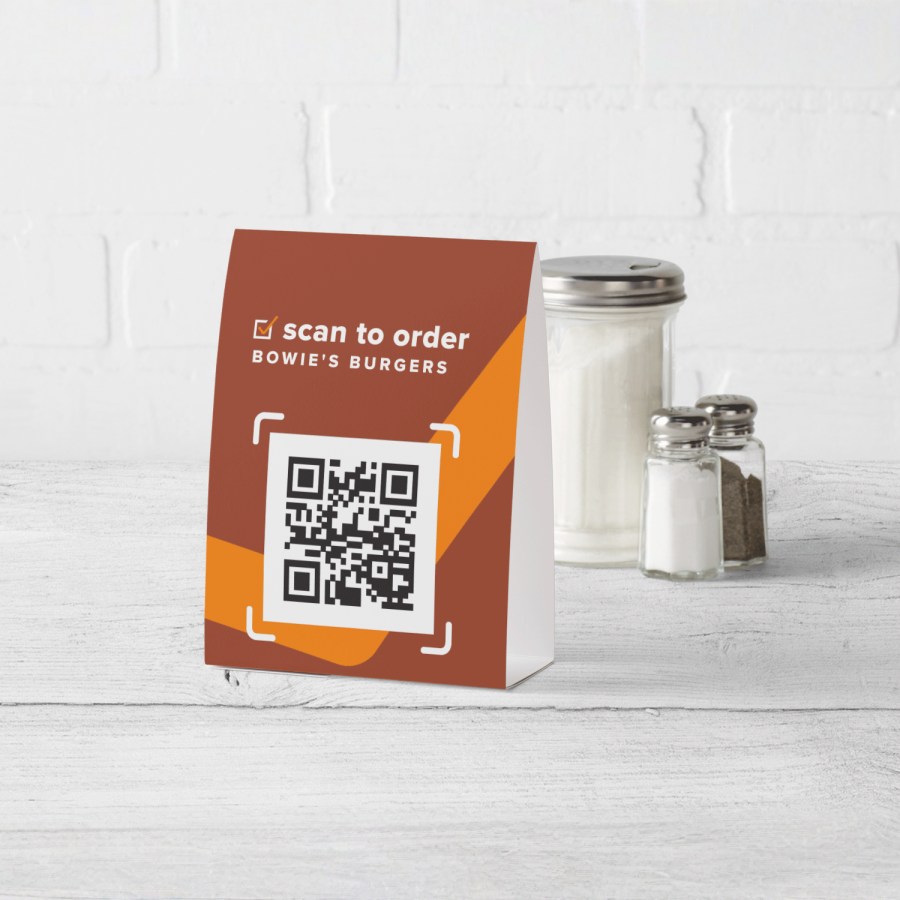
Adding QR codes to table tents connects the physical and digital worlds. Guests can scan codes to see menus, videos, or special offers. This makes your tents more useful and interactive.
Ideas for using QR codes:
- Link to online menus or ordering systems
- Show how-to videos or tutorials
- Share social media pages or contests
- Provide event schedules or maps
Credit: www.vistaprint.ca
Frequently Asked Questions
What Materials Do I Need To Create Table Tents?
To create table tents, you need sturdy cardstock, a printer, scissors, and a design template. Optional materials include laminating sheets and adhesive. These materials ensure your table tents are durable, visually appealing, and easy to fold for display.
How Do I Design An Effective Table Tent?
Design an effective table tent by keeping the message clear, using large fonts, and adding eye-catching visuals. Include your brand logo and contact details. Use contrasting colors to enhance readability and ensure the design aligns with your marketing goals.
What Size Is Best For Table Tents?
The best size for table tents is typically 4×6 inches or 5×7 inches. These sizes fit well on most tables and provide enough space for clear messaging. Choose a size that suits your content without overwhelming the table space.
How Can I Print Table Tents Professionally?
Print table tents professionally using a high-quality printer or through a local print shop. Use thick, glossy cardstock for durability. Ensure your design is set to the correct dimensions and print in full color for the best impact.
Conclusion
Creating table tents can boost any event or business display. Use clear text and attractive colors to catch attention. Keep your message short and easy to read. Choose sturdy materials for a professional look. Regular updates keep your table tents fresh and relevant.
Small efforts make a big difference in presentation. Try different styles to see what works best. Start designing today to enhance your space effectively.