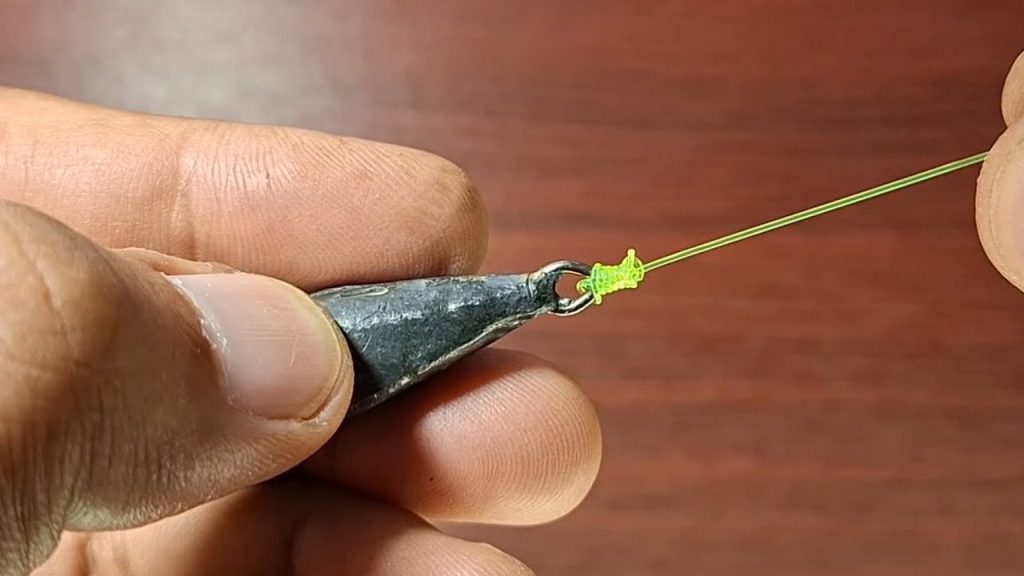
Are you tired of losing fish because your sinker or hook isn’t tied right? The secret to a successful fishing trip often starts with how you tie your sinker and hook on the fishing line.
If you want to catch more fish and avoid frustrating tangles or slips, learning the proper knots is a game-changer. In this guide, you’ll discover simple, step-by-step techniques that anyone can master quickly. Keep reading, and you’ll be ready to cast your line with confidence and reel in your next big catch.

Credit: jimswansonmanofthewoods.wordpress.com
Choosing The Right Sinker And Hook
Choosing the right sinker and hook is important for successful fishing. The right gear helps your bait reach the right depth and attract fish.
You must consider the type of water, fish size, and fishing style before picking sinkers and hooks.
Types Of Sinkers
Sinkers come in many shapes and sizes. Each type has a specific use for different fishing conditions.
- Split Shot: Small and easy to attach. Good for light fishing.
- Egg Sinker: Oval-shaped, allows bait to move freely.
- Pyramid Sinker: Holds well in sandy or muddy bottoms.
- Bank Sinker: Teardrop shape for casting long distances.
- Bullet Sinker: Slim shape ideal for fishing in heavy cover.
Selecting Hook Sizes
Hook size depends on the type of fish you want to catch. Small hooks suit small fish and big hooks suit large fish.
| Hook Size | Best For |
| 10-14 | Small fish like panfish and trout |
| 6-8 | Medium fish like bass and walleye |
| 1-4 | Large fish like catfish and pike |
| 1/0 and above | Very large fish like muskie and saltwater species |
Matching Sinkers And Hooks
Match sinker weight with hook size for balance. A heavy sinker with a small hook may scare fish.
Here are tips to match sinkers and hooks:
- Use light sinkers with small hooks for clear, calm water.
- Choose heavier sinkers with bigger hooks in strong currents.
- Adjust sinker weight so bait moves naturally.
- Test different combos to find what works best.

Credit: fishingbooker.com
Preparing Your Fishing Line
Preparing your fishing line is important before tying a sinker and hook. It helps ensure your knots hold well. Good preparation can improve your fishing experience.
This guide explains how to get your line ready. You will learn how to cut, check, and clear your line for tying.
Cutting The Line
Cut the fishing line cleanly to avoid frayed ends. Use sharp scissors or line cutters for a smooth cut. A clean cut helps your knots hold better.
Cut the line to the right length before tying. Too long or too short makes tying harder. Measure the needed length carefully.
Checking Line Strength
Check the strength of your fishing line to avoid breaks. Pull the line gently to test its tension. Look for weak spots or damage.
Replace the line if it feels weak or worn out. Using a strong line keeps your hook and sinker secure during fishing.
Clearing Line For Tying
Clear the line before tying to keep knots tight. Remove any dirt, water drops, or tangles from the line. A clean line helps you tie better knots.
- Wipe the line with a dry cloth
- Untangle any knots or loops
- Keep the line dry and smooth
Attaching The Sinker
Attaching the sinker to your fishing line is important for better casting and bait control. The sinker helps the bait reach the right depth in the water.
This guide explains how to attach the sinker properly to keep your fishing setup secure and effective.
Sliding The Sinker Onto The Line
Start by sliding the sinker onto the fishing line before tying the hook. Make sure the sinker moves freely along the line.
Choose a sinker hole size that fits your fishing line to avoid slipping off easily.
Using Slip Sinkers
Slip sinkers slide up and down the line, allowing fish to bite without feeling the weight. They work well in many fishing situations.
To use a slip sinker, thread the line through the sinker’s hole. Then add a small stopper or bead above it to keep it in place.
- Thread sinker onto the line
- Add a bead to protect the knot
- Tie a stopper knot or use a small rubber stopper
Securing The Sinker Position
To stop the sinker from sliding too far, use a stopper knot or bead above it. This keeps the sinker near the hook.
Adjust the stopper position to control how far the sinker can move, which helps with different fishing depths.
- Tie a simple overhand knot as a stopper
- Use a plastic bead between sinker and knot
- Check stopper tightness before fishing

Credit: www.youtube.com
Tying The Hook
Tying the hook to your fishing line is an important skill. A good knot keeps your hook secure and helps catch fish.
There are different knots to choose from. Each knot has its own strength and ease of tying.
Choosing A Knot Type
Pick a knot that fits your fishing style and line type. Some knots work better with thin lines, others with thick ones.
Popular knots for tying hooks include the Improved Clinch Knot, Palomar Knot, and Uni Knot. These knots hold well and are easy to tie.
- Improved Clinch Knot: strong and simple
- Palomar Knot: very strong and quick to tie
- Uni Knot: versatile and easy to adjust
Step-by-step Knot Tying
Start by threading the line through the hook eye. Leave a few inches of tag end for tying.
Wrap the tag end around the standing line several times. Then, pass the tag end back through the loop near the hook eye.
- Thread line through hook eye
- Make 5-7 wraps with tag end
- Pass tag end through loop near eye
- Pull tag end and standing line to tighten
- Trim excess tag end
Testing The Knot Strength
After tying, pull the line hard to check the knot. The knot should hold tight and not slip.
If the knot slips or loosens, retie it. A weak knot can make you lose fish and tackle.
- Pull line firmly to test knot
- Look for slipping or loosening
- Retie if knot is weak
- Trim tag end close to knot
Tips For A Secure Setup
Tying a sinker and hook on your fishing line is key to a good catch. A secure setup keeps your gear strong and ready.
Follow simple tips to avoid common problems and make your fishing easier and more fun.
Avoiding Line Twist
Line twist weakens your setup and can cause tangles. To stop this, attach the sinker and hook carefully.
- Use a swivel between the main line and sinker to reduce twist.
- Attach the hook with a strong, twist-free knot like the Palomar knot.
- Let the sinker slide freely if using a slip sinker setup.
- Check your line for twists before fishing.
Ensuring Knot Tightness
Tight knots hold the sinker and hook firmly. Loose knots can slip or break easily.
| Tip | Description |
| Wet the line | Moisten knots before tightening to reduce friction and damage. |
| Pull tight | Apply steady pressure when tightening the knot to secure it. |
| Trim excess | Cut off extra line close to the knot to prevent snagging. |
| Test the knot | Pull on the hook and sinker to make sure the knot holds. |
Regular Line Inspection
Check your line often to find wear and tear before it breaks.
- Look for frays or cuts along the line.
- Replace line sections that look weak or damaged.
- Inspect knots for loosening or slipping.
- Test your gear before each fishing trip.
Common Mistakes To Avoid
Tying a sinker and hook on a fishing line seems easy. Many anglers make simple errors that cause problems.
These mistakes can make your fishing less effective or cause you to lose fish. Avoid these common errors.
Loose Knots
Loose knots can slip or break when you catch a fish. Tight knots keep the sinker and hook secure on the line.
Make sure to pull the knot tight and wet the line before pulling. This helps the knot set firmly.
- Do not leave extra slack in the knot
- Check knots before casting
- Practice knots to tie them quickly and tightly
Incorrect Sinker Placement
Placing the sinker too close or too far from the hook can reduce your catch. The right placement helps the bait move naturally.
Keep the sinker a few inches above the hook. This allows the bait to float and attract fish better.
- Too close: bait looks unnatural and scares fish
- Too far: sinker drags and reduces bait movement
- Adjust placement based on water depth and current
Using Wrong Line Types
Using the wrong fishing line weakens the connection to the sinker and hook. Match the line type to your fishing style.
Monofilament lines stretch more but are easier to tie. Braided lines are stronger but need special knots.
- Choose monofilament for beginners and light fishing
- Use braided lines for heavy fish and strong currents
- Check line strength and thickness before tying
Frequently Asked Questions
How Do You Attach A Sinker To A Fishing Line?
To attach a sinker, thread the line through its hole. Position it about 12 inches above the hook. Secure it by tying a knot or using a split shot. This ensures the sinker stays in place while casting and retrieving.
What’s The Best Knot For Tying A Hook?
The Palomar knot is highly recommended for tying a hook. It’s strong and easy to tie. Begin by doubling the line, passing it through the hook’s eye, then tying an overhand knot. Finally, loop the hook through and tighten.
Can You Use A Swivel With A Hook?
Yes, using a swivel with a hook helps prevent line twisting. Attach the swivel between the hook and main line. This setup allows the hook to rotate freely, minimizing tangles and enhancing bait presentation. Swivels are especially useful when using live bait.
Why Is A Sinker Necessary For Fishing?
Sinkers add weight to your line, allowing it to sink quickly. They help maintain bait at the desired depth. This is crucial for targeting specific fish species. Additionally, sinkers improve casting distance and accuracy, especially in windy conditions.
Conclusion
Tying a sinker and hook on your fishing line is simple with practice. Use the right knots and check them often. Strong knots keep your line secure and help catch fish. Take your time and follow each step carefully. Soon, you will feel more confident by the water.
Fishing becomes more fun when your gear works well. Keep trying, and enjoy every fishing trip.