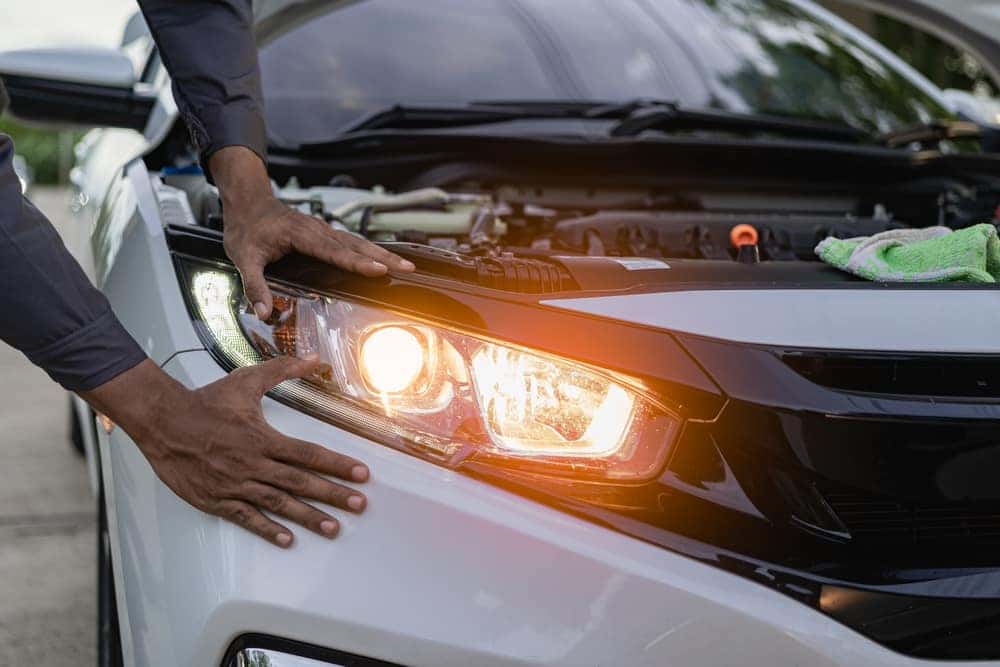
Are your car headlights dim or flickering? Changing them might seem tricky, but it’s easier than you think.
Bright headlights keep you safe and help you see clearly at night. In this guide, you’ll learn simple, step-by-step tips to replace your car headlights quickly and without stress. By the end, you’ll feel confident handling this task on your own—and save time and money.
Ready to see the road better and drive safer? Let’s get started.
Tools Needed
Changing car headlights is a simple task you can do at home. Having the right tools makes the job easier and faster.
This guide lists the basic tools you need to change your car headlights safely and correctly.
New Headlight Bulbs
You must have the correct replacement bulbs for your car model. Check your owner’s manual for the right type.
Using the right bulbs ensures your headlights work well and last long.
Screwdrivers
Screwdrivers help remove screws that hold the headlight in place. Usually, you need a flathead or Phillips screwdriver.
- Flathead screwdriver for flat screws
- Phillips screwdriver for cross-shaped screws
Socket Wrench Set
A socket wrench helps remove bolts around the headlight. It fits tightly and makes turning easier.
Use the right socket size to avoid damaging the bolts or nuts.
Gloves
Wear gloves to protect your hands from dirt and sharp parts. Gloves also prevent oils from your skin from touching the bulb.
Clean bulbs last longer and work better without skin oils.
Clean Cloth
A clean cloth helps you handle the bulb without touching it directly. It also cleans the headlight lens if needed.
Keep the cloth handy to avoid smudges and dirt on your new bulbs.
Owner’s Manual
Your car’s owner manual gives instructions on headlight replacement. It shows where the bulbs are and how to remove them.
Follow the manual to avoid mistakes and damage to your car parts.
Safety Precautions
Changing car headlights can be simple but requires care. Follow safety rules to avoid injuries and damage.
Always prepare your workspace and tools before starting. This helps you work safely and quickly.
Turn Off The Engine And Lights
Make sure the car engine is off. Also, switch off all lights before you start working.
This prevents electric shocks and stops the bulbs from getting hot, which can cause burns.
Wear Gloves And Eye Protection
Wear gloves to keep your hands safe from sharp parts and dirt. Gloves also stop oils from your skin reaching the bulb.
Use safety glasses to protect your eyes from dust and debris during the headlight change.
Avoid Touching The Bulb Glass
Do not touch the glass part of the new bulb with bare hands. Oils can make bulbs burn out faster.
- Hold the bulb by its base only
- If touched, clean it with rubbing alcohol and a cloth
Work In A Well-lit And Dry Area
Choose a bright place to see all parts clearly. Good light helps avoid mistakes and injury.
Make sure the area is dry. Water and electricity can cause shocks or damage your car.
Secure The Car Properly
Set the parking brake and turn off the ignition. This keeps the car from moving while you work.
If possible, place wheel chocks behind the tires for extra safety.
Locate The Headlight Assembly
Changing car headlights starts with finding the headlight assembly. This part holds the bulb and lens.
Knowing where the assembly is helps you access the bulb easily. It is usually at the front of the car.
Check The Front Of Your Car
The headlight assembly is on both sides of the car’s front. Look near the grille and bumper.
You will see a clear lens covering the bulb. This lens is part of the headlight assembly.
Open The Hood To Access The Assembly
Open the car hood to reach the back of the headlight assembly. This space holds the bulb socket.
Look for a round cover or connector behind the headlight lens. This is where you will remove the bulb.
Use Your Owner’s Manual
Your owner’s manual shows the exact location of the headlight assembly. It also explains how to open it.
Follow the manual’s guide to avoid damaging any parts. It can save time and effort.
Remove The Old Headlight
Removing an old car headlight is an important step before installing a new one. It helps ensure the new bulb fits properly and works well.
This guide explains how to remove the old headlight safely and easily.
Accessing The Bulb
First, open the hood of your car to reach the back of the headlight. You may need to remove a cover or dust cap that protects the bulb.
- Locate the headlight assembly inside the engine bay.
- Look for a round or square cover behind the headlight.
- Twist or pull the cover off gently to expose the bulb.
Disconnecting The Wiring
Next, you must disconnect the wiring that powers the bulb. This wiring is usually connected by a plug or clip.
| Type of Connector | How to Disconnect |
| Plug-in Connector | Press the tab and pull the plug out |
| Clip Connector | Lift the clip gently before pulling |
| Twist Lock Connector | Turn counterclockwise then pull |
Removing The Bulb
After disconnecting the wiring, remove the old bulb from the headlight housing. This step may vary by car model.
- Hold the bulb base firmly.
- Turn the bulb counterclockwise or release any clips holding it.
- Pull the bulb straight out without forcing it.
- Avoid touching the glass part of the bulb with your fingers.
Choose The Right Replacement Bulb
Changing car headlights needs the right bulb type. Using the correct bulb keeps your lights bright and safe.
Picking the right bulb means checking your car’s needs and buying quality parts. This guide helps you choose well.
Checking Bulb Type
Look at your car’s manual to find the bulb type. It shows the exact model and size you need.
You can also check the old bulb for numbers or codes. This helps to match the new bulb correctly.
- Find the bulb code on the old bulb
- Check the car manual for bulb specifications
- Visit an auto store with your car’s make and model
Selecting Quality Bulbs
Choose bulbs from trusted brands to ensure good light and long life. Cheap bulbs may burn out fast.
Pick bulbs that match your driving needs, like bright white light for night driving or yellow light for fog.
- Look for bulbs with good reviews and warranties
- Pick bulbs that fit your car’s headlight housing
- Choose bulbs with proper brightness and color temperature

Credit: www.youtube.com
Install The New Headlight
Installing a new headlight is important for safe driving. You need to handle the parts carefully to avoid damage.
This guide explains how to insert the bulb, reconnect wiring, and secure the assembly properly.
Inserting The Bulb
Hold the new bulb by the base, not the glass. Oils from your skin can shorten bulb life.
Carefully push the bulb into the socket. Make sure it fits snugly and is aligned correctly.
Reconnecting Wiring
Locate the wiring harness that connects to the bulb. Check that it is clean and free of damage.
Attach the wiring plug firmly to the bulb’s base. It should click or feel secure once connected.
Securing The Assembly
Place the headlight assembly back into its housing. Align it with the mounting points carefully.
Use screws or clips to fasten the assembly tightly. Avoid over-tightening to prevent damage.
Test The New Headlights
After changing your car headlights, testing them is very important. This ensures they work correctly and keep you safe.
Testing helps you check if the lights are bright and aligned properly. It also finds any problems early.
Check The Light Brightness
Turn on the new headlights in a dark area. Look at how bright the lights shine on the road.
If the lights look dim or flicker, the bulbs might be faulty or not connected well.
Inspect The Light Alignment
Stand in front of your car and see if the headlights point straight ahead. They should not shine too high or low.
Proper alignment helps you see the road without blinding other drivers.
Test Both High And Low Beams
Switch between high and low beams. Make sure both settings work and change smoothly.
Each beam serves a different purpose, so both must function well for safe driving.
Check For Any Flickering Or Issues
Watch the headlights for a few minutes. Look for flickering, dimming, or unusual colors.
These signs may mean a loose connection or a bulb problem.
Test Headlights On The Road
Drive your car at night to see how the headlights perform on the road. Check visibility and beam reach.
Make sure the lights help you see clearly and do not blind other drivers.

Credit: www.youtube.com
Adjust Headlight Alignment
Proper headlight alignment improves your night driving safety. It helps you see the road clearly without blinding other drivers.
This guide explains how to adjust your car headlights at home with simple tools and steps.
Prepare Your Vehicle And Tools
Park your car on a level surface facing a flat wall about 25 feet away. Make sure the tires are properly inflated and the car is empty.
You will need a tape measure, masking tape, a screwdriver or wrench, and a flashlight if it is dark.
Mark Reference Points On The Wall
Turn on your headlights and use masking tape to mark the wall. These marks will help you see where the light beams hit.
- Measure the height from the ground to the center of the headlight.
- Place a horizontal tape line on the wall at the same height.
- Put a vertical tape line on the wall aligned with the car’s center.
- Mark where each headlight beam hits the wall.
Adjust The Headlight Aim
Locate the adjustment screws on the back or top of each headlight. These control the vertical and horizontal aim of the lights.
Turn the screws slowly and check the light pattern on the wall. Adjust until the beams align with the marked tape lines.
| Adjustment Direction | Effect on Beam |
| Turn clockwise | Moves beam up or right |
| Turn counterclockwise | Moves beam down or left |
Test Your Adjusted Headlights
After adjusting, take your car for a short drive in the dark. Check if the headlights illuminate the road well and do not blind oncoming drivers.
If needed, return to the wall and fine-tune the adjustments for better alignment.
Common Issues And Fixes
Changing car headlights can seem hard if problems appear. Knowing common issues helps you fix them quickly.
This guide covers usual headlight problems and simple ways to solve them at home.
Burned Out Bulbs
Bulbs can stop working after long use. They lose brightness or do not light at all.
Replacing the bulb is the main fix. Make sure to buy the right type for your car model.
- Turn off the car and open the hood
- Remove the headlight cover or dust cap
- Unplug the wiring harness from the bulb
- Take out the old bulb carefully
- Insert the new bulb without touching the glass
- Reconnect the wiring and cover the headlight
Foggy Or Cloudy Headlight Covers
Headlight covers can get foggy from dirt and oxidation. This lowers light output.
Clean the covers with a headlight restoration kit or mild abrasive to clear the fog.
- Wash the headlight with soap and water
- Apply the restoration compound or polish
- Buff the surface with a clean cloth
- Repeat if needed for better clarity
- Seal with a UV protectant to prevent future fog
Loose Or Broken Connections
Loose wires or connectors can cause headlights to flicker or not work.
Check all wiring and plugs for tightness and damage. Fix or replace bad parts.
- Turn off the car and open the hood
- Inspect wires for cracks or corrosion
- Push connectors firmly into place
- Replace damaged wires or connectors
- Test the headlights before closing the hood
Headlight Alignment Problems
Headlights can point too high, low, or sideways. This reduces night visibility.
Adjust the headlight aim using screws on the headlight housing to align properly.
- Park the car on a flat surface facing a wall
- Measure the height of the headlight center from the ground
- Mark the wall to match this height
- Use adjustment screws to move headlights to the marks
- Test the new alignment by driving at night
Moisture Inside Headlight
Water or moisture can enter the headlight, causing fogging or damage.
Remove the headlight and dry it out. Check seals and replace if broken.
- Remove the headlight assembly from the car
- Open the headlight cover carefully
- Dry the inside with a cloth or let it air dry
- Inspect rubber seals for cracks or gaps
- Replace seals or apply sealant to keep water out
- Reinstall the headlight securely

Credit: www.youtube.com
Frequently Asked Questions
How Do I Know When To Change Car Headlights?
Check for dim or flickering lights and cracked bulbs. Regularly inspect headlights to ensure safety and visibility. Replace bulbs if lighting is weak or uneven.
What Tools Are Needed To Change Car Headlights?
You typically need a screwdriver, gloves, and replacement bulbs. Some cars may require socket wrenches or trim removal tools. Always consult your vehicle manual for specifics.
Can I Change Car Headlights Myself Safely?
Yes, with proper instructions and safety precautions, you can. Make sure the engine is off and bulbs are cool before starting. Wear gloves to avoid oil on bulbs.
How Long Does It Take To Change Car Headlights?
Changing headlights usually takes 15 to 30 minutes per side. Time varies based on car model and bulb type. Being prepared speeds up the process.
Conclusion
Changing car headlights is simple and saves you time. Follow the steps carefully for safety. Use the right tools and check the new bulbs before installing. Clean the area to keep lights bright and clear. Regularly check headlights to avoid problems on the road.
Taking care of your car helps you drive safer at night. Now, you can change headlights without any trouble or extra costs. Give your car the care it needs and enjoy better visibility.