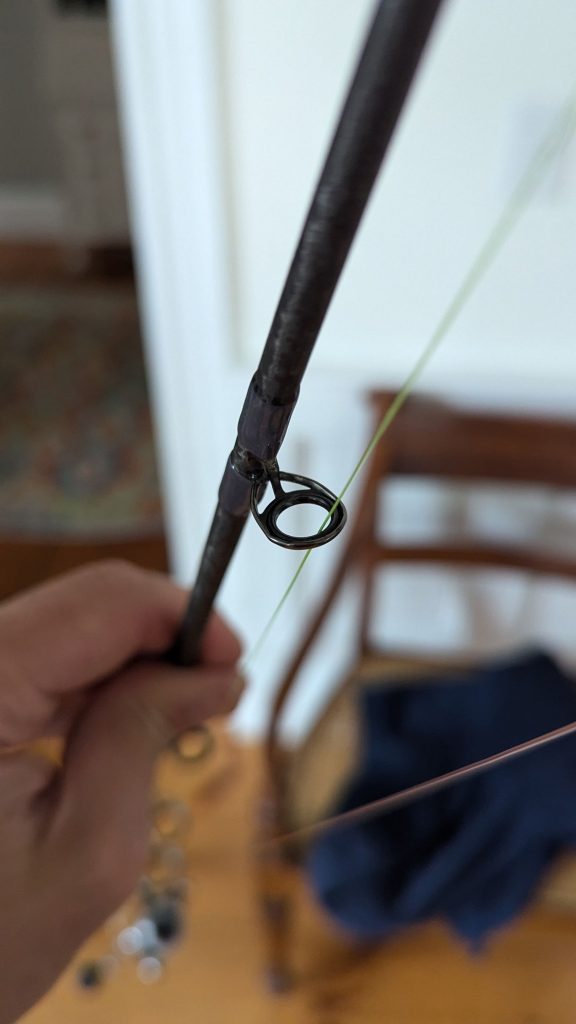
Have you ever noticed a small crack or break in the eye of your fishing rod? It might seem like a minor issue, but a damaged eye can ruin your fishing experience.
If you don’t fix it, your line could get tangled or even snap at the worst moment. The good news is, you don’t need to buy a new rod. You can replace the eye yourself with just a few simple tools and steps.
In this guide, you’ll learn exactly how to replace the eye on your fishing rod quickly and easily. Keep reading, and you’ll be back on the water in no time, fishing with confidence and ease.
Credit: collegeofems.com
Tools And Materials Needed
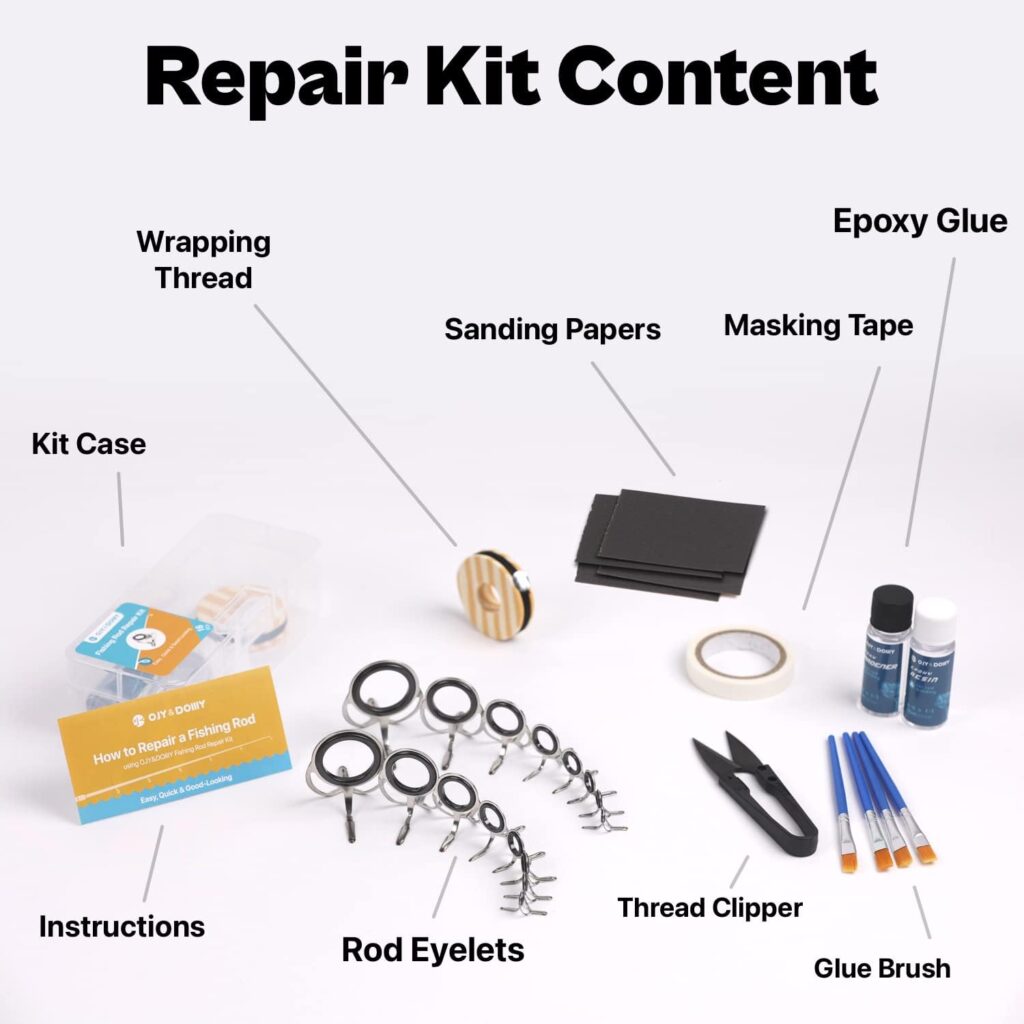
Replacing the eye on a fishing rod is a simple task if you have the right tools. Using proper materials helps fix the rod securely.
This guide covers the essential tools, choosing the correct replacement eyes, and extra supplies you may need.
Essential Tools
You need a few basic tools to remove the old eye and attach the new one. These tools make the job easier and more precise.
- Small flathead screwdriver or knife to remove old wrapping
- Heat source like a lighter or heat gun to soften thread
- Fine sandpaper to clean the rod surface
- Small scissors or snips for cutting thread
- Paintbrush for applying glue or epoxy
- Tiny clamps or tape to hold the eye in place while drying
Choosing Replacement Eyes
Replacement eyes come in different sizes and styles. Pick one that fits your rod and the line size you use.
Match the eye’s frame color and material to your rod for better durability and look.
- Check the diameter of the old eye to find the right size
- Choose ceramic or stainless steel rings for smooth line flow
- Use light or heavy-duty eyes based on fishing type
- Pick frames that fit your rod’s thickness and action
Additional Supplies
You will need some extra supplies to secure the new eye and finish the repair.
These items help protect the thread and keep the eye stable during fishing.
- Strong thread like nylon or polyester rod wrapping thread
- Epoxy or rod-building glue to seal the thread
- Rod finish or clear coat for a smooth, shiny surface
- Masking tape to mark the wrapping area
- Paper towels or cloth for cleaning up excess glue
Removing The Old Eye
Replacing the eye on a fishing rod starts with removing the old one carefully. This step prevents damage to the rod and prepares it for a new eye.
Use the right tools and methods to remove the damaged eye safely. Follow the steps below for a smooth process.
Inspecting The Damaged Eye
Look closely at the old eye to see how it is attached. Check for cracks, rust, or loose glue. This helps decide the best removal method.
Cutting Or Heating Methods
There are two main ways to remove the old eye: cutting it off or softening the glue with heat. Choose the safest option for your rod.
- Use a small knife or razor to cut the thread wrapping the eye.
- Apply gentle heat with a hairdryer to soften the glue.
- Carefully lift the eye off the rod with pliers once loose.
- Do not force the eye to avoid breaking the rod.
Cleaning The Rod Surface
After removing the eye, clean the rod surface to remove glue and dirt. This helps the new eye stick properly and last longer.
| Cleaning Material | Purpose |
| Rubbing Alcohol | Removes old glue residue |
| Soft Cloth | Wipes rod surface clean |
| Fine Sandpaper | Smooths rough spots gently |
Preparing The New Eye
Replacing the eye on your fishing rod needs careful preparation. This helps the new eye fit well and last longer.
Two important parts of preparation are picking the right size and aligning the eye correctly.
Selecting The Correct Size
Choosing the right size eye is key. A wrong size can affect your fishing line and rod balance.
- Measure the diameter of the old eye or the rod tip.
- Match the new eye size with the rod’s specifications.
- Consider the line size you usually use for fishing.
- Smaller eyes are for light lines and delicate rods.
- Larger eyes fit heavier lines and strong rods.
Aligning The Eye Properly
Aligning the new eye with the rod is important for smooth casting and durability.
| Alignment Step | Description |
| Check the rod’s line | Look along the rod to find the exact line path. |
| Place the new eye | Set the eye on the rod where the old eye was. |
| Ensure straight line | The eye should line up straight with other guides. |
| Tighten temporarily | Use tape or light glue to hold the eye in place. |
| Test the fit | Run the fishing line through to check smoothness. |
Attaching The New Eye
Replacing the eye on a fishing rod is a simple process. You need to attach the new eye securely. This guide will help you do it right.
Follow the steps carefully to ensure the eye stays in place during fishing.
Applying Adhesive Or Epoxy
Choose a strong adhesive or epoxy made for fishing rods. Apply a small amount inside the eye ring. Make sure not to use too much.
Spread the glue evenly for a firm hold and avoid any mess on the rod.
Securing The Eye In Place
- Slide the new eye onto the rod tip carefully.
- Align it straight with the other eyes on the rod.
- Hold it firmly for a few minutes to prevent movement.
- Use masking tape to keep it steady while drying.
- Check that the eye does not rotate or slip.
Drying And Curing Time
| Adhesive Type | Drying Time | Curing Time |
| Epoxy Resin | 5-10 minutes | 24 hours |
| Super Glue (Cyanoacrylate) | 1-2 minutes | 12 hours |
| Polyurethane Glue | 10-15 minutes | 24-48 hours |
Allow the adhesive to dry completely. Avoid moving the rod during this time. Full curing ensures the eye stays fixed and strong.
Finishing Touches
Replacing the eye on a fishing rod requires care in the final steps. These steps ensure the eye stays secure and works well during fishing.
Pay close attention to wrapping, coating, and stability checks. Each step adds strength and durability to your repair.
Wrapping With Thread
Use strong thread to wrap the new eye tightly to the rod. Wrap evenly from the base to the top of the eye foot. This holds the eye firmly in place.
- Start by tying a secure knot on the rod.
- Wrap the thread smoothly without gaps.
- Cover the entire foot of the eye.
- Finish with a tight knot to lock the thread.
Applying Protective Coating
After wrapping, add a clear protective coating over the thread. This coating stops the thread from fraying and protects it from water damage.
| Coating Type | Purpose | Drying Time |
| Epoxy Resin | Strong and waterproof | 24 hours |
| Polyurethane Varnish | Flexible and clear | 6 hours |
| Super Glue (Cyanoacrylate) | Quick drying, less flexible | 10 minutes |
Checking For Stability
Test the new eye to make sure it stays in place. Check for any movement or looseness that could cause problems.
Here are simple checks to confirm stability:
- Gently wiggle the eye; it should not move.
- Pull the thread to test its strength.
- Look for cracks in the coating.
- Make sure the eye aligns with the rod guide path.

Credit: www.amazon.com
Maintenance Tips
Keeping your fishing rod in good shape helps it last longer. One key part is the eye, which guides the fishing line. Replacing the eye is easier with regular care.
This guide covers how to check your rod often and avoid damage to the eye.
Regular Inspection
Look over your fishing rod every time before you fish. Check the eyes for cracks, rust, or bends. These signs mean the eye needs fixing or replacing.
- Run your finger along the eye for rough spots
- Look for rust or corrosion on metal parts
- Check if the eye ring is loose or wobbly
- Use a magnifying glass to see small cracks
- Test the rod’s guides by threading the line through
Preventing Future Damage
Protect your rod eyes by handling the rod with care. Store it in a safe place and clean it after each use. Avoid knocks and harsh environments.
| Prevention Tip | How to Do It |
| Store Properly | Use rod holders or cases to avoid bending or breaks |
| Clean Regularly | Wipe eyes with a soft cloth and fresh water after fishing |
| Avoid Rough Surfaces | Do not drag the rod on rocks or hard surfaces |
| Inspect After Use | Check for damage after every fishing trip |
| Replace Damaged Eyes | Fix or swap eyes before they break completely |

Credit: naavagreen.com
Frequently Asked Questions
How Do I Know When To Replace A Fishing Rod Eye?
Replace the eye if it’s cracked, bent, or rusted. Damaged eyes can cause line breakage and poor casting performance.
What Tools Do I Need To Replace A Fishing Rod Eye?
You need a replacement eye, glue or epoxy, a knife, sandpaper, and a heat source for shrinking tubing.
Can I Replace A Fishing Rod Eye By Myself?
Yes, you can replace it at home with basic tools and patience. Follow step-by-step instructions carefully for best results.
How Long Does It Take To Replace A Fishing Rod Eye?
Replacing an eye usually takes 20 to 30 minutes, depending on your experience and drying time for adhesives.
Conclusion
Replacing the eye on your fishing rod keeps it working well. You save money by fixing it yourself. Take your time to avoid mistakes. Use the right tools for best results. This simple fix helps you enjoy fishing longer. Practice a few times to get better.
Soon, rod repairs will feel easy and quick. Keep your gear ready for the next fishing trip. Small repairs make a big difference in your fishing experience.