Is your fishing rod not working like it used to? Maybe the line keeps snapping, or the reel feels stuck.
Don’t let a broken rod ruin your next fishing trip. You can fix it yourself with a few simple steps. In this guide, you’ll learn how to spot common problems and repair your fishing rod quickly. Keep reading, and you’ll be ready to cast your line with confidence again.
Your perfect catch is just a fix away!
Common Fishing Rod Issues
Fishing rods often face wear and tear from use and exposure. Knowing common problems helps fix them quickly.
This guide covers typical issues like broken rods, loose guides, handle damage, and reel seat problems.
Broken Rod Tips
Broken tips reduce your rod’s performance. Fixing them can save your rod from replacement.
- Cut the broken tip clean with a sharp blade.
- Measure a new tip to match the original size.
- Use strong glue to attach the new tip.
- Allow it to dry fully before use.
Loose Guides
Guides hold the fishing line in place. Loose guides cause line tangles and poor casting.
To fix loose guides, follow these tips:
- Check if the guide feet are cracked or broken.
- Remove old thread wrapping carefully.
- Re-wrap the guide tightly with new thread.
- Apply a clear rod finish or epoxy to seal the wrapping.
Handle Damage
Handle damage makes holding your rod uncomfortable. It can be caused by water or heavy use.
| Damage Type | Repair Method |
| Cracked Cork | Fill cracks with cork filler or glue |
| Worn Handle | Wrap with grip tape or replace cork |
| Water Damage | Dry fully and apply sealant |
Reel Seat Problems
Reel seats hold the reel in place. Loose or damaged seats cause reel wobble or loss.
- Tighten the reel seat by hand or with a tool.
- Use thread tape for extra grip if needed.
- Replace damaged reel seats with new ones.
- Apply epoxy to secure loose seats firmly.

Credit: www.youtube.com
Tools And Materials Needed
Fixing a fishing rod needs the right tools and materials. Using proper items makes repairs easier and longer lasting.
This guide covers the basic tools, special adhesives, and parts you may need for rod repair.
Basic Repair Kit
A basic repair kit has the essential tools for common fishing rod fixes. These tools help you clean, cut, and join parts.
- Small screwdriver set for tightening screws
- Needle-nose pliers for gripping small pieces
- Sharp scissors or a knife for cutting threads
- Sandpaper or emery cloth to smooth rough edges
- Thread or fishing line for wrapping guides
- Heat gun or hairdryer to help adhesives set
Specialized Adhesives
Strong adhesives keep the rod parts together. Use glue made for fishing rods or water-resistant types.
- Epoxy resin for fixing cracks and breaks
- Super glue for quick small repairs
- UV curing glue that hardens with light
- Thread sealant to protect wrapped guides
Replacement Parts
Some rod parts may need replacing if damaged. Having spare parts helps you fix the rod fully.
- Rod guides of different sizes
- Tip tops for the rod ends
- Handle grips or cork pieces
- Reel seats to hold the fishing reel
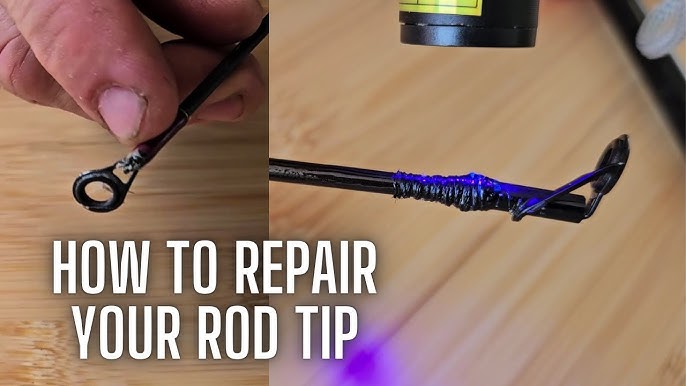
Fixing Rod Tips
Fishing rod tips are delicate and can break during use. Fixing them helps you keep your rod in good shape. This guide shows how to repair rod tips step by step.
We focus on removing broken tips, attaching new ones, and securing them properly for long-lasting use.
Removing Broken Tips
Start by removing the broken tip carefully. Use heat or tools to loosen the glue holding it. Avoid damaging the rod blank during this process.
- Heat the tip with a lighter or heat gun for a few seconds
- Gently twist and pull the broken tip off
- Clean any glue residue on the rod tip
- Use sandpaper to smooth the surface if needed
Attaching New Tips
Choose a new tip that matches the rod’s size and style. Fit it carefully on the rod blank. Test the fit before gluing to ensure it is straight and secure.
| Tip Size | Rod Diameter | Fit Type |
| Small | 1.5 – 2.0 mm | Slip-on |
| Medium | 2.1 – 2.8 mm | Slip-on |
| Large | 2.9 – 4.0 mm | Push-in |
Securing With Thread And Epoxy
After fitting the new tip, wrap the base with thread to hold it firmly. Apply epoxy to seal and strengthen the connection. Let it dry fully before use.
- Wrap the thread tightly around the tip base
- Apply thin coats of epoxy over the thread
- Rotate the rod while drying to avoid drips
- Allow 24 hours for epoxy to cure completely

Credit: www.amazon.com
Repairing Guides
Fishing rod guides help control the fishing line. They keep the line smooth and strong. Fixing damaged guides can save your rod and improve fishing.
This guide shows how to find broken guides, remove old ones, and install new guides properly.
Identifying Damaged Guides
Look closely at each guide on your rod. Check for cracks, breaks, or missing parts. Feel for rough spots that can cut the fishing line.
- Cracked or chipped rings
- Loose or bent guide frames
- Rust or corrosion on metal parts
- Missing inserts or pieces
- Rough edges that can fray the line
Removing Old Guides
Carefully remove the damaged guides before adding new ones. Use tools that do not harm the rod blank.
- Heat the guide wraps lightly with a heat gun or lighter to soften glue.
- Use a sharp knife to cut the thread wraps around the guide.
- Gently pull the guide off the rod blank.
- Clean leftover glue and thread from the rod surface.
Installing New Guides
Set new guides carefully in the right positions. Use strong thread and glue to hold them firmly.
| Task | Details |
| Position Guides | Align guides evenly along the rod length. |
| Wrap Thread | Use thread to tightly bind guides to the rod. |
| Apply Epoxy | Coat wraps with clear epoxy for strength and smoothness. |
| Let Dry | Allow epoxy to cure fully before use. |
Handle And Grip Restoration
Fishing rod handles and grips wear out after long use. Restoring them keeps your rod comfortable and easy to use. This guide covers fixing cork handles, foam grips, and cleaning tips.
Replacing Cork Handles
Cork handles can crack or peel over time. Replacing them restores a smooth and firm grip. You will need cork tape, glue, and sandpaper to finish the job.
- Remove the old cork handle carefully.
- Sand the rod blank to remove glue residue.
- Wrap cork tape tightly around the handle area.
- Apply glue to secure the cork tape in place.
- Let the glue dry completely before sanding the cork smooth.
Fixing Foam Grips
Foam grips may tear or lose shape. You can patch small holes or replace the grip. Use foam repair adhesive or a new foam sleeve for replacement.
- Clean the foam grip area with mild soap and water.
- For small tears, apply foam adhesive and press the edges together.
- To replace, remove the old foam by sliding it off the handle.
- Slide the new foam grip onto the handle.
- Trim excess foam with a sharp knife if needed.
Cleaning And Maintenance
Regular cleaning keeps your handle and grip in good shape. Dirt and sweat can damage materials over time. Use soft tools and mild cleaners for best care.
| Material | Cleaning Method | Drying Tip |
|---|---|---|
| Cork | Wipe with damp cloth, avoid soaking | Air dry in shade |
| Foam | Use mild soap and water, gently scrub | Pat dry, avoid direct sunlight |
| Rubber | Clean with warm water and cloth | Wipe dry immediately |
Reel Seat Adjustments
The reel seat holds the reel to the fishing rod. It needs to be secure for good fishing. Adjusting the reel seat helps keep the reel in place.
Loose or worn reel seats can cause problems. Fixing these issues improves your fishing experience.
Tightening Loose Reel Seats
A loose reel seat makes the reel wobble. Tighten it carefully to avoid damage. Use a soft cloth to protect the rod.
- Loosen the locking nut by turning it counterclockwise.
- Slide the reel foot into the seat properly.
- Turn the locking nut clockwise to tighten.
- Check if the reel is firmly held without movement.
- If still loose, add a thin layer of tape under the reel foot.
Replacing Worn Components
Over time, parts of the reel seat can wear out. Replace these parts to keep the reel secure.
| Component | Signs of Wear | Replacement Tips |
| Locking Nut | Cracks, stripped threads | Match thread size and type |
| Reel Seat Rings | Broken or loose rings | Choose rings that fit the rod size |
| Reel Seat Body | Cracks, damage | Consider full seat replacement |
Preventive Maintenance Tips
Keeping your fishing rod in good shape helps it last longer. Regular care stops damage before it starts.
This guide covers easy ways to clean, store, and check your rod often.
Regular Cleaning
Clean your fishing rod after every trip. Salt, dirt, and debris can harm the rod and guides.
- Rinse the rod with fresh water to remove salt and dirt.
- Use a soft cloth to wipe the rod and guides gently.
- Check the reel seat and handle for grime and clean carefully.
- Dry the rod completely before storing it.
Proper Storage
Store your fishing rod in a dry place away from direct sunlight. This prevents warping and fading.
| Storage Tip | Reason |
| Keep rod upright or horizontal on a rack | Prevents bending or warping |
| Avoid leaning against walls | Stops pressure points and damage |
| Use rod sleeves or cases | Protects from dust and scratches |
| Store away from heat sources | Prevents material weakening |
Routine Inspections
Check your rod often for cracks, loose guides, or worn parts. Fixing small issues saves big repairs.
- Look over the rod blank for cracks or scratches.
- Check guides for bent frames or damaged rings.
- Test the reel seat for tightness and security.
- Inspect handles for splits or loose grips.
- Replace any broken or worn parts right away.

Credit: www.reddit.com
Frequently Asked Questions
How Do I Repair A Broken Fishing Rod Tip?
To fix a broken fishing rod tip, remove the damaged tip and replace it with a new rod tip guide. Use rod glue or epoxy to secure it firmly. Allow it to dry completely before using the rod again for fishing.
What Tools Are Needed To Fix A Fishing Rod?
Common tools include epoxy glue, replacement guides, sandpaper, scissors, and a heat source like a lighter. These help in removing damaged parts, securing new guides, and finishing repairs efficiently.
How To Fix A Fishing Rod Guide Alignment?
To fix guide alignment, loosen the wraps holding the guides. Adjust the guide to line up with the rod tip, then rewrap and secure with epoxy. Proper alignment improves casting accuracy and rod performance.
Can I Fix A Cracked Fishing Rod Blank At Home?
Minor cracks can be repaired using fiberglass tape and epoxy resin. Clean the crack, apply resin, wrap with fiberglass tape, and cure it. For severe cracks, professional repair or replacement is recommended.
Conclusion
Fixing a fishing rod can save time and money. Small problems often have simple solutions. Check the rod carefully before starting repairs. Use the right tools to avoid damage. Take your time and work step by step. A well-fixed rod will perform like new.
Keep your rod in good condition to fish longer. Practice these tips to enjoy fishing more. Easy repairs help you stay ready for your next trip.