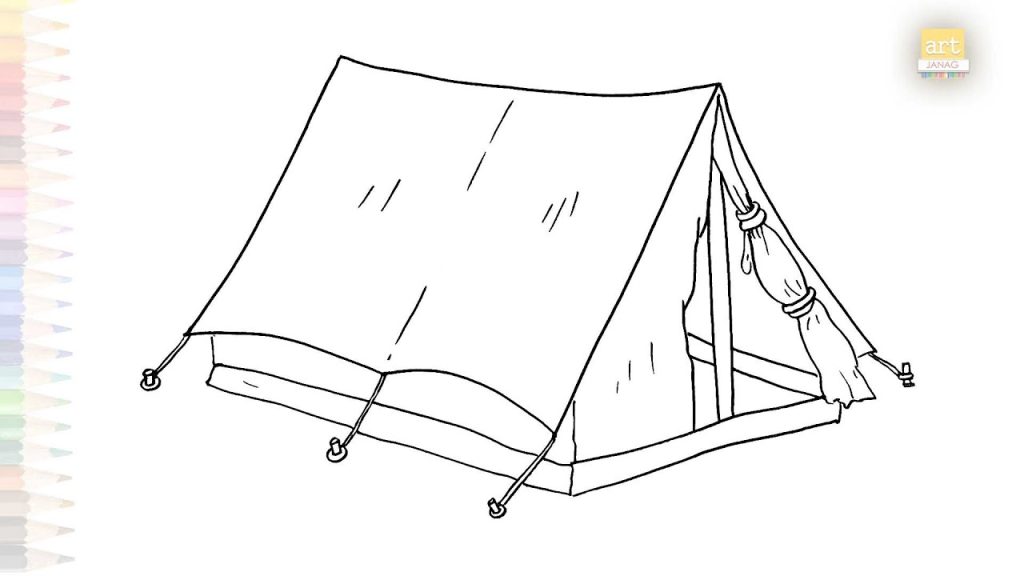
Have you ever wanted to capture the simple charm of a tent in your drawings but didn’t know where to start? Drawing a tent might seem tricky at first, but with the right steps, you’ll be surprised at how easy and fun it can be.
Whether you’re sketching for a camping story, decorating a journal, or just practicing your art skills, this guide will walk you through every detail. By the end, you’ll have a clear, neat tent drawing that feels just right. Ready to bring your tent to life on paper?
Let’s dive in and make your drawing skills shine!
Materials Needed
Drawing a tent is simple and fun. You need some basic materials to start.
These materials help you create clean and clear drawings step by step.
Paper
Use plain white paper for your drawing. It shows your lines well.
You can use sketch pads or printer paper. Choose a size that fits your workspace.
Pencil
A pencil helps you draw shapes and lines lightly. You can erase mistakes easily.
- Use an HB or 2B pencil for clear lines
- Keep a sharpener nearby
- Try different pencil types for shading
Eraser
An eraser lets you fix wrong lines. It keeps your drawing neat and clean.
Choose a soft eraser to avoid tearing the paper.
Ruler
A ruler helps you draw straight lines for the tent’s edges. It improves accuracy.
Use a ruler that is at least 12 inches long for better control.
Colored Pencils Or Markers
Colored pencils or markers add color to your tent drawing. They make it lively.
Pick colors that match real tents, like green, brown, or beige.

Credit: www.youtube.com
Basic Tent Shapes
Tents come in many shapes. Each shape has a different look and use.
Knowing basic tent shapes helps you draw them easily and clearly.
Triangle Form
The triangle form is the simplest tent shape. It looks like a tall triangle.
It has two sloping sides that meet at the top. The base is flat and wide.
- Draw a horizontal line for the base.
- Add two diagonal lines meeting at a point above the base.
- Draw the entrance as a small triangle or rectangle on one side.
- Add lines inside to show the tent’s folds.
Dome Style
Dome tents have curved shapes. They look like half circles or domes.
These tents use flexible poles that bend to form the dome.
A-frame Design
The A-frame tent looks like the letter A. It has two sloped sides and a ridge on top.
| Feature | Description |
| Shape | Two sloping sides meeting at a ridge |
| Base | Rectangular or square |
| Support | Poles form the A shape |
| Common Use | Camping and hiking tents |
Sketching The Tent Frame
Drawing a tent starts with creating the frame. The frame shows the tent’s basic shape. It helps you plan where other parts go.
Focus on simple lines that show the structure. This makes the tent look real and easy to understand.
Drawing The Poles
Start by sketching the tent poles. Poles hold the tent up and give it shape. Draw them as straight lines or slightly curved if needed.
Show where poles cross or connect. Use light lines first, so you can fix mistakes. Make sure the poles look balanced and support the tent well.
Marking The Tent Base
Next, mark the tent base on the ground. This is the area the tent covers. Draw a flat shape like a rectangle or triangle to show the base.
Keep the base size in proportion to the poles. Mark corners clearly to guide where the tent fabric will go. This helps finish the drawing later.

Credit: www.youtube.com
Adding Tent Details
Adding details to your tent drawing makes it look more real. Small touches bring life to your sketch.
Focus on fabric texture, doors, windows, ropes, and stakes. These parts complete the tent’s look.
Drawing The Fabric
Start by sketching the fabric’s folds and creases. This shows the tent’s shape and softness.
Use light lines for wrinkles and darker lines for edges. Add small shadows to give depth.
- Draw curved lines to show fabric folds
- Add shading where fabric overlaps
- Use texture lines for rough or smooth fabric
Adding Tent Door And Windows
Doors and windows make your tent drawing more interesting. Draw their shapes clearly.
Show open or closed doors by drawing flaps or zippers. For windows, add mesh or curtains.
- Draw a rectangle or triangle for the door
- Add lines for zippers or flaps
- Sketch small rectangles for windows
- Include mesh lines or curtain folds
Including Ropes And Stakes
Ropes and stakes hold the tent in place. Draw them to show how the tent stands firm.
Draw thin ropes tied from the tent corners to the ground. Add stakes where ropes meet the soil.
- Use straight or slightly curved lines for ropes
- Draw small triangular shapes for stakes
- Show knots where ropes attach to the tent
Shading And Textures
Shading and textures bring life to your tent drawing. They make the fabric look real and three-dimensional.
By adding details like folds, shadows, and light spots, you can show the tent’s shape and material.
Creating Fabric Texture
To create fabric texture, use small lines and soft shading. These show the roughness or smoothness of the tent cloth.
- Draw thin, curved lines along the fabric folds.
- Use light crosshatching to show shadows on the fabric.
- Leave some areas blank for highlights where light hits.
- Vary line pressure to create darker and lighter fabric parts.
Adding Shadows For Depth
Shadows help the tent look solid and set in space. Add shadows where the fabric bends or overlaps.
| Shadow Area | How to Shade | Effect |
| Under the tent flap | Use dark shading with soft edges | Shows depth and opening |
| Fold lines | Draw thin dark lines | Suggests creases |
| Ground contact | Shade the bottom edges darker | Makes the tent feel grounded |
| Sunlit areas | Leave lighter or add soft highlights | Creates contrast and realism |
Coloring The Tent
Coloring your tent drawing brings it to life. It helps show the tent’s shape and texture.
Use colors to make your tent look bright or natural. Choosing the right colors is important.
Choosing Colors
Pick colors that match the type of tent you want to draw. Bright colors show fun or camping tents. Earth tones give a natural look.
- Use green, brown, or beige for forest tents
- Choose red, blue, or yellow for a lively tent
- Try gray or white for modern or winter tents
- Mix colors for a striped or patterned tent
Applying Color Gradients
Color gradients add depth and light to your tent. They make the surface look curved and real.
| Gradient Type | Effect on Tent |
|---|---|
| Light to Dark | Shows light hitting one side and shadow on the other |
| Warm to Cool | Creates a soft transition for natural look |
| Single Color Fade | Makes fabric look smooth and shiny |
| Multi-color Blend | Gives a creative and colorful effect |
Final Touches
After sketching your tent, the last steps make it look neat and clear. These final touches help your drawing look complete.
Focus on cleaning up lines and removing extra marks. This makes your tent drawing easy to understand and more attractive.
Refining Lines
Go over your main lines with a darker pencil or pen. Make sure the lines are smooth and steady. This makes the tent shape stand out.
Keep the line thickness consistent. Avoid shaky or uneven lines. Use gentle strokes to improve the look of your drawing.
- Use a fine liner or dark pencil
- Trace over main tent edges slowly
- Keep lines smooth and straight
- Fix any uneven parts carefully
- Don’t press too hard to avoid smudges
Erasing Guidelines
Remove the light sketch lines and guides that helped you draw. Use a soft eraser to avoid damaging the paper. Erase gently around your refined lines.
Check your drawing for any leftover marks. Clean these up to give your tent a polished look. This step makes your drawing ready for coloring or shading.
- Use a soft, clean eraser
- Erase light sketch lines only
- Be gentle near dark lines
- Remove smudges and stray marks
- Keep the paper clean and flat

Credit: www.youtube.com
Frequently Asked Questions
How Do I Start Drawing A Tent?
Begin by sketching a simple triangle for the tent’s main shape. Add a rectangle base for stability. This forms the basic tent structure for detailed drawing.
What Materials Are Best For Drawing A Tent?
Use pencils for initial sketching, then fine liners for outlines. Colored pencils or markers add vibrant details and shading to enhance realism.
How Can I Add Depth To My Tent Drawing?
Create depth by shading the tent’s sides differently. Use darker shades for shadow areas and lighter ones for highlights to make it look 3D.
What Common Tent Styles Should I Know To Draw?
Familiarize with A-frame, dome, and teepee tents. Knowing these styles helps you create accurate and varied tent drawings for different contexts.
Conclusion
Drawing a tent is simple with the right steps. Start with basic shapes and add details slowly. Practice often to improve your skills. Don’t worry about mistakes; they help you learn. Use these tips to enjoy your drawing journey. Keep your pencil ready and have fun creating tents!