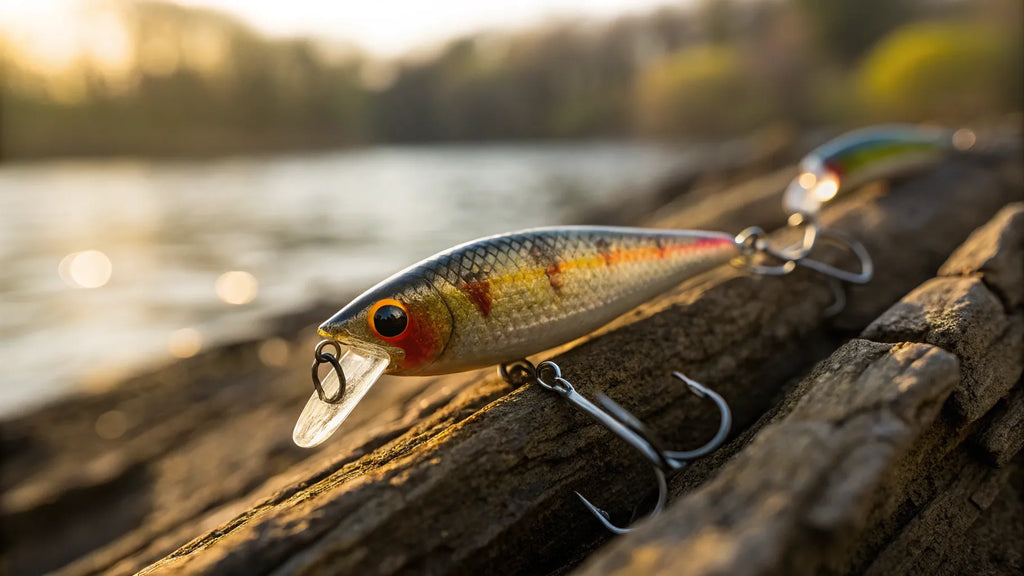
Have you ever wanted to create fishing lures that stand out and attract more fish? Painting your own fishing lures can give you that extra edge on the water.
It’s not just about looks—custom colors and patterns can make your lure more effective and unique. In this guide, you’ll learn simple, step-by-step tips to paint your fishing lures like a pro, even if you’ve never picked up a brush before.
Get ready to turn ordinary lures into eye-catching masterpieces that will boost your catch every time. Keep reading, and you’ll soon see how easy and fun it is to personalize your gear.
Choosing The Right Lure
Painting fishing lures can make them look more real. It can also attract more fish. Choosing the right lure is the first step.
Different lures work in different waters and fish types. You need to pick one that fits your fishing style.
Types Of Fishing Lures
Fishing lures come in many types. Each type moves in a unique way to catch fish attention.
- Crankbaits: These dive underwater and wiggle.
- Spinnerbaits: They flash light with spinning blades.
- Jigs: Simple hooks with a weighted head.
- Soft Plastics: Flexible and look like real bait.
- Spoons: Shiny and wobble to mimic injured fish.
Materials Suitable For Painting
Not all lure materials hold paint well. Choose materials that accept paint and last in water.
- Wood: Easy to paint and durable.
- Plastic: Common and works well with special paint.
- Metal: Needs proper primer before painting.
Acrylic paints work best on most materials. Use a clear coat to protect your paint job from water.
Selecting Lure Shapes
Lure shapes affect how they move in water. Pick shapes that match the fish you want to catch.
- Long and slim shapes mimic small fish.
- Round shapes look like frogs or bugs.
- Flat shapes can flutter and attract attention.
Choose a shape that fits your painting skills. Simple shapes are easier to paint well.
Essential Painting Supplies
Painting fishing lures requires the right supplies. These tools help you create attractive and durable finishes. Choosing good supplies makes the process easier and the results better.
Below are the main supplies you need to paint fishing lures. Each type plays a special role in the painting process.
Paint Types And Finishes
Use paints made for plastic or metal surfaces. Acrylic paints are popular because they dry fast and are easy to use. Enamel paints give a shiny and strong finish but take longer to dry.
- Acrylic paints dry quickly and clean up with water.
- Enamel paints provide a hard, glossy surface.
- Some paints come with matte or gloss finishes.
- Use paint that resists water and sunlight.
Brushes And Tools
Choose small, fine brushes for detailed work. Synthetic brushes work well with acrylic paints. Use foam brushes for smooth, even coats. Toothpicks or fine needles help with tiny details.
- Fine tip brushes for small details
- Foam brushes for smooth base coats
- Toothpicks for dots and tiny lines
- Palette or mixing tray for blending paints
Protective Coatings
After painting, apply a clear coat to protect the lure. Use varnishes or clear spray finishes. These coatings guard against water, scratches, and fading from sunlight.
- Glossy clear coats make colors bright
- Matte clear coats reduce shine
- Use waterproof coatings for durability
- Apply several thin layers for best results
Preparing Lures For Painting
Painting fishing lures starts with good preparation. Clean and smooth surfaces help paint stick better.
Setting up your workspace right makes painting easier and less messy.
Cleaning And Sanding
Remove dirt, grease, and old paint from the lure. Use warm water and mild soap. Rinse well and dry.
Lightly sand the lure’s surface with fine-grit sandpaper. This helps the new paint stick better.
- Wash lure with warm soapy water
- Rinse thoroughly and dry with a soft cloth
- Sand gently with 400-600 grit sandpaper
- Remove sanding dust before painting
Priming The Surface
Apply a thin primer layer to the lure. Primer creates a smooth base for paint. Use a spray primer for best results.
Let the primer dry completely before painting. This prevents paint from peeling off later.
| Primer Type | Dry Time | Best Use |
| Spray Primer | 15-30 minutes | Even coverage on plastic or metal |
| Brush-on Primer | 30-45 minutes | Small touch-ups or detailed areas |
Setting Up Your Workspace
Choose a clean, well-ventilated area. Cover surfaces with newspaper or plastic sheets.
- Use a table or bench with good lighting
- Keep all painting tools within reach
- Wear gloves and a mask for safety
- Have a drying rack or stand ready

Credit: www.lurenet.com
Painting Techniques
Painting fishing lures needs patience and care. The right technique can make your lures more attractive to fish.
Using good painting methods helps your lures last longer and look more realistic.
Base Coating Methods
Base coating gives your lure a smooth and even color. It prepares the surface for details and patterns.
You can use spray paint, airbrush, or a simple brush for base coating. Spray paint covers large areas quickly.
- Clean the lure before painting to remove dirt and oils.
- Apply thin layers of paint to avoid drips.
- Let each layer dry fully before adding the next.
Creating Patterns And Details
Patterns make your lure look like real fish or bugs. Use small brushes or stencils to add spots, stripes, or scales.
Be careful with fine details. Thin paint and steady hands create clean lines and shapes.
- Start with light colors, then add darker details.
- Use a toothpick or fine brush for tiny dots.
- Try sponging or tapping for textured effects.
Using Airbrush Vs. Brushes
An airbrush sprays paint in a smooth, even layer. It is good for soft fades and large areas.
Brushes give more control for small parts and fine details. They are better for sharp lines and small patterns.
- Airbrush: fast coverage, smooth gradients, needs cleaning.
- Brush: slow but precise, good for details, less equipment.
- Use both tools to get the best look on your lure.
Adding Realistic Features
Painting fishing lures with realistic features helps attract more fish. Realistic details make lures look alive in the water.
Focus on textures, colors, and light reflections. These elements mimic real fish and increase lure effectiveness.
Mimicking Fish Scales
Fish scales have a unique pattern and shine. To copy this, use small, layered brush strokes or stencils. Paint the scales using light and dark shades for depth.
- Start with a base coat of the lure’s main color.
- Use a stencil or small brush to add scale patterns.
- Apply lighter colors on top of darker base colors.
- Add a thin layer of iridescent paint for shine.
- Seal the paint with a clear coat to protect the details.
Adding Eyes And Highlights
Eyes give life to fishing lures. Use small beads or paint round shapes with a black center and a white dot for highlights. Highlights mimic light reflections on the lure’s surface.
| Feature | Painting Tip |
|---|---|
| Eye Shape | Use a small round brush for accuracy. |
| Highlight | Add a tiny white dot on the black pupil. |
| Eye Position | Place eyes slightly forward for a natural look. |
| Highlight Placement | Apply on raised surfaces or edges of the lure. |
Incorporating Reflective Elements
Reflective parts attract fish by catching light. Use shiny paint, glitter, or foil strips on the lure body. Reflective elements simulate fish skin and water reflections.
- Apply a base layer of metallic or pearlescent paint.
- Use fine glitter to add sparkle.
- Place foil strips on flat or curved areas.
- Seal with a clear gloss to keep shine.

Credit: www.lurenet.com
Sealing And Finishing
Sealing and finishing are key steps in painting fishing lures. They protect your paint from water and wear. A good finish also gives your lure a shiny, attractive look.
This guide covers clear coats, drying tips, and how to keep your painted lures looking great for a long time.
Applying Clear Coats
Clear coats seal the paint and add a smooth finish. Use spray or brush-on clear coats made for outdoor use. Apply thin, even layers to avoid drips and bubbles.
- Choose a clear coat that is waterproof and durable.
- Apply the first coat lightly and let it dry before adding more.
- Use multiple thin coats for better protection.
- Sand lightly between coats with fine sandpaper for smoothness.
- Allow the final coat to dry fully before handling.
Drying And Curing Tips
Proper drying and curing ensure your lure’s paint lasts. Avoid touching the lure until it is completely dry. Keep it in a dust-free, well-ventilated place.
| Drying Stage | Conditions | Time |
| Initial Dry | Room temperature, no dust | 30 minutes |
| Between Coats | Light sanding, clean surface | 1-2 hours |
| Final Cure | Cool, dry area, no handling | 24-48 hours |
Maintaining Painted Lures
Care helps your painted lures keep their look and function. Rinse lures with fresh water after use. Avoid dropping them on hard surfaces.
- Store lures in a dry tackle box away from sunlight.
- Check paint for chips and touch up if needed.
- Use soft cloths to clean lures gently.
- Reapply clear coat after heavy use to protect the paint.
Troubleshooting Common Issues
Painting fishing lures can be tricky. Some issues may ruin your work or cause frustration.
Knowing how to fix common problems saves time and keeps your lures looking good.
Avoiding Paint Peeling
Paint peeling happens when the surface is dirty or not prepped well. It also occurs if paint layers are too thick.
Clean your lure with rubbing alcohol before painting. Use light, even coats to prevent peeling.
- Sand the lure lightly for better paint grip
- Remove dust and oils before painting
- Apply several thin layers instead of one thick layer
- Let each layer dry fully before adding the next
Fixing Color Smudges
Color smudges occur when paint is wet and touches another surface. It can also happen if you handle the lure too soon.
Use a light touch when painting. Let paint dry completely before touching or adding details.
- Keep your hands clean and dry
- Use a drying rack to hold lures safely
- Work in a dust-free, calm area
- Use a fine brush for small details
Dealing With Uneven Coats
Uneven coats make your lure look blotchy and rough. This happens if paint is applied too fast or the surface is not smooth.
Apply paint slowly and evenly. Sand between coats to smooth out bumps before adding more paint.
- Use a soft brush or airbrush for smooth layers
- Sand gently with fine sandpaper between coats
- Thin your paint if it is too thick
- Keep paint strokes consistent in one direction

Credit: www.battlbox.com
Inspiring Design Ideas
Painting fishing lures lets you create unique designs that catch fish and eyes. Simple ideas can make your lures stand out on the water.
Try different patterns and colors to find what works best. Use nature and fishing trends as your guide.
Classic Lure Patterns
Classic patterns have proven to attract many fish species. These timeless designs use shapes and colors fish easily recognize.
Popular patterns include stripes, spots, and scales. These mimic real baitfish or insects.
- Striped patterns resembling perch or bass
- Spotted designs like trout or sunfish
- Scale-like patterns for a realistic look
- Bright colors with dark backs for depth
Custom Color Combinations
Mixing colors lets you create lures that fit your style. Experiment with bright and muted shades.
Use colors that stand out in the water or blend in softly. Think about the type of water and fish you want to catch.
- Neon colors for murky or stained water
- Natural earth tones for clear water
- Two-tone blends for a smooth transition
- Metallic finishes for extra shine
Seasonal And Local Fish Designs
Paint lures to match the fish active in each season. Local fish shapes and colors help lure bites.
Look at local baitfish and insects for ideas. Change designs with the season to stay effective.
- Spring: bright colors and small baitfish patterns
- Summer: vibrant and flashy designs for active fish
- Fall: darker colors that match falling leaves
- Winter: subtle, natural tones for slow fish
- Local fish colors like bluegill or shad
Frequently Asked Questions
What Materials Do I Need To Paint Fishing Lures?
You need primer, acrylic paints, brushes, clear coat, and fine sandpaper. Quality materials ensure durable, vibrant finishes on your lures.
How Do I Prepare Fishing Lures For Painting?
Clean lures thoroughly and sand lightly to remove old paint. This creates a smooth surface for better paint adhesion.
Which Paint Type Works Best For Fishing Lures?
Acrylic paints are ideal due to their water resistance and quick drying time. They provide vibrant, lasting colors underwater.
How Many Coats Of Paint Should I Apply?
Apply 2-3 thin coats, allowing each to dry fully. Thin layers prevent cracking and ensure even coverage.
Conclusion
Painting fishing lures adds a personal touch to your gear. It helps attract more fish by mimicking real prey. You only need a few basic tools and some patience. Practice different colors and patterns to see what works best. Keep your lures dry and store them carefully to last longer.
Enjoy the process and have fun creating unique designs. With time, your painted lures will stand out on the water. Give it a try and watch your fishing experience improve.