A flat motorcycle tire can happen when you least expect it, leaving you stranded and frustrated. But what if you could fix it yourself quickly and safely?
Knowing how to patch a motorcycle tire not only saves you time and money but also gives you confidence on the road. In this guide, you’ll learn simple, step-by-step methods that anyone can follow—even if you’ve never done it before.
Keep reading, and you’ll be ready to handle a flat tire like a pro the next time it happens.
Tools And Materials Needed
Patching a motorcycle tire is a useful skill for any rider. You need the right tools and materials before you start. This guide covers what you need to carry out a successful repair.
Having these items ready helps you fix the tire quickly and safely. Keep them in your motorcycle repair kit for easy access on the road.
Essential Repair Kit Items
Your tire repair kit should have all the basic tools and materials. These items help you find the leak and patch the tire properly.
- Tire levers to remove the tire from the rim
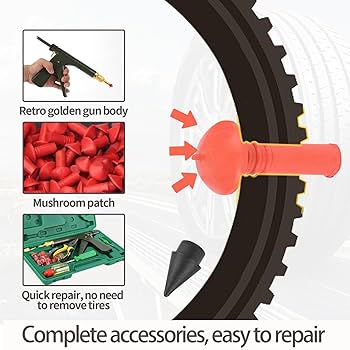
- Patch kit including rubber patches and vulcanizing glue
- Rasp tool to roughen the tire surface
- Air pump or compressor to inflate the tire
- Tube or tire plug if the puncture is large
- Soap water to locate the puncture by bubbles
- Sandpaper for cleaning the patch area
Safety Gear To Use
Wear safety gear to protect yourself while patching the tire. It keeps you safe from sharp tools and chemicals.
| Safety Item | Purpose |
| Gloves | Protect hands from sharp objects and glue |
| Eye Protection | Prevent debris or glue from entering eyes |
| Work Clothes | Keep your skin safe from dirt and chemicals |
| Face Mask | Protect from inhaling glue fumes |

Credit: www.amazon.com
Preparing The Motorcycle
Fixing a motorcycle tire starts with getting the bike ready. Proper preparation keeps you safe and makes the work easier.
Two important steps are positioning the bike and removing the wheel. Follow these steps carefully before patching the tire.
Positioning And Securing The Bike
Place the motorcycle on a flat surface. Use a sturdy stand or a center stand to keep it steady. Make sure the bike will not tip over while you work.
- Turn off the engine and remove the key.
- Engage the parking brake if available.
- Use wheel chocks to block the wheels that stay on the ground.
- Lift the bike with a jack or center stand carefully.
- Check that the bike is stable and secure before proceeding.
Removing The Wheel
Take off the wheel that has the tire to be patched. This step depends on your motorcycle model and wheel type.
| Action | Details |
| Loosen axle nuts | Use the correct size wrench to loosen but do not fully remove yet. |
| Disconnect brake components | Remove brake caliper or drum brake parts carefully to avoid damage. |
| Lift and remove wheel | Slide the wheel off the axle gently and place it on a clean surface. |
| Inspect the wheel | Check for damage or debris before starting the patch work. |
Locating The Puncture
Finding the puncture is the first step to patch a motorcycle tire. Without locating it, you cannot fix the tire properly.
You can use simple techniques to find where the air is escaping from your tire.
Visual Inspection Techniques
Look closely at the tire surface for nails, glass, or sharp objects. Check the tire tread and sidewalls carefully.
Sometimes you may see a small hole or a piece stuck in the tire. This can help you find the puncture quickly.
- Examine the tire under good light
- Run your fingers slowly over the surface
- Look for objects embedded in the tire
- Check for any cuts or cracks on the tire
Using Water Or Soapy Solution
Mix water with soap to make a bubbly solution. Apply it on the tire surface where you suspect the puncture.
Watch for bubbles forming. Bubbles appear when air escapes through the hole.
- Mix water and a few drops of dish soap
- Brush or spray the solution on the tire
- Look carefully for air bubbles
- Mark the spot of the bubbles with chalk or tape

Credit: www.amazon.ca
Removing The Tire
Removing a motorcycle tire is the first step to patch a flat. You need to take off the tire safely without damage.
Follow simple steps to remove the tire from the rim carefully. This helps you fix the tire properly.
Deflating The Tire
Before removing the tire, you must let all the air out. This makes it easier to work on the tire.
Find the valve stem and press the pin inside. Let the air escape until the tire is flat.
- Locate the valve stem on the wheel
- Use a small tool or your finger to press the valve pin
- Wait until you hear no air coming out
- Check that the tire is fully deflated
Using Tire Irons Safely
Use tire irons to remove the tire from the rim. Handle the tools carefully to avoid damage.
Place the tire irons under the tire bead and pry it over the rim edge gently. Work slowly around the wheel.
- Insert the first tire iron under the tire bead
- Hold the second iron a few inches away for leverage
- Lift the tire bead over the rim edge carefully
- Move around the wheel to free the tire
- Be careful not to pinch the inner tube if it is still inside
Applying The Patch
Patching a motorcycle tire is important to fix small holes. Doing it right keeps your tire safe and strong.
This guide will help you apply the patch correctly to stop air leaks.
Cleaning The Damaged Area
Start by removing dirt and debris from the damaged spot. Use a clean cloth to wipe the area well.
Make sure the tire surface is dry before moving to the next step.
Roughening The Surface
Use sandpaper or a metal scraper to roughen the damaged area. This helps the glue stick better.
Rub the surface until it looks dull and not shiny. Do not overdo it to avoid making a bigger hole.
Applying Glue And Patch
Apply a thin, even layer of glue on the roughened area. Spread it carefully with a brush or stick.
Wait a few minutes until the glue becomes sticky. Then place the patch firmly on the spot.
- Press the patch firmly with your hand
- Make sure no air bubbles are under the patch
- Hold the patch for a few minutes to set
Reassembling The Tire
After patching the motorcycle tire, you need to put it back together carefully. This process is important to ensure the tire works safely and lasts longer.
Follow these steps to seat the tire correctly on the rim and inflate it to the right pressure.
Seating The Tire Back On The Rim
Place the tire evenly on the rim. Make sure the patch is inside and not near the edges. Use your hands or tire irons to push the tire bead over the rim edge.
- Start by aligning one side of the tire bead with the rim.
- Work your way around the rim, pushing the bead over the edge.
- Check that the tire sits evenly and the patch remains inside.
- Avoid using sharp tools that can damage the tire or rim.
Inflating To Correct Pressure
Inflate the tire slowly to the recommended pressure. This helps the tire bead seat firmly against the rim. Check the pressure with a reliable gauge.
| Pressure Type | Recommended PSI |
|---|---|
| Front Tire | 28-32 PSI |
| Rear Tire | 32-36 PSI |
Testing And Final Checks
After patching a motorcycle tire, it’s important to test the repair. This ensures your safety and the tire’s durability.
Perform final checks before riding. These checks help avoid leaks and alignment problems.
Checking For Leaks
Check the patch area for any air leaks. A simple water test shows if the repair holds air.
- Mix water with a little soap in a spray bottle.
- Spray the patched area and valve stem evenly.
- Look for bubbles forming on the patch or valve.
- If bubbles appear, air is escaping and the patch may need redoing.
- Repeat the test after fixing any leaks to confirm the repair.
Ensuring Proper Wheel Alignment
Proper wheel alignment keeps your motorcycle stable and safe. Misalignment can cause uneven tire wear.
| Check Point | How to Check | What to Fix |
| Wheel Position | Make sure the wheel sits straight in the frame. | Adjust axle or chain tension. |
| Tire Spin | Spin the wheel to hear any rubbing sounds. | Fix brake pads or fender if rubbing. |
| Chain Alignment | Look from the back to see if the chain runs straight. | Adjust chain tension or rear axle. |
| Balance | Check if the tire wobbles when spinning. | Balance the wheel or replace damaged parts. |

Credit: www.amazon.ca
Tips For Preventing Future Punctures
Patching a motorcycle tire is important, but preventing punctures is better. Taking simple steps can keep your tires safe longer.
Regular care and smart riding help avoid common causes of tire damage. Follow these tips to protect your tires.
Regular Tire Maintenance
Check your tires often for cuts, nails, or worn tread. Damaged tires are more likely to get punctures.
Keep tires inflated to the recommended pressure. Low pressure causes more wear and makes punctures easier.
- Inspect tires before every ride
- Remove small stones or debris from tread
- Check tire pressure weekly
- Replace tires when tread is low
Safe Riding Practices
Ride carefully and avoid rough roads or debris. Sharp objects on the road can cause punctures.
Slow down on gravel or dirt. Sudden movements increase the chance of hitting something sharp.
- Watch for nails, glass, or metal pieces
- Keep a safe distance behind other vehicles
- Choose smooth roads when possible
- Avoid sharp turns on rough surfaces
Frequently Asked Questions
How Do I Know If My Motorcycle Tire Needs Patching?
Check for visible punctures, slow air leaks, or a flat tire. Inspect the tire surface carefully. If the damage is small and in the tread area, patching is usually possible. Sidewall damage requires tire replacement for safety.
What Tools Are Required To Patch A Motorcycle Tire?
You need a tire repair kit, including patches, rubber cement, a tire plug, a rasp tool, and pliers. Additionally, a tire pressure gauge and air pump help check and maintain proper inflation after patching.
Can I Patch A Motorcycle Tire Myself Safely?
Yes, you can safely patch small tread punctures at home. Follow step-by-step instructions carefully, ensure the tire is clean, and use proper tools. For large or sidewall damage, consult a professional for safety.
How Long Does A Patched Motorcycle Tire Last?
A properly patched tire can last the remainder of its tread life if the repair is done correctly. Avoid high speeds and inspect the patch regularly. Replace the tire if the patch shows signs of failure.
Conclusion
Patching a motorcycle tire helps you save time and money. The process is simple and can be done with basic tools. Always check the tire for damage before riding again. Regular tire care keeps your ride safe and smooth. With practice, patching becomes easier and quicker.
Stay prepared and confident on the road. Your bike deserves good maintenance to last longer. Keep learning small repairs to enjoy every ride.