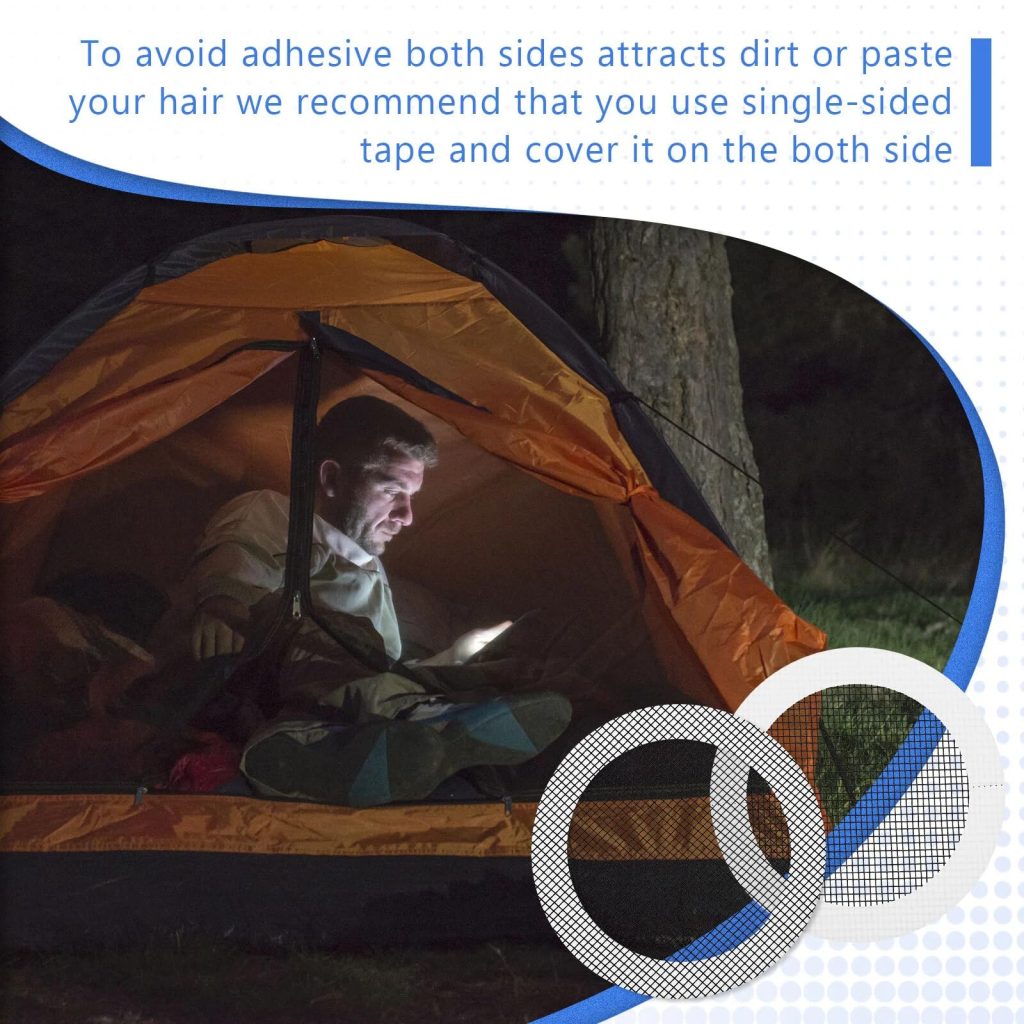
You’ve just noticed a tear in your tent, and it’s frustrating. A small rip can quickly turn your camping trip into a rainy disaster.
But don’t worry—you don’t need to buy a new tent or call for help. You can fix it yourself, right now. Imagine turning that hole into a strong, waterproof patch that keeps you dry and comfortable. You’ll discover simple, step-by-step ways to patch your tent effectively.
Keep reading, and you’ll learn how to protect your gear and save your adventure before it’s too late.
Credit: www.pomoly.com
Assessing Tent Damage
Before patching a tent, you need to check the damage carefully. This helps you fix it the right way.
Look at the fabric, frame, and any leaks to know what needs repair.
Identifying Types Of Tears
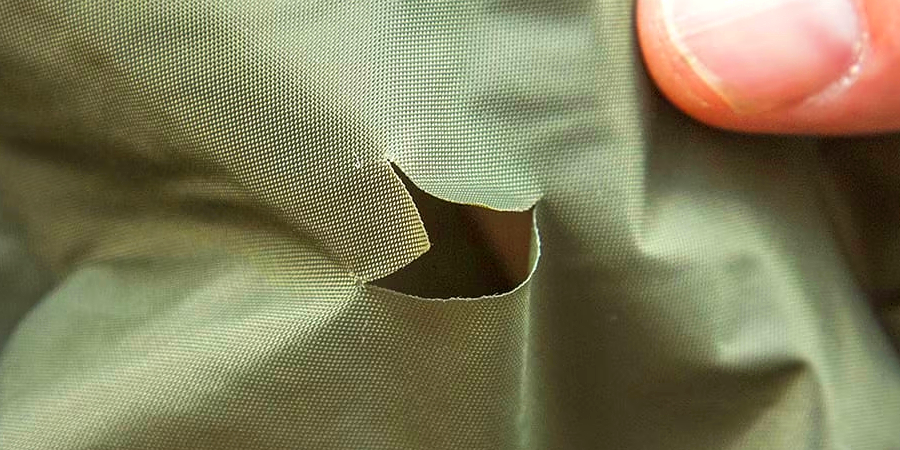
Tears in your tent can be small or large. Some tears are straight cuts, while others are jagged or holes.
Knowing the tear type helps you choose the right patch and repair method.
- Small holes usually need a simple patch
- Long tears might need sewing before patching
- Jagged tears may require trimming edges first
Checking For Frame Issues
The tent frame holds the structure. Check if poles are bent, broken, or loose.
Damaged frames can cause fabric tears or poor tent shape. Fix frame problems before patching fabric.
- Look for bent or cracked poles
- Check pole joints and connectors
- Make sure all parts fit tightly
Locating Leak Sources
Leaks let water inside the tent. Find where water enters to stop leaks.
Check seams, zippers, and fabric for holes or worn spots.
- Look inside and outside for wet spots
- Use a flashlight to see small holes
- Spray water gently on tent to test leaks
Gathering Repair Materials
Patching a tent needs the right materials. Gathering these items first saves time and effort later.
Using proper tools and materials ensures a strong and lasting repair. Prepare everything before you start patching.
Essential Tools And Supplies
Having the correct tools makes the repair process smooth. You will need simple items that help fix tears and holes.
- Scissors or a sharp knife to cut patch materials
- Cleaning cloth to wipe the tent surface
- Sandpaper or emery board to roughen the repair area
- Measuring tape or ruler to size the patch
- Marker or pen for marking patch outlines
- Adhesives or tapes to stick patches firmly
Choosing The Right Patch Material
Select patch material that matches your tent fabric. This helps keep the tent waterproof and strong.
| Patch Material | Best For | Notes |
| Silicone-coated nylon | Lightweight tents | Waterproof and flexible |
| Polyurethane-coated polyester | Durable tents | Strong and abrasion-resistant |
| Canvas patches | Heavy-duty tents | Less flexible but tough |
| Self-adhesive vinyl | Quick fixes | Easy to apply but less durable |
Using Adhesives And Tapes
Choose adhesives and tapes made for outdoor fabrics. They must hold well and resist water.
- Silicone-based adhesives for flexible, waterproof bonds
- Polyurethane glue for strong, permanent fixes
- Double-sided repair tape for fast patching
- Seam sealer to cover stitches and edges
Preparing The Tent Surface
Before patching a tent, prepare the surface carefully. A clean and smooth area helps the patch stick better. This makes your repair last longer and keeps the tent waterproof.
Follow simple steps to get the tent ready. These include cleaning, drying, and trimming the fabric around the damaged spot.
Cleaning The Area
Remove dirt, dust, and debris from the damaged area. Use a soft brush or cloth to clean the fabric gently. Avoid harsh chemicals that can weaken the tent material.
- Brush off loose dirt
- Wipe with a damp cloth
- Use mild soap if needed
- Rinse with clean water
- Let the area air dry
Drying And Flattening Fabric
Make sure the fabric is completely dry before patching. Moisture can cause the patch to peel off. Spread the tent flat on a clean surface to avoid wrinkles.
Press the fabric lightly to smooth out folds. Use weights or clips if needed to keep the fabric flat and steady.
Trimming Frayed Edges
Cut away any loose threads or torn fabric around the hole. This helps the patch fit tightly and prevents further tearing. Use sharp scissors for clean cuts.
Here is a simple table showing tools for trimming:
| Tool | Purpose |
|---|---|
| Sharp Scissors | Cut clean edges |
| Thread Clippers | Remove small threads |
| Utility Knife | Trim tough fabric |
Credit: www.pomoly.com
Applying Tent Patches
Fixing a tear in your tent keeps it safe from rain and wind. Using patches is an easy way to repair small holes or rips.
To make the patch last, you must apply it carefully. Follow these simple steps to get good results.
Cutting Patch To Size
Cut the patch slightly larger than the damaged area. This ensures the patch covers the tear fully.
Round the edges of the patch to stop it from peeling off easily.
Positioning And Securing Patch
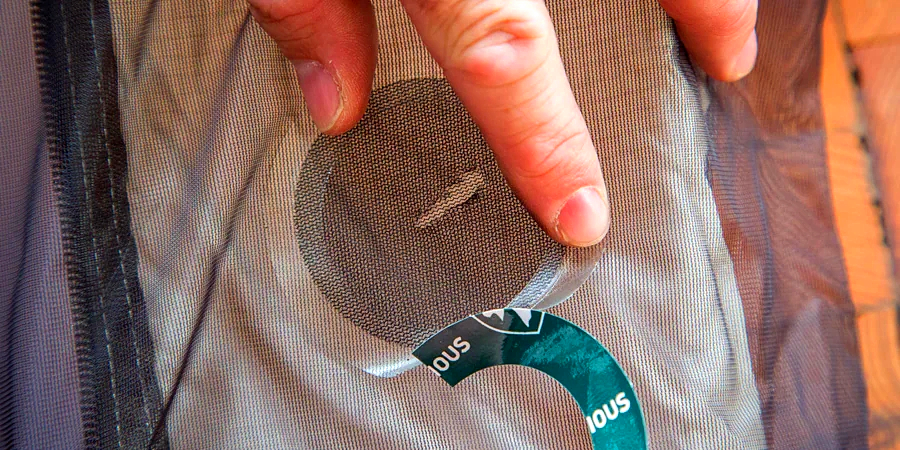
Clean and dry the tent surface around the tear. Place the patch over the damaged spot carefully.
Press the patch firmly to remove air bubbles. Use a roller or flat object to smooth it down.
- Make sure the patch sticks evenly
- Avoid wrinkles or folds
- Check that edges are sealed tightly
Allowing Proper Adhesive Cure Time
Let the adhesive dry for the time suggested by the patch instructions. This helps the patch bond well.
Do not use the tent or expose it to moisture until the patch is fully set.
- Keep the tent in a dry place
- Avoid moving the patched area
- Wait at least 24 hours for best results
Temporary Fixes On The Trail
Fixing your tent quickly can save your camping trip. You need simple tools and fast methods. Temporary fixes help you stay dry and safe until you can repair properly.
This guide covers easy ways to patch your tent on the trail. Learn how to use duct tape, safety pins, seal small holes, and manage frame breaks.
Using Duct Tape And Safety Pins
Duct tape is a strong, quick fix for tears and rips. Safety pins hold fabric together when tape is not enough. Both tools are lightweight and easy to carry.
- Clean the torn area before applying tape.
- Cut a patch larger than the tear and smooth it down.
- Use safety pins to hold flaps or loose fabric edges.
- Check the fix regularly to avoid bigger damage.
Sealing Small Holes Quickly
Small holes let in wind and rain. You can seal them fast with simple items. This stops leaks until you get home for a full repair.
| Material | Use |
| Clear Nail Polish | Seals tiny holes in the fabric |
| Waterproof Tape | Covers small cuts and pinholes |
| Seam Sealer | Blocks leaks along stitched seams |
Managing Frame Breaks
A broken frame can collapse your tent. You can make a temporary fix using common gear. This keeps the tent standing until you replace the pole.
Try these fixes for broken poles:
- Use a tent stake or stick as a splint inside the broken pole.
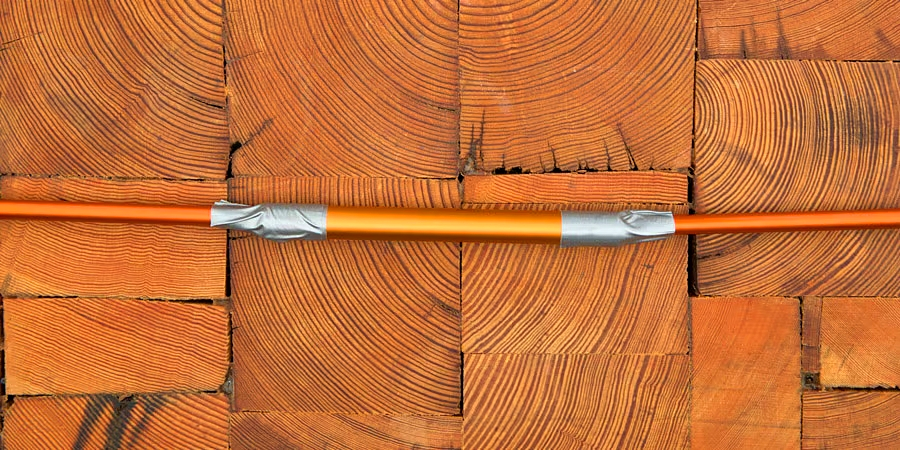
- Wrap duct tape tightly around the break to hold it firm.
- Use zip ties or cord to secure the pole to a strong branch.
- Build a simple support with trekking poles if available.
Credit: www.pomoly.com
Maintaining Tent Integrity
Keeping your tent in good shape helps it last longer. Fixing small tears quickly saves you from bigger problems.
Patching your tent properly protects it from rain and wind. You keep it strong by checking and caring for it often.
Regular Tent Inspections
Look over your tent before and after each trip. Find holes, tears, or weak spots early.
Check seams, zippers, and fabric for damage. Fix small issues before they get worse.
- Look for holes or rips in the fabric
- Check all seams and stitching
- Test zippers and fasteners
- Inspect poles and frame for cracks
Storing Tent Properly
Store your tent dry and clean. Moisture can cause mold and weaken the fabric.
Keep it in a cool, dry place away from sunlight. Use a loose bag or a breathable container.
- Dry tent completely before storing
- Fold loosely to avoid creases
- Keep away from heat and direct sun
- Store in a dry, ventilated area
Preventing Future Damage
Set up your tent on soft, clean ground. Avoid sharp rocks or sticks that can tear fabric.
Use a groundsheet under your tent. It protects the bottom from abrasion and moisture.
- Clear campsite of sharp objects
- Use a footprint or groundsheet
- Don’t leave tent open in strong wind
- Handle tent poles gently
Frequently Asked Questions
How Do I Patch A Small Hole In A Tent?
Clean the area, apply a fabric patch, and use strong adhesive. Allow it to dry fully before use. This prevents water leaks and maintains tent durability.
What Materials Are Needed To Patch A Tent?
You need a fabric patch, waterproof adhesive, scissors, and a cleaning cloth. Optional: seam sealer for extra protection and durability.
Can I Patch A Tent Without Sewing?
Yes, use adhesive fabric patches designed for tents. They create a strong seal without sewing and are quick to apply.
How Long Does A Tent Patch Last?
A properly applied patch can last multiple camping seasons. Longevity depends on patch quality, tent use, and weather conditions.
Conclusion
Patching a tent keeps it strong and ready for your next trip. Small tears can turn into big problems if left alone. Use the right materials and take your time fixing holes. A well-patched tent protects you from rain and wind.
Regular checks and quick repairs save money and effort. Enjoy your outdoor adventures with a tent that works well. Simple steps make a big difference in tent care. Keep your gear safe and your trips worry-free.