
A tear in your tent can turn a fun camping trip into a stressful experience. You might worry about rain leaking in or bugs sneaking through the hole.
But don’t panic—fixing a tear is easier than you think. With a few simple steps and the right materials, you can repair your tent quickly and get back to enjoying the outdoors. Keep reading, and you’ll learn exactly how to patch your tent so it stays strong and reliable for your next adventure.
Credit: www.montbell.com
Identify The Tear
Finding a tear in your tent is the first step to fixing it. You need to carefully check your tent to spot any damage.
Knowing exactly where the tear is and what kind it is helps you repair the tent correctly.
Locate The Damage
Look over your tent in a bright place. Check both inside and outside for holes or rips.
Feel the fabric gently with your hands. Sometimes small tears are easier to find by touch.
- Spread the tent fabric flat on the ground
- Use a flashlight to see small holes
- Look closely around seams and corners
- Check areas that touch the ground or rocks
Assess The Size And Type
Measure the size of the tear with a ruler or tape. Small tears need a different fix than large rips.
Check if the tear is a clean cut, a hole, or a stretched fabric. This helps you choose the right patch or tape.
- Small hole: less than 1 inch across
- Medium tear: 1 to 4 inches long
- Large rip: longer than 4 inches or jagged edges
- Seam damage: fabric pulled from stitching

Credit: www.amazon.ca
Gather Repair Materials
Fixing a tear in your tent needs the right materials. Gathering these before you start will save time.
Knowing which tools and kits to use helps the repair last longer and keeps your tent strong.
Essential Tools
You need a few basic tools to repair a tent tear. These help you prepare and secure the patch well.
- Scissors or a sharp knife to trim fabric
- Sandpaper or a small brush to clean the area
- Cloth or wipes to dry the surface
- Measuring tape to size the patch
- Marker or chalk to mark the repair spot
Recommended Repair Kits
Using a tent repair kit can make fixing easier. These kits have materials matched for tent fabrics.
| Item | Description |
| Adhesive patches | Sticky fabric pieces to cover holes or tears |
| Seam sealer | Liquid sealant to waterproof seams and repairs |
| Repair tape | Strong tape that bonds well with tent material |
| Fabric glue | Glue designed for outdoor fabrics and nylon |
| Instruction manual | Guide with steps for using each repair item |
Prepare The Tent Surface
Fixing a tear in your tent starts with preparing the surface. This ensures the repair sticks well and lasts longer.
Cleaning and drying the fabric properly makes a big difference in the repair process.
Clean The Area
Remove dirt, dust, and debris from the torn area before repairing. A clean surface helps the patch or adhesive stick better.
- Brush off loose dirt with a soft brush.
- Use a damp cloth to wipe the area gently.
- Avoid harsh chemicals that can damage the fabric.
- Let the area air dry before moving to the next step.
Dry The Fabric
Make sure the fabric is completely dry before you start fixing the tear. Moisture can weaken the repair.
| Drying Method | Time Required | Notes |
| Air Dry | Several hours | Best for delicate fabrics |
| Use a Towel | 5-10 minutes | Blot gently to remove moisture |
| Sunlight | 1-2 hours | Avoid direct sunlight if fabric is sensitive |
Apply Tent Tape Patch
Fixing a tear in your tent with a tape patch is a quick and effective method. It helps keep your tent waterproof and strong.
Using the right tape and applying it correctly will make the patch last longer. Follow these steps carefully.
Cut The Patch
Cut a piece of tent tape that is larger than the tear. Make sure it covers the hole by at least one inch on all sides.
- Use sharp scissors to get a clean cut.
- Round the corners of the tape to prevent peeling.
- Choose tape that matches the tent fabric if possible.
Smooth And Seal
After placing the tape over the tear, smooth it out to remove air bubbles. Press firmly to seal the edges.
| Action | Tip |
|---|---|
| Clean Area | Wipe the surface with rubbing alcohol |
| Apply Tape | Press from center to edges |
| Seal Edges | Use a flat tool like a credit card |
| Dry Time | Let it set for 24 hours before use |
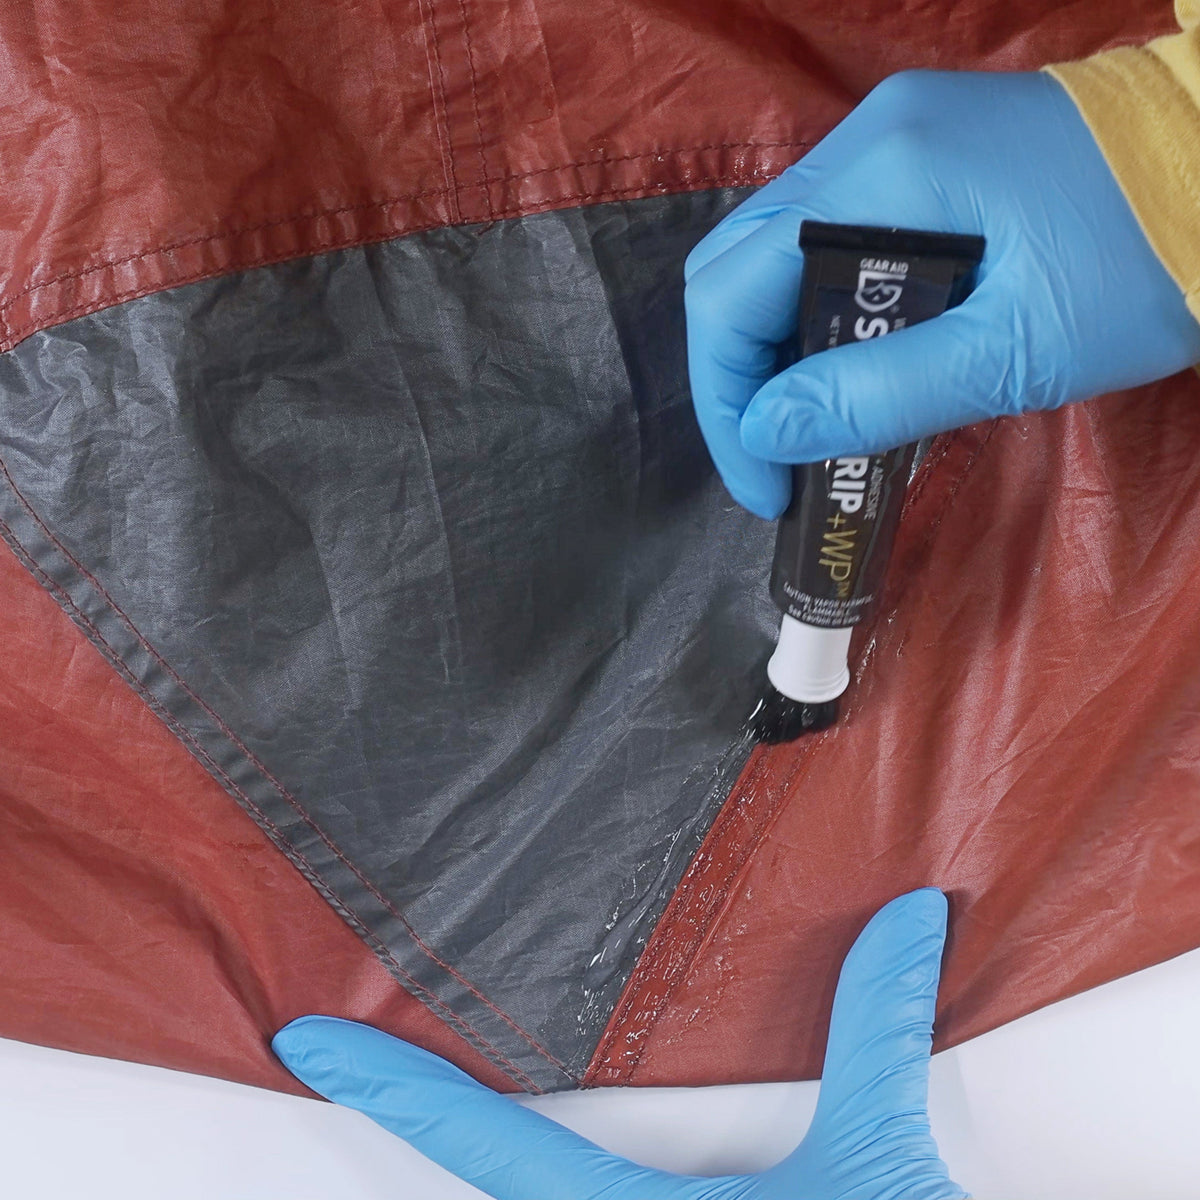
Use Seam Sealer For Extra Strength
Tears in tents weaken the fabric and let in wind and rain. Using seam sealer helps fix these tears and adds extra strength to the repair.
Seam sealer is a special glue that keeps your tent fabric strong and waterproof. It works well on small tears and along seams.
Choose The Right Sealer
Pick a seam sealer made for your tent’s fabric. Most tents use nylon or polyester, so check the label to match the sealer.
Some sealers are clear, while others come tinted to match your tent’s color. Clear sealers work on all colors and fabrics.
- Choose sealers designed for nylon or polyester
- Use clear sealer for all fabric colors
- Avoid sealers with strong chemicals that can damage fabric
Apply Properly
Clean the torn area before applying seam sealer. Make sure the fabric is dry and free of dirt or dust.
Use a small brush or your finger to spread the sealer evenly over the tear. Cover the whole damaged area and a little around it.
- Clean and dry the tear before application
- Apply a thin, even layer of sealer
- Let the sealer dry fully before folding or packing
- Repeat if needed for bigger tears
Sew The Tear For Durability
Fixing a tear in your tent by sewing makes the repair strong. Sewing holds the fabric together well. This way, the tear will not get bigger.
You need the right tools and skills to sew the tear properly. This guide helps you sew for long-lasting results.
Select Suitable Thread And Needle
Use thread that is strong and weather-resistant. Nylon or polyester thread works best. These threads do not break easily and resist water.
Choose a needle made for heavy fabrics. A sharp, strong needle will pass through tent material without bending. Size 90/14 or 100/16 needles work well.
- Use nylon or polyester thread
- Pick a sharp, strong needle
- Needle size 90/14 or 100/16 is ideal
- Avoid cotton thread as it breaks easily
Stitching Techniques
Start sewing a little before the tear and end a little after it. This gives extra strength. Use small, tight stitches close together.
Try a backstitch for strong seams. It locks each stitch in place. This stops the tear from opening again.
- Sew beyond the tear edges
- Use small, tight stitches
- Backstitch for strong seams
- Keep stitches straight and even
Prevent Future Tears
Tears in tents can ruin your camping trip. Fixing a tear is good, but preventing one is better. Taking care of your tent helps it last longer and stay strong.
Here are some tips to stop tears from happening again. Proper setup and regular care keep your tent safe from damage.
Proper Tent Setup
Setting up your tent the right way lowers the chance of tears. Choose a flat, clean area without sharp rocks or sticks. This protects the tent floor and fabric.
Use all the stakes and poles that come with the tent. This keeps the tent tight and stable. Loose fabric can flap in the wind and cause tears.
- Pick a smooth, level spot to pitch your tent
- Clear away rocks, sticks, and debris
- Fully stake down all corners and guylines
- Keep the tent fabric taut but not too tight
- Avoid sharp objects near or inside the tent
Regular Maintenance Tips
Checking your tent regularly helps catch small problems early. Look for weak spots, holes, or loose seams. Fix these before they get worse.
Clean your tent after each trip. Dirt and grit can wear down the fabric. Store your tent dry and folded loosely to avoid creases and stress points.
- Inspect tent fabric and seams for damage
- Repair small tears or holes right away
- Wash tent with mild soap and water only
- Let the tent dry fully before packing it away
- Store in a cool, dry place away from sunlight
Credit: www.gearaid.com
Frequently Asked Questions
How Do I Repair A Small Tear In My Tent?
Clean the tear area and dry it completely. Use a strong tent repair tape or patch to cover the tear. Press firmly and allow it to set for several hours before use.
What Materials Are Best For Fixing Tent Tears?
Use waterproof repair tape, tent patches, or sealant designed for nylon or polyester fabrics. These materials ensure strong, weather-resistant repairs that last through outdoor conditions.
Can I Sew A Tear In My Tent Without Damaging It?
Yes, use a curved needle and strong thread designed for outdoor gear. Sew gently to avoid enlarging the tear, then apply a patch or sealant over the stitching for waterproofing.
How Long Does A Tent Repair Usually Last?
A proper repair can last multiple camping seasons. Using quality materials and applying repairs carefully ensures durability against wind, rain, and general wear.
Conclusion
Fixing a tear in your tent keeps it safe and dry. Small repairs stop bigger problems later. Using simple tools and patches works well. Clean the area before you start. Press the patch firmly to avoid leaks. Regularly check your tent for new tears.
A strong tent means a better camping trip. Stay prepared and enjoy your outdoor adventures.