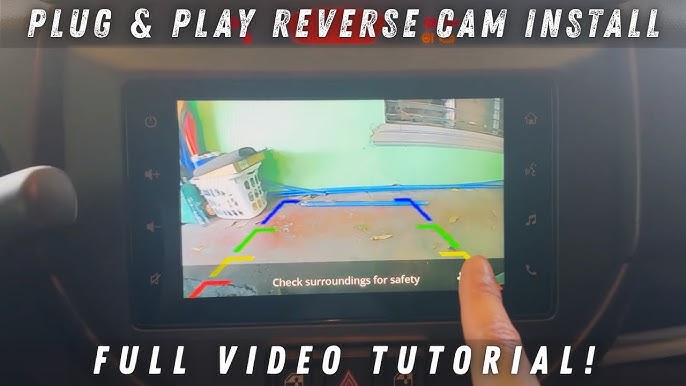
Have you ever struggled to park your car in a tight spot or worried about unseen obstacles behind you? Installing a rear camera can change the way you drive, making every reverse safer and easier.
In this guide, you’ll learn exactly how to install a rear camera for your car step-by-step, without any confusing jargon or expensive help. By the end, you’ll have the confidence to improve your car’s safety and enjoy peace of mind every time you back up.
Keep reading—your safer driving experience starts here.
Choosing The Right Rear Camera
Installing a rear camera can improve your car’s safety. It helps you see behind while parking or reversing.
Picking the right rear camera is important. It depends on your needs and car type.
Types Of Rear Cameras
There are several types of rear cameras. Each type fits different cars and budgets.
- Wired cameras connect directly to the car’s display.
- Wireless cameras use Wi-Fi or Bluetooth to send video.
- Flush-mount cameras sit flat on the car surface for a clean look.
- Surface-mount cameras attach on the car’s outside easily.
Key Features To Consider
Look at camera features before buying. The right features make the camera more useful.
- Resolution: Clear images help you see better.
- Wide-angle lens: Covers more area behind your car.
- Night vision: Helps you see in the dark.
- Waterproof rating: Protects the camera from rain and dust.
- Guidelines: Shows lines to help you park.
Budget And Brand Options
Decide how much you want to spend on a rear camera. There are many brands at different prices.
Cheaper cameras may lack some features. Well-known brands offer better quality and support.
- Budget models are basic but work well for simple needs.
- Mid-range cameras add features like better image quality.
- High-end brands include advanced functions and durability.
Gathering Required Tools
Installing a rear camera on your car needs the right tools. Having these tools ready makes the job easier and safer.
Before starting, check that you have all tools. This saves time and avoids interruptions while working.
Essential Tools List
Use the correct tools to install the rear camera properly. Each tool has a specific purpose in the process.
- Screwdrivers (Phillips and flathead) for removing and securing screws
- Wire strippers to prepare cables for connections
- Electrical tape to insulate and protect wire joints
- Power drill with bits for mounting the camera if needed
- Multimeter to check electrical connections and voltage
- Zip ties to keep cables organized and secure
- Panel removal tool to safely remove interior panels without damage
- Measuring tape to place the camera accurately
Safety Precautions
Safety is important when working on your car’s electrical system. Follow these steps to stay safe.
Always disconnect the car battery before starting. This prevents electric shocks and short circuits.
- Wear safety glasses to protect your eyes from debris
- Work in a well-lit area to see clearly
- Keep tools and parts organized to avoid accidents
- Do not force parts; use the right tool for each job
- Handle wires carefully to avoid damage
Preparing Your Vehicle
Installing a rear camera needs a clean and safe workspace. Preparing your vehicle helps the process go smoothly.
Start by making sure the area is ready and the car is safe to work on. This avoids damage and injury.
Cleaning The Installation Area
Clean the spot where you will place the camera. Dirt and dust can stop the camera from sticking well.
Use a soft cloth and mild cleaner to wipe the area. Make sure it is dry before you attach the camera.
Disconnecting The Battery
Unplug the car battery to keep safe while working with wires. This stops electric shocks and shorts.
Use a wrench to loosen the negative terminal first. Then remove the positive terminal to fully disconnect the battery.
- Wear gloves to protect your hands
- Turn off all car electronics
- Keep tools away from the battery terminals

Credit: www.youtube.com
Mounting The Rear Camera
Mounting the rear camera correctly is important for clear views. It helps you see behind your car safely.
This section explains how to choose the best spot and fix the camera firmly.
Selecting The Mounting Location
Pick a spot at the back of your car that gives a wide view. The center near the license plate is a good place.
Make sure the camera lens is not blocked by parts of the car or dirt.
- Choose a flat surface
- Avoid places with metal bars or obstacles
- Check that the camera can see low and wide
- Keep the lens away from dirt and water splashes
Installing The Camera Bracket
The bracket holds the camera in place. Attach it firmly to the chosen spot.
Use the screws or adhesive that come with your camera for the bracket.
- Clean the mounting spot before attaching
- Position the bracket so the camera faces straight back
- Tighten screws securely but do not over-tighten
- If using adhesive, press firmly and wait to set
Securing The Camera
Attach the camera to the bracket and check its angle. The view should cover the area behind your car.
Make sure all parts are tight so the camera does not move while driving.
- Connect the camera to the bracket firmly
- Adjust the angle for a clear rear view
- Double-check that screws or clips hold the camera well
- Test the camera image before finalizing installation
Routing The Wiring
Routing the wiring for your car’s rear camera is an important step. It ensures a clean look and reliable connection. Careful planning helps avoid damage and keeps wires hidden.
Follow safety tips and use the right tools. This guide covers planning the wire path, hiding and securing wires, and connecting to the power source.
Planning The Wire Path
Choose the shortest and safest route from the rear camera to the front of the car. Avoid sharp edges, moving parts, and hot areas like the engine. Use existing wire channels if possible.
- Check the car’s manual for wiring paths
- Plan to run wires along door sills or under carpets
- Avoid areas near the exhaust or brake lines
- Make sure the wires will not be pinched or cut
- Use a fish tape tool to pull wires through tight spaces
Hiding And Securing Wires
Secure wires to prevent movement and damage. Keep wires hidden for a neat look. Use clips and tape to fasten wires along the route.
| Material | Purpose |
| Wire Clips | Hold wires firmly in place |
| Electrical Tape | Protect and bundle wires |
| Wire Loom | Shield wires from abrasion |
| Zip Ties | Group wires neatly |
Connecting To Power Source
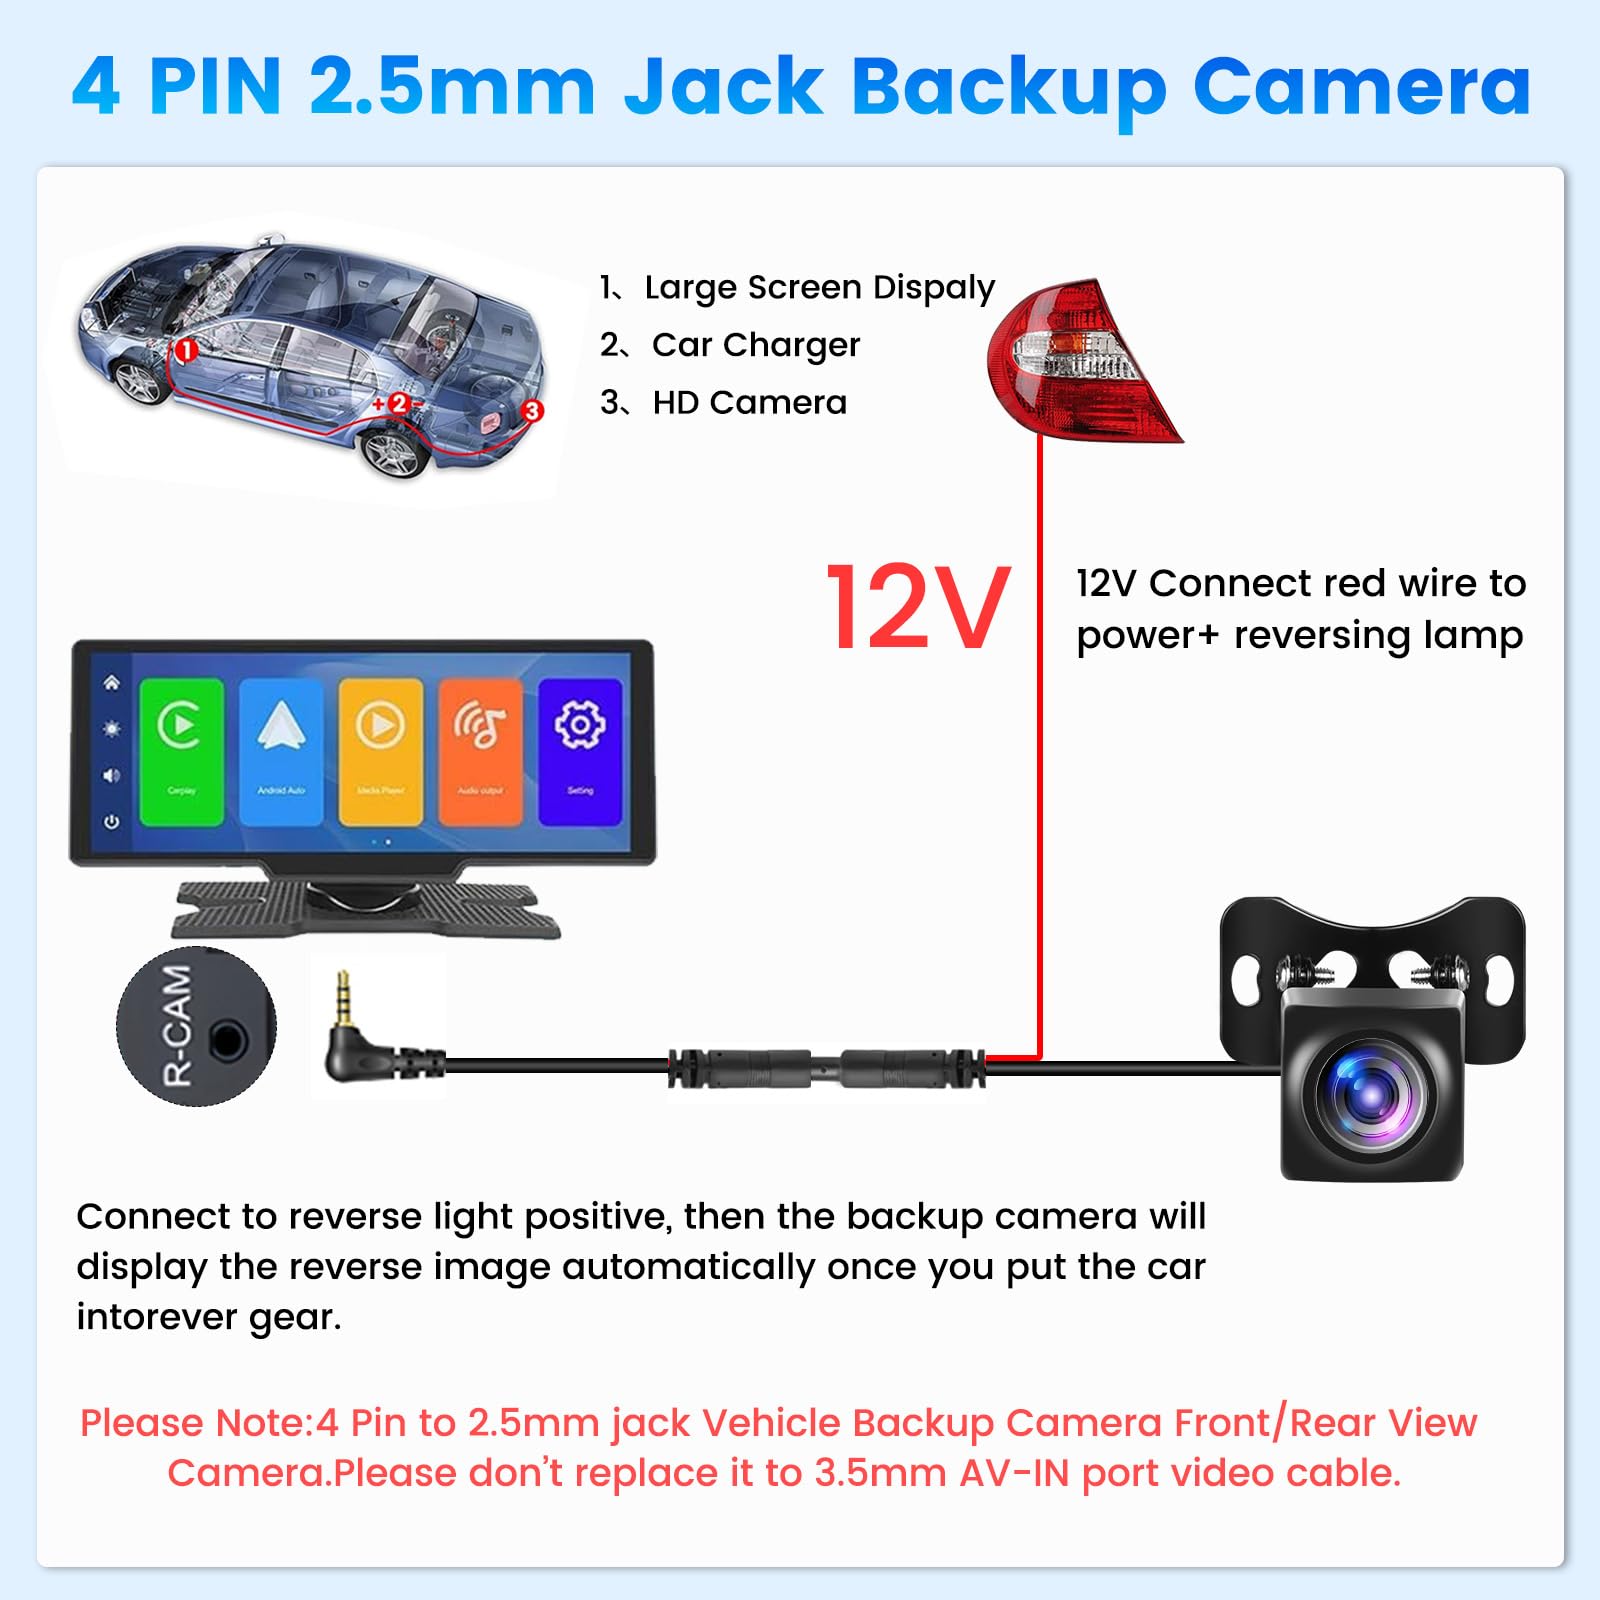
Connect the rear camera power wire to a proper power source. Use the car’s reverse light wire for power. This makes the camera turn on automatically when reversing.
- Locate the reverse light wire behind the tail light
- Use a test light to confirm the wire activates when in reverse
- Strip a small section of insulation on the reverse wire
- Connect the camera’s power wire using a wire tap or soldering
- Secure all connections with electrical tape
Credit: www.amazon.ca
Connecting To The Display Unit
Installing a rear camera needs a clear connection to the car’s display unit. This connection lets you see the camera’s view on your screen.
We will cover how to wire the camera to the head unit and test the connection to make sure it works.
Wiring To The Head Unit
First, find the video input on your car’s head unit. This is where you will connect the camera cable.
Use the RCA cable from the rear camera to plug into the video input. Also, connect the power wires correctly to avoid damage.
- Locate the head unit’s video input port
- Connect the RCA video cable from the camera
- Attach the camera’s power wire to the reverse light power
- Ground the camera by connecting the black wire to the car frame
- Secure all wires to avoid loose connections
Testing The Connection
Turn on the car and shift to reverse gear. The display should show the rear camera feed.
If the image does not appear, check all cable connections and power sources.
- Start the car engine
- Shift the gear to reverse
- Look for the rear camera image on the display
- Recheck wiring if the image is missing or unclear
- Adjust camera angle if needed for a better view
Adjusting Camera Settings
After installing the rear camera, you need to adjust its settings. Proper adjustment helps you see clearly and avoid accidents.
This guide covers how to align the camera angle and configure image settings for the best view.
Aligning The Camera Angle
Position the camera so it covers the area behind your car. Check for any blind spots and adjust accordingly.
- Mount the camera at the center of your rear bumper or license plate.
- Tilt the camera down slightly to see the ground behind the car.
- Make sure the camera view is wide enough to cover the full rear width.
- Use the monitor inside the car to check the angle before fixing it in place.
- Secure the camera tightly to avoid movement while driving.
Configuring Image Settings
Adjust the image settings to improve visibility in different lighting conditions. Use the controls on your monitor or camera system.
| Setting | Description | Tips |
| Brightness | Adjusts light levels in the image. | Increase if the image is too dark. |
| Contrast | Controls the difference between light and dark areas. | Set to a medium level to avoid washed-out images. |
| Color | Changes the color intensity. | Keep natural colors for better recognition. |
| Guidelines | Shows parking lines on the screen. | Turn on to help with parking. |

Credit: www.youtube.com
Final Checks And Troubleshooting
After installing the rear camera in your car, you need to check if it works properly. This helps avoid problems while driving.
If you find any issues, troubleshooting can fix most problems quickly. Follow simple steps to ensure your camera works well.
Verifying Camera Functionality
Turn on your car and shift to reverse gear. The camera should show a clear image on the screen.
Check the camera view from different angles. Make sure there are no blurry spots or dark areas.
- Ensure the camera lens is clean and free from dirt.
- Confirm the screen displays the camera feed without delay.
- Test the parking guidelines if your camera has them.
Common Issues And Fixes
Sometimes the camera may not work as expected. Here are some common problems and easy fixes to try.
- No image on the screen:Check power connections and fuses.
- Blurry or dark image:Clean the camera lens and check lighting.
- Image delays or freezes:Inspect the video cable for damage or loose plugs.
- Parking lines not showing:Reset the camera settings in the display menu.
Frequently Asked Questions
How Do I Install A Rear Camera In My Car?
To install a rear camera, first choose a compatible model. Mount the camera near the license plate. Connect the power wire to the reverse light. Then, route the video cable to the dashboard display. Test the camera before finalizing the setup.
What Tools Are Needed For Rear Camera Installation?
You will need a screwdriver, wire stripper, electrical tape, and a drill. A multimeter helps check connections. Use zip ties to organize cables. These tools ensure a secure and professional installation.
Can I Install A Rear Camera Myself?
Yes, most rear cameras are DIY-friendly. Basic electrical knowledge helps. Follow the manufacturer’s instructions carefully. If unsure, consult a professional to avoid damage or safety risks.
How Long Does Rear Camera Installation Take?
Installation usually takes 1 to 2 hours. Time varies by car model and camera complexity. Proper planning and tools speed up the process.
Conclusion
Installing a rear camera in your car improves safety and parking ease. Follow the steps carefully to avoid mistakes and ensure proper setup. Use the right tools and check all connections before finalizing. Test the camera to confirm it shows clear images.
Regular checks keep the camera working well over time. A rear camera helps you see blind spots and prevents accidents. Simple to install, it adds valuable assistance every time you drive or park. Take your time and enjoy the benefits of better rear visibility.